2011 SUBARU IMPREZA WRX radio
[x] Cancel search: radioPage 89 of 458
1-58Seat, seatbelt and SRS airbags
This includes following modifica- tions. .Installation of custom steering
wheels
. Attachment of additional trim
materials to the dashboard
. Installation of custom seats
. Replacement of seat fabric or
leather
. Installation of additional fabric or
leather on the front seat
. Attachment of a hands-free mi-
crophone or any other accessory
to a front pillar, a center pillar, a
rear pillar, the windshield, a side
window, an assist grip, or any
other cabin surface that would be
near a deploying SRS curtainairbag.
. Installation of additional electri-
cal/electronic equipment such as
a mobile two-way radio on or
near the SRS airbag system
components and/or wiring is not
advisable. This could interfere
with proper operation of the
SRS airbag system.CAUTION
Do not perform any of the following
modifications. Such modifications
can interfere with proper operation
of the SRS airbag system. . Attachment of any equipment
(bush bar, winches, snow plow,
skid plate, etc.) other than genu-
ine SUBARU accessory parts to
the front end.
. Modification of the suspension
system or front end structure.
. Installation of a tire of different
size and construction from the
tires specified on the vehicle
placard attached to the driver ’s
door pillar or specified for indivi-
dual vehicle models in this Own-er ’s Manual.
. Attachment of any equipment
(side steps or side sill protectors,
etc.) other than genuine SUBARU
accessory parts to the side body.
Always consult your SUBARU dealer if
you want to install any accessory parts on
your vehicle.
Page 97 of 458
2-8Keys and doors
Remote keyless entry system
CAUTION
. Do not expose the remote trans-
mitter to severe shocks, such as
those experienced as a result of
dropping or throwing.
. Do not take the remote transmit-
ter apart except when replacing
the battery.
. Do not get the remote transmitter
wet. If it gets wet, wipe it dry with
a cloth immediately.
. When you carry the remote trans-
mitter on an airplane, do not
press the button of the remote
transmitter while in the airplane.
When any button of the remote
transmitter is pressed, radio
waves are sent and may affect
the operation of the airplane.
When you carry the remote trans-
mitter in a bag on an airplane,
take measures to prevent the
buttons of the remote transmitter
from being pressed.
. FCC WARNING
Changes or modifications not
expressly approved by the party responsible for compliance
could void the user
’s authority
to operate the equipment.
This device complies with Part 15 of
the FCC Rules and RSS-Gen of IC
Rules. Operation is subject to the
following two conditions: (1) this de-
vice may not cause harmful interfer-
ence, and (2) this device must accept
any interference received, including
interference that may cause undesiredoperation.
Two transmitters are provided for your vehicle.
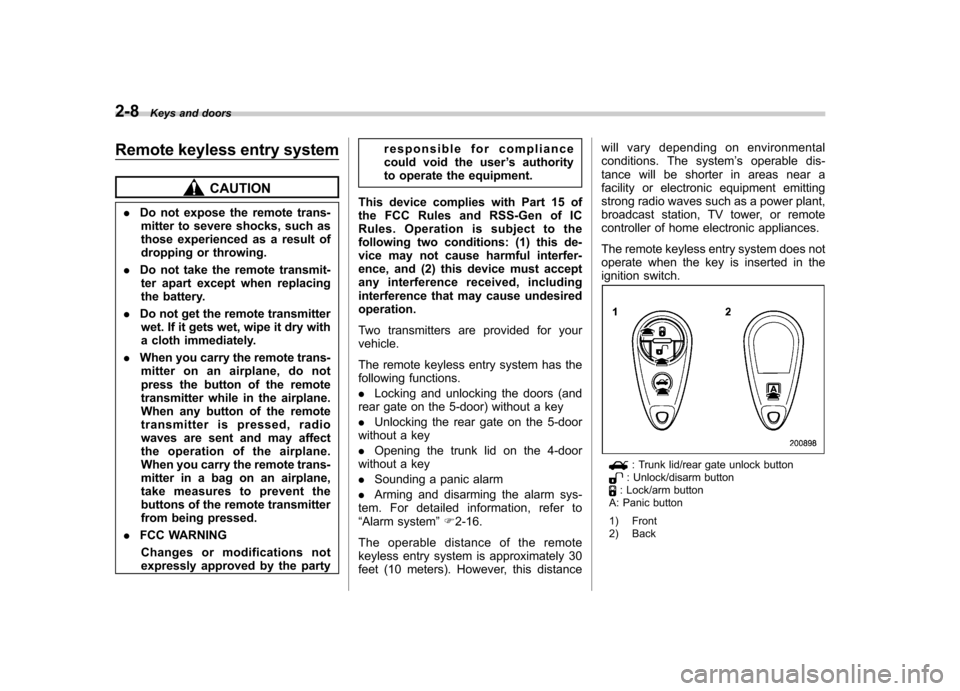
The remote keyless entry system has the
following functions. . Locking and unlocking the doors (and
rear gate on the 5-door) without a key. Unlocking the rear gate on the 5-door
without a key. Opening the trunk lid on the 4-door
without a key. Sounding a panic alarm
. Arming and disarming the alarm sys-
tem. For detailed information, refer to “ Alarm system ”F 2-16.
The operable distance of the remote
keyless entry system is approximately 30
feet (10 meters). However, this distance will vary depending on environmental
conditions. The system
’s operable dis-
tance will be shorter in areas near a
facility or electronic equipment emitting
strong radio waves such as a power plant,
broadcast station, TV tower, or remote
controller of home electronic appliances.
The remote keyless entry system does not
operate when the key is inserted in the
ignition switch.
: Trunk lid/rear gate unlock button: Unlock/disarm button: Lock/arm button
A: Panic button
1) Front
2) Back
Page 188 of 458
Antenna system.................................................. 5-3
Roof antenna ...................................................... 5-3
FM reception ....................................................... 5-3
Installation of accessories .................................. 5-4
Audio set ............................................................. 5-4
Type A audio set (if equipped) ............................. 5-5
Type B audio set (if equipped) ............................. 5-6
Type C audio set (if equipped) ............................. 5-7
Power and sound controls ................................. 5-8
Power switch and volume control ........................ 5-8
Sound control ..................................................... 5-8
Adjustable level of each mode ............................ 5-11
FM/AM radio operation ...................................... 5-12
FM/AM selection ................................................. 5-12
Tuning ............................................................... 5-12
Displaying radio PS (Program Service Name) and RT (Radio Text) ................................................ 5-15
Station preset .................................................... 5-16
Satellite radio operation (if equipped) .............. 5-17
XM
TMsatellite radio (U.S.A. only) ........................ 5-17
Sirius satellite radio ........................................... 5-17
Satellite radio reception ...................................... 5-17
Displaying satellite radio ID of tuner ................... 5-18
Band selection ................................................... 5-19
Channel and category selection .......................... 5-19
Channel preset ................................................... 5-21
Display selection ................................................ 5-22
CD player operation ........................................... 5-23
Play file. ............................................................. 5-23
How to insert a CD (type A and C) ...................... 5-23How to insert a CD(s) (type B) ..
.......................... 5-23
How to play back a CD ...................................... 5-24
To select a track from its beginning. ................... 5-26
Fast-forwarding and fast-reversing ..................... 5-27
Repeating .......................................................... 5-28
Random playback .............................................. 5-29
Scan ................................................................. 5-30
Display selection ............................................... 5-30
Folder selection ................................................. 5-31
How to eject a CD from the player (type A and C).................................................................... 5-32
How to eject CDs from the player (type B) ..... ..... 5-32
When the following messages are displayed. . ..... 5-33
Auxiliary input jack (if equipped). ..................... 5-34
Precautions to observe when handling a compact disc ................................................... 5-35
USB storage device / iPod
®operations
(type C audio) ................................................. 5-37
Play file ............................................................. 5-37
Connectable USB storage device ....................... 5-37
Connectable iPod
®models ................................. 5-38
Connecting USB storage device / iPod®............. 5-38
How to play back ............................................... 5-39
To select a track/index from its beginning ..... ..... 5-40
To select a chapter from its beginning when connecting iPod
®............................................. 5-40
Fast-forwarding and fast-reversing ..................... 5-40
Repeating .......................................................... 5-40
Random playback .............................................. 5-41
SCAN (only when connecting USB storage device) ............................................................ 5-41 Audio
5
Page 191 of 458
5-4Audio
Installation of accessories
Always consult your SUBARU dealer
before installing a citizen band radio or
other transmitting device in your vehicle.
Such devices may cause the electronic
control system to malfunction if they are
incorrectly installed or if they are not
suited for the vehicle. Audio set
Your SUBARU may be equipped with one
of the following audio sets. Refer to the
pages indicated in this section for operat-
ing details. NOTE
If a cell phone is placed near the audio
set, it may cause the audio set to emit
noise when the phone receives calls.
This noise does not indicate an audio
set malfunction. Note that a cell phone
should be placed as far as possible
from the audio set.
Page 192 of 458

&Type A audio set (if equipped)The audio set will operate only when the
ignition switch is in the “Acc ”or “ON ”
position. . Power and sound controls: refer to
page 5-8. Radio operation: refer to page 5-12
. Satellite radio operation (if equipped):
refer to page 5-17. CD (compact disc) player operation:
refer to page 5-23. Auxiliary input jack: refer to page 5-34 Audio
5-5
– CONTINUED –
Page 193 of 458
5-6Audio
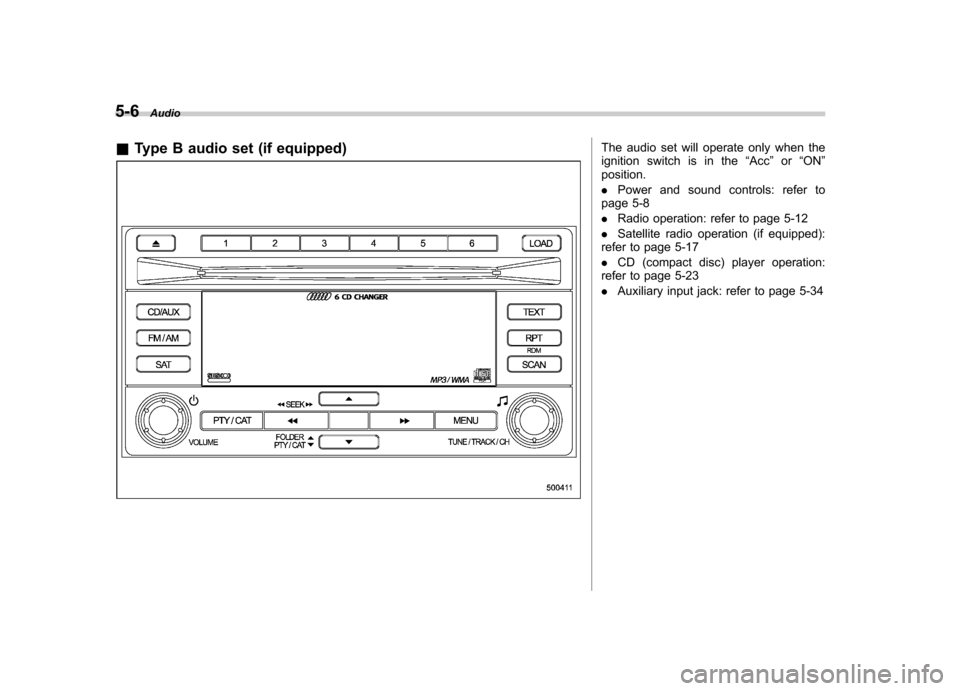
& Type B audio set (if equipped)
The audio set will operate only when the
ignition switch is in the “Acc ”or “ON ”
position. . Power and sound controls: refer to
page 5-8. Radio operation: refer to page 5-12
. Satellite radio operation (if equipped):
refer to page 5-17. CD (compact disc) player operation:
refer to page 5-23. Auxiliary input jack: refer to page 5-34
Page 194 of 458

&Type C audio set (if equipped)The audio set will operate only when the
ignition switch is in the “Acc ”or “ON ”
position. . Power and sound controls: refer to
page 5-8. Radio operation: refer to page 5-12
. Satellite radio operation (if equipped):
refer to page 5-17. CD (compact disc) player operation:
refer to page 5-23. Auxiliary input jack: refer to page 5-34
. USB storage device/iPod
®operation:
refer to page 5-37. Hands-free system: refer to page 5-46 Audio
5-7
Page 195 of 458
5-8Audio
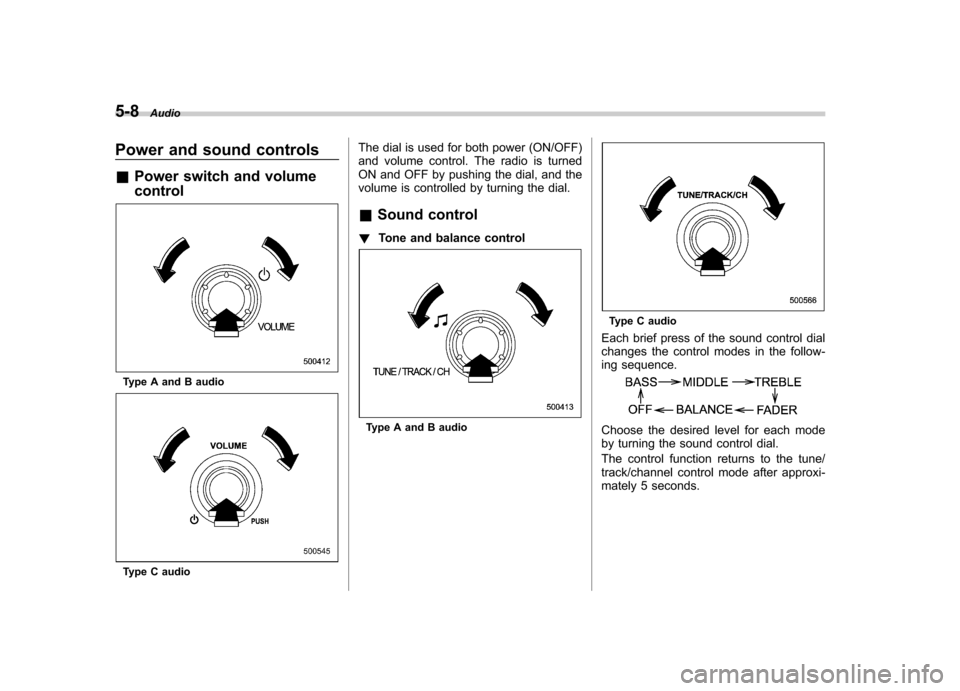
Power and sound controls &Power switch and volume control
Type A and B audio
Type C audio The dial is used for both power (ON/OFF)
and volume control. The radio is turned
ON and OFF by pushing the dial, and the
volume is controlled by turning the dial. &
Sound control
! Tone and balance control
Type A and B audio
Type C audio
Each brief press of the sound control dial
changes the control modes in the follow-
ing sequence.
Choose the desired level for each mode
by turning the sound control dial.
The control function returns to the tune/
track/channel control mode after approxi-
mately 5 seconds.