2011 SUBARU IMPREZA WRX stop start
[x] Cancel search: stop startPage 287 of 458
7-24Starting and operating
the parking brake or foot brake is applied.
Avoid coasting with the transmission in neutral.
During coasting, there is no engine brak-
ing effect.
WARNING
Do not drive the vehicle with the
select lever in the “N ” (neutral)
position. Engine braking has no
effect in this condition and the risk
of an accident is consequently in-creased.
NOTE
If the select lever is in the “N ” position
when you stop the engine for parking,
you may not subsequently be able to
move it to the “R ” or “P ” position. If
this happens, turn the ignition switch tothe “ON ”position. You will then be able
to move the select lever to the “P ”
position. For details, refer to “Shift lock
function ”F 7-24.
! D (Drive)
This position is for normal driving.
The transmission automatically shifts into
a suitable gear from 1st to 4th according to
the vehicle speed and the acceleration
you require. When more acceleration is required in this
position, depress the accelerator pedal
fully to the floor and hold that position. The
transmission will automatically downshift
to 3rd, 2nd or 1st gear. When you release
the pedal, the transmission will return to
the original gear position.
To use the
“SPORT ”mode, move the lever
from this position into the manual gate. To
use the manual mode, move the lever
from this position into the manual gate
then move it toward the “+ ” and “� ” ends.
! While climbing a grade
When driving up a hill, undesired upshift to
4th gear is prevented from taking place
when the accelerator is released. This
minimizes the chance of subsequent
downshifting to a lower gear when accel-
erating again. This prevents repeated
upshifting and downshifting resulting in a
smoother operation of the vehicle.
NOTE
The transmission may downshift to 2nd
or 1st gear, depending on the way the
accelerator pedal is depressed to ac-
celerate the vehicle again. ! While going down a hill
When you are descending a hill or any
other slope while braking with the“ SPORT ”mode selected, the transmission may downshift to 3rd or 2nd gear depend-
ing on how hard you depress the brake
pedal, causing engine braking to work.
Reacceleration for a short time will cause
the transmission to upshift normally.
NOTE . A 4th-to-3rd automatic downshift
will not occur at speeds above 50
mph (80 km/h) and a 3rd-to-2nd auto-
matic downshift will not occur at
speeds above 24 mph (38 km/h).. Automatic downshifts to 3rd or 2nd
may occur even when driving on a level
road depending on conditions, such as
how hard you depress the brake pedal. & Shift lock function
The shift lock function helps prevent the
improper operation of the select lever. . The select lever cannot be operated
unless the ignition switch is turned to the “ ON ”position and the brake pedal is
depressed. . The select lever cannot be moved from
the “P ” position to any other position
before the brake pedal is depressed.
Depress the brake pedal first, and then
operate the select lever. . Only the “P ”position allows you to turn
the key from the “Acc ”position to the
Page 288 of 458

“LOCK ”position and remove the key from
the ignition key cylinder. . If the ignition switch is turned to the
“ LOCK ”position while the select lever is in
the “N ”position, the select lever may not
be moved to the “P ”position after a period
of time. Therefore, move the select lever
to the “P ” position with the brake pedal
depressed soon after the ignition switch is
turned to the “LOCK ”position.
! Shift lock release
If the select lever cannot be operated, turn
the ignition switch back to the “ON ”
position then move the select lever to the“ P ” position with the brake pedal de-
pressed.
If the select lever does not move after
performing the above procedure, perform
the following steps. . When the select lever cannot be
shifted from “P ” to “N ”:
Refer to “Shift lock release using the shift
lock release button ”F 7-25.
. When the select lever cannot be
shifted from “N ” to “R ”, “P ”:
Within 60 seconds after placing the igni-
tion switch in the “Acc ”position, move the
select lever to the “R ”or “P ” position with
the brake pedal depressed. If you must perform the above procedure,
the shift lock system (or the vehicle control
system) may be malfunctioning. Contact a
SUBARU dealer for an inspection as soon
as possible.
If the select lever does not move after
performing the above procedure, refer to“
Shift lock release using the shift lock
release button ”F 7-25.
! Shift lock release using the shift
lock release button
Perform the following procedure to release
the shift lock.
1. Apply the parking brake and stop the engine.
2. Remove the shift lock cover using a
flat-head screwdriver. The shift lock re-
lease button is located under the shift lock cover. NOTE
To prevent damage to the shift lock
cover, cover the tip of the flat-head
screwdriver with vinyl tape or a cloth
before removing the cover.
3. While depressing the brake pedal,
insert a screwdriver into the hole, press
the shift lock release button using a
screwdriver, and then move the select
lever.
If the select lever does not move after
performing the above procedure, the shift
lock system may be malfunctioning. Con-
tact a SUBARU dealer for an inspection
as soon as possible.Starting and operating
7-25
– CONTINUED –
Page 289 of 458
7-26Starting and operating
& Selection of manual mode
NOTE
Please read the following points care-
fully and bear them in mind when using
the manual mode. . If you attempt to shift down when
the engine speed is too high, i.e., when
a downshift would push the tachometer
needle beyond the red zone, beeps will
be emitted to warn you that the down-
shift is not possible.. If you attempt to shift up when the
vehicle speed is too low, the transmis-
sion will not respond.. You can perform a skip-shift (for
example, from 4th to 2nd) by operating
the select lever twice in rapid succes-sion.. The transmission automatically se-
lects 1st gear when the vehicle stopsmoving.. If the temperature of the automatic
transmission fluid becomes too high,the “AT OIL TEMP ”warning light will
illuminate and upshifts to 4th gear will
not be possible. Immediately stop the
vehicle in a safe place and let the
engine idle until the warning light turnsoff.
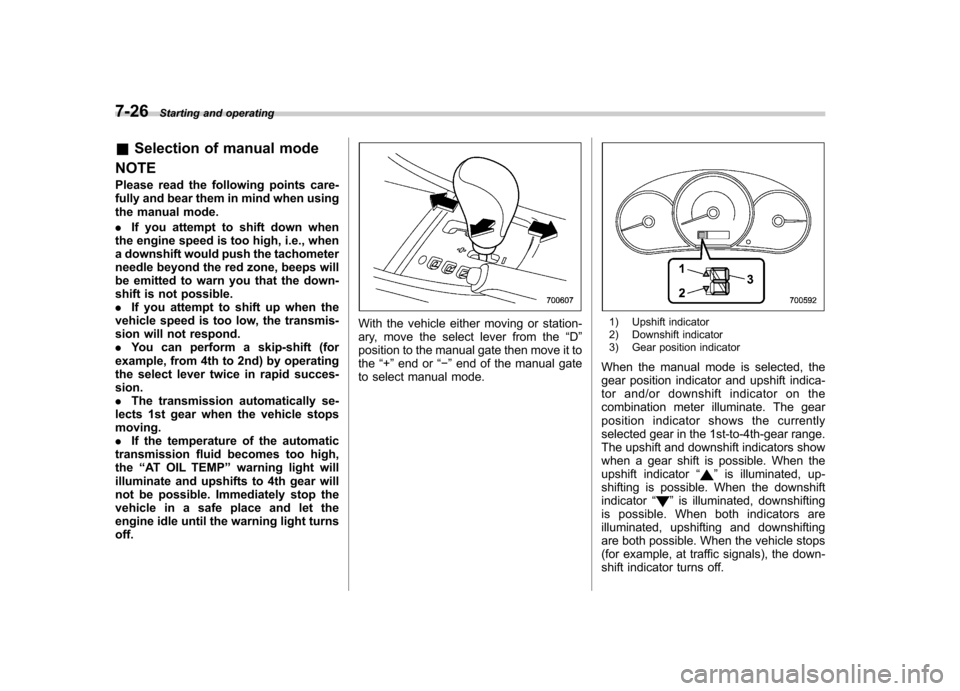
With the vehicle either moving or station-
ary, move the select lever from the “D ”
position to the manual gate then move it tothe “+ ” end or “� ” end of the manual gate
to select manual mode.1) Upshift indicator
2) Downshift indicator
3) Gear position indicator
When the manual mode is selected, the
gear position indicator and upshift indica-
tor and/or downshift indicator on the
combination meter illuminate. The gear
position indicator shows the currently
selected gear in the 1st-to-4th-gear range.
The upshift and downshift indicators show
when a gear shift is possible. When the
upshift indicator “
”is illuminated, up-
shifting is possible. When the downshift indicator “
”is illuminated, downshifting
is possible. When both indicators are
illuminated, upshifting and downshifting
are both possible. When the vehicle stops
(for example, at traffic signals), the down-
shift indicator turns off.
Page 290 of 458
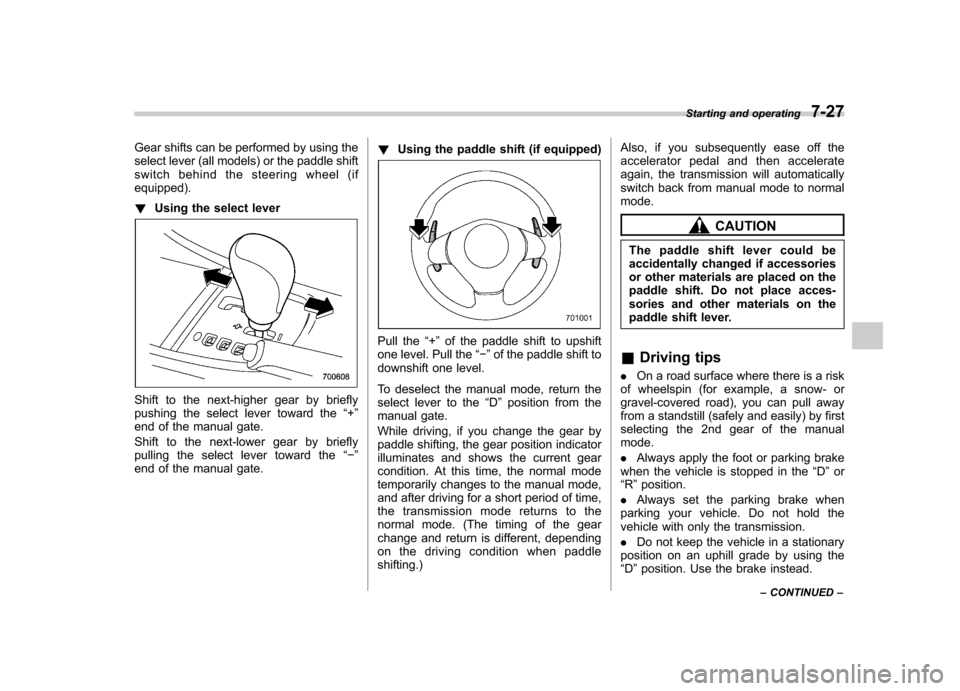
Gear shifts can be performed by using the
select lever (all models) or the paddle shift
switch behind the steering wheel (ifequipped). !Using the select lever
Shift to the next-higher gear by briefly
pushing the select lever toward the “+ ”
end of the manual gate.
Shift to the next-lower gear by briefly
pulling the select lever toward the “� ”
end of the manual gate. !
Using the paddle shift (if equipped)
Pull the “+ ” of the paddle shift to upshift
one level. Pull the “� ” of the paddle shift to
downshift one level.
To deselect the manual mode, return the
select lever to the “D ” position from the
manual gate.
While driving, if you change the gear by
paddle shifting, the gear position indicator
illuminates and shows the current gear
condition. At this time, the normal mode
temporarily changes to the manual mode,
and after driving for a short period of time,
the transmission mode returns to the
normal mode. (The timing of the gear
change and return is different, depending
on the driving condition when paddleshifting.) Also, if you subsequently ease off the
accelerator pedal and then accelerate
again, the transmission will automatically
switch back from manual mode to normalmode.
CAUTION
The paddle shift lever could be
accidentally changed if accessories
or other materials are placed on the
paddle shift. Do not place acces-
sories and other materials on the
paddle shift lever.
& Driving tips
. On a road surface where there is a risk
of wheelspin (for example, a snow- or
gravel-covered road), you can pull away
from a standstill (safely and easily) by first
selecting the 2nd gear of the manualmode. . Always apply the foot or parking brake
when the vehicle is stopped in the “D ”or
“ R ”position.
. Always set the parking brake when
parking your vehicle. Do not hold the
vehicle with only the transmission. . Do not keep the vehicle in a stationary
position on an uphill grade by using the “ D ”position. Use the brake instead. Starting and operating
7-27
– CONTINUED –
Page 294 of 458
Power steering
The power steering system operates only
when the engine is running.
If you lose power steering assist because
the engine stops or the system fails to
function, you can steer but it will take
much more effort.
CAUTION
Do not hold the steering wheel at the
fully locked position left or right for
more than 5 seconds. This may
damage the power steering pump.
NOTE
Right after the engine has been started
and before it has warmed up, you may
hear a noise coming from areas adja-
cent to the power steering pump which
is located at the right-front area of the
engine compartment. This noise is
normal. It does not indicate power
steering system trouble. Braking &
Braking tips
WARNING
Never rest your foot on the brake
pedal while driving. This can cause
dangerous overheating of the
brakes and needless wear on the
brake pads and linings.
! When the brakes get wet
When driving in rain or after washing the
vehicle, the brakes may get wet. As a
result, brake stopping distance will be
longer. To dry the brakes, drive the vehicle
at a safe speed while lightly depressing
the brake pedal to heat up the brakes. ! Use of engine braking
Remember to make use of engine braking
in addition to foot braking. When descend-
ing a grade, if only the foot brake is used,
the brakes may start working improperly
because of brake fluid overheating,
caused by overheated brake pads. To
help prevent this, shift into a lower gear to
get stronger engine braking. ! Braking when a tire is punctured
Do not depress the brake pedal suddenly
when a tire is punctured. This could cause a loss of control of the vehicle. Keep
driving straight ahead while gradually
reducing speed. Then slowly pull off the
road to a safe place. &
Brake system
! Two separate circuits
Your vehicle has two separate circuit
brake systems. Each circuit works diag-
onally across the vehicle. If one circuit of
the brake system should fail, the other half
of the system still works. If one circuit fails,
the brake pedal will go down much closer
to the floor than usual and you will need to
press it down much harder. And a much
longer distance will be needed to stop thevehicle. ! Brake booster
The brake booster uses engine manifold
vacuum to assist braking force. Do not
turn off the engine while driving because
that will turn off the brake booster, result-
ing in poor braking power.
The brakes will continue to work even
when the brake booster completely stops
functioning. If this happens, however, you
will have to depress the pedal much
harder than normal and the braking dis-
tance will increase. Starting and operating
7-31
– CONTINUED –
Page 295 of 458
7-32Starting and operating
!Brake assist system
WARNING
Do not be overconfident about the
brake assist. It is not a system that
brings more braking ability to the
vehicle beyond its braking capabil-
ity. Always use the utmost care
when driving regarding vehicle
speed and safe distance.
CAUTION
When you need to brake suddenly,
continue depressing the brake pedal
strongly to bring the effect of the
brake assist.
Brake assist is a driver assistance system.
It assists the brake power when the driver
cannot depress the brake pedal strongly
and the brake power is insufficient.
Brake assist generates the brake power
according to the speed at which the driver
depresses the brake pedal. NOTE
When you depress the brake pedal
strongly or suddenly, the following
phenomena occur. However, even
though these occur, they do not indi- cate any malfunctions, and the brake
assist system is operating properly. .
You might feel that the brake pedal
is applied by lighter force and gener-
ates a greater braking force.. You might hear the sound of ABS
operating from the engine compart-ment.
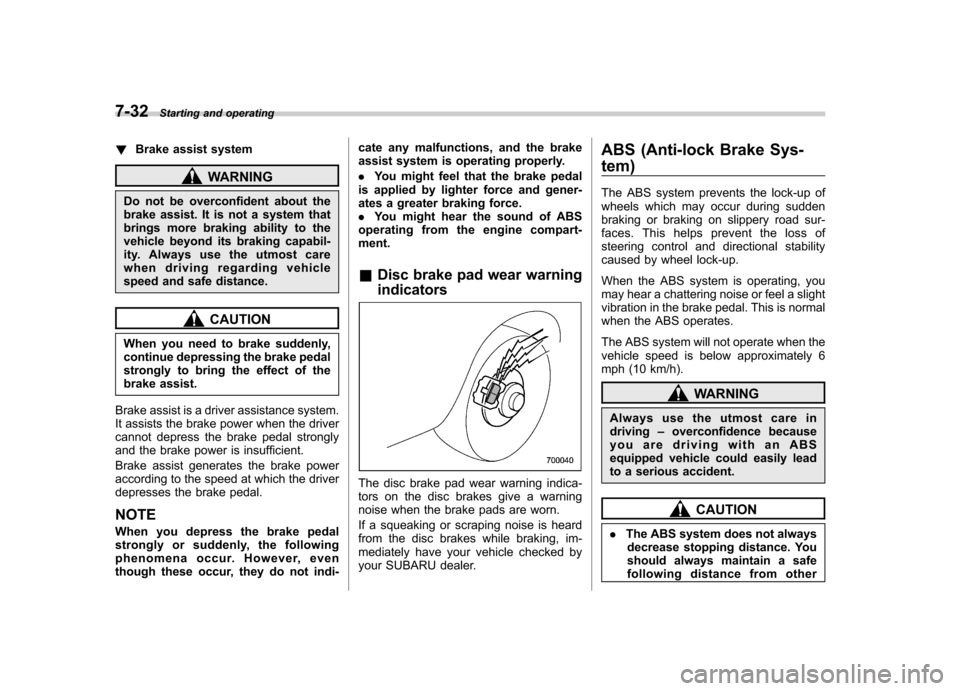
& Disc brake pad wear warning indicators
The disc brake pad wear warning indica-
tors on the disc brakes give a warning
noise when the brake pads are worn.
If a squeaking or scraping noise is heard
from the disc brakes while braking, im-
mediately have your vehicle checked by
your SUBARU dealer. ABS (Anti-lock Brake Sys- tem)
The ABS system prevents the lock-up of
wheels which may occur during sudden
braking or braking on slippery road sur-
faces. This helps prevent the loss of
steering control and directional stability
caused by wheel lock-up.
When the ABS system is operating, you
may hear a chattering noise or feel a slight
vibration in the brake pedal. This is normal
when the ABS operates.
The ABS system will not operate when the
vehicle speed is below approximately 6
mph (10 km/h).
WARNING
Always use the utmost care in driving –overconfidence because
you are driving with an ABS
equipped vehicle could easily lead
to a serious accident.
CAUTION
. The ABS system does not always
decrease stopping distance. You
should always maintain a safe
following distance from other
Page 296 of 458
vehicles.
. When driving on badly surfaced
roads, gravel roads, icy roads, or
over deep newly fallen snow,
stopping distances may be long-
er for a vehicle with the ABS
system than one without. When
driving under these conditions,
therefore, reduce your speed and
leave ample distance from othervehicles.
. When you feel the ABS system
operating, you should maintain
constant brake pedal pressure.
Do not pump the brake pedal
since doing so may defeat the
operation of the ABS system.
& ABS system self-check
Just after the vehicle is started, you may
feel on the brake pedal a vibration similar
to when the ABS operates, and you may
also hear the sound of the ABS working
from the engine compartment. This is
caused by an automatic functional test of
the ABS system being carried out and
does not indicate any abnormal condition. & ABS warning light
Refer to “ABS warning light ”F 3-21. Electronic Brake Force Dis-
tribution (EBD) system
The EBD system maximizes the effective-
ness of the brakes by allowing the rear
brakes to supply a greater proportion of
the braking force. It functions by adjusting
the distribution of braking force to the rear
wheels in accordance with the vehicle
’s
loading condition and speed.
The EBD system is an integral part of the
ABS system and uses some of the ABSsystem ’s components to perform its func-
tion of optimizing the distribution of brak-
ing force. If any of the ABS components
used by the EBD system malfunction, the
EBD system also stops working.
When the EBD system is operating, you
may hear a chattering noise or feel a slight
vibration in the brake pedal. This is normal
and does not indicate a malfunction. &
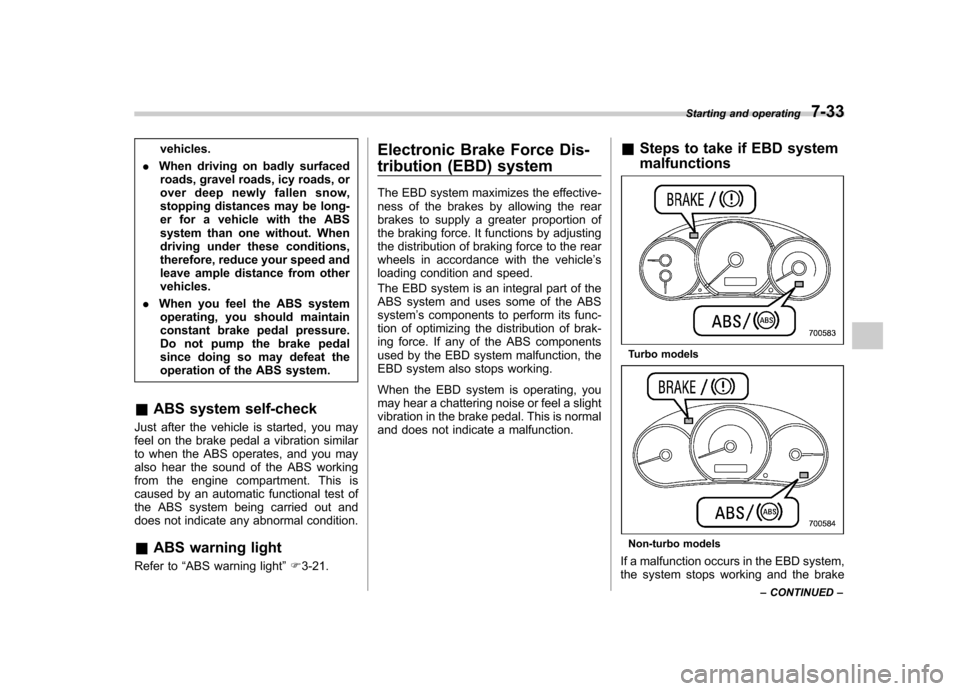
Steps to take if EBD system malfunctions
Turbo models
Non-turbo models
If a malfunction occurs in the EBD system,
the system stops working and the brake Starting and operating
7-33
– CONTINUED –
Page 297 of 458
7-34Starting and operating
system warning light and ABS warning
light illuminate simultaneously.
The EBD system may be malfunctioning if
the brake system warning light and ABS
warning light illuminate simultaneously
during driving.
Even if the EBD system malfunctions, the
conventional braking system will still func-
tion. However, the rear wheels will be
more prone to locking when the brakes
are applied harder than usual and thevehicle’s motion may therefore become
somewhat harder to control.
If the brake system warning light and ABS
warning light illuminate simultaneously,
take the following steps.
1. Stop the vehicle in the nearest safe,
flat location.
2. Shut down the engine, apply the
parking brake, and then restart it.
3. Release the parking brake. If both
warning lights turn off, the EBD system
may be malfunctioning. Drive carefully to
the nearest SUBARU dealer and have the
system inspected.
4. If both warning lights illuminate again
and remain illuminated after the engine
has been restarted, shut down the engine
again, apply the parking brake, and check
the brake fluid level. Refer to “Brake fluid ”
F 11-25. 5. If the brake fluid level is not below the“
MIN ”mark, the EBD system may be
malfunctioning. Drive carefully to the
nearest SUBARU dealer and have the
system inspected.
6. If the brake fluid level is below the “ MIN ”mark, DO NOT drive the vehicle.
Instead, have the vehicle towed to the
nearest SUBARU dealer for repair.
WARNING
. Driving with the brake system
warning light illuminated is dan-
gerous. This indicates your brake
system may not be working
properly. If the light remains
illuminated, have the brakes in-
spected by a SUBARU dealer
immediately.
. If at all in doubt about whether
the brakes are operating prop-
erly, do not drive the vehicle.
Have your vehicle towed to the
nearest SUBARU dealer for re-
pair. Vehicle Dynamics Control system
WARNING
Always use the utmost care in driving –overconfidence because
you are driving with a Vehicle Dy-
namics Control system equipped
vehicle could easily lead to a ser-
ious accident.
CAUTION
. Even if your vehicle is equipped
with Vehicle Dynamics Control
system, winter tires should be
used when driving on snow-cov-
ered or icy roads; in addition,
vehicle speed should be reduced
considerably. Simply having a
Vehicle Dynamics Control sys-
tem does not guarantee that the
vehicle will be able to avoid
accidents in any situation.
. Activation of the Vehicle Dy-
namics Control system is an
indication that the road being
travelled on has a slippery sur-
face; since having Vehicle Dy-
namics Control is no guarantee