2011 SUBARU IMPREZA WRX change time
[x] Cancel search: change timePage 227 of 458
5-40Audio
version, the iPod
®may not activate
smoothly after operation or not work
properly.. Do not disconnect the connector
from an iPod
®during iPod®operation.
& To select a track/index from
its beginning
Select a track/index in the same way that
a track is selected when a CD is played.
For details, refer to “To select a track from
its beginning ”F 5-26.
& To select a chapter from its
beginning when connectingiPod
®
While podcasts or audiobooks are playing,
select a chapter in the same way that a
track is selected when a CD is played. For
details, refer to “To select a track from its
beginning ”F 5-26.
& Fast-forwarding and fast-re- versing
Fast forward or reverse is operated in the
same way a CD is played. For details,
refer to “Fast-forwarding and fast-rever-
sing ”F 5-27. NOTE
When connecting iPod
®:
. When the end of an index is reached
while fast forwarding, fast forwarding
ends and play begins from the begin-
ning of the next index.. When the beginning of an index is
reached while rewin ding, rewinding
ends and play begins from the begin-
ning of the index. & Repeating
! When connecting USB storage de- vice
Repeating is operated in the same way a
CD is played. For details, refer to “Re-
peating ”F 5-28. !
When connecting iPod
®
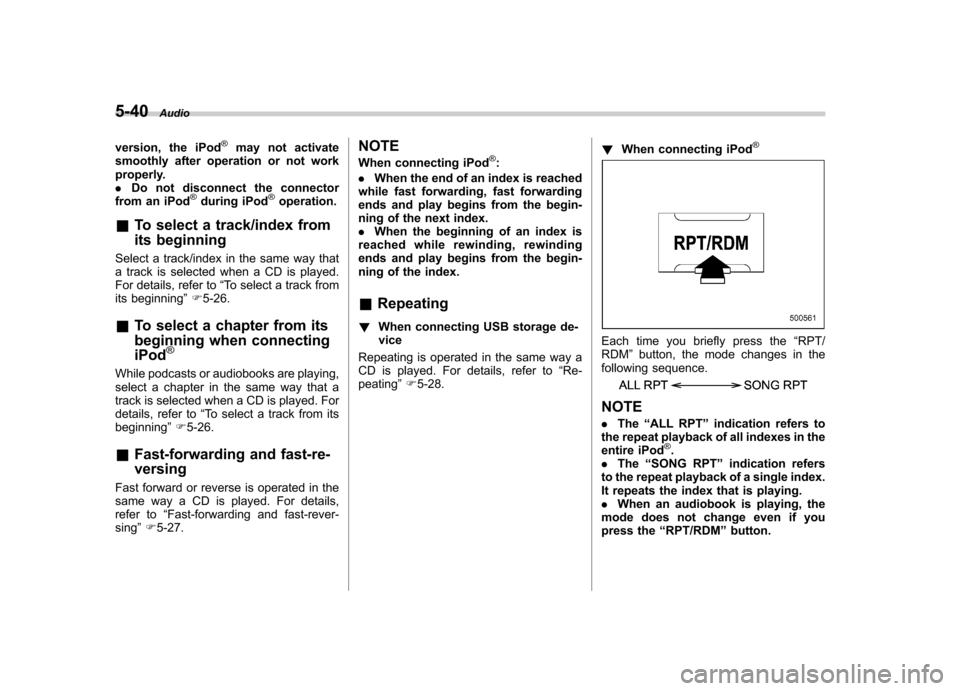
Each time you briefly press the “RPT/
RDM ”button, the mode changes in the
following sequence.
NOTE . The “ALL RPT ”indication refers to
the repeat playback of all indexes in the
entire iPod
®.
. The “SONG RPT ”indication refers
to the repeat playback of a single index.
It repeats the index that is playing.. When an audiobook is playing, the
mode does not change even if you
press the “RPT/RDM ”button.
Page 228 of 458

&Random playback
To playback a track/index/file(s) at ran-
dom, press the “RPT/RDM ”button for 0.5
second or longer while the track/index/file
is playing.
Each time you press the button, the mode
changes in the following sequence.
When connecting USB storage device:
When connecting iPod®:
NOTE . The “FOLDER RDM ”indication re-
fers to the random playback in the
folders. It randomly repeats all of the
tracks in the folder.. The “ALL RDM ”indication refers to
the random playback in the entire USB
storage device. It randomly repeats all
of the tracks in the USB storage device.. The “ALBUM RDM ”indication refers
to the shuffle playback in the album. It
randomly repeats all of the indexes in
the album.. The “SONG RDM ”indication refers
to the shuffle playback in the entireiPod
®. It randomly repeats all of the
indexes in the iPod®.
. When an iPod®is connected, the
files are played back at random by the
shuffle function of the iPod
®. There-
fore, iPod®operation may be different
depending on the model of the con-
nected iPod
®.
. When an audiobook or a podcast is
playing, the mode does not change
even if you press the “RPT/RDM ”
button for 0.5 second or longer.
To cancel the random playback mode,
press the “RPT/RDM ”button for more than
0.5 second and select CANCEL. The“ RDM ”indication will turn off, and the
normal playback mode will resume. &
SCAN (only when connecting
USB storage device)
Scan is operated in the same way a CD is
played. For details, refer to “Scan ”F 5-30.
NOTE
When an iPod
®is connected, you
cannot select the SCAN mode.
& Selecting category (only
when connecting iPod
®)
When the “LIST ”button is pressed for less
than 1.5 seconds, the iPod®menu is
displayed.
Each time you turn the “TUNE/TRACK/
CH ”dial clockwise, the displayed category
changes in the following sequence. Each
time you turn the “TUNE/TRACK/CH ”dial
Audio
5-41
– CONTINUED –
Page 230 of 458
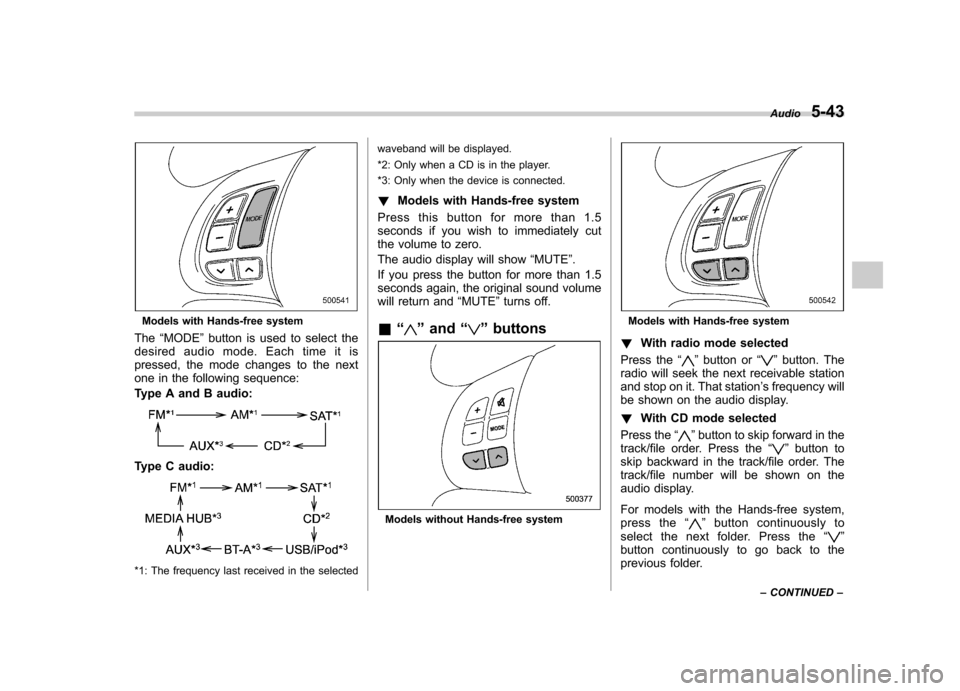
Models with Hands-free system
The “MODE ”button is used to select the
desiredaudiomode.Eachtimeitis
pressed, the mode changes to the next
one in the following sequence:
Type A and B audio:
Type C audio:
*1: The frequency last received in the selected waveband will be displayed.
*2: Only when a CD is in the player.
*3: Only when the device is connected.
! Models with Hands-free system
Press this button for more than 1.5
seconds if you wish to immediately cut
the volume to zero.
The audio display will show “MUTE ”.
If you press the button for more than 1.5
seconds again, the original sound volume
will return and “MUTE ”turns off.
& “
”and “”buttons
Models without Hands-free system
Models with Hands-free system
! With radio mode selected
Press the “
”button or “”button. The
radio will seek the next receivable station
and stop on it. That station ’s frequency will
be shown on the audio display. ! With CD mode selected
Press the “
”button to skip forward in the
track/file order. Press the “”button to
skip backward in the track/file order. The
track/file number will be shown on the
audio display.
For models with the Hands-free system,
press the “
”button continuously to
select the next folder. Press the “”
button continuously to go back to the
previous folder. Audio
5-43
– CONTINUED –
Page 233 of 458
5-46Audio
!How to play back
Press the “CD/AUX ”button and select the
“ BT-A ”mode.
! To select a track from its beginning
Select a track in the same way that a track
is selected when a CD is played. Refer to“ To select a track from its beginning ”F 5-
26. ! Repeating
Repeating is operated in the same way a
CD is played. Refer to “Repeating ”F 5-28.
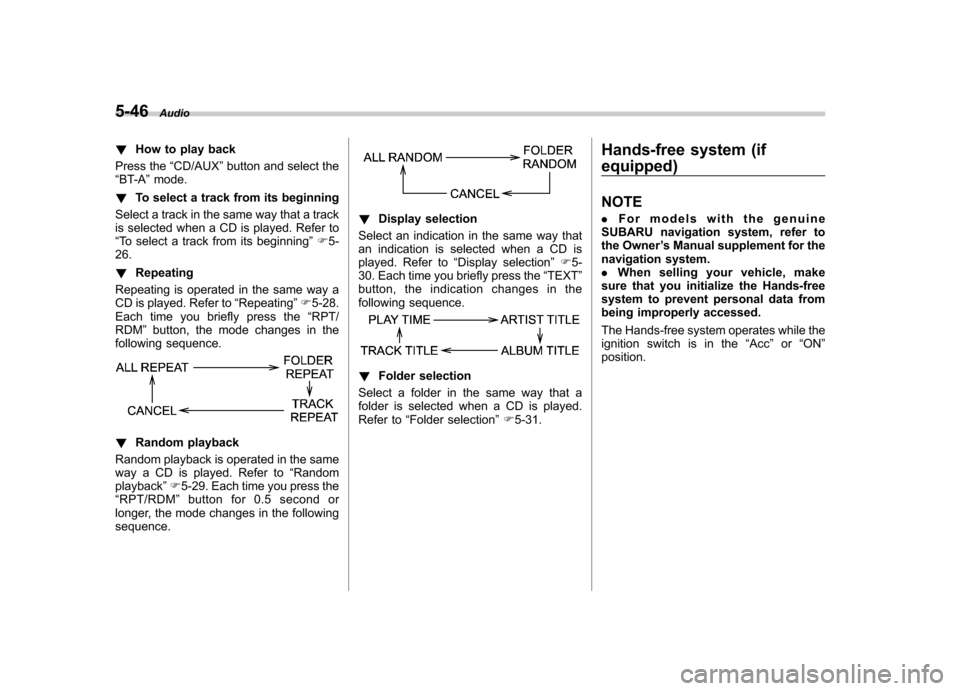
Each time you briefly press the “RPT/
RDM ”button, the mode changes in the
following sequence.
! Random playback
Random playback is operated in the same
way a CD is played. Refer to “Random
playback ”F 5-29. Each time you press the
“ RPT/RDM ”button for 0.5 second or
longer, the mode changes in the followingsequence.
! Display selection
Select an indication in the same way that
an indication is selected when a CD is
played. Refer to “Display selection ”F 5-
30. Each time you briefly press the “TEXT ”
button, the indication changes in the
following sequence.
! Folder selection
Select a folder in the same way that a
folder is selected when a CD is played.
Refer to “Folder selection ”F 5-31. Hands-free system (if
equipped) NOTE .
For models with the genuine
SUBARU navigation system, refer to
the Owner ’s Manual supplement for the
navigation system.. When selling your vehicle, make
sure that you initialize the Hands-free
system to prevent personal data from
being improperly accessed.
The Hands-free system operates while the
ignition switch is in the “Acc ”or “ON ”
position.
Page 251 of 458
6-2Interior equipment
Interior lights
When leaving your vehicle, make sure the
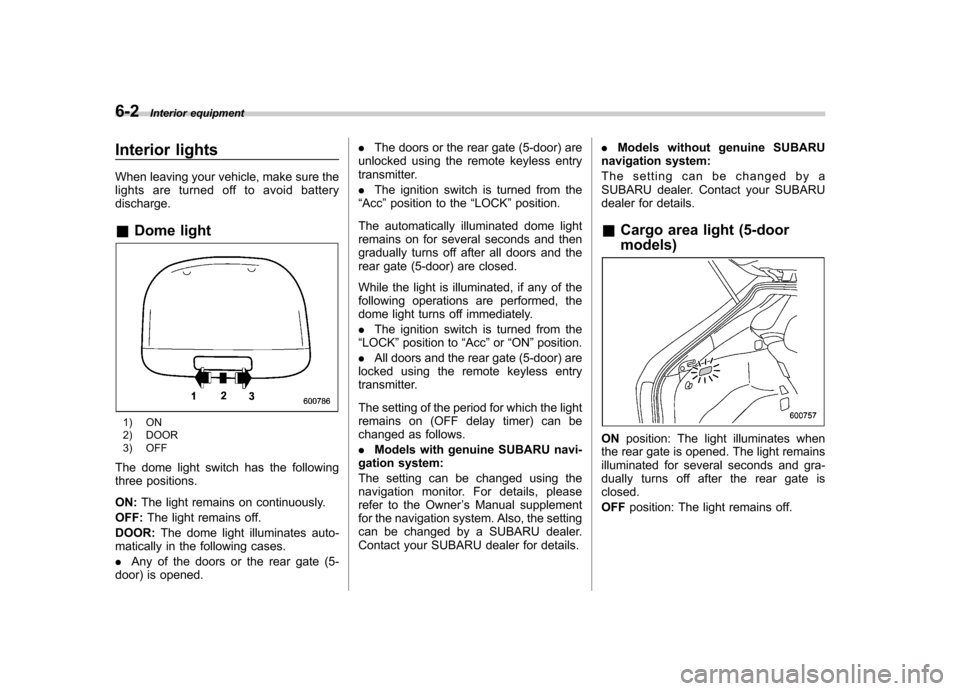
lights are turned off to avoid batterydischarge. &Dome light
1) ON
2) DOOR
3) OFF
The dome light switch has the following
three positions. ON: The light remains on continuously.
OFF: The light remains off.
DOOR: The dome light illuminates auto-
matically in the following cases. . Any of the doors or the rear gate (5-
door) is opened. .
The doors or the rear gate (5-door) are
unlocked using the remote keyless entry
transmitter. . The ignition switch is turned from the
“ Acc ”position to the “LOCK ”position.
The automatically illuminated dome light
remains on for several seconds and then
gradually turns off after all doors and the
rear gate (5-door) are closed.
While the light is illuminated, if any of the
following operations are performed, the
dome light turns off immediately. . The ignition switch is turned from the
“ LOCK ”position to “Acc ”or “ON ”position.
. All doors and the rear gate (5-door) are
locked using the remote keyless entry
transmitter.
The setting of the period for which the light
remains on (OFF delay timer) can be
changed as follows. . Models with genuine SUBARU navi-
gation system:
The setting can be changed using the
navigation monitor. For details, please
refer to the Owner ’s Manual supplement
for the navigation system. Also, the setting
can be changed by a SUBARU dealer.
Contact your SUBARU dealer for details. .
Models without genuine SUBARU
navigation system:
The setting can be changed by a
SUBARU dealer. Contact your SUBARU
dealer for details.
& Cargo area light (5-door models)
ON position: The light illuminates when
the rear gate is opened. The light remains
illuminated for several seconds and gra-
dually turns off after the rear gate isclosed. OFF position: The light remains off.
Page 252 of 458
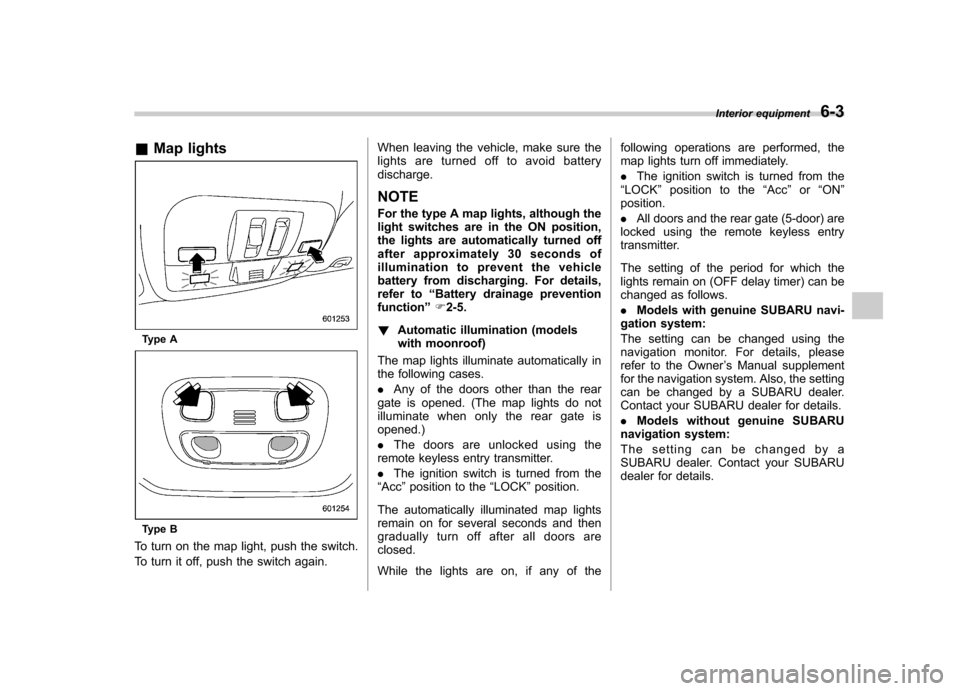
&Map lights
Type A
Type B
To turn on the map light, push the switch.
To turn it off, push the switch again. When leaving the vehicle, make sure the
lights are turned off to avoid batterydischarge.
NOTE
For the type A map lights, although the
light switches are in the ON position,
the lights are automatically turned off
after approximately 30 seconds of
illumination to prevent the vehicle
battery from discharging. For details,
refer to “Battery drainage prevention
function ”F 2-5.
! Automatic illumination (models
with moonroof)
The map lights illuminate automatically in
the following cases. . Any of the doors other than the rear
gate is opened. (The map lights do not
illuminate when only the rear gate isopened.) . The doors are unlocked using the
remote keyless entry transmitter.. The ignition switch is turned from the
“ Acc ”position to the “LOCK ”position.
The automatically illuminated map lights
remain on for several seconds and then
gradually turn off after all doors areclosed.
While the lights are on, if any of the following operations are performed, the
map lights turn off immediately. .
The ignition switch is turned from the
“ LOCK ”position to the “Acc ”or “ON ”
position.. All doors and the rear gate (5-door) are
locked using the remote keyless entry
transmitter.
The setting of the period for which the
lights remain on (OFF delay timer) can be
changed as follows. . Models with genuine SUBARU navi-
gation system:
The setting can be changed using the
navigation monitor. For details, please
refer to the Owner ’s Manual supplement
for the navigation system. Also, the setting
can be changed by a SUBARU dealer.
Contact your SUBARU dealer for details. . Models without genuine SUBARU
navigation system:
The setting can be changed by a
SUBARU dealer. Contact your SUBARU
dealer for details. Interior equipment
6-3
Page 276 of 458

not. Remote engine start transmitter pro-
gramming and feature programming can
be adjusted using the following procedure.
1. Open the driver’s door (the driver ’s
door must remain opened throughout the
entire process).
2. Insert the key into the vehicle ’s ignition
switch and turn to the “ON ”position.
3. Locate the small black programming
button behind the fuse box cover, on the
driver ’s side left under the dashboard
panel.
4. Press and hold the black programming
button for 10 to 15 seconds. The horn will
honk and the turn signal lights will flash
three times to indicate that the system has
entered programming mode. At this point
you can proceed to either step 5 or step 6.
5. To program a remote engine start
transmitter: press and release the “
”
button on each transmitter. The horn will
honk and the turn signal lights will flash
one time to indicate a successful trans-
mitter learn each time the “
”button is
pressed. You can program up to eight transmitters.
6. To toggle the Horn Confirmation chirps
ON/OFF: depress and release the brake
pedal to toggle the feature. The horn will
chirp and the turn signal lights will flash
one time to indicate Confirmation Horn
Chirps are “OFF ”. The horn will honk and the turn signal lights will flash 2 times to
indicate Confirmation Horn Chirps are“
ON ”. Depressing the brake pedal repeat-
edly will toggle the feature ON or OFF
each time.
7. To exit the remote engine start trans-
mitter and feature programming mode,
turn the ignition switch to the “LOCK ”
position, remove the key from the ignition
switch and test operation of the remote
engine start transmitter(s) and horn con-
firmation feature.
& System maintenance
! Changing the batteries
CAUTION
. Do not let dust, oil or water get on
or in the remote engine start
transmitter when replacing the
battery.
. Be careful not to damage the
printed circuit board in the re-
mote engine start transmitter
when replacing the battery.
. Be careful not to allow children to
touch the battery and any re-
moved parts; children could
swallow them.
. There is a danger of explosion if an incorrect replacement battery
is used. Replace only with the
same or equivalent type of bat-
tery.
. Batteries should not be exposed
to excessive heat such as sun-
shine, fire or the like.
The two 3-volt lithium batteries (modelCR-1220 ) supplied in your remote engine
start transmitter should last approximately
3 years, depending on usage. When the
batteries begin to weaken, you will notice
a decrease in range (distance from the
vehicle that your remote engine start
system operates). Follow the instructions
below to change the remote engine start
transmitter batteries.
Starting and operating 7-13
– CONTINUED –
Page 290 of 458
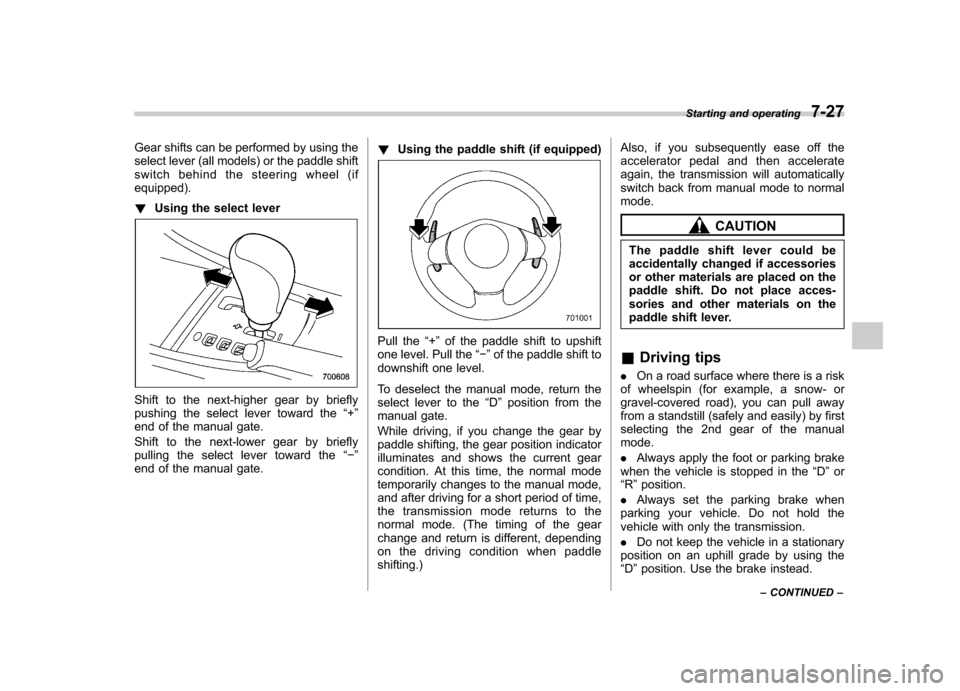
Gear shifts can be performed by using the
select lever (all models) or the paddle shift
switch behind the steering wheel (ifequipped). !Using the select lever
Shift to the next-higher gear by briefly
pushing the select lever toward the “+ ”
end of the manual gate.
Shift to the next-lower gear by briefly
pulling the select lever toward the “� ”
end of the manual gate. !
Using the paddle shift (if equipped)
Pull the “+ ” of the paddle shift to upshift
one level. Pull the “� ” of the paddle shift to
downshift one level.
To deselect the manual mode, return the
select lever to the “D ” position from the
manual gate.
While driving, if you change the gear by
paddle shifting, the gear position indicator
illuminates and shows the current gear
condition. At this time, the normal mode
temporarily changes to the manual mode,
and after driving for a short period of time,
the transmission mode returns to the
normal mode. (The timing of the gear
change and return is different, depending
on the driving condition when paddleshifting.) Also, if you subsequently ease off the
accelerator pedal and then accelerate
again, the transmission will automatically
switch back from manual mode to normalmode.
CAUTION
The paddle shift lever could be
accidentally changed if accessories
or other materials are placed on the
paddle shift. Do not place acces-
sories and other materials on the
paddle shift lever.
& Driving tips
. On a road surface where there is a risk
of wheelspin (for example, a snow- or
gravel-covered road), you can pull away
from a standstill (safely and easily) by first
selecting the 2nd gear of the manualmode. . Always apply the foot or parking brake
when the vehicle is stopped in the “D ”or
“ R ”position.
. Always set the parking brake when
parking your vehicle. Do not hold the
vehicle with only the transmission. . Do not keep the vehicle in a stationary
position on an uphill grade by using the “ D ”position. Use the brake instead. Starting and operating
7-27
– CONTINUED –