2011 SUBARU IMPREZA WRX change wheel
[x] Cancel search: change wheelPage 121 of 458
Instruments and controlsCruise control set indicator light ......................... 3-27
Front fog light indicator light (if equipped) .......... 3-27
Headlight indicator light (if equipped) ................. 3-27
Driver ’s control center differential auto indicator
light (STI) ......................................................... 3-27
Driver ’s control center differential indicator and
warning lights (STI) .......................................... 3-27
REV indicator light (STI) ..................................... 3-28
Clock ................................................................... 3-28
Information display ............................................ 3-29
Outside temperature indicator ............................ 3-29
Current fuel consumption (if equipped) ............... 3-30
Average fuel consumption .................................. 3-30
Turn off display of fuel consumption indicator .......................................................... 3-31
Light control switch ........................................... 3-31
Headlights. ......................................................... 3-32
High/low beam change (dimmer) ......................... 3-32
Headlight flasher ................................................ 3-32 Daytime running light system
............................. 3-33
Turn signal lever ................................................ 3-33
Illumination brightness control ......................... 3-33
Headlight beam leveler (if equipped) ............... 3-34
Front fog light switch (if equipped) .................. 3-36
Wiper and washer .............................................. 3-36
Windshield wiper and washer switches .............. 3-38
Rear window wiper and washer switch –
5-door ............................................................. 3-39
Mirrors ................................................................ 3-40
Inside mirror ...................................................... 3-40
Auto-dimming mirror/compass (if equipped) ....... 3-40
Auto-dimming mirror/compass with HomeLink
®(if equipped) .................................................... 3-41
Outside mirrors ................................................. 3-47
Defogger and deicer .......................................... 3-48
Tilt/telescopic steering wheel ........................... 3-50
Horn .................................................................... 3-51
Page 139 of 458
3-20Instruments and controls
the telltale will flash for approximately one
minute and then remain continuously
illuminated. This sequence will continue
upon subsequent vehicle start-ups as long
as the malfunction exists. When the
malfunction indicator is illuminated, the
system may not be able to detect or signal
low tire pressure as intended. TPMS
malfunctions may occur for a variety of
reasons, including the installation of re-
placement or alternate tires or wheels on
the vehicle that prevent the TPMS from
functioning properly. Always check the
TPMS malfunction telltale after replacing
one or more tires or wheels on your
vehicle to ensure that the replacement or
alternate tires and wheels allow the TPMS
to continue to function properly.
Should the warning light illuminate stea-
dily after blinking for approximately one
minute, have the system inspected by
your nearest SUBARU dealer as soon aspossible.
WARNING
If this light does not illuminate
briefly after the ignition switch is
turned ON or the light illuminates
steadily after blinking for approxi-
mately one minute, you should have
your Tire Pressure Monitoring Sys-
tem checked at a SUBARU dealer as soon as possible.
If this light illuminates while driving,
never brake suddenly and keep
driving straight ahead while gradu-
ally reducing speed. Then slowly
pull off the road to a safe place.
Otherwise an accident involving
serious vehicle damage and serious
personal injury could occur.
If this light still illuminates while
driving after adjusting the tire pres-
sure, a tire may have significant
damage and a fast leak that causes
the tire to lose air rapidly. If you have
a flat tire, replace it with a spare tire
as soon as possible.
When a spare tire is mounted or a
wheel rim is replaced without the
original pressure sensor/transmitter
being transferred, the Low tire pres-
sure warning light will illuminate
steadily after blinking for approxi-
mately one minute. This indicates
the TPMS is unable to monitor all
four road wheels. Contact your
SUBARU dealer as soon as possible
for tire and sensor replacement and/
or system resetting.
If the light illuminates steadily after
blinking for approximately one min-
ute, promptly contact a SUBARU
dealer to have the system inspected.
CAUTION
The tire pressure monitoring system
is NOT a substitute for manually
checking tire pressure. The tire
pressure should be checked peri-
odically (at least monthly) using a
tire gauge. After any change to tire
pressure(s), the tire pressure mon-
itoring system will not re-check tire
inflation pressures until the vehicle
is first driven more than 20 mph (32
km/h). After adjusting the tire pres-
sures, increase the vehicle speed to
at least 20 mph (32 km/h) to start the
TPMS re-checking of the tire infla-
tion pressures. If the tire pressures
are now above the severe low
pressure threshold, the low tire
pressure warning light should turn
off a few minutes later. Therefore, be
sure to install the specified size for
the front and rear tires.
Page 142 of 458
light illuminates, have the vehicle
inspected at an authorized SUBARU
dealer.
! Hill start assist OFF indicator light(STI)
While the Hill start assist system is
deactivated, the Hill start assist OFF
indicator light illuminates continuously to
inform the driver that the Hill start assist
system is not operational. & Door open warning light
The door open warning light illuminates if
any door or the rear gate is not fullyclosed.
Always make sure this light is not illumi-
nated before you start to drive. &All-Wheel Drive warn-
ing light (AT models)
This light illuminates when All-Wheel
Drive is disengaged and the drive me-
chanism is switched to Front Wheel Drive
for maintenance or similar purposes.
It flashes if the vehicle is driven with tires
of differing diameters fitted on the wheels
or with an excessively low air pressure in
any of the tires.
CAUTION
Continuing to drive with the AWD
warning light flashing can damage
the powertrain. If the AWD warning
light starts to flash, promptly park in
a safe place and check whether the
tires have differing diameters and
whether any of the tires has an
excessively low inflation pressure.
& Vehicle Dynamics
Control operation indi-
cator light
It blinks when the skid suppression func-
tion is activated. It illuminates only when
the traction control function is operating.
The Vehicle Dynamics Control system is
probably malfunctioning under any of the
following conditions. Have your vehicle
checked at a SUBARU dealer immedi-
ately. .The light does not illuminate when the
ignition switch is turned to the “ON ”
position.. The light does not turn off even after a
period of approximately 2 seconds after
the ignition switch has been turned to the“ ON ”position. &
Vehicle Dynamics
Control warning light/
Vehicle Dynamics Con-
trol OFF indicator light/
Traction Control OFF in-
dicator light (STI)
This warning light has both the function of
indicating malfunctions in the Vehicle
Dynamics Control system and the function
of indicating that the Vehicle Dynamics
Control system has been deactivated or
only the Traction Control system has beendeactivated.
It illuminates in the event of a malfunction
in the system and is on when the Vehicle
Dynamics Control system is not operating
or only the Traction Control system is notoperating. STI:
This warning light illuminates in yellow for
approximately 1 second when the ignition
switch is turned to the “ON ”position. After
that, this warning light changes to green
and remains illuminated in green for 1
second, and then turns off. It indicates that
the Vehicle Dynamics Control system is
operating normally. Instruments and controls
3-23
– CONTINUED –
Page 229 of 458
5-42Audio
counterclockwise, the displayed category
changes in the opposite sequence.
To select the category, press the “TUNE/
TRACK/CH ”dial. To close the iPod®
menu, press the “LIST ”button for more
than 1.5 seconds. To return to the pre-
vious screen, briefly press the “LIST ”
button. & Display selection
Refer to “Display selection ”F 5-30.
! Page scroll
Refer to “Page (track/folder title) scroll ”
F 5-31.
& Folder selection (only when
connecting USB storage de- vice)
Refer to “Folder selection ”F 5-31. NOTE
When an iPod
®is connected, you
cannot select a folder. & When “CHECK DEVICE ”is
displayed
This message is displayed under the
following conditions. . When there is a short in the USB bus
. When a non-corresponding device (for
example a USB mouse) is connected. When a non-corresponding iPod
®is
connected . When a connected iPod
®is frozen
. When a transmission malfunction oc-
curs . When an iPod
®confirmation malfunc-
tion occurs. When a HUB class USB storage
device is connected
Disconnect the USB storage device/iPod
®
and check it. Audio control buttons (if
equipped)
These buttons are located on the spokes
of the steering wheel. They allow the
driver to control audio functions without
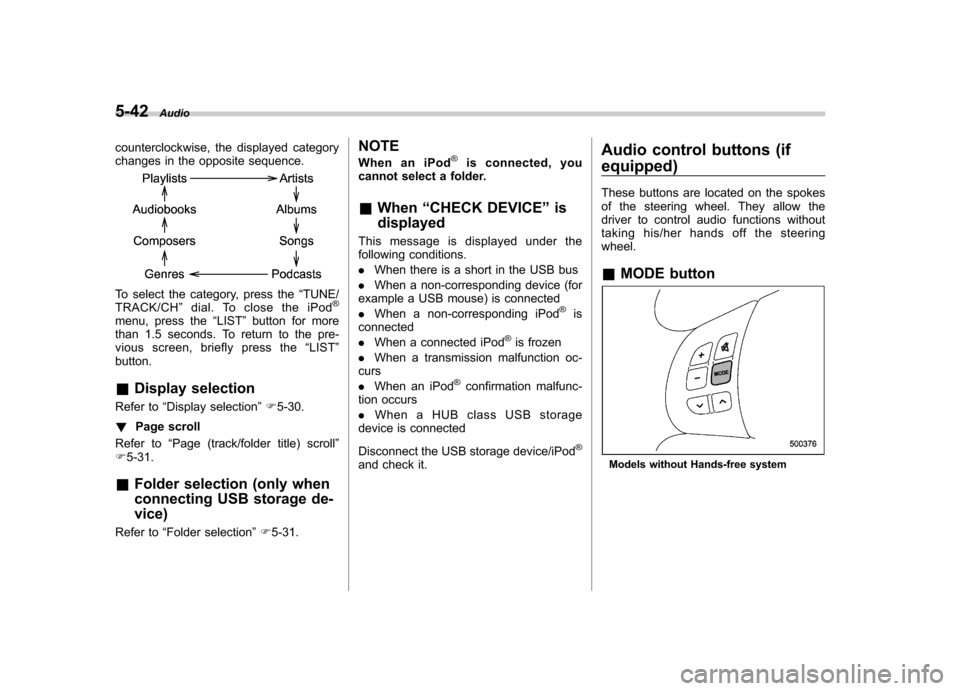
taking his/her hands off the steeringwheel. &
MODE buttonModels without Hands-free system
Page 281 of 458
7-18Starting and operating
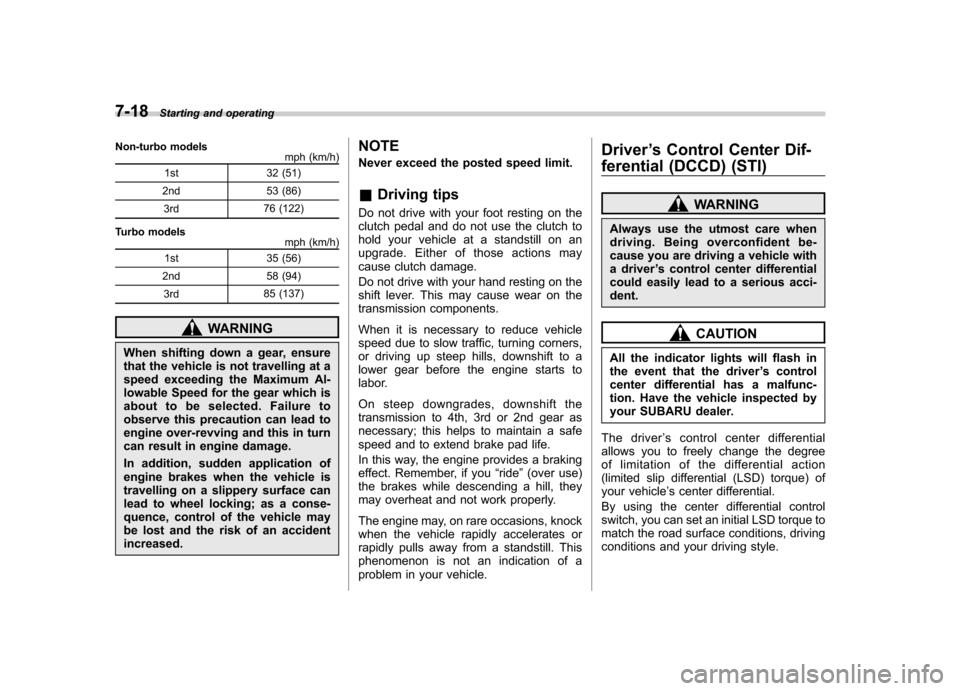
Non-turbo models
mph (km/h)
1st 32 (51)
2nd 53 (86)
3rd 76 (122)
Turbo models mph (km/h)
1st 35 (56)
2nd 58 (94)
3rd 85 (137)
WARNING
When shifting down a gear, ensure
that the vehicle is not travelling at a
speed exceeding the Maximum Al-
lowable Speed for the gear which is
about to be selected. Failure to
observe this precaution can lead to
engine over-revving and this in turn
can result in engine damage.
In addition, sudden application of
engine brakes when the vehicle is
travelling on a slippery surface can
lead to wheel locking; as a conse-
quence, control of the vehicle may
be lost and the risk of an accident increased. NOTE
Never exceed the posted speed limit. &
Driving tips
Do not drive with your foot resting on the
clutch pedal and do not use the clutch to
hold your vehicle at a standstill on an
upgrade. Either of those actions may
cause clutch damage.
Do not drive with your hand resting on the
shift lever. This may cause wear on the
transmission components.
When it is necessary to reduce vehicle
speed due to slow traffic, turning corners,
or driving up steep hills, downshift to a
lower gear before the engine starts to
labor.
On steep downgrades, downshift the
transmission to 4th, 3rd or 2nd gear as
necessary; this helps to maintain a safe
speed and to extend brake pad life.
In this way, the engine provides a braking
effect. Remember, if you “ride ”(over use)
the brakes while descending a hill, they
may overheat and not work properly.
The engine may, on rare occasions, knock
when the vehicle rapidly accelerates or
rapidly pulls away from a standstill. This
phenomenon is not an indication of a
problem in your vehicle. Driver
’s Control Center Dif-
ferential (DCCD) (STI)
WARNING
Always use the utmost care when
driving. Being overconfident be-
cause you are driving a vehicle with
a driver ’s control center differential
could easily lead to a serious acci-dent.
CAUTION
All the indicator lights will flash in
the event that the driver ’s control
center differential has a malfunc-
tion. Have the vehicle inspected by
your SUBARU dealer.
The driver ’s control center differential
allows you to freely change the degree
of limitation of the d ifferential action
(limited slip differential (LSD) torque) of
your vehicle ’s center differential.
By using the center differential control
switch, you can set an initial LSD torque to
match the road surface conditions, driving
conditions and your driving style.
Page 282 of 458
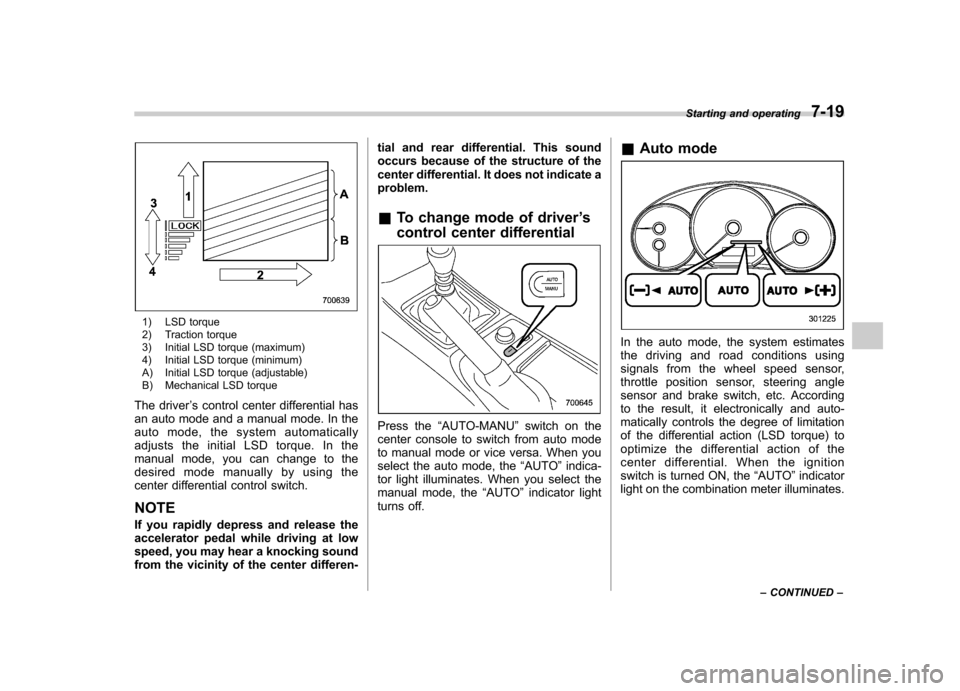
1) LSD torque
2) Traction torque
3) Initial LSD torque (maximum)
4) Initial LSD torque (minimum)
A) Initial LSD torque (adjustable)
B) Mechanical LSD torque
The driver ’s control center differential has
an auto mode and a manual mode. In the
auto mode, the system automatically
adjusts the initial LSD torque. In the
manual mode, you can change to the
desired mode manually by using the
center differential control switch. NOTE
If you rapidly depress and release the
accelerator pedal while driving at low
speed, you may hear a knocking sound
from the vicinity of the center differen- tial and rear differential. This sound
occurs because of the structure of the
center differential. It does not indicate aproblem.
& To change mode of driver ’s
control center differential
Press the “AUTO-MANU ”switch on the
center console to switch from auto mode
to manual mode or vice versa. When you
select the auto mode, the “AUTO ”indica-
tor light illuminates. When you select the
manual mode, the “AUTO ”indicator light
turns off. &
Auto mode
In the auto mode, the system estimates
the driving and road conditions using
signals from the wheel speed sensor,
throttle position sensor, steering angle
sensor and brake switch, etc. According
to the result, it electronically and auto-
matically controls the degree of limitation
of the differential action (LSD torque) to
optimize the differential action of the
center differential. When the ignition
switch is turned ON, the “AUTO ”indicator
light on the combination meter illuminates. Starting and operating
7-19
– CONTINUED –
Page 283 of 458
![SUBARU IMPREZA WRX 2011 4.G Owners Manual 7-20Starting and operating
The auto mode has 3 modes as follows.
Mode Operation
AUTO [+] This mode emphasizes traction control and strengthens the
limitation of differential action
that is suitable SUBARU IMPREZA WRX 2011 4.G Owners Manual 7-20Starting and operating
The auto mode has 3 modes as follows.
Mode Operation
AUTO [+] This mode emphasizes traction control and strengthens the
limitation of differential action
that is suitable](/manual-img/17/7260/w960_7260-282.png)
7-20Starting and operating
The auto mode has 3 modes as follows.
Mode Operation
AUTO [+] This mode emphasizes traction control and strengthens the
limitation of differential action
that is suitable for driving on
slippery roads for vehicle stabi-
lity.
AUTO This mode is suitable for most driving situations.
AUTO [ �] This mode is suitable when you
seek quick response from the
steering wheel and smooth
driving.
! Mode setting method
In most situations, it is recommended that the “AUTO ”mode is selected.
Push the control switch forward to select the
“AUTO [+] ”mode. After setting the
mode, “
”on the combination meter
illuminates.
Pull the control switch rearward to select the “AUTO [ �]” mode. After setting the
mode, “
”on the combination meter
illuminates.
When the “AUTO [+] ”mode is selected,
pull the control switch rearward to change
to the “AUTO ”mode. When the “AUTO
[ � ]” mode is set, push the control switch
forward to change to the “AUTO ”mode. &
Manual mode
In the manual mode, you can use the
center differential control switch to adjust
the initial LSD torque as desired. When
this mode is selected, the “AUTO ”indica-
tor light on the combination meter turnsoff.
Page 284 of 458
!Center differential control switch
and indicator light
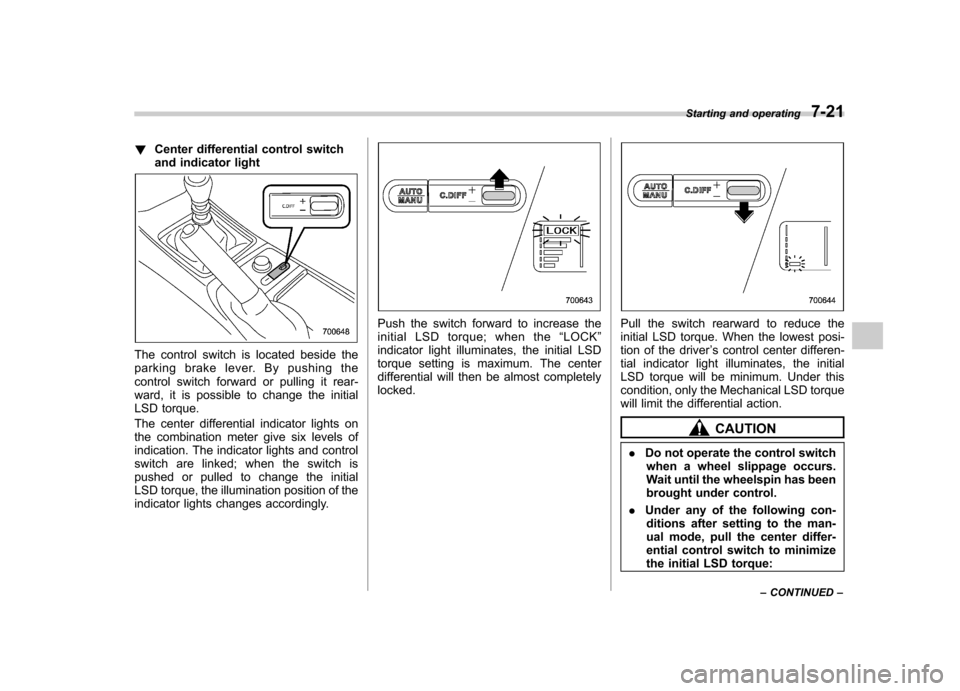
The control switch is located beside the
parking brake lever. By pushing the
control switch forward or pulling it rear-
ward, it is possible to change the initial
LSD torque.
The center differential indicator lights on
the combination meter give six levels of
indication. The indicator lights and control
switch are linked; when the switch is
pushed or pulled to change the initial
LSD torque, the illumination position of the
indicator lights changes accordingly.
Push the switch forward to increase the
initial LSD torque; when the “LOCK ”
indicator light illuminates, the initial LSD
torque setting is maximum. The center
differential will then be almost completelylocked.Pull the switch rearward to reduce the
initial LSD torque. When the lowest posi-
tion of the driver ’s control center differen-
tial indicator light illuminates, the initial
LSD torque will be minimum. Under this
condition, only the Mechanical LSD torque
will limit the differential action.
CAUTION
. Do not operate the control switch
when a wheel slippage occurs.
Wait until the wheelspin has been
brought under control.
. Under any of the following con-
ditions after setting to the man-
ual mode, pull the center differ-
ential control switch to minimize
the initial LSD torque: Starting and operating
7-21
– CONTINUED –