2011 SUBARU IMPREZA warning
[x] Cancel search: warningPage 91 of 458

2-2Keys and doors
Keys
1) Master key (Black)
2) Submaster key (Black)
3) Valet key (Gray)
4) Key number plate
5) Security ID plate
Three types of keys are provided for your vehicle:
Master key, submaster key and valet key.
The master key and submaster key fit all
locks on your vehicle. . Ignition switch
. Driver ’s door
. Trunk lid release lever (4-door)
. Glove box
The valet key fits only the ignition switch and driver
’s door lock. You can keep the
trunk and glove box locked when you
leave your vehicle and valet key at a
parking facility.
CAUTION
Do not attach a large key holder or
key case to either key. If it bangs
against your knees while you are
driving, it could turn the ignition
switch from the “ON ”position to the
“ Acc ”or “LOCK ”position, thereby
stopping the engine.
& Key number plate
The key number is stamped on the key
number plate attached to the key set.
Write down the key number and keep it in
another safe place, not in the vehicle. This
number is needed to make a replacement
key if you lose your key or lock it inside the
vehicle. Refer to “Key replacement ”F 2-3. Immobilizer
CAUTION
FCC WARNING
Changes or modifications not ex-
pressly approved by the party re-
sponsible for compliance could void
the user ’s authority to operate the
equipment.
The immobilizer system is designed to
prevent an unauthorized person from
starting the engine. Only keys registered
with your vehicle ’s immobilizer system can
be used to operate your vehicle. Even if
an unregistered key fits into the ignition
switch and can be turned to the “START ”
position, the engine will automatically stop
after several seconds.
Each immobilizer key contains a trans-
ponder in which the key ’s ID code is
stored. When a key is inserted into the
ignition switch and turned to the “ON ”
position, the transponder transmits thekey ’s ID code to the immobilizer system ’s
receiver. If the transmitted ID code
matches the ID code registered in the
immobilizer system, the system allows the
engine to be started. Since the ID code is
transmitted and acted upon almost in-
Page 94 of 458

1) Rotate the lock lever rearward.
2) Close the door.
To lock the door from the outside without
the key, rotate the lock lever rearward and
then close the door.
To lock the door from the outside using the
power door locking switch, push the front
side of the switch ( “LOCK ”side) and then
close the door. In this case, all closed
doors and the rear gate (for 5-door) are
locked at the same time.
Always make sure that all doors and the
rear gate (for 5-door) are locked before
leaving your vehicle. NOTE
Make sure that you do not leave the key
inside the vehicle when locking the doors from the outside without the key.
& Locking and unlocking from
the inside
1) Lock
2) Unlock
To lock the door from the inside, rotate the
lock lever rearward. To unlock the door
from the inside, rotate the lock leverforward.
The red mark on the lock lever appears
when the door is unlocked.
Pull the inside door handle to open an
unlocked door.
Always make sure that all doors and the
rear gate (for 5-door) are closed before
starting to drive.
WARNING
Keep all doors locked when you
drive, especially when small chil-
dren are in your vehicle.
Along with the proper use of seat-
belts and child restraints, locking
the doors reduces the chance of
being thrown out of the vehicle in anaccident.
It also helps prevent passengers
from falling out if a door is acciden-
tally opened, and intruders from
unexpectedly opening doors and
entering your vehicle.
& Battery drainage prevention function
If a door or the rear gate (5-door) is not
completely closed, the interior lights will
remain illuminated as a result. However,
several lights are automatically turned off
by the battery drainage prevention func-
tion to prevent the battery from dischar-
ging. The following interior lights are
affected by this function. Keys and doors
2-5
– CONTINUED –
Page 97 of 458

2-8Keys and doors
Remote keyless entry system
CAUTION
. Do not expose the remote trans-
mitter to severe shocks, such as
those experienced as a result of
dropping or throwing.
. Do not take the remote transmit-
ter apart except when replacing
the battery.
. Do not get the remote transmitter
wet. If it gets wet, wipe it dry with
a cloth immediately.
. When you carry the remote trans-
mitter on an airplane, do not
press the button of the remote
transmitter while in the airplane.
When any button of the remote
transmitter is pressed, radio
waves are sent and may affect
the operation of the airplane.
When you carry the remote trans-
mitter in a bag on an airplane,
take measures to prevent the
buttons of the remote transmitter
from being pressed.
. FCC WARNING
Changes or modifications not
expressly approved by the party responsible for compliance
could void the user
’s authority
to operate the equipment.
This device complies with Part 15 of
the FCC Rules and RSS-Gen of IC
Rules. Operation is subject to the
following two conditions: (1) this de-
vice may not cause harmful interfer-
ence, and (2) this device must accept
any interference received, including
interference that may cause undesiredoperation.
Two transmitters are provided for your vehicle.
The remote keyless entry system has the
following functions. . Locking and unlocking the doors (and
rear gate on the 5-door) without a key. Unlocking the rear gate on the 5-door
without a key. Opening the trunk lid on the 4-door
without a key. Sounding a panic alarm
. Arming and disarming the alarm sys-
tem. For detailed information, refer to “ Alarm system ”F 2-16.
The operable distance of the remote
keyless entry system is approximately 30
feet (10 meters). However, this distance will vary depending on environmental
conditions. The system
’s operable dis-
tance will be shorter in areas near a
facility or electronic equipment emitting
strong radio waves such as a power plant,
broadcast station, TV tower, or remote
controller of home electronic appliances.
The remote keyless entry system does not
operate when the key is inserted in the
ignition switch.
: Trunk lid/rear gate unlock button: Unlock/disarm button: Lock/arm button
A: Panic button
1) Front
2) Back
Page 110 of 458
your vehicle. Examples:–Vibration from a construction site
– Vibration in a multistory car park
– Vibration from trains
. You can have the sensitivity of the
shock sensors adjusted to your pre-
ference by your SUBARU dealer. Child safety locks
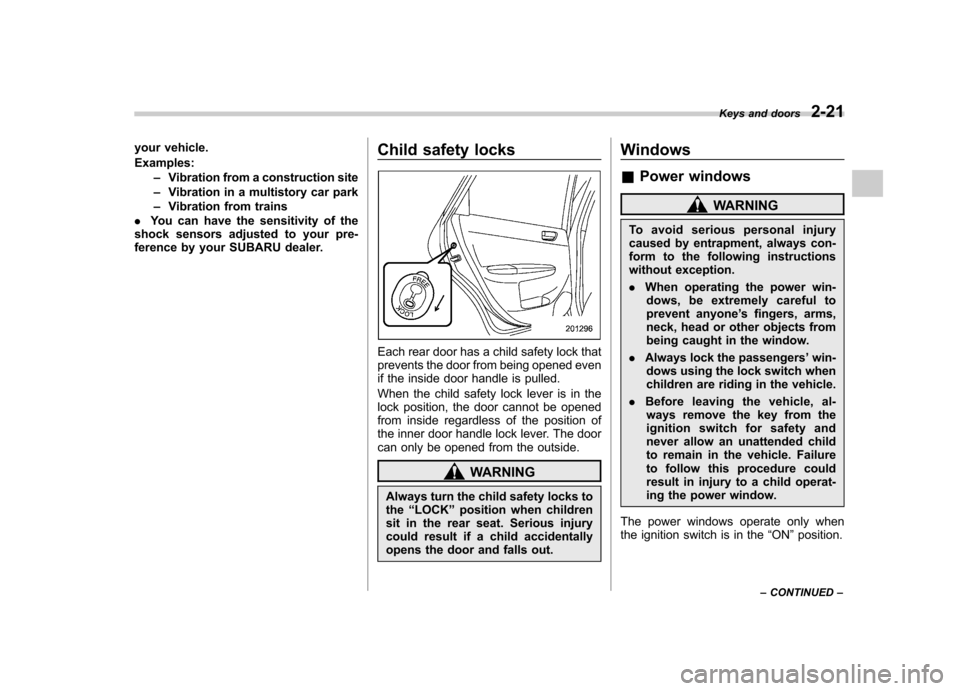
Each rear door has a child safety lock that
prevents the door from being opened even
if the inside door handle is pulled.
When the child safety lock lever is in the
lock position, the door cannot be opened
from inside regardless of the position of
the inner door handle lock lever. The door
can only be opened from the outside.
WARNING
Always turn the child safety locks to the “LOCK ”position when children
sit in the rear seat. Serious injury
could result if a child accidentally
opens the door and falls out. Windows &
Power windows
WARNING
To avoid serious personal injury
caused by entrapment, always con-
form to the following instructions
without exception. . When operating the power win-
dows, be extremely careful to
prevent anyone ’s fingers, arms,
neck, head or other objects from
being caught in the window.
. Always lock the passengers ’win-
dows using the lock switch when
children are riding in the vehicle.
. Before leaving the vehicle, al-
ways remove the key from the
ignition switch for safety and
never allow an unattended child
to remain in the vehicle. Failure
to follow this procedure could
result in injury to a child operat-
ing the power window.
The power windows operate only when
the ignition switch is in the “ON ”position.
Keys and doors
2-21
– CONTINUED –
Page 114 of 458
Trunk lid (4-door)
WARNING
. To prevent dangerous exhaust
gas from entering the vehicle,
always keep the trunk lid closed
while driving.
. Help prevent children, adults or
animals from locking themselves
in the trunk. On hot or sunny
days, the temperature in the
trunk could quickly become high
enough to cause death or serious
heat-related injuries including
brain damage to anyone locked
inside, particularly for small chil-dren.
. When leaving the vehicle, either
close all windows and lock all
doors. Also make certain that the
trunk is closed. &
To open and close the trunk
lid from outside
The trunk lid can be opened using the
remote keyless entry system. Refer to“ Remote keyless entry system ”F 2-8.
To close the trunk lid, lightly press the
trunk lid down until the latch engages.
NOTE
Do not leave your valuables in the
trunk when you leave your vehicle. & To open the trunk lid from inside
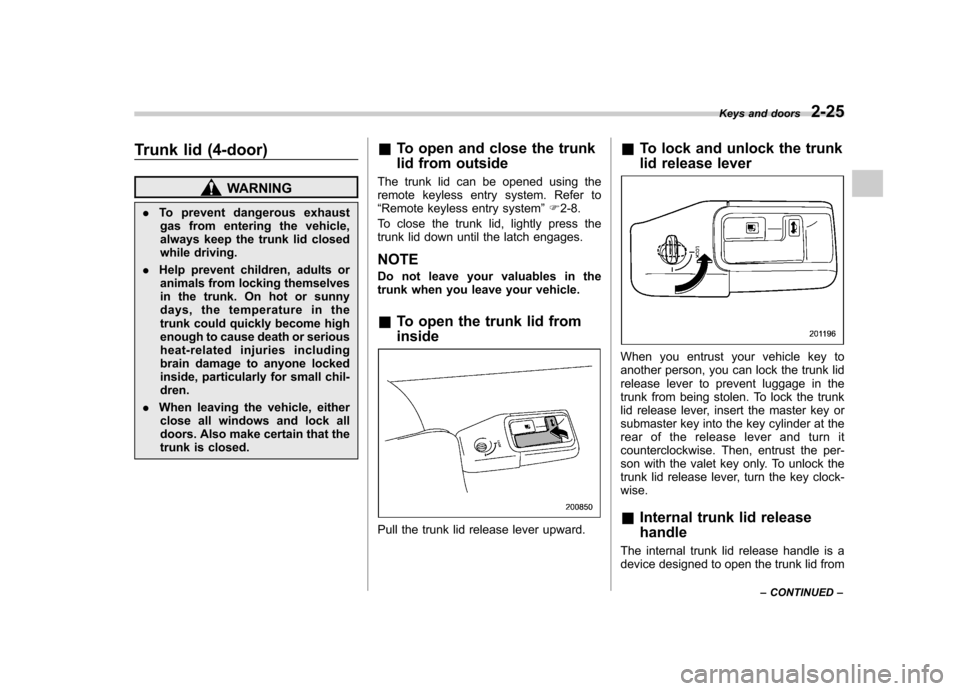
Pull the trunk lid release lever upward. &
To lock and unlock the trunk
lid release lever
When you entrust your vehicle key to
another person, you can lock the trunk lid
release lever to prevent luggage in the
trunk from being stolen. To lock the trunk
lid release lever, insert the master key or
submaster key into the key cylinder at the
rear of the release lever and turn it
counterclockwise. Then, entrust the per-
son with the valet key only. To unlock the
trunk lid release lever, turn the key clock-wise. &Internal trunk lid release handle
The internal trunk lid release handle is a
device designed to open the trunk lid from Keys and doors
2-25
– CONTINUED –
Page 115 of 458
2-26Keys and doors
inside the trunk. In the event children or
adults become locked inside the trunk, the
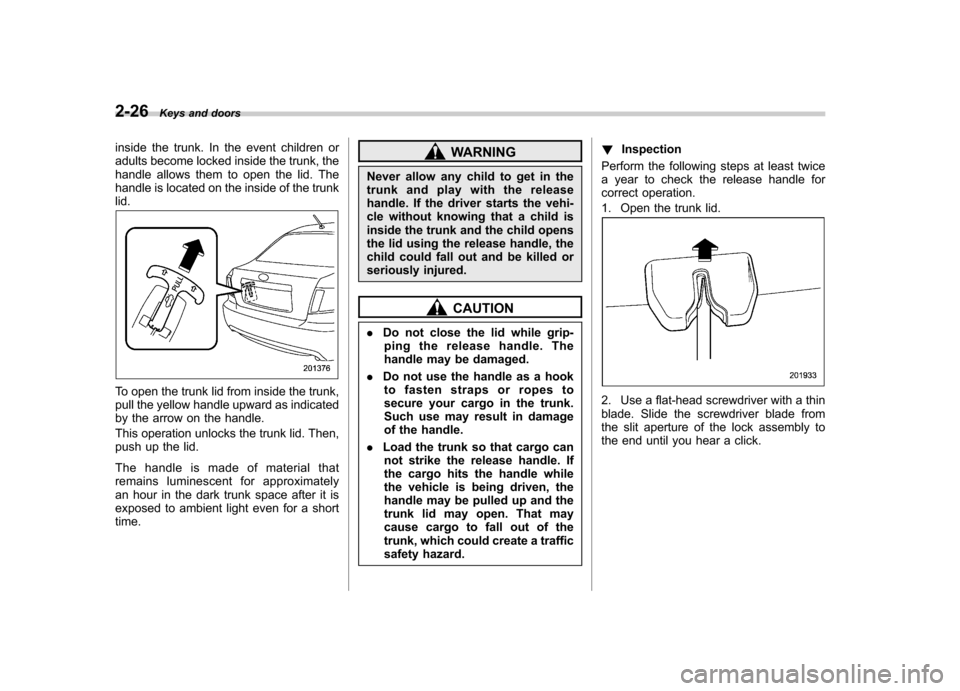
handle allows them to open the lid. The
handle is located on the inside of the trunklid.
To open the trunk lid from inside the trunk,
pull the yellow handle upward as indicated
by the arrow on the handle.
This operation unlocks the trunk lid. Then,
push up the lid.
The handle is made of material that
remains luminescent for approximately
an hour in the dark trunk space after it is
exposed to ambient light even for a shorttime.
WARNING
Never allow any child to get in the
trunk and play with the release
handle. If the driver starts the vehi-
cle without knowing that a child is
inside the trunk and the child opens
the lid using the release handle, the
child could fall out and be killed or
seriously injured.
CAUTION
. Do not close the lid while grip-
ping the release handle. The
handle may be damaged.
. Do not use the handle as a hook
to fasten straps or ropes to
secure your cargo in the trunk.
Such use may result in damage
of the handle.
. Load the trunk so that cargo can
not strike the release handle. If
the cargo hits the handle while
the vehicle is being driven, the
handle may be pulled up and the
trunk lid may open. That may
cause cargo to fall out of the
trunk, which could create a traffic
safety hazard. !
Inspection
Perform the following steps at least twice
a year to check the release handle for
correct operation.
1. Open the trunk lid.
2. Use a flat-head screwdriver with a thin
blade. Slide the screwdriver blade from
the slit aperture of the lock assembly to
the end until you hear a click.
Page 117 of 458
2-28Keys and doors
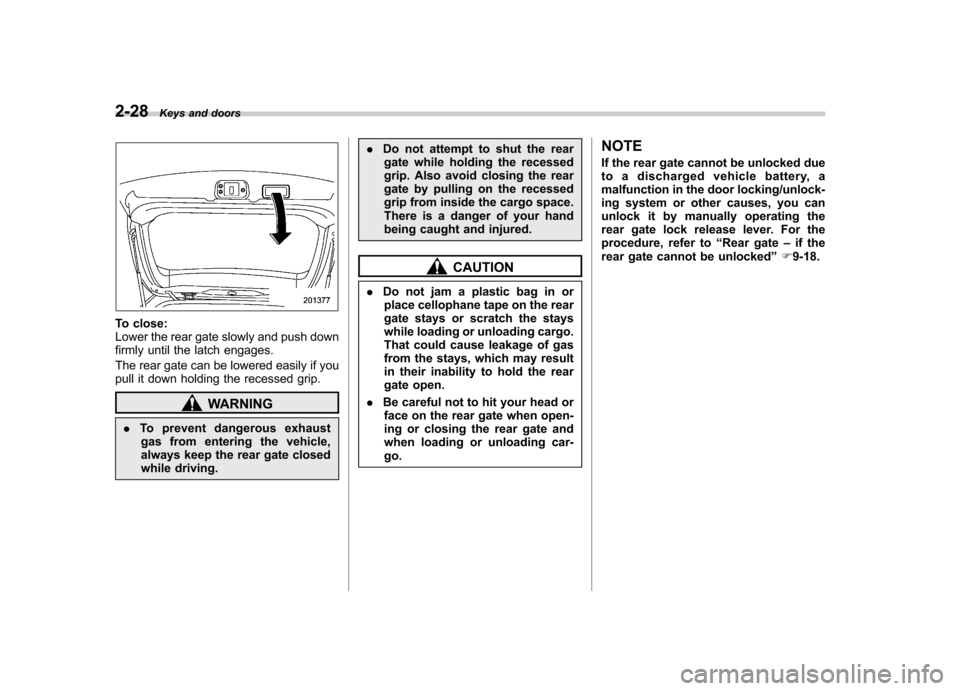
To close:
Lower the rear gate slowly and push down
firmly until the latch engages.
The rear gate can be lowered easily if you
pull it down holding the recessed grip.
WARNING
. To prevent dangerous exhaust
gas from entering the vehicle,
always keep the rear gate closed
while driving. .
Do not attempt to shut the rear
gate while holding the recessed
grip. Also avoid closing the rear
gate by pulling on the recessed
grip from inside the cargo space.
There is a danger of your hand
being caught and injured.
CAUTION
. Do not jam a plastic bag in or
place cellophane tape on the rear
gate stays or scratch the stays
while loading or unloading cargo.
That could cause leakage of gas
from the stays, which may result
in their inability to hold the rear
gate open.
. Be careful not to hit your head or
face on the rear gate when open-
ing or closing the rear gate and
when loading or unloading car-go. NOTE
If the rear gate cannot be unlocked due
to a discharged vehicle battery, a
malfunction in the door locking/unlock-
ing system or other causes, you can
unlock it by manually operating the
rear gate lock release lever. For the
procedure, refer to
“Rear gate –if the
rear gate cannot be unlocked ”F 9-18.
Page 118 of 458
Moonroof (if equipped)
WARNING
Never let anyone ’shands,arms,
head or any objects protrude from
the moonroof. A person could be
seriously injured if the vehicle stops
suddenly or turns sharply or if the
vehicle is involved in an accident.
To avoid serious personal injury
caused by entrapment, always con-
form to the following instructions
without exception. . Before closing the moonroof,
make sure that no one ’s hands,
arms, head or other objects will
be accidentally caught in themoonroof.
. Before leaving the vehicle, al-
ways remove the key from the
ignition switch for safety and
never allow an unattended child
to remain in the vehicle. Failure
to follow this procedure could
result in injury to a child operat-
ing the moonroof. .
Never try to check the anti-en-
trapment function by deliberately
placing part of your body in themoonroof.
CAUTION
. Do not sit on the edge of the open
moonroof.
. Do not operate the moonroof if
falling snow or extremely cold
conditions have caused it to
freeze shut.
. The anti-entrapment function
does not operate when the moon-
roof is being tilted down. Be sure
to confirm that it is safe to do so
before tilting the moonroof down.
The moonroof has both tilting and slidingfunctions.
The moonroof operates only when the
ignition switch is in the “ON ”position. &
Moonroof switches
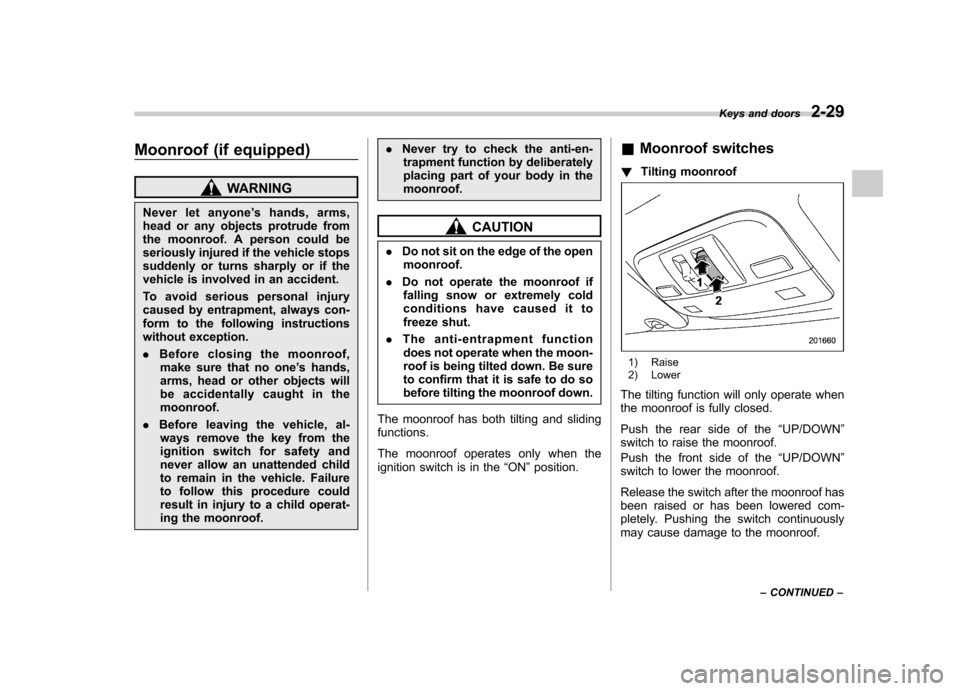
! Tilting moonroof
1) Raise
2) Lower
The tilting function will only operate when
the moonroof is fully closed.
Push the rear side of the “UP/DOWN ”
switch to raise the moonroof.
Push the front side of the “UP/DOWN ”
switch to lower the moonroof.
Release the switch after the moonroof has
been raised or has been lowered com-
pletely. Pushing the switch continuously
may cause damage to the moonroof. Keys and doors
2-29
– CONTINUED –