Page 199 of 458
5-12Audio
FM/AM radio operation &FM/AM selection
Type A and B audio
Type C audio
Push the “FM/AM ”button when the radio is off to turn on the radio.
Push the
“FM/AM ”button when the radio
is on to select FM1, FM2, FM3 or AM reception.
Each brief press of the “FM/AM ”button
changes the radio in the following se-
quence starting from the last radio band
with you selected.
& Tuning
! Manual tuning
Type A and B audio
Type C audio
Turn the “TUNE/TRACK/CH ”dial clock-
wise to increase the tuning frequency and
turn the “TUNE/TRACK/CH ”dial counter-
clockwise to decrease it.
Each time the dial is turned, the frequency
interval can be changed between 10 kHz
in the AM mode and 0.2 MHz in the FMmode. ! Stereo indicator
The stereo indicator “ST ”will illuminate
when an FM stereo broadcast is received.
Page 205 of 458

5-18Audio
signals can be blocked by objects such as
buildings, but the network of repeater
stations allows signal coverage within
urban areas such as cities.
You may experience problems in receiving XM
TMsatellite radio signals in the follow-
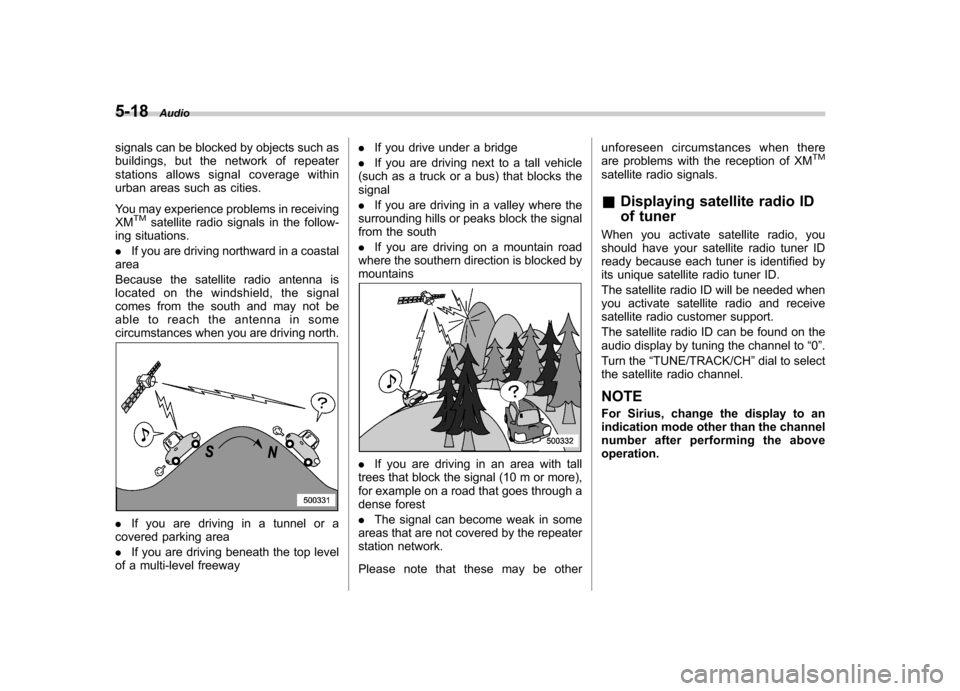
ing situations. . If you are driving northward in a coastal
area
Because the satellite radio antenna is
located on the windshield, the signal
comes from the south and may not be
able to reach the antenna in some
circumstances when you are driving north.
. If you are driving in a tunnel or a
covered parking area . If you are driving beneath the top level
of a multi-level freeway .
If you drive under a bridge
. If you are driving next to a tall vehicle
(such as a truck or a bus) that blocks the signal . If you are driving in a valley where the
surrounding hills or peaks block the signal
from the south . If you are driving on a mountain road
where the southern direction is blocked by mountains
. If you are driving in an area with tall
trees that block the signal (10 m or more),
for example on a road that goes through a
dense forest . The signal can become weak in some
areas that are not covered by the repeater
station network.
Please note that these may be other unforeseen circumstances when there
are problems with the reception of XM
TM
satellite radio signals. &
Displaying satellite radio ID
of tuner
When you activate satellite radio, you
should have your satellite radio tuner ID
ready because each tuner is identified by
its unique satellite radio tuner ID.
The satellite radio ID will be needed when
you activate satellite radio and receive
satellite radio customer support.
The satellite radio ID can be found on the
audio display by tuning the channel to “0 ”.
Turn the “TUNE/TRACK/CH ”dial to select
the satellite radio channel.
NOTE
For Sirius, change the display to an
indication mode other than the channel
number after performing the aboveoperation.
Page 206 of 458
&Band selection
Type A and B audio
Type C audio
Push the “SAT ”button when the radio is
off to turn on the radio.
Push the “SAT ”button when the radio is on to select SAT1, SAT2 or SAT3 recep- tion.
& Channel and category selec- tion
! Channel selection
Type A and B audio
Type C audio
Turn the “TUNE/TRACK/CH ”dial clock-
wise to select the next channel and turn the “TUNE/TRACK/CH ”dial counterclock-
wise to select the previous channel. Audio
5-19
– CONTINUED –
Page 213 of 458
5-26Audio
& To select a track from its beginning
! Forward direction
Type A and B audio
Type C audio Turn the
“TUNE/TRACK/CH ”dial clock-
wise to skip to the beginning of the next
track/file. Each time the dial is turned, the
indicated track/file number will increase. NOTE
In an MP3, WMA or AAC (type C audio)
folder, skipping past the last track/file
will take you back to the first track/file
in the folder. ! Backward direction
Type A and B audio
Type C audio
Turn the “TUNE/TRACK/CH ”dial counter-
clockwise to skip to the beginning of the
current track/file. Each time the dial is
turned, the indicated track/file number willdecrease.
NOTE
In an MP3, WMA or AAC (type C audio)
folder, skipping past the first track/file
will take you to the last track/file in the
folder.
Page 217 of 458

5-30Audio
& Scan
Type A and B audio
Type C audio
The scan mode lets you listen to the first
10 seconds of each track/file in succes-
sion. Press the “SCAN ”button to start scanning upward beginning with the track/
file(s) following the currently selected one.
After all track/file(s) in the disk/folder have
been scanned, normal playback will be
resumed. To cancel the scan mode, pressthe
“SCAN ”button again.
NOTE
The scan mode will be cancelled if you
perform any of the following steps. . Press the “RPT/RDM ”button
. Turn the “TUNE/TRACK/CH ”dial
. Press the “
”or “”side of the
“ FOLDER/PTY/CAT ”button
. Press the “
”button
. Press the disc select button (type B
audio) . Select the radio or AUX mode
. Press the “LOAD ”button when
there is free space in the CD magazine
(type B audio). Press the “PTY/CAT ”button
. Turn off the power of the audio
equipment. Turn the ignition switch to the
“ LOCK ”position &
Display selectionType A and B audio
Type C audio
If you press the “TEXT ”button during
playback, the indication will change to the
next one in the following sequence.
Page 228 of 458

&Random playback
To playback a track/index/file(s) at ran-
dom, press the “RPT/RDM ”button for 0.5
second or longer while the track/index/file
is playing.
Each time you press the button, the mode
changes in the following sequence.
When connecting USB storage device:
When connecting iPod®:
NOTE . The “FOLDER RDM ”indication re-
fers to the random playback in the
folders. It randomly repeats all of the
tracks in the folder.. The “ALL RDM ”indication refers to
the random playback in the entire USB
storage device. It randomly repeats all
of the tracks in the USB storage device.. The “ALBUM RDM ”indication refers
to the shuffle playback in the album. It
randomly repeats all of the indexes in
the album.. The “SONG RDM ”indication refers
to the shuffle playback in the entireiPod
®. It randomly repeats all of the
indexes in the iPod®.
. When an iPod®is connected, the
files are played back at random by the
shuffle function of the iPod
®. There-
fore, iPod®operation may be different
depending on the model of the con-
nected iPod
®.
. When an audiobook or a podcast is
playing, the mode does not change
even if you press the “RPT/RDM ”
button for 0.5 second or longer.
To cancel the random playback mode,
press the “RPT/RDM ”button for more than
0.5 second and select CANCEL. The“ RDM ”indication will turn off, and the
normal playback mode will resume. &
SCAN (only when connecting
USB storage device)
Scan is operated in the same way a CD is
played. For details, refer to “Scan ”F 5-30.
NOTE
When an iPod
®is connected, you
cannot select the SCAN mode.
& Selecting category (only
when connecting iPod
®)
When the “LIST ”button is pressed for less
than 1.5 seconds, the iPod®menu is
displayed.
Each time you turn the “TUNE/TRACK/
CH ”dial clockwise, the displayed category
changes in the following sequence. Each
time you turn the “TUNE/TRACK/CH ”dial
Audio
5-41
– CONTINUED –
Page 229 of 458

5-42Audio
counterclockwise, the displayed category
changes in the opposite sequence.
To select the category, press the “TUNE/
TRACK/CH ”dial. To close the iPod®
menu, press the “LIST ”button for more
than 1.5 seconds. To return to the pre-
vious screen, briefly press the “LIST ”
button. & Display selection
Refer to “Display selection ”F 5-30.
! Page scroll
Refer to “Page (track/folder title) scroll ”
F 5-31.
& Folder selection (only when
connecting USB storage de- vice)
Refer to “Folder selection ”F 5-31. NOTE
When an iPod
®is connected, you
cannot select a folder. & When “CHECK DEVICE ”is
displayed
This message is displayed under the
following conditions. . When there is a short in the USB bus
. When a non-corresponding device (for
example a USB mouse) is connected. When a non-corresponding iPod
®is
connected . When a connected iPod
®is frozen
. When a transmission malfunction oc-
curs . When an iPod
®confirmation malfunc-
tion occurs. When a HUB class USB storage
device is connected
Disconnect the USB storage device/iPod
®
and check it. Audio control buttons (if
equipped)
These buttons are located on the spokes
of the steering wheel. They allow the
driver to control audio functions without
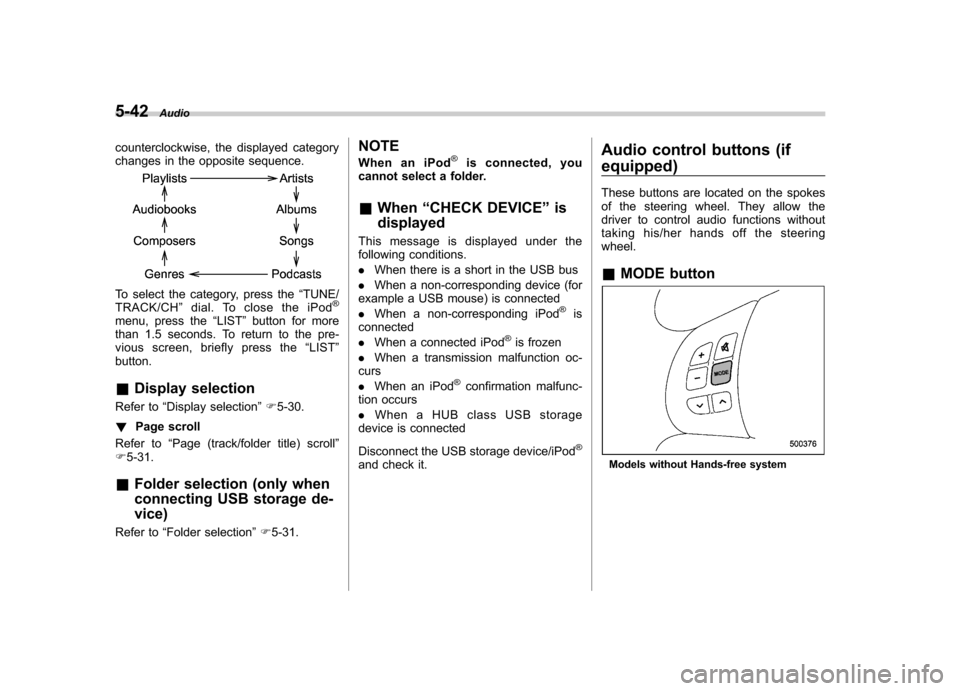
taking his/her hands off the steeringwheel. &
MODE buttonModels without Hands-free system
Page 234 of 458

&Tips for the Hands-free sys- tem
! Bluetooth
®
NOTE
The Bluetooth word mark and logo are
registered trademarks of Bluetooth
SIG, Inc.
It is possible to connect a cell phone to the
in-vehicle equipment through the Blue-
tooth
®format (wireless) to make a phone
call from the in-vehicle equipment or take
an incoming phone call.
Since the Bluetooth
®format is wireless, a
connection between the in-vehicle equip-
ment and the cell phone can be made
without placing them in close proximity of
each other. The cell phone can be used with it left in the breast pocket or bag.
NOTE . The Hands-free system may not
operate properly under the following conditions.
–The cell phone is turned off.
– The cell phone is not in the
phone call area. – The battery of the cell phone has
run down.– The cell phone is not connected
to the Hands-free system.– The cell phone is behind the seat
or in the glove box.– A metal material covers or
touches the cell phone.
. Depending on the type of cell phone
that is used, the screen on the cell
phone may remain illuminated while
the ignition switch is in the “ON ”
position. If this occurs, turn the illumi-
nation off by adjusting the cell phonesettings. . Depending on the setting of the cell
phone, the dial lock function may be
activated after making a call. Deacti-
vate the automatic dial lock function of
the cell phone before using the Hands-
free system. . Depending on the type of cell phone
that is used, operation and the sound volume may be different from those of
cell phones currently used. .
When the ignition switch is turned to
the “LOCK ”position during a call, the
call may be disconnected or continued
on the cell phone depending on the
type of cell phone that is used. Note
that operation of the cell phone may be
necessary if the call is continued on the
cell phone. . Do not speak at the same time as the
other party during a call. If you and the
party speak at the same time, it may be
difficult for the other party to hear your
voice and vice versa. This is normal. . The receiver sound volume should
be set as low as possible. Otherwise,
the party you are calling may notice an
undesirable echo sound. . Speak clearly and loudly.
. Your voice may be difficult to be
heard by the party under the following conditions.
–Driving on a rough road.
– Driving at a high speed.
– Driving with a window open.
– When air from the ventilator
blows directly towards the micro-phone. – When the sound coming from the
ventilator is loud. Audio
5-47
– CONTINUED –