Page 129 of 167
Navigation (NAV)*
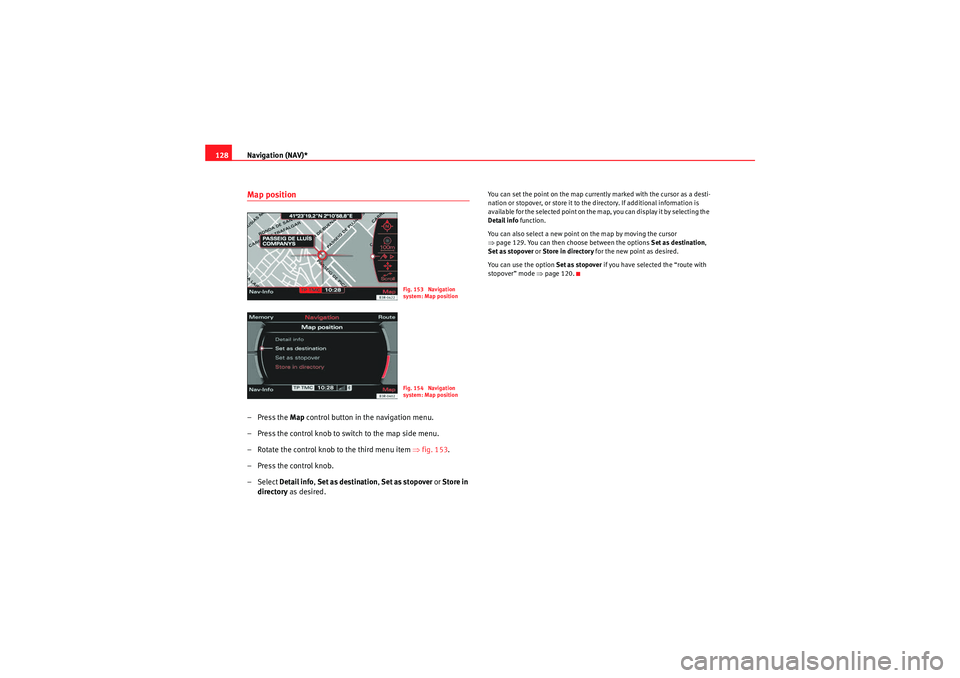
128Map position– Press the Map control button in the navigation menu.
– Press the control knob to switch to the map side menu.
– Rotate the control knob to the third menu item ⇒fig. 153 .
– Press the control knob.
– Select Detail info , Set as destination , Set as stopover or Store in
directory as desired.
You can set the point on the map currently marked with the cursor as a desti-
nation or stopover, or store it to the directory. If additional information is
available for the selected point on the map, you can display it by selecting the
Detail info function.
You can also select a new point on the map by moving the cursor
⇒ page 129. You can then choose between the options Set as destination,
Set as stopover or Store in directory for the new point as desired.
You can use the option Set as stopover if you have selected the “route with
stopover” mode ⇒page 120.
Fig. 153 Navigation
system: Map positionFig. 154 Navigation
system: Map position
media_systemE_EN.book Seite 128 Montag, 21. September 2009 1:48 13
Page 130 of 167
Navigation (NAV)*129
Operating
RADIO, MEDIA (audiovisual
systems)
NAME, TEL
NAV, INFO
CAR, SETUP
Moving the cursor over the map
A new destination or stopover can be set using the map by
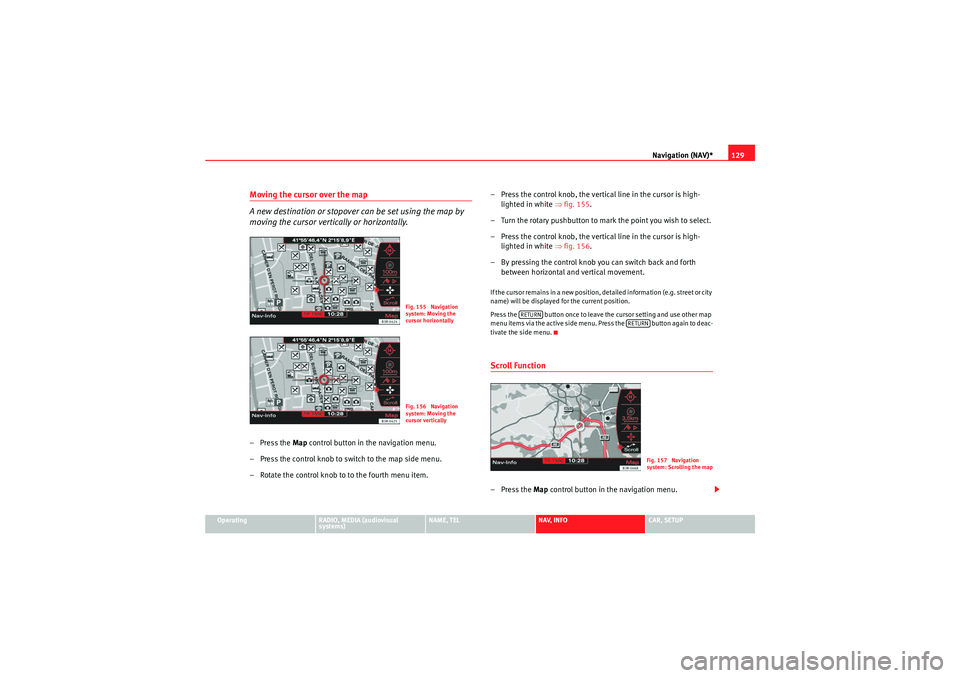
moving the cursor vertically or horizontally.– Press the Map control button in the navigation menu.
– Press the control knob to switch to the map side menu.
– Rotate the control knob to to the fourth menu item. – Press the control knob, the vertical line in the cursor is high-
lighted in white ⇒fig. 155 .
– Turn the rotary pushbutton to mark the point you wish to select.
– Press the control knob, the vertical line in the cursor is high- lighted in white ⇒fig. 156 .
– By pressing the control knob you can switch back and forth between horizontal and vertical movement.
If the cursor remains in a new position, detailed information (e.g. street or city
name) will be displayed for the current position.
Press the button once to leave the cursor setting and use other map
menu items via the active side menu. Press the button again to deac-
tivate the side menu.Scroll Function–Press the Map control button in the navigation menu.
Fig. 155 Navigation
system: Moving the
cursor horizontallyFig. 156 Navigation
system: Moving the
cursor vertically
RETURN
RETURN
Fig. 157 Navigation
system: Scrolling the map
media_systemE_EN.book Seite 129 Montag, 21. September 2009 1:48 13
Page 131 of 167
Navigation (NAV)*
130
– Press the control knob to switch to the map side menu.
– Rotate the control knob to to the fifth menu option apart from the map.
– Press the control knob to activate the scroll function by following the route established ⇒ page 129, fig. 157
– Press the ⇒page 9 button to leave the map side
menu.Nav-Info control buttonNavigation information
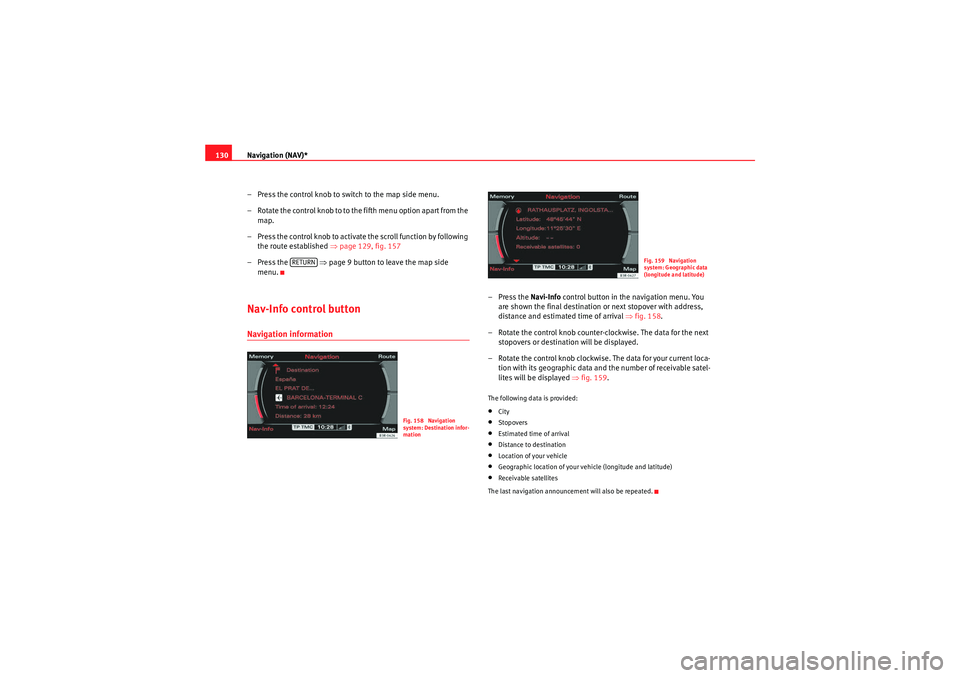
–Press the Navi-Info control button in the navigation menu. You
are shown the final destination or next stopover with address,
distance and estimated time of arrival ⇒fig. 158 .
– Rotate the control knob counter-clockwise. The data for the next stopovers or destination will be displayed.
– Rotate the control knob clockwise. The data for your current loca-
tion with its geographic data and the number of receivable satel-
lites will be displayed ⇒fig. 159 .The following data is provided:•City•Stopovers•Estimated time of arrival•Distance to destination•Location of your vehicle•Geographic location of your vehicle (longitude and latitude)•Receivable satellites
The last navigation announcement will also be repeated.
RETURN
Fig. 158 Navigation
system: Destination infor-
mation
Fig. 159 Navigation
system: Geographic data
(longitude and latitude)
media_systemE_EN.book Seite 130 Montag, 21. September 2009 1:48 13
Page 132 of 167
Navigation (NAV)*131
Operating
RADIO, MEDIA (audiovisual
systems)
NAME, TEL
NAV, INFO
CAR, SETUP
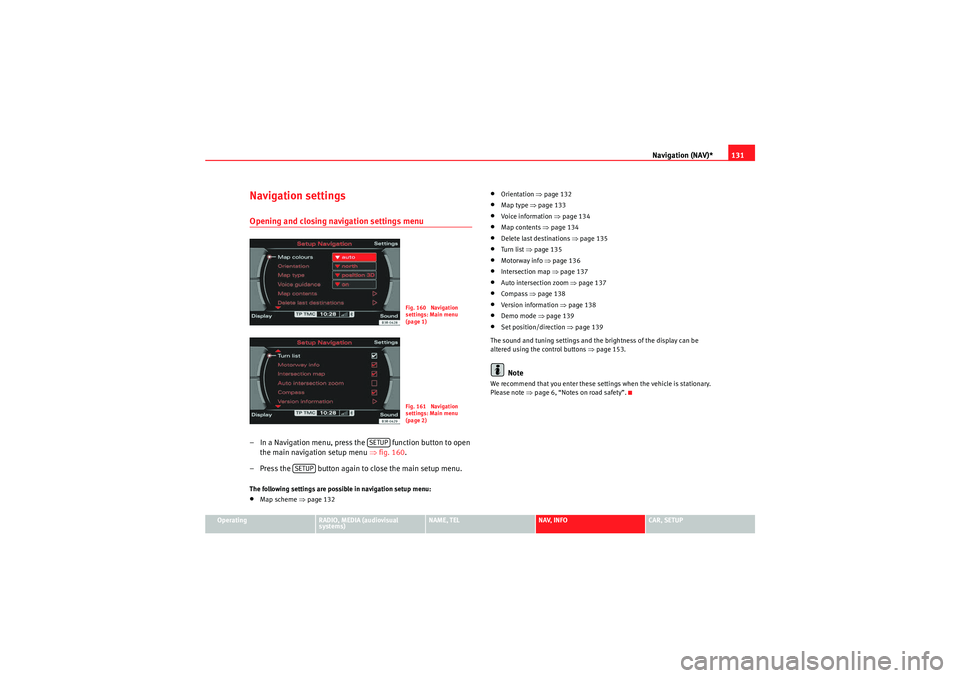
Navigation settingsOpening and closing navigation settings menu– In a Navigation menu, press the function button to open
the main navigation setup menu ⇒fig. 160 .
– Press the button again to close the main setup menu.The following settings are possible in navigation setup menu:•Map scheme ⇒ page 132
•Orientation ⇒page 132•Map type ⇒ page 133•Voice information ⇒ page 134•Map contents ⇒page 134•Delete last destinations ⇒page 135•Turn list ⇒page 135•Motorway info ⇒ page 136•Intersection map ⇒page 137•Auto intersection zoom ⇒page 137•Compass ⇒page 138•Version information ⇒page 138•Demo mode ⇒page 139•Set position/direction ⇒page 139
The sound and tuning settings and the brightness of the display can be
altered using the control buttons ⇒page 153.Note
We recommend that you enter these settings when the vehicle is stationary.
Please note ⇒ page 6, “Notes on road safety”.
Fig. 160 Navigation
settings: Main menu
(page 1)Fig. 161 Navigation
settings: Main menu
(page 2)
SETUP
SETUP
media_systemE_EN.book Seite 131 Montag, 21. September 2009 1:48 13
Page 133 of 167
Navigation (NAV)*
132Map scheme
The map representation can be changed according to driving
conditions (day or night).– Press the ⇒page 9 function button in the navigation
menu.
– Select Map scheme ⇒ page 131, fig. 160 .
– Select day , night or auto as desired.Day
The map representation contains all type of topographical details. The back-
ground is shown in light colours. This makes map features easy to recognise.
The daytime view is optimised for ambient light ⇒page 101, fig. 117 .
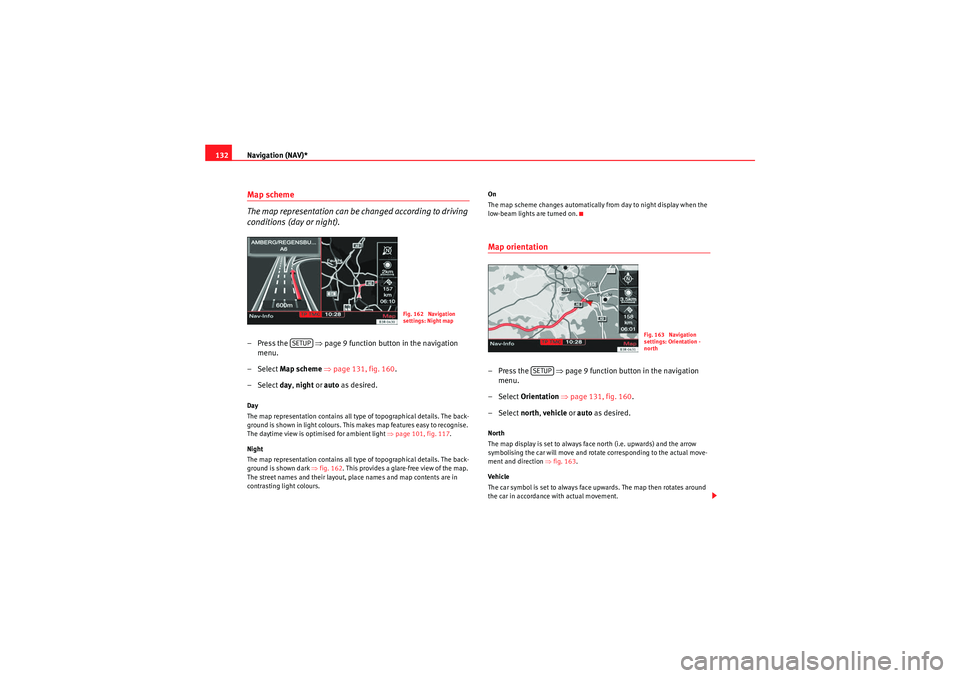
Night
The map representation contains all type of topographical details. The back-
ground is shown dark ⇒fig. 162 . This provides a glare-free view of the map.
The street names and their layout, place names and map contents are in
contrasting light colours. On
The map scheme changes automatically from day to night display when the
low-beam lights are turned on.
Map orientation–Press the ⇒
page 9 function button in the navigation
menu.
– Select Orientation ⇒page 131, fig. 160 .
– Select north, vehicle or auto as desired.North
The map display is set to always face north (i.e. upwards) and the arrow
symbolising the car will move and rotate corresponding to the actual move-
ment and direction ⇒fig. 163.
Vehicle
The car symbol is set to always face upwards. The map then rotates around
the car in accordance with actual movement.
Fig. 162 Navigation
settings: Night map
SETUP
Fig. 163 Navigation
settings: Orientation -
north
SETUP
media_systemE_EN.book Seite 132 Montag, 21. September 2009 1:48 13
Page 134 of 167
Navigation (NAV)*133
Operating
RADIO, MEDIA (audiovisual
systems)
NAME, TEL
NAV, INFO
CAR, SETUP
On
The map display will change automatically according to the set map scale. If
the scale is less than 2.5 km, the map is oriented to vehicle. When the scale
is greater than 2.5 km, the display is oriented to North.
Map type
You can choose from four different map types.– Press the
⇒page 9 function button in the navigation
menu.
– Select the desired map display under Map type ⇒ page 131,
fig. 160 .The map types "destination", "location" or "overview" are 2-dimensional. If
you select "Location 3D" the map is shown in three dimensions.
The following settings are possible: Destination
The map display is oriented to the destination, meaning that the map always
shows the current single destination or final destination for a current route
plan. The destination is marked with a destination flag. When you select this
map type, the
North ⇒ page 132 orientation is set automatically to make it
easier to orient yourself.
Location map
The current vehicle location is displayed. The orientation of the map matches
the settings in the Navigation System ⇒page 132.
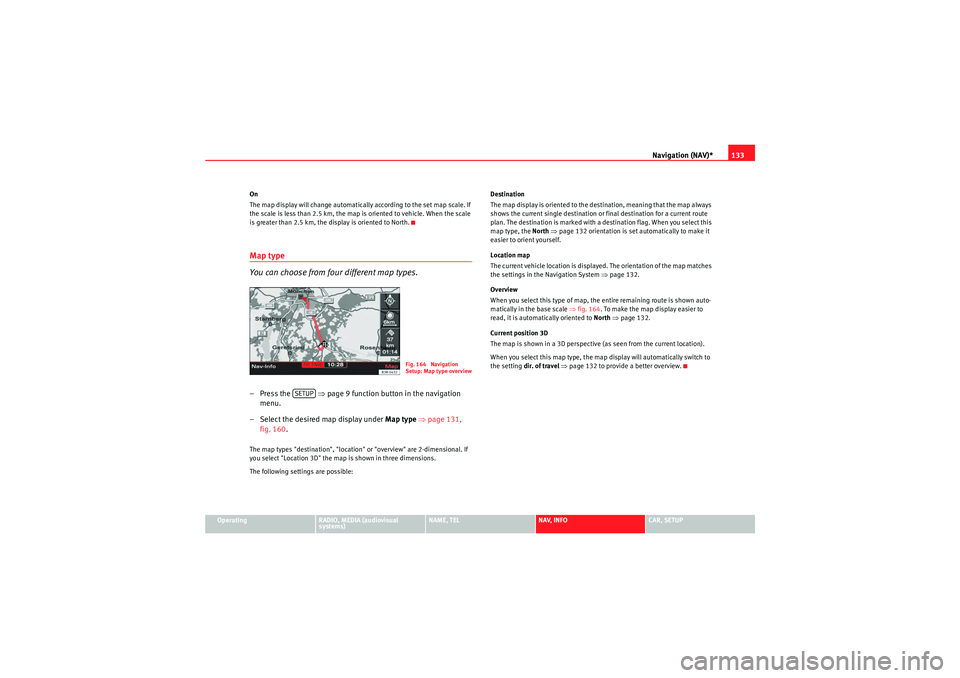
Overview
When you select this type of map, the entire remaining route is shown auto-
matically in the base scale ⇒fig. 164 . To make the map display easier to
read, it is automatically oriented to North ⇒ page 132.
Current position 3D
The map is shown in a 3D perspective (as seen from the current location).
When you select this map type, the map display will automatically switch to
the setting dir. of travel ⇒ page 132 to provide a better overview.
Fig. 164 Navigation
Setup: Map type overview
SETUP
media_systemE_EN.book Seite 133 Montag, 21. September 2009 1:48 13
Page 135 of 167
Navigation (NAV)*
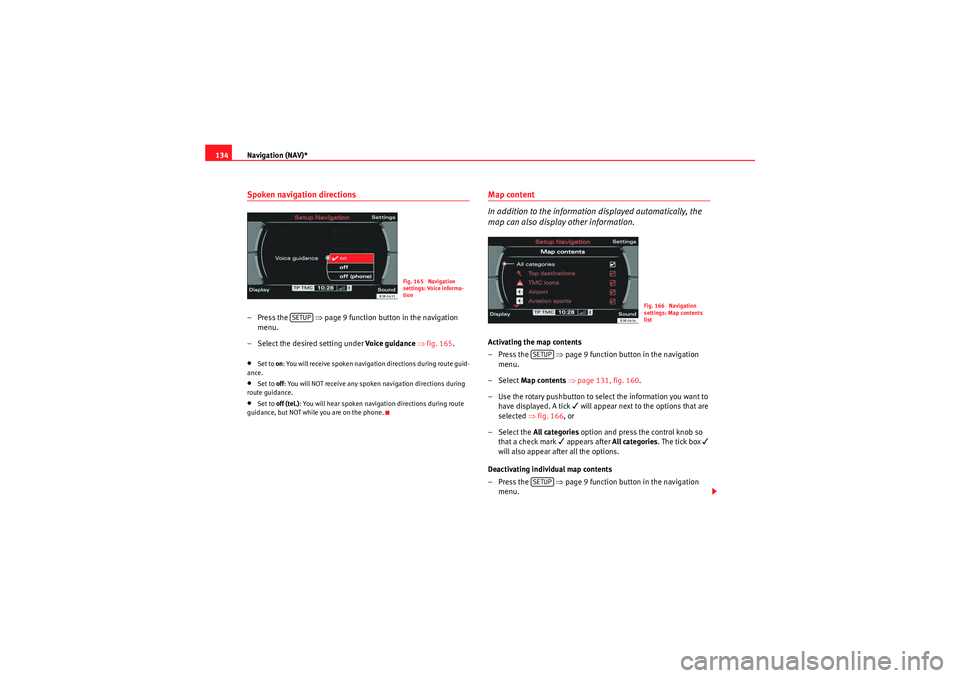
134Spoken navigation directions– Press the ⇒page 9 function button in the navigation
menu.
– Select the desired setting under Voice g uida nce ⇒ fig. 165 .•Set to on : You will receive spoken navigation directions during route guid-
ance.•Set to off : You will NOT receive any spoken navigation directions during
route guidance.•Set to off (tel.) : You will hear spoken navigation directions during route
guidance, but NOT while you are on the phone.
Map content
In addition to the information displayed automatically, the
map can also display other information.Activating the map contents
–Press the ⇒ page 9 function button in the navigation
menu.
– Select Map contents ⇒ page 131, fig. 160 .
– Use the rotary pushbutton to select the information you want to have displayed. A tick
will appear next to the options that are
selected ⇒ fig. 166, or
– Select the All categories option and press the control knob so
that a check mark
appears after All categories. The tick box
will also appear after all the options.
Deactivating individual map contents
–Press the ⇒ page 9 function button in the navigation
menu.
Fig. 165 Navigation
settings: Voice informa-
tion
SETUP
Fig. 166 Navigation
settings: Map contents
list
SETUPSETUP
media_systemE_EN.book Seite 134 Montag, 21. September 2009 1:48 13
Page 136 of 167
Navigation (NAV)*135
Operating
RADIO, MEDIA (audiovisual
systems)
NAME, TEL
NAV, INFO
CAR, SETUP
–Select Map contents ⇒ page 131, fig. 160 .
– Use the rotary pushbutton to remove the tick
if you do not want
to have the information shown on the map.
Deactivating all map contents
– Press the ⇒page 9 function button in the navigation
menu.
–Select Map contents ⇒ page 131, fig. 160 .
– First select the All filters option and press the control knob so
that the tick box appears after it
. The tick box
will also
appear after all the options.
– Then press the control knob again and the check marks
after
all the options will disappear.
In addition to the information displayed automatically, the map can also
display other information.
You can select the map contents to be displayed as desired. The map
contents are displayed in accordance with the selected map scale.Delete last destinations– Press the ⇒page 9 function button in the navigation
menu.
–Select Delete last destinations ⇒ page 131, fig. 160 .
–Confirm Are you sure you want to delete the route? with Ye s. The
entire list of last destinations is deleted ⇒page 116.
Turn l ist
During the route guidance a list of upcoming turns (including
distance) is displayed.–Press the ⇒page 9 function button in the navigation
menu.
– Place a tick
⇒ page 131, fig. 161 next to the option Tu r n l ist to
activate the option.
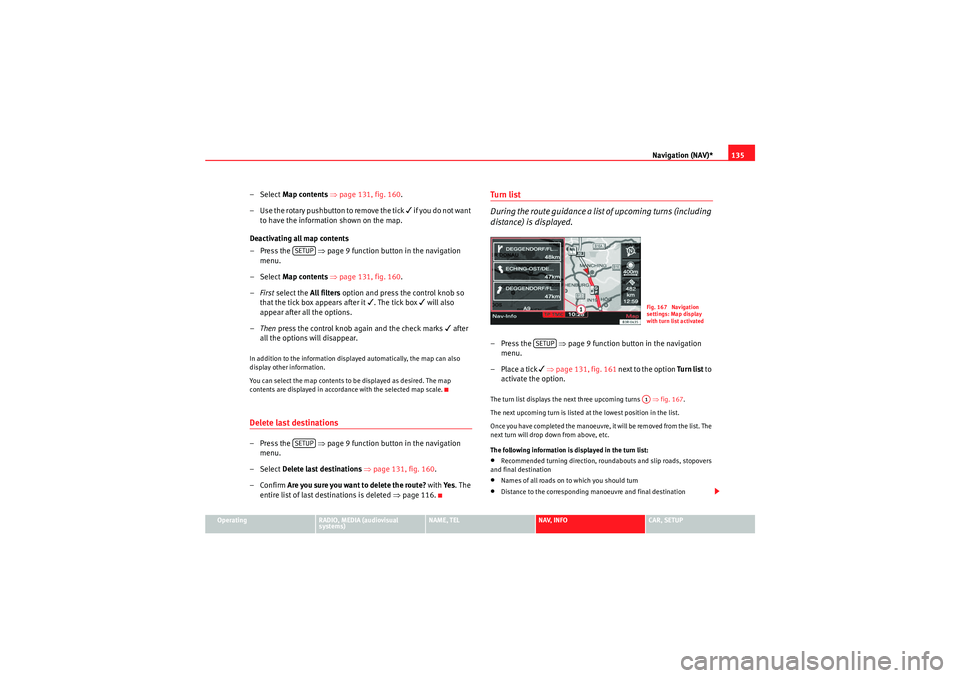
The turn list displays the next three upcoming turns ⇒ fig. 167.
The next upcoming turn is listed at the lowest position in the list.
Once you have completed the manoeuvre, it will be removed from the list. The
next turn will drop down from above, etc.
The following information is displayed in the turn list:•Recommended turning direction, roundabouts and slip roads, stopovers
and final destination•Names of all roads on to which you should turn•Distance to the corresponding manoeuvre and final destination
SETUPSETUP
Fig. 167 Navigation
settings: Map display
with turn list activated
SETUP
A1
media_systemE_EN.book Seite 135 Montag, 21. September 2009 1:48 13
 1
1 2
2 3
3 4
4 5
5 6
6 7
7 8
8 9
9 10
10 11
11 12
12 13
13 14
14 15
15 16
16 17
17 18
18 19
19 20
20 21
21 22
22 23
23 24
24 25
25 26
26 27
27 28
28 29
29 30
30 31
31 32
32 33
33 34
34 35
35 36
36 37
37 38
38 39
39 40
40 41
41 42
42 43
43 44
44 45
45 46
46 47
47 48
48 49
49 50
50 51
51 52
52 53
53 54
54 55
55 56
56 57
57 58
58 59
59 60
60 61
61 62
62 63
63 64
64 65
65 66
66 67
67 68
68 69
69 70
70 71
71 72
72 73
73 74
74 75
75 76
76 77
77 78
78 79
79 80
80 81
81 82
82 83
83 84
84 85
85 86
86 87
87 88
88 89
89 90
90 91
91 92
92 93
93 94
94 95
95 96
96 97
97 98
98 99
99 100
100 101
101 102
102 103
103 104
104 105
105 106
106 107
107 108
108 109
109 110
110 111
111 112
112 113
113 114
114 115
115 116
116 117
117 118
118 119
119 120
120 121
121 122
122 123
123 124
124 125
125 126
126 127
127 128
128 129
129 130
130 131
131 132
132 133
133 134
134 135
135 136
136 137
137 138
138 139
139 140
140 141
141 142
142 143
143 144
144 145
145 146
146 147
147 148
148 149
149 150
150 151
151 152
152 153
153 154
154 155
155 156
156 157
157 158
158 159
159 160
160 161
161 162
162 163
163 164
164 165
165 166
166


