2011 Seat Exeo phone
[x] Cancel search: phonePage 108 of 124

NAV (navigation system)107
Operating
RADIO, CD/MP3
TEL (telephone)
NAV, INFO
SETUP
•Set to auto: You will hear spoken navigation directions during route guid-
ance, but NOT while you are on the phone.Time / duration display
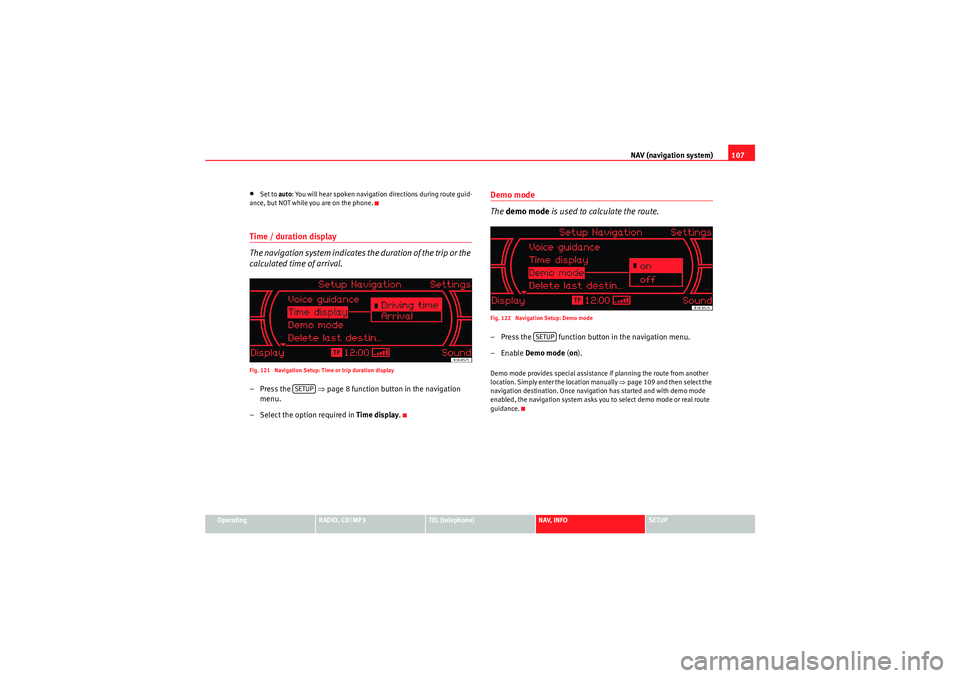
The navigation system indicates the duration of the trip or the
calculated time of arrival.Fig. 121 Navigation Setup: Time or trip duration display–Press the ⇒ page 8 function button in the navigation
menu.
– Select the option required in Time display.
Demo mode
The demo mode is used to calculate the route.Fig. 122 Navigation Setup: Demo mode– Press the function button in the navigation menu.
–Enable Demo mode ( on).Demo mode provides special assistance if planning the route from another
location. Simply enter the location manually ⇒ page 109 and then select the
navigation destination. Once navigation has started and with demo mode
enabled, the navigation system asks you to select demo mode or real route
guidance.
SETUP
SETUP
Media System 1.0_EN.book Seite 107 Donnerstag, 10. September 2009 1:52 13
Page 110 of 124

NAV (navigation system)109
Operating
RADIO, CD/MP3
TEL (telephone)
NAV, INFO
SETUP
– Activate the option Compass . The compass will be shown on the
instrument panel display if navigation is not switched on.Changing a wheel–Press the ⇒ page 8 function button in the navigation
menu.
– Select Wheel change and confirm with Ye s.The tyre size must be taken into account when calculating the route. If a wheel
has been changed, the navigation system should be calibrated.Entering NAV start locationFig. 125 Navigation Setup: Select country Fig. 126 Navigation Setup: Entering NAV start location
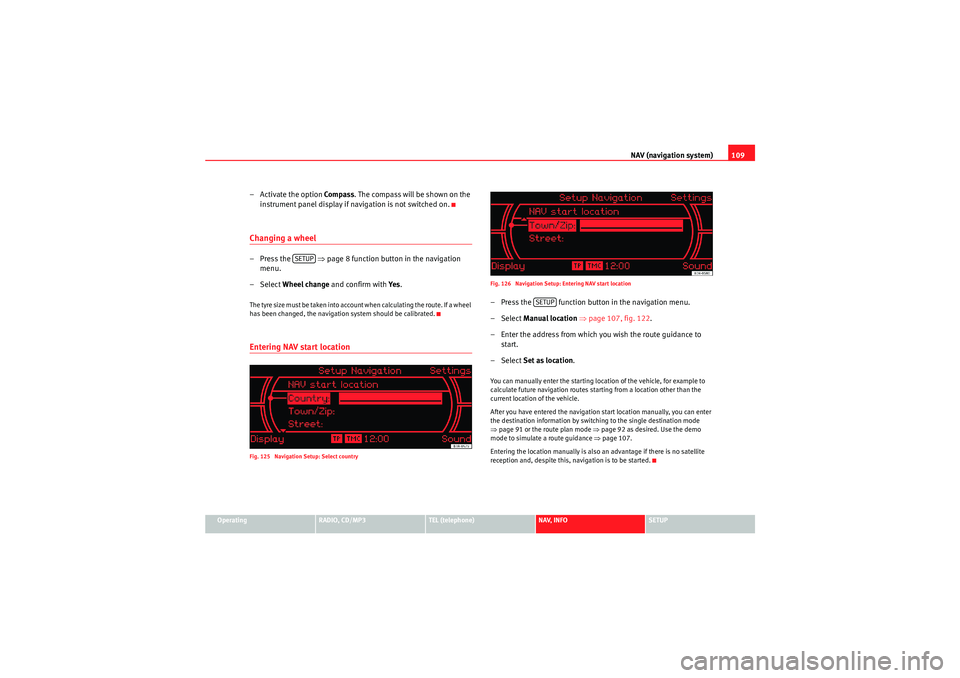
– Press the function button in the navigation menu.
– Select
Manual location ⇒ page 107, fig. 122 .
– Enter the address from which you wish the route guidance to start.
– Select Set as location .You can manually enter the starting location of the vehicle, for example to
calculate future navigation routes starting from a location other than the
current location of the vehicle.
After you have entered the navigation start location manually, you can enter
the destination information by switching to the single destination mode
⇒page 91 or the route plan mode ⇒ page 92 as desired. Use the demo
mode to simulate a route guidance ⇒page 107.
Entering the location manually is also an advantage if there is no satellite
reception and, despite this, navigation is to be started.
SETUP
SETUP
Media System 1.0_EN.book Seite 109 Donnerstag, 10. September 2009 1:52 13
Page 112 of 124

INFO (Traffic information)111
Operating
RADIO, CD/MP3
TEL (telephone)
NAV, INFO
SETUP
The following submenus are available in the traffic information setup menu:
Note
Urgent announcements are marked as
top priority (e.g. car travelling in
wrong direction on the motorway). Important messages can be interrupted by
pressing the button or the rotary pushbutton.Traffic information setupOpening and closing the tra ffic information setup menu– While in any Info menu, press the function selector button
to access the Setup Info main menu ⇒page 52, fig. 60 .
– Press the button again to close the main setup menu.The following options are available in the traffic information setup menu:•TMC filter ⇒ page 111•Traffic programme ⇒page 112•Preferred TMC station
The sound and tuning settings and the brightness of the display can be
altered using the control buttons ⇒page 118.
Note
We recommend that you enter these settings when the vehicle is stationary.
Please note ⇒page 6, “Notes on road safety”.TMC filter
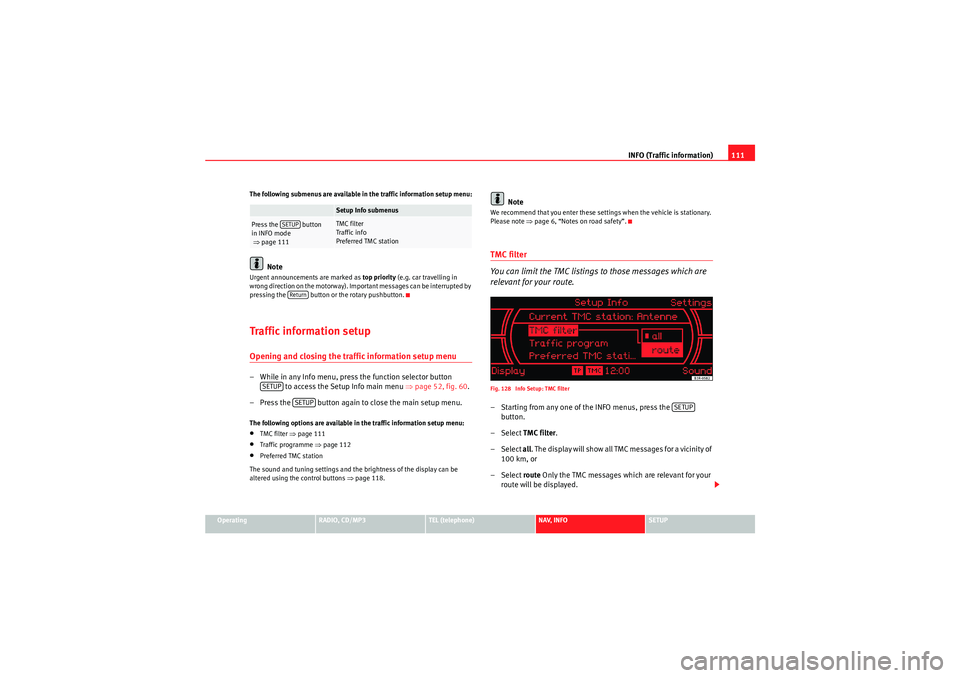
You can limit the TMC listings to those messages which are
relevant for your route.Fig. 128 Info Setup: TMC filter– Starting from any one of the INFO menus, press the
button.
– Select TMC filter.
– Select all. The display will show all TMC messages for a vicinity of
100 km, or
– Select route Only the TMC messages which are relevant for your
route will be displayed.
Setup Info submenus
Press the button
in INFO mode
⇒ page 111
TMC filter
Tra ff ic in fo
Preferred TMC station
SETUPReturn
SETUP
SETUP
SETUP
Media System 1.0_EN.book Seite 111 Donnerstag, 10. September 2009 1:52 13
Page 114 of 124

INFO (Traffic information)113
Operating
RADIO, CD/MP3
TEL (telephone)
NAV, INFO
SETUP
– Select the setting Traffic programme on to activate the traffic
programme function.If you have selected a station that does not broadcast a traffic programme,
the navigation system will tune into another traffic programme station that
does on the same frequency band.
If you are listening to a station which does not broadcast traffic news (in
Germany, for example, BAYERN 1), but which belongs to a network of stations
that does broadcast traffic news (Bavarian Radio), the radio will stay tuned to
the station without traffic information (BAYERN 1). The radio tunes into the
traffic report station (e.g. Bayern 3) only while the report is being transmitted .
Radio stations in the MW and LW waveband do not transmit traffic news.
The TP (Traffic Programme) symbol on the display indicates the following
statuses:
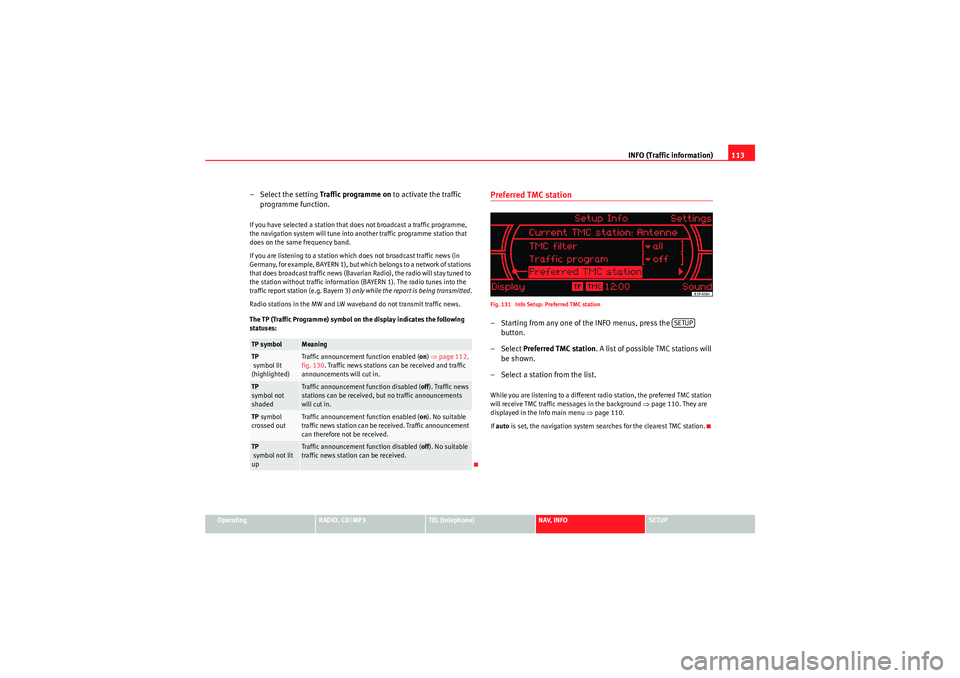
Preferred TMC stationFig. 131 Info Setup: Preferred TMC station– Starting from any one of the INFO menus, press the button.
– Select Preferred TMC station . A list of possible TMC stations will
be shown.
– Select a station from the list.While you are listening to a different radio station, the preferred TMC station
will receive TMC traffic messages in the background ⇒page 110. They are
displayed in the Info main menu ⇒page 110.
If auto is set, the navigation system searches for the clearest TMC station.
TP symbol
Meaning
TP
symbol lit
(highlighted)
Traffic announcement function enabled ( on) ⇒ page 112,
fig. 130 . Traffic news stations can be received and traffic
announcements will cut in.
TP
symbol not
shaded
Traffic announcement function disabled ( off). Traffic news
stations can be received, but no traffic announcements
will cut in.
TP symbol
crossed out
Traffic announcement function enabled ( on). No suitable
traffic news station can be received. Traffic announcement
can therefore not be received.
TP
symbol not lit
up
Traffic announcement function disabled ( off). No suitable
traffic news station can be received.
SETUP
Media System 1.0_EN.book Seite 113 Donnerstag, 10. September 2009 1:52 13
Page 116 of 124

SETUP115
Operating
RADIO, CD/MP3
TEL (telephone)
NAV, INFO
SETUP
SETUPSETUPIntroductionGeneral safety precautionsWe recommend that you only make adjustments to the system configuration
while the vehicle is stationary. In this way you can be sure that you will not
be unnecessarily distracted from the traffic when reading the messages on
the display. Please note ⇒page 6.Selecting system setup functionFig. 132 Display: Radio setup menu
– Press the button ⇒page 8 in addition to any other main
function button that is already activated. The Setup main menu
corresponding to that function (e.g. Radio) will appear on the
display ⇒fig. 132 .
– While in the Setup main menu, press any one of the control buttons to call up the corresponding submenu (e.g. Radio: to
⇒ fig. 132 ).The Setup menu only works in conjunction with one of the activated main
functions ⇒page 8; it provides access to further menu options. The Setup,
Sound and Display function menus are opened by pressing the corre-
sponding control button. These Setup submenus are always the same,
regardless of the setup menu of the main function you are in.
SETUP
A1
A3
Media System 1.0_EN.book Seite 115 Donnerstag, 10. September 2009 1:52 13
Page 118 of 124

SETUP117
Operating
RADIO, CD/MP3
TEL (telephone)
NAV, INFO
SETUP
•Dutch•Portuguese•Swedish•Spanish•Czech
There is also the Automatic setting. With this setting the navigation system
uses the language of the driver information system. Instructions for
performing this setting are indicated in the Owner's Manual.Units of measurement, date and timeThe navigation system uses the units of measurement (km/miles), the time
and the date format (12 h/24 h) of the driver information system. Instructions
for editing them are indicated in the Owner's Manual.
Factory settings
Settings can be reset to default factory settings in this func-
tion.Fig. 134 Setup: Default settings
Fig. 135 Setup: Resetting to factory defaults–Press the Settings control button in the Setup menu.
– Select Default settings. The boxes for all the systems are shaded
⇒ fig. 134 .
Media System 1.0_EN.book Seite 117 Donnerstag, 10. September 2009 1:52 13
Page 119 of 124

SETUP
118
– Disable all the systems not to be reset to zero by turning and
pressing the rotary pushbutton.
– Select Reset.
–Confirm Reset selected systems? with Ye s to return the selected
functions to the default settings.MMI settings
The settings for the functions available under the Settings menu ⇒ page 116
will be returned to the factory defaults.
Radio / Sound memory
Radio stations stored in the list ⇒page 37 are deleted and the factory sound
settings are reset ⇒page 53.
Navigation memory
The destination memory (individual destinations and route plans) is deleted.
Other navigation settings
The settings / stored data for the functions available in the navigation (e.g.
route criteria) will be returned to the factory default values.
Te l e p h o n e *
Personalised data (e.g. stored telephone numbers) is deleted and factory
telephone settings are reset.
"Display" MenuBrightnessFig. 136 Setup: Adjusting the brightness of the display–Press the Display control button in the Setup menu.
– Turn the rotary pushbutton in a clockwise direction to increase
the brightness of the display, or anti-clockwise to reduce the
brightness.The setting is saved even if you switch to another menu.
Media System 1.0_EN.book Seite 118 Donnerstag, 10. September 2009 1:52 13
Page 120 of 124

Index119
Index
AAccept call . . . . . . . . . . . . . . . . . . . . . . . . . . . . . . 74
Alphanumeric keyboard . . . . . . . . . . . . . . . . . . . 21
Answering a call . . . . . . . . . . . . . . . . . . . . . . . . . . 65
Answering the phone . . . . . . . . . . . . . . . . . . . . . 65
Audio source
AUX-IN connection . . . . . . . . . . . . . . . . . . . . . 45
CD . . . . . . . . . . . . . . . . . . . . . . . . . . . . . . . . . . 45
Automatic seek mode . . . . . . . . . . . . . . . . . . . . . 38
Aux-in . . . . . . . . . . . . . . . . . . . . . . . . . . . . . . . . . . 32
AUX-IN connection Connecting portable player . . . . . . . . . . . . . . 32
Selecting source . . . . . . . . . . . . . . . . . . . . . . 45BBluetooth . . . . . . . . . . . . . . . . . . . . . . . . . . . . . . . 60CCall optionsAccept call . . . . . . . . . . . . . . . . . . . . . . . . . . . 74
CD CD/MP3 function selector button . . . . . . . . . 44
CD - General notes Control button: Source . . . . . . . . . . . . . . . . . 45
CD - Source Selecting . . . . . . . . . . . . . . . . . . . . . . . . . . . . 45 CD changer . . . . . . . . . . . . . . . . . . . . . . . . . . . . . . 47
CD player
Ejecting CDs . . . . . . . . . . . . . . . . . . . . . . . . . . 25
Loading navigation CD . . . . . . . . . . . . . . . . . 25
CD Setup MP3 track display . . . . . . . . . . . . . . . . . . . . . 52
CD/TV (function button) See "Compact discs" . . . . . . . . . . . . . . . . . . . 46
CDs Pausing/Resuming playback . . . . . . . . . . . . 46
Compact discs Basic functions . . . . . . . . . . . . . . . . . . . . . . . 48
Main menu . . . . . . . . . . . . . . . . . . . . . . . . . . . 46
Selecting a track . . . . . . . . . . . . . . . . . . . . . . 46
Setup menu . . . . . . . . . . . . . . . . . . . . . . . . . . 52
Control buttons . . . . . . . . . . . . . . . . . . . . . . . . . . 10 RETURN button . . . . . . . . . . . . . . . . . . . . . . . . 10
Control Panel Function selector buttons . . . . . . . . . . . . . . . . 8
Control panel Cleaning and care . . . . . . . . . . . . . . . . . . . . . . 7
Control buttons . . . . . . . . . . . . . . . . . . . . . . . 10
Forward/reverse buttons . . . . . . . . . . . . . . . . 11
RETURN button . . . . . . . . . . . . . . . . . . . . . . . . 10
Rotary pushbutton . . . . . . . . . . . . . . . . . . . . . . 9
Controls Control buttons . . . . . . . . . . . . . . . . . . . . . . . 10
Forward/reverse buttons . . . . . . . . . . . . . . . . 11 Function selector buttons . . . . . . . . . . . . . . . . 8
Rotary pushbutton . . . . . . . . . . . . . . . . . . . . . . 9
DDeleting data . . . . . . . . . . . . . . . . . . . . . . . . . . . . 22
Display
A guide to the display . . . . . . . . . . . . . . . . . . 17
Cleaning and care . . . . . . . . . . . . . . . . . . . . . . 7
Elements: alphanumeric keyboard . . . . . . . 21
Elements: cursor and arrows . . . . . . . . . . . . 19
Elements: function symbols . . . . . . . . . . . . . 23
Elements: selection boxes . . . . . . . . . . . . . . 20
Elements: status line . . . . . . . . . . . . . . . . . . . 18
Elements: tick boxes . . . . . . . . . . . . . . . . . . . 20
Overview . . . . . . . . . . . . . . . . . . . . . . . . . . . . 17
Selected option . . . . . . . . . . . . . . . . . . . . . . . 21
Drives iPod: interface . . . . . . . . . . . . . . . . . . . . . . . . 27
USB: interface . . . . . . . . . . . . . . . . . . . . . . . . 29
DTMF tones . . . . . . . . . . . . . . . . . . . . . . . . . . . . . 63
Dynamic navigation . . . . . . . . . . . . . . . . . . . . . . . 87EEnding a call . . . . . . . . . . . . . . . . . . . . . . . . . . . . 66
Entering data . . . . . . . . . . . . . . . . . . . . . . . . . . . . 22
Media System 1.0_EN.book Seite 119 Donnerstag, 10. September 2009 1:52 13