2011 Seat Altea XL light
[x] Cancel search: lightPage 244 of 319

Checking and refilling levels
242
Caution•When mixed with other additives the colour of G 12 will change to brown.
If this occurs you should have the coolant changed immediately. Failure to do
so will result in engine damage!•If a lot of coolant fluid has been lost, wait for the engine to cool down
before putting in cold coolant. This avoids damaging the engine. Large
coolant losses are an indication of leaks in the cooling system. See a special-
ised workshop immediately and have the cooling system checked. Other-
wise, there is a risk of engine damage.Washer fluid and windscreen wiper bladesTopping up washer fluid
�Y
The water for cleaning the windscreen should always be
mixed with washer fluid.
The windscreen washer and the headlight washers are supplied with fluid
from the windscreen washer fluid container in the engine compartment.
The reservoir is located on the right-hand side of the engine compartment.
Plain water is not enough to clean th e windscreen and headlights. We recom-
mend that you always add a product to the windscreen washer fluid.
Approved windscreen cleaning products exist on the market with high deter-
gent and anti-freeze properties, these may be added all-year-round. Please
follow the dilution instructions on the packaging.
WARNING
Any work carried out in the engine compartment or on the engine must be
carried out cautiously.•When working in the engine compartment, always observe the safety
warnings ⇒page 233.Caution
•Never put radiator anti-freeze or other additives into the windscreen
washer fluid.•Always use approved windscreen cleansing products diluted as per
instructions. If you use other washer fluids or soap solutions, the tiny holes
in the fan-shaped nozzles could become blocked.
Fig. 169 In the engine
compartment: Cap of
windscreen washer fluid
reservoir.
AlteaXL_EN.book Seite 242 Donnerstag, 9. September 2010 12:13 12
Page 247 of 319

Checking and refilling levels245
Safety First
Operating Instructions
Practical Tips
Technical Specifications
WARNING
Do not drive unless you have good visibility through all windows!•Clean the windscreen wiper blades and all windows regularly.•The wiper blades should be changed once or twice a year.Caution
•A damaged or dirty window wiper could scratch the rear window.•Never use fuel, nail varnish remover, paint thinner or similar products to
clean the window.•Never move the windscreen wiper by hand. This could cause damage.
Brake fluidChecking the brake fluid level
The brake fluid is checked at the intervals given in the service
schedule.– Read off the fluid level at the transparent brake fluid reservoir. It should always be between the “MIN” and “MAX” marks.The position of the brake fluid reservoir is shown in the corresponding engine
compartment illustration ⇒page 293. The brake fluid reservoir has a black
and yellow cap.
The brake fluid level drops slightly when the vehicle is being used as the
brake pads are automatically adjusted as they wear.
Fig. 173 In the engine
compartment: Brake fluid
reservoir cover
AlteaXL_EN.book Seite 245 Donnerstag, 9. September 2010 12:13 12
Page 249 of 319

Checking and refilling levels247
Safety First
Operating Instructions
Practical Tips
Technical Specifications
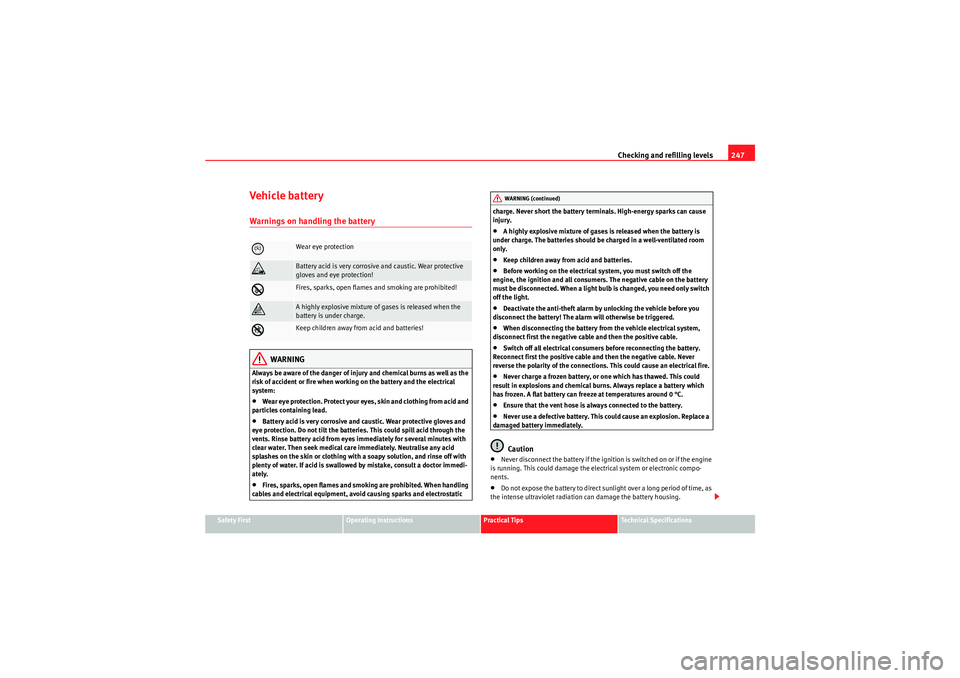
Vehicle batteryWarnings on handling the battery
WARNING
Always be aware of the danger of injury and chemical burns as well as the
risk of accident or fire when working on the battery and the electrical
system:•Wear eye protection. Protect your eyes, skin and clothing from acid and
particles containing lead.•Battery acid is very corrosive and caustic. Wear protective gloves and
eye protection. Do not tilt the batteries. This could spill acid through the
vents. Rinse battery acid from eyes immediately for several minutes with
clear water. Then seek medical care immediately. Neutralise any acid
splashes on the skin or clothing with a soapy solution, and rinse off with
plenty of water. If acid is swallowed by mistake, consult a doctor immedi-
ately.•Fires, sparks, open flames and smoking are prohibited. When handling
cables and electrical equipment, avoid causing sparks and electrostatic charge. Never short the battery terminals. High-energy sparks can cause
injury.
•A highly explosive mixture of gases is released when the battery is
under charge. The batteries should be charged in a well-ventilated room
only.•Keep children away from acid and batteries.•Before working on the electrical system, you must switch off the
engine, the ignition and all consumers. The negative cable on the battery
must be disconnected. When a light bulb is changed, you need only switch
off the light.•Deactivate the anti-theft alarm by unlocking the vehicle before you
disconnect the battery! The alarm will otherwise be triggered.•When disconnecting the battery from the vehicle electrical system,
disconnect first the negative cable and then the positive cable.•Switch off all electrical consumers before reconnecting the battery.
Reconnect first the positive cable and then the negative cable. Never
reverse the polarity of the connections. This could cause an electrical fire.•Never charge a frozen battery, or one which has thawed. This could
result in explosions and chemical burns. Always replace a battery which
has frozen. A flat battery can freeze at temperatures around 0 °C.•Ensure that the vent hose is always connected to the battery.•Never use a defective battery. This could cause an explosion. Replace a
damaged battery immediately.Caution
•Never disconnect the battery if the ignition is switched on or if the engine
is running. This could damage the electrical system or electronic compo-
nents.•Do not expose the battery to direct sunlight over a long period of time, as
the intense ultraviolet radiation can damage the battery housing.
Wear eye protection
Battery acid is very corrosive and caustic. Wear protective
gloves and eye protection!
�Ž
Fires, sparks, open flames and smoking are prohibited!
�Ÿ
A highly explosive mixture of gases is released when the
battery is under charge.
Keep children away from acid and batteries!
WARNING (continued)
AlteaXL_EN.book Seite 247 Donnerstag, 9. September 2010 12:13 12
Page 253 of 319

Wheels and tyres251
Safety First
Operating Instructions
Practical Tips
Technical Specifications
2. The tyre pressures should only be checked when the tyres are
cold. The slightly raised pressures of warm tyres must not be
reduced.
3. Adjust the tyre pressure to the load you are carrying.Tyre pressure
The correct tyre pressure is especially important at high speeds. The pressure
should therefore be checked at least once a month and before starting a
journey.
The sticker with the tyre pressure values can be found on the inside of the
tank flap. The tyre pressure values given are for cold tyres. Do not reduce the
slightly raised pressures of warm tyres ⇒.
WARNING
•Check the tyre pressure at least once per month. Checking the tyre
pressure is very important. If the tyre pressure is too high or too low, there
is an increased danger of accidents - particularly at high speeds.•A tyre can easily burst if the pressure is too low, causing an accident!•At continuously high speeds, a tyre with insufficient pressure flexes
more. In this way it becomes too hot, and this can cause tread separation
and tyre blow-out. Always observe the recommended tyre pressures.•If the tyre pressure is too low or too high, the tyres will wear prema-
turely and the vehicle will not handle well. Risk of accident!For the sake of the environment
Under-inflated tyres will increase fuel consumption.
Tyre pressure monitoring
The tyre pressure monitoring system constantly checks the
pressure of the tyres.The system uses the speed sensors of the ABS wheels. It operates by
analysing the speed and frequency spectrum of each wheel.
For optimum performance, use genuine SEAT tyres. In addition, check and
adjust tyre pressures regularly.
Whenever the tyre pressures are changed or one or more tyres are changed,
the system should be Reset by pressing the SET switch on the centre console.
The system warns the driver in the event of a loss of pressure by means of
symbols and messages in the instrument panel display. The system uses ESP
⇒ page 199.
Note that tyre pressure also depends on tyre temperature. Tyre pressure
increases about 0.1 bar for each 10 °C in tyre temperature increase. The tyre
heats up while the vehicle is being driven and the tyre pressure will rise
accordingly. For this reason, you should only adjust the tyre pressures when
they are cold (i.e. approximately at ambient temperature).
To ensure that the tyre pressure monitoring system works reliably, you should
check and, if necessary, adjust the tyre pressures at regular intervals and
store the correct pressures (reference values) in the system.
A tyre pr essure i nfor ma ti on lab e l is a tta che d to t he insi de o f the fu el ta nk f lap.
WARNING
•Never adjust tyre pressure when the tyres are hot. This may damage or
even burst the tyres. Risk of accident!•An insufficiently inflated tyre flexes a lot more at high speeds and
causes significant heating of the tyre. Under these conditions, the tyre
bead may be released or the tyre may burst. Risk of accident!
AlteaXL_EN.book Seite 251 Donnerstag, 9. September 2010 12:13 12
Page 262 of 319

If and when
260reliably seal punctures up to a size of about 4 mm caused by the penetration
of a foreign body into the tyre.
Note
•Seek professional assistance if the repair of a tyre puncture is not
possible with the sealing compound.Changing a wheelPreparation work
What you must do before changing a wheel.– If you have a flat tyre or puncture, park the vehicle as far away from the flow of traffic as possible. Choose a location that is as
level as possible.
– All passengers should leave the vehicle. They should wait in a safe area (for instance behind the roadside crash barrier).
– Switch off the engine. Switch on the hazard warning lights.
–Apply the handbrake firmly.
– Engage the first gear, or put the selector lever to position P for
those vehicles with an automatic gearbox.
– If you are towing a trailer, unhitch it from your vehicle.
–Take the vehicle tools and the spare wheel out of the luggage
compartment.
WARNING
Put the hazard warning lights on and place the warning triangle in position.
This is for your own safety and also warns other road users.
Caution
If you have to change the tyre on a gradient, block the wheel opposite the
wheel being changed by placing a stone or similar object under it to prevent
the vehicle from rolling away.
Note
Please observe legal requirements when doing so.Changing a wheelChange the wheel as described below
– Pull off the hub cap . Also see ⇒page 261.
– Slacken the wheel bolts.
– Raise the car with the jack at the corresponding point.
– Remove the wheel and then mount the spare wheel
– Lower the vehicle.
– Tighten the wheel bolts firmly with the box spanner.
–Replace the hub cap .
AlteaXL_EN.book Seite 260 Donnerstag, 9. September 2010 12:13 12
Page 267 of 319

If and when265
Safety First
Operating Instructions
Practical Tips
Technical Specifications
Jack position points for vehicles with sill panel trim* Vehicles with plastic sill panel trim, with cover*
– Remove the cap to access the anchor point for the vehicle jack
⇒fig. 181 .
–Pull on the cover and remove it fr om its allotment in the direction
of the arrow ⇒fig. 181 .
– Once the cover has been released, it will remain connected to its strap so that is not lost.
Removing and fitting the wheel
For removal and fitting the wheel, the following tasks must be
completed.After loosening the wheel bolts and raising the vehicle with the jack,
change the wheel as described below:
Removing a wheel
– Unscrew the bolts using the hexagonal tool in the handle of the
screwdriver (vehicle tool) and place them on a clean surface
⇒ fig. 182 .
Fitting a wheel
– Screw in the wheel bolts and tighten them lightly using the hexagonal socket in the screwdriver handle.
Fig. 181 Plastic sill panel
trim with jack allotment
cover
AA
Fig. 182 Changing the
wheel: Hexagonal socket
in screwdriver handle to
turn the wheel bolts
AlteaXL_EN.book Seite 265 Donnerstag, 9. September 2010 12:13 12
Page 270 of 319

If and when
268
–Take the tyre repair kit out of the luggage compartment.
WARNING
Put the hazard warning lights on and place the warning triangle in position.
This is for your own safety and also warns other road users.
Caution
Take special care if you have to repair a tyre on a slope.
Note
Please observe legal requirements when doing so.Tyre repair
The following sections describe the procedures for repairing
a tyre.Using the sealing compound
– The instructions on the containe r give detailed information on
how to use the sealing compound.
Inflating the tyre.
– Remove the air compressor and hose from the container.
– Screw the retaining nut onto the valve.
– Plug the compressor cable into a 12 volt power socket. – Turn on compressor and monitor the pressure shown on the pres-
sure gauge.
Completing the repair
– Remove the compressor hose from the valve.
– Fit the valve cap.
– Unplug the compressor from the socket.
– Return all tools to their proper storing location.
Note
•If the vehicle is equipped with tyre pressure control, enter the new tyre
pressures using the SET button on the centre console.•The compressor should never be allowed to run for longer than 6
minutes.
AlteaXL_EN.book Seite 268 Donnerstag, 9. September 2010 12:13 12
Page 272 of 319

If and when
270The electric windows are protected by circuit breakers . These reset automat-
ically after a few seconds when the overload (caused for example by frozen
windows) has been corrected.
Fuses colour code
WARNING
Never “repair” damaged fuses and never replace them with fuses with a
higher rating. Failure to comply could result in fire. This could also cause
damage to other parts of the electrical system.
Note
•If a newly replaced fuse blows again after a short time, the electrical
system must be checked by a specialised workshop as soon as possible.
•If you replace a fuse with higher-rating fuse, you could cause damage to
another location in the electrical system.•Always keep some spare fuses in the vehicle. These are available from
SEAT dealers.•In addition to the fuses listed in the following tables, there are other fuses
which must be replaced by the Technical Service Workshop.
Colour
Amps
light brown
5
Red
10
Blue
15
Ye ll ow
20
Natural (white)
25
Green
30
orange
40
Red
50
white
80
Blue
100
grey
150
violet
200
AlteaXL_EN.book Seite 270 Donnerstag, 9. September 2010 12:13 12