Page 205 of 365

13B-205
MR-372-J84-13B200$540.mif
V13
EDC16
Program No: C1
Vdiag No: 18, 1C, 20,
50, 58, 5CDIESEL INJECTION
Fault finding – Interpretation of statuses13B
ET704
ET705
BRAKE SWITCH NO. 1
BRAKE SWITCH NO. 2
NOTESSpecial note:
Statuses ET704 and ET705 should change status at the same time. In the event of
inconsistency, consult the interpretation of fault DF050 Brake switch circuit.
ACTIVE
or
INACTIVE
If the brake lights are working:
check the continuity and make sure there is no interference resistance on the following
connection:
Connection code 5A between components 160 and 120/645/119.
If there is a repair method (see Technical Note 6015A, Repairing electrical wiring,
Wiring: Repair precautions), repair the wiring, otherwise replace it.
If the brake lights are not operational, check:
– the condition and fitting of the brake switch,
– the condition and conformity of the brake lights fuse,
– the conformity of the values in the following table:
disconnect the switch and carry out the following checks:
for Mégane II and Scénic II with ESP
Continuity between
connectionsInsulation between
connections
Switch pressed
(Brake pedal released)5A and BPT 65G and SP17
Switch released
(Brake pedal depressed)65G and SP17 5A and BPT
for Mégane II and Scénic II without ESP:
Continuity between
connectionsInsulation between
connections
Switch pressed
(Brake pedal released)5A and BPT 65A and SP17
Switch released
(Brake pedal depressed)65A and SP17 5A and BPT
For Laguna II:
Continuity between
connectionsInsulation between
connections
Switch pressed
(Brake pedal released)5A and SP13 65A and AP10
Switch released
(Brake pedal depressed)65A and AP10 5A and SP13
Replace the switch if the values obtained are not correct
AFTER REPAIRCarry out a road test, then check with the diagnostic tool.
EDC16_V50_ET704/EDC16_V58_ET704/EDC16_V5C_ET704/EDC16_V50_ET705/EDC16_V58_ET705/EDC16_V5C_ET705/
EDC16_V18_ET704/EDC16_V1C_ET704/EDC16_V20_ET704/EDC16_V18_ET705/EDC16_V1C_ET705/EDC16_V20_ET705
Page 323 of 365

13B-323
MR-372-J84-13B200$828.mif
V13
DIESEL INJECTION
Fault finding – Fault Finding Chart
EDC16
Program No.: C1
Vdiag no.: 18, 1C, 20,
50, 58, 5C
13B
ALP 4
CONTINUED
Check the injector operation: run test 9.
If the fault is still present
Check the conformity of the accelerator pedal position sensor, the brake pedal sensor, the atmospheric pressure
sensor, the exhaust gas recirculation valve and the damper valve.
Check the consistency of the signal: of the air flowmeter, of the engine coolant temperature sensor, of the fuel
temperature sensor and of the engine speed.
Check the connections, continuity and absence of interference resistance on the air flow sensor (run DF056 Air
flow sensor circuit, 2.DEF), the engine coolant temperature sensor (run DF001 Coolant circuit, 1.DEF), and
the engine speed (run DF195 Engine speed / camshaft sensor consistency, 2.DEF).
Check:
– That the diesel filter is not clogged (for the test, see DF053 Rail pressure regulation function 2.def).
– That there are no leaks on the high and low pressure diesel circuits, run Test 4 Turbocharged air inlet circuit
check.
– That the oil vapour rebreathing system is connected.
– The flow regulator (jammed / seized), apply the interpretation of command AC011 Rail pressure regulator.
– Check the timing setting (and the position of the high pressure pump pinion)
– Check the engine compressions (cylinder compression balance with the Compression test function on the
CLIP Technic tool).
– Measure the engine compressions with the special tool
– If the fault is still present, contact the techline.
AFTER REPAIRCarry out a road test followed by a complete check with the diagnostic tool.
Page 324 of 365

13B-324
MR-372-J84-13B200$828.mif
V13
DIESEL INJECTION
Fault finding – Fault Finding Chart
EDC16
Program No.: C1
Vdiag no.: 18, 1C, 20,
50, 58, 5C
13B
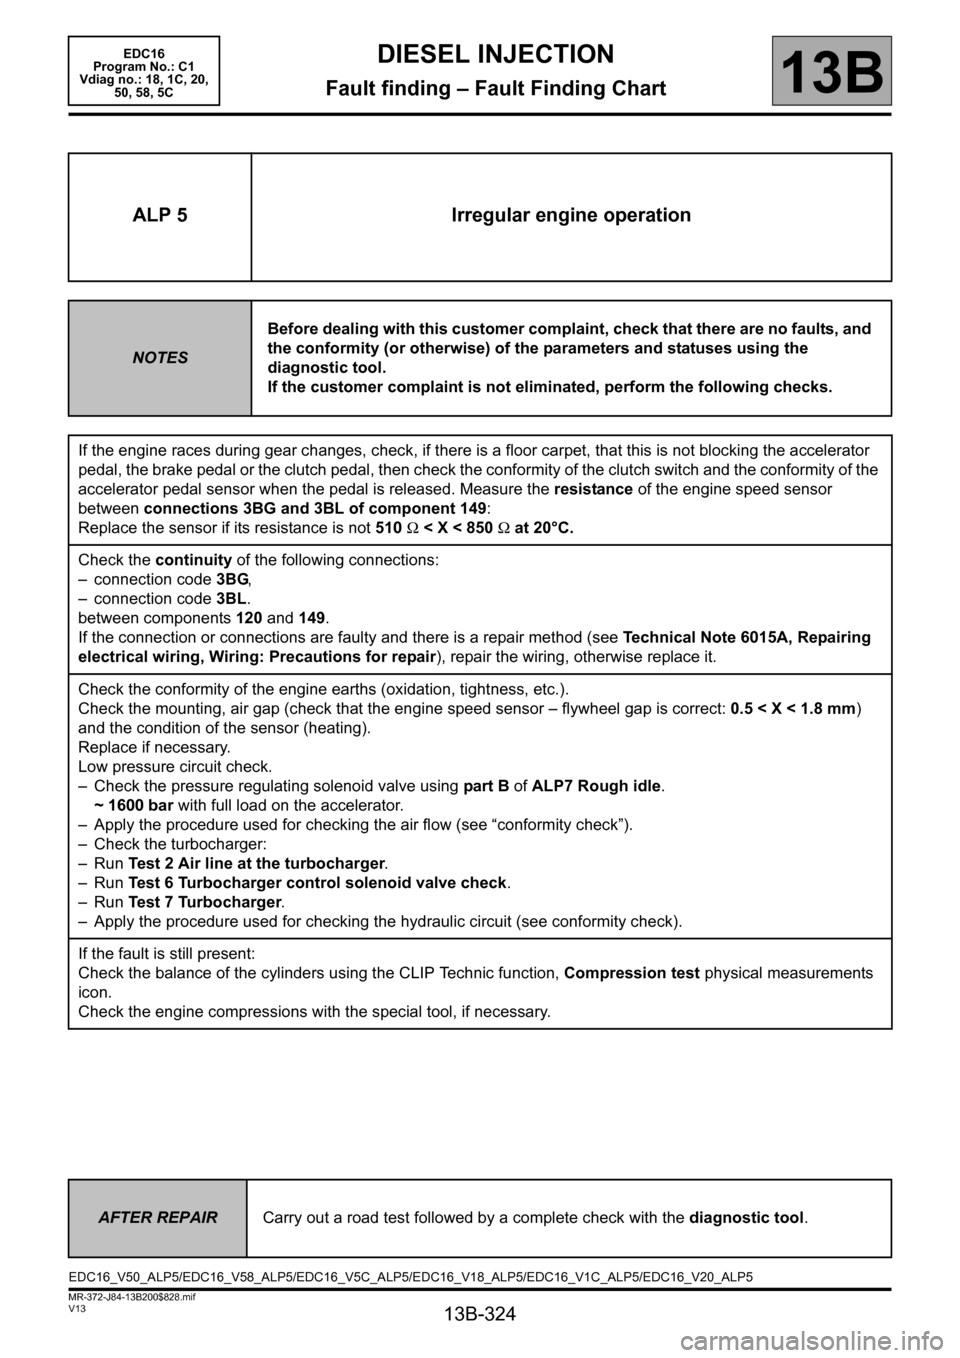
ALP 5 Irregular engine operation
NOTESBefore dealing with this customer complaint, check that there are no faults, and
the conformity (or otherwise) of the parameters and statuses using the
diagnostic tool.
If the customer complaint is not eliminated, perform the following checks.
If the engine races during gear changes, check, if there is a floor carpet, that this is not blocking the accelerator
pedal, the brake pedal or the clutch pedal, then check the conformity of the clutch switch and the conformity of the
accelerator pedal sensor when the pedal is released. Measure the resistance of the engine speed sensor
between connections 3BG and 3BL of component 149:
Replace the sensor if its resistance is not 510 Ω < X < 850 Ω at 20°C.
Check the continuity of the following connections:
– connection code 3BG,
– connection code 3BL.
between components 120 and 149.
If the connection or connections are faulty and there is a repair method (see Technical Note 6015A, Repairing
electrical wiring, Wiring: Precautions for repair), repair the wiring, otherwise replace it.
Check the conformity of the engine earths (oxidation, tightness, etc.).
Check the mounting, air gap (check that the engine speed sensor – flywheel gap is correct: 0.5 < X < 1.8 mm)
and the condition of the sensor (heating).
Replace if necessary.
Low pressure circuit check.
– Check the pressure regulating solenoid valve using part B of ALP7 Rough idle.
~ 1600 bar with full load on the accelerator.
– Apply the procedure used for checking the air flow (see “conformity check”).
– Check the turbocharger:
–Run Test 2 Air line at the turbocharger.
–Run Test 6 Turbocharger control solenoid valve check.
–Run Test 7 Turbocharger.
– Apply the procedure used for checking the hydraulic circuit (see conformity check).
If the fault is still present:
Check the balance of the cylinders using the CLIP Technic function, Compression test physical measurements
icon.
Check the engine compressions with the special tool, if necessary.
AFTER REPAIRCarry out a road test followed by a complete check with the diagnostic tool.
EDC16_V50_ALP5/EDC16_V58_ALP5/EDC16_V5C_ALP5/EDC16_V18_ALP5/EDC16_V1C_ALP5/EDC16_V20_ALP5