Page 79 of 472

▫ General Information .................. 118
� Voice Command — If Equipped ........... 118
▫ Voice Command System Operation ........ 118
▫ Commands ........................ 119
▫ Voice Training ...................... 122
� Seats .............................. 123
▫ Manual Seat Adjuster — If Equipped ...... 123
▫ Manual Reclining Seats — If Equipped ..... 124
▫ Head Restraints ..................... 126
▫ Power Seats — If Equipped ............. 127
▫ Power Lumbar — If Equipped ........... 130
▫ Heated Seats — If Equipped ............ 130
▫ Ventilated Seats — If Equipped .......... 133 ▫ 40-20-40 Front Bench Seat — If Equipped . . . 134
� Driver Memory Seat — If Equipped ........ 134
▫ Setting Memory Positions And Linking RKE
Transmitter To Memory ................ 135
▫ Memory Position Recall ................ 136
▫ To Disable a RKE Transmitter Linked To
Memory ........................... 137
▫ Self-Limiting Control .................. 137
▫ Driver Easy Exit And Easy Entry Control . . . 138
� To Open And Close The Hood ............ 138
� Lights ............................. 140
▫ Headlights ......................... 141
▫ Automatic Headlights ................. 141
▫ Headlight Delay ..................... 14278 UNDERSTANDING THE FEATURES OF YOUR VEHICLE
Page 139 of 472

Driver Easy Exit and Easy Entry Control
This additional feature provides automatic driver’s seat
positioning which will enhance driver mobility into and
out of the vehicle. The seat cushion will move rearward
approximately 2.5 in (60 mm) when the key is removed
from the ignition switch. The seat will move forward
approximately 2.5 in (60 mm) when the key is placed into
the ignition and turned out of the LOCK position. Each
stored memory setting will have an associated Easy Exit
and Easy Entry position. The Easy Exit and Easy Entry
feature may be automatically disabled if the seat is
positioned rearward enough and there is no benefit in
moving the seat any farther rearward.
NOTE: The Easy Entry/Easy Exit feature can be en-
abled or disabled through the programmable features in
the Electronic Vehicle Information Center (EVIC). Refer
to “Electronic Vehicle Information Center (EVIC)/
Customer-Programmable Features” in “Understanding
Your Instrument Panel” for further information. TO OPEN AND CLOSE THE HOOD
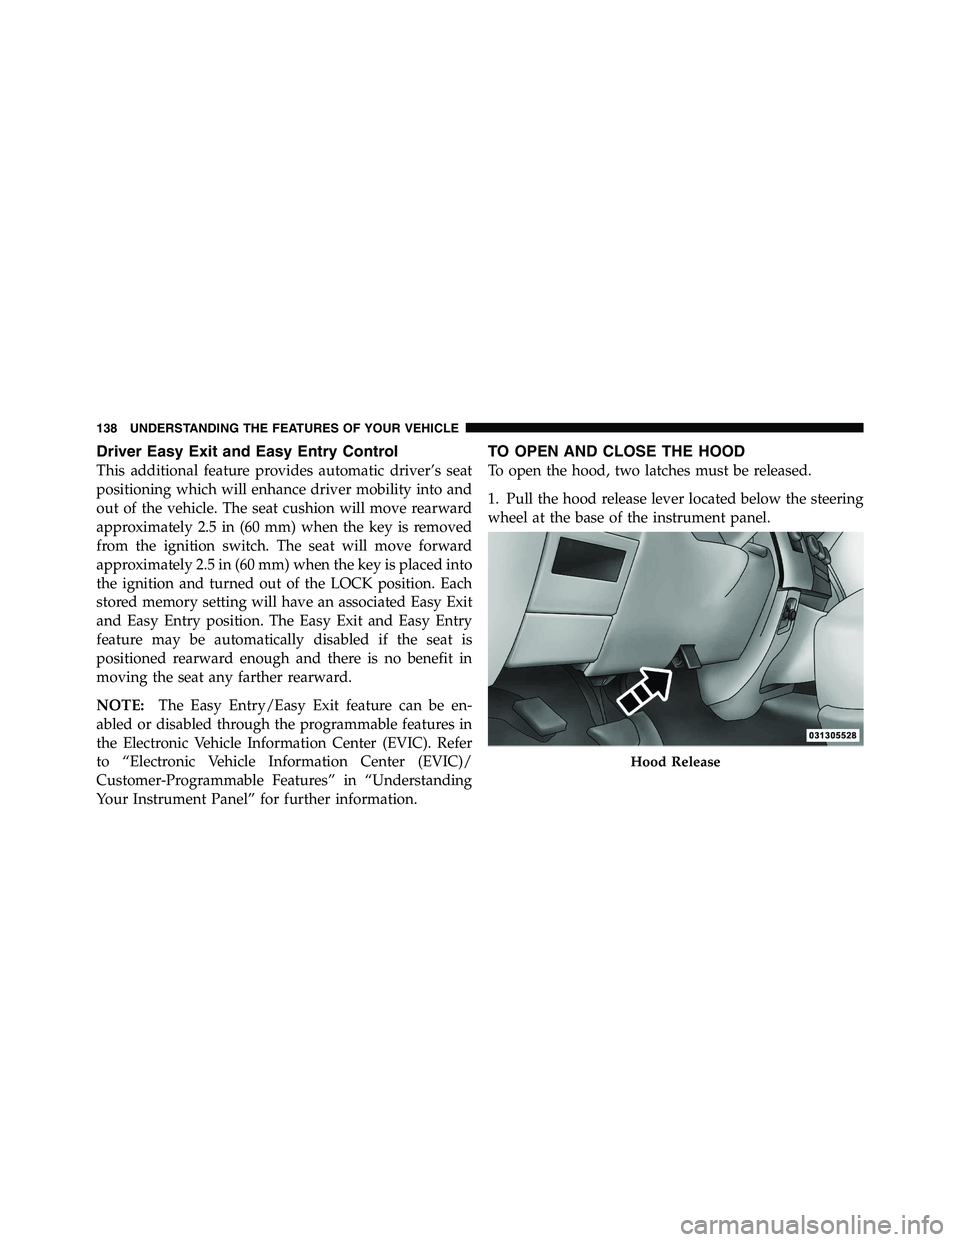
To open the hood, two latches must be released.
1. Pull the hood release lever located below the steering
wheel at the base of the instrument panel.
Hood Release138 UNDERSTANDING THE FEATURES OF YOUR VEHICLE
Page 140 of 472
2. Reach into the opening beneath the center of the hood
and push the safety latch lever from right to left to release
it, before raising the hood.
CAUTION!To prevent possible damage, do not slam the hood to
close it. Use a firm downward push at the front center
of the hood to ensure that both latches engage.
WARNING!Be sure the hood is fully latched before driving your
vehicle. If the hood is not fully latched, it could open
when the vehicle is in motion and block your vision.
Failure to follow this warning could result in serious
injury or death.Safety Latch (1500 Series Shown)
3 UNDERSTANDING THE FEATURES OF YOUR VEHICLE 139
Page 369 of 472

WARNING!• Take care to avoid the radiator cooling fan when-
ever the hood is raised. It can start anytime the
ignition switch is on. You can be injured by
moving fan blades.
• Remove any metal jewelry such as watch bands or
bracelets that might make an inadvertent electrical
contact. You could be seriously injured.
• Batteries contain sulfuric acid that can burn your
skin or eyes and generate hydrogen gas which is
flammable and explosive. Keep open flames or
sparks away from the battery.
1. Set the parking brake, shift the automatic transmission
into PARK and turn the ignition to LOCK.
2. Turn off the heater, radio, and all unnecessary electri-
cal accessories. 3. If using another vehicle to jump-start the battery, park
the vehicle within the jumper cables reach, set the
parking brake and make sure the ignition is OFF.
WARNING!Do not allow vehicles to touch each other as this
could establish a ground connection and personal
injury could result.
Jump-Starting Procedure
WARNING!Failure to follow this procedure could result in per-
sonal injury or property damage due to battery ex-
plosion.368 WHAT TO DO IN EMERGENCIES
Page 393 of 472

Under normal operating conditions, the catalytic con-
verter will not require maintenance. However, it is impor-
tant to keep the engine properly tuned to assure proper
catalyst operation and prevent possible catalyst damage.
NOTE: Intentional tampering with emissions control
systems can result in civil penalties being assessed
against you.
In unusual situations involving grossly malfunctioning
engine operation, a scorching odor may suggest severe
and abnormal catalyst overheating. If this occurs, stop
the vehicle, turn off the engine and allow it to cool.
Service, including a tune-up to manufacturer’s specifica-
tions, should be obtained immediately.
To minimize the possibility of catalytic converter dam-
age:
• Do not shut off the engine or interrupt the ignition,
when the transmission is in gear and the vehicle is in
motion. • Do not try to start the engine by pushing or towing the
vehicle.
• Do not idle the engine with any spark plug wires
disconnected or removed, such as when diagnostic
testing, or for prolonged periods during very rough
idle or malfunctioning operating conditions.
Cooling System
WARNING!You or others can be badly burned by hot coolant or
steam from your radiator. If you see or hear steam
coming from under the hood, do not open the hood
until the radiator has had time to cool. Never try to
open a cooling system pressure cap when the radiator
is hot.392 MAINTAINING YOUR VEHICLE
Page 417 of 472

NOTE: For lighted switches, see your authorized dealer
for replacement instructions.
All of the inside bulbs are brass or glass-wedge base.
Aluminum base bulbs are not approved.
LIGHT BULBS – Exterior Bulb No.
Center High Mounted Stop Lamp (CHMSL) ..... 921
Fog Lamp ............................. 9145
Dual Headlamp ......................... H13
Quad Headlamp – Low Beam ............... H11
Quad Headlamp – High Beam .............. 9005
Side Marker (Dual Headlamp) ............. 3157K
Side Marker (Quad Headlamp) ............ 3157NA
Rear Cargo Lamp ........................ 921
Cab Roof Marker Lamps ................. 194NA BULB REPLACEMENT
Dual or Quad Headlamp/Front Park and Turn
Signal – If Equipped
1. Open the hood.
2. Disconnect and isolate the negative battery cable.
3. Remove the four plastic push-in fasteners that secure
the upper radiator seal to the grille support and both
fender ledges.
4. Remove the two plastic push-in rivets that secure the
upper radiator seal to the radiator.
5. Remove the upper radiator seal from the vehicle.
6. Remove the two headlamp assembly attachment
screws.416 MAINTAINING YOUR VEHICLE