2011 Peugeot Partner headlamp
[x] Cancel search: headlampPage 10 of 200
8
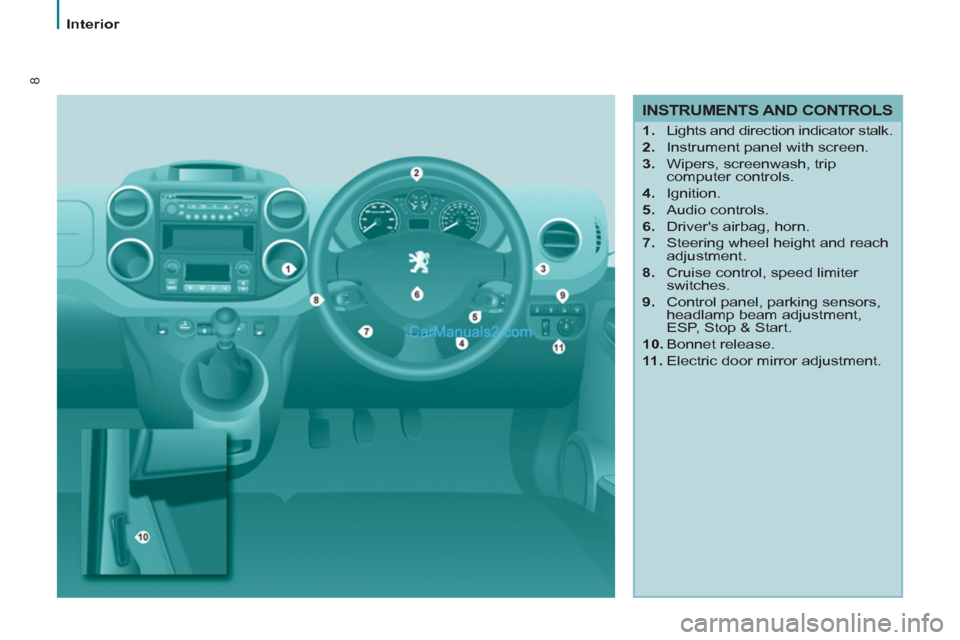
INSTRUMENTS AND CONTROLS
1.
Lights and direction indicator stalk.
2.
Instrument panel with screen.
3.
Wipers, screenwash, trip
computer controls.
4.
Ignition.
5.
Audio controls.
6.
Driver's airbag, horn.
7.
Steering wheel height and reach
adjustment.
8.
Cruise control, speed limiter
switches.
9.
Control panel, parking sensors,
headlamp beam adjustment,
ESP, Stop & Start.
10.
Bonnet release.
11 .
Electric door mirror adjustment.
Interior
Page 13 of 200
3
3
3
3
9
3
11
FAMILIARISATION
Interior
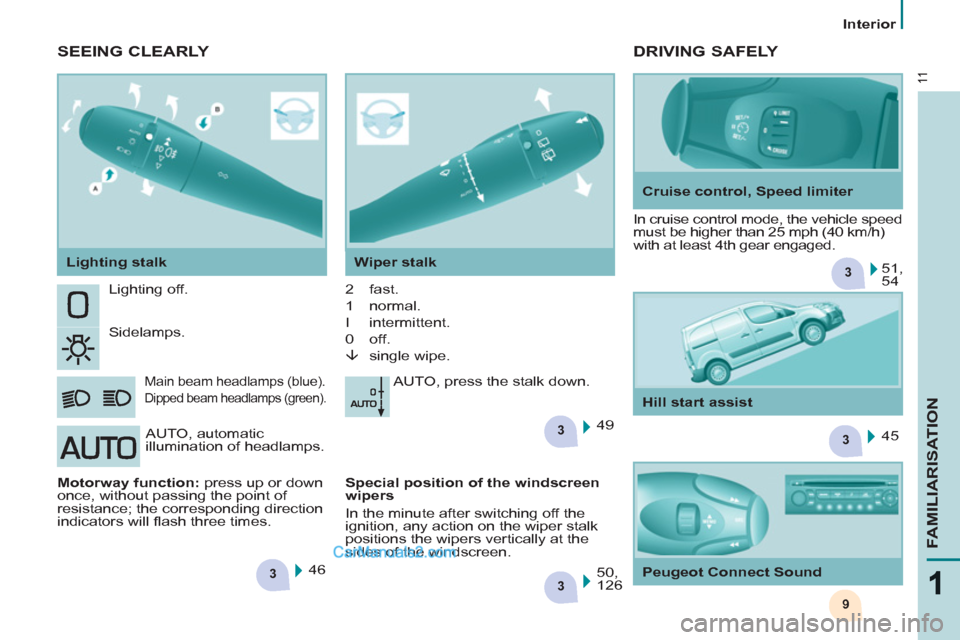
Lighting off.
Sidelamps.
Main beam headlamps (blue).
Dipped beam headlamps (green).
2 fast.
1 normal.
I intermittent.
0 off.
�È
single wipe.
AUTO, press the stalk down.
AUTO, automatic
illumination of headlamps.
46 49 In cruise control mode, the vehicle speed
must be higher than 25 mph (40 km/h)
with at least 4th gear engaged.
51,
54
45
SEEING CLEARLY DRIVING SAFELY
Motorway function:
press up or down
once, without passing the point of
resistance; the corresponding direction
indicators will fl ash three times.
Lighting stalk
Wiper stalk
Cruise control, Speed limiter
Hill start assist
Peugeot Connect Sound
50,
126
Special position of the windscreen
wipers
In the minute after switching off the
ignition, any action on the wiper stalk
positions the wipers vertically at the
sides of the windscreen.
Page 33 of 200
31
READY TO SET OFF
22
Instruments and controls
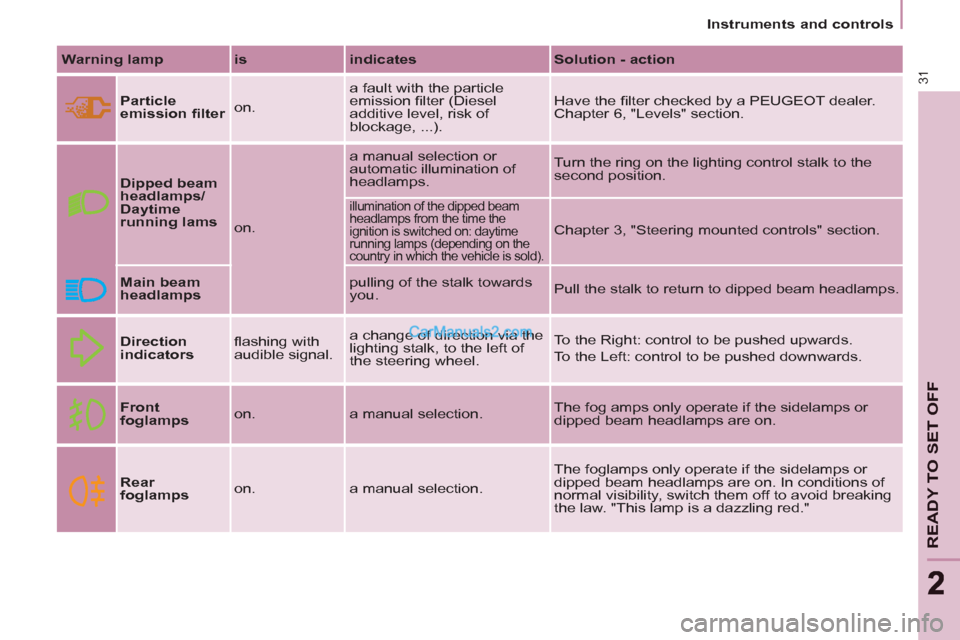
Warning lamp
is
indicates
Solution - action
Particle
emission fi lter
on. a fault with the particle
emission fi lter (Diesel
additive level, risk of
blockage, ...). Have the fi lter checked by a PEUGEOT dealer.
Chapter 6, "Levels" section.
Dipped beam
headlamps/
Daytime
running lams
on. a manual selection or
automatic illumination of
headlamps. Turn the ring on the lighting control stalk to the
second position.
illumination of the dipped beam
headlamps from the time the
ignition is switched on: daytime
running lamps (depending on the
country in which the vehicle is sold).
Chapter 3, "Steering mounted controls" section.
Main beam
headlamps
pulling of the stalk towards
you. Pull the stalk to return to dipped beam headlamps.
Direction
indicators
fl ashing with
audible signal. a change of direction via the
lighting stalk, to the left of
the steering wheel. To the Right: control to be pushed upwards.
To the Left: control to be pushed downwards.
Front
foglamps
on. a manual selection. The fog amps only operate if the sidelamps or
dipped beam headlamps are on.
Rear
foglamps
on. a manual selection. The foglamps only operate if the sidelamps or
dipped beam headlamps are on. In conditions of
normal visibility, switch them off to avoid breaking
the law. "This lamp is a dazzling red."
Page 49 of 200
47
Steering mounted controls
EASE OF USE and COMFOR
T
3
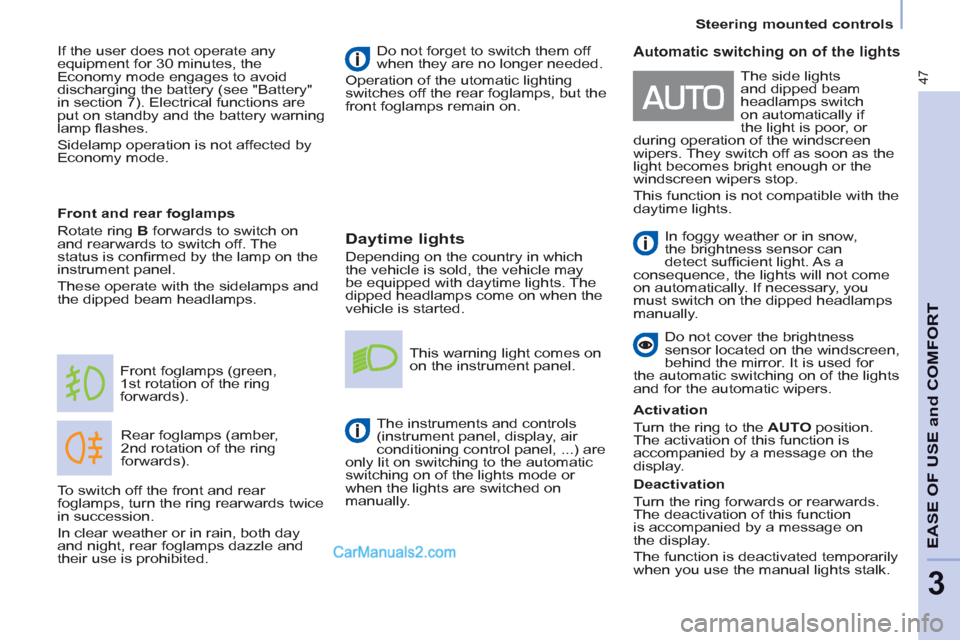
Daytime lights
Depending on the country in which
the vehicle is sold, the vehicle may
be equipped with daytime lights. The
dipped headlamps come on when the
vehicle is started.
Rear foglamps (amber,
2nd rotation of the ring
forwards). Front foglamps (green,
1st rotation of the ring
forwards).
Front and rear foglamps
Rotate ring B
forwards to switch on
and rearwards to switch off. The
status is confi rmed by the lamp on the
instrument panel.
These operate with the sidelamps and
the dipped beam headlamps. Do not forget to switch them off
when they are no longer needed.
Operation of the utomatic lighting
switches off the rear foglamps, but the
front foglamps remain on.
This warning light comes on
on the instrument panel.
The instruments and controls
(instrument panel, display, air
conditioning control panel, ...) are
only lit on switching to the automatic
switching on of the lights mode or
when the lights are switched on
manually.
To switch off the front and rear
foglamps, turn the ring rearwards twice
in succession.
In clear weather or in rain, both day
and night, rear foglamps dazzle and
their use is prohibited.
Automatic switching on of the lights
In foggy weather or in snow,
the brightness sensor can
detect suffi cient light. As a
consequence, the lights will not come
on automatically. If necessary, you
must switch on the dipped headlamps
manually.
Do not cover the brightness
sensor located on the windscreen,
behind the mirror. It is used for
the automatic switching on of the lights
and for the automatic wipers.
Activation
Turn the ring to the AUTO
position.
The activation of this function is
accompanied by a message on the
display.
Deactivation
Turn the ring forwards or rearwards.
The deactivation of this function
is accompanied by a message on
the display.
The function is deactivated temporarily
when you use the manual lights stalk. The side lights
and dipped beam
headlamps switch
on automatically if
the light is poor, or
during operation of the windscreen
wipers. They switch off as soon as the
light becomes bright enough or the
windscreen wipers stop.
This function is not compatible with the
daytime lights. If the user does not operate any
equipment for 30 minutes, the
Economy mode engages to avoid
discharging the battery (see "Battery"
in section 7). Electrical functions are
put on standby and the battery warning
lamp fl ashes.
Sidelamp operation is not affected by
Economy mode.
Page 50 of 200
48
Steering mounted controls
If the brightness sensor
does not function
correctly
, the lights come on
accompanied by the service
warning light, an audible signal
and a message on the display.
Consult a PEUGEOT dealer.
Guide-me-home lighting
The temporary maintaining of the
dipped headlamps lighting, with the
ignition off, makes the driver's exit
easier when the light is poor.
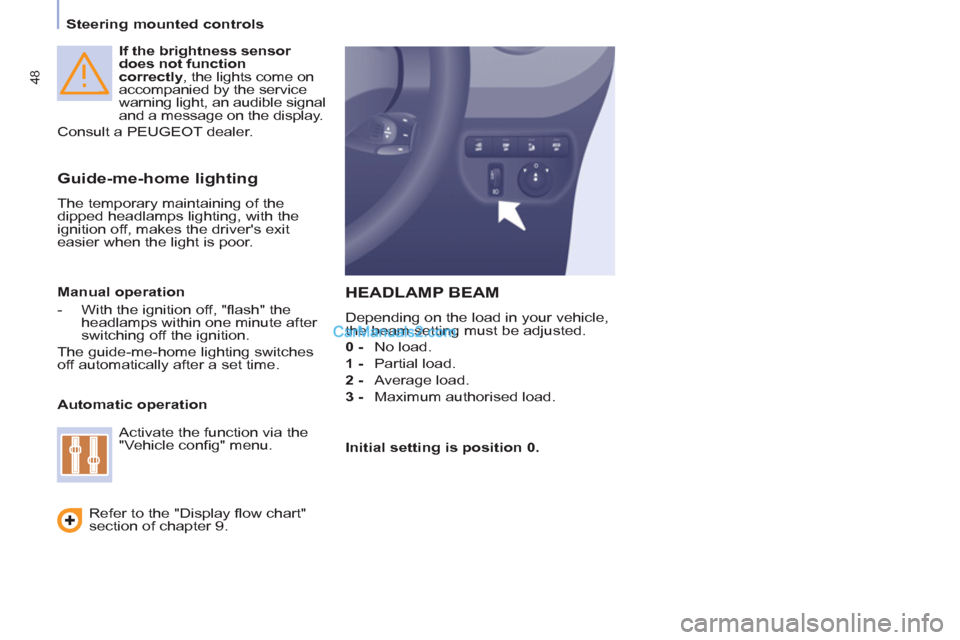
HEADLAMP BEAM
Depending on the load in your vehicle,
the beam setting must be adjusted.
0 -
No load.
1 -
Partial load.
2 -
Average load.
3 -
Maximum authorised load.
Manual operation
- With the ignition off, "fl ash" the
headlamps within one minute after
switching off the ignition.
The guide-me-home lighting switches
off automatically after a set time.
Automatic operation
Refer to the "Display fl ow chart"
section of chapter 9.
Activate the function via the
"Vehicle confi g" menu.
Initial setting is position 0.
Page 52 of 200
50
Steering mounted controls
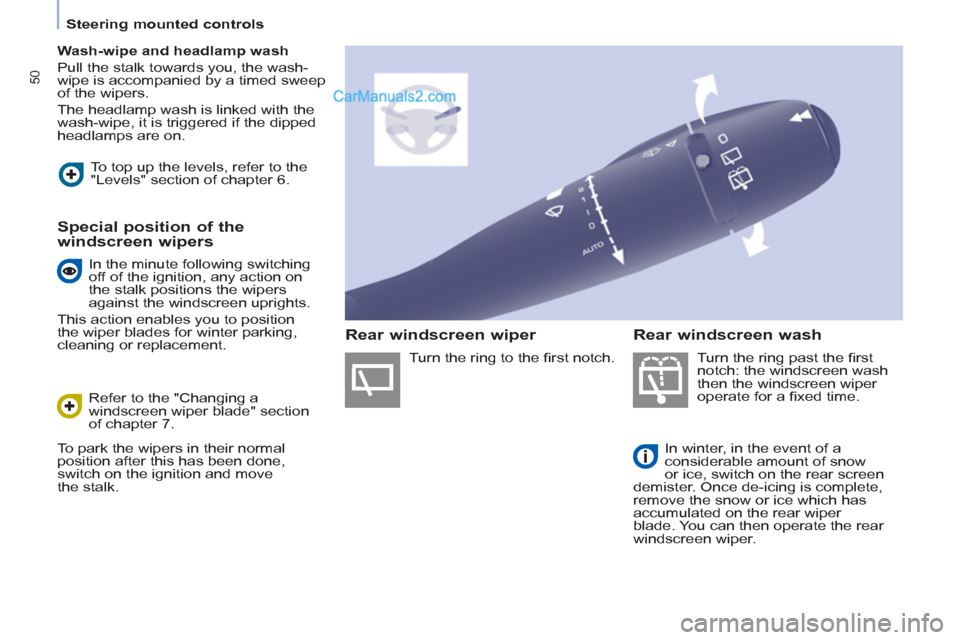
Wash-wipe and headlamp wash
Pull the stalk towards you, the wash-
wipe is accompanied by a timed sweep
of the wipers.
The headlamp wash is linked with the
wash-wipe, it is triggered if the dipped
headlamps are on.
Turn the ring past the fi rst
notch: the windscreen wash
then the windscreen wiper
operate for a fi xed time.
In winter, in the event of a
considerable amount of snow
or ice, switch on the rear screen
demister. Once de-icing is complete,
remove the snow or ice which has
accumulated on the rear wiper
blade. You can then operate the rear
windscreen wiper. To top up the levels, refer to the
"Levels" section of chapter 6.
Special position of the
windscreen wipers
Refer to the "Changing a
windscreen wiper blade" section
of chapter 7.
To park the wipers in their normal
position after this has been done,
switch on the ignition and move
the stalk. Turn the ring to the fi rst notch.
Rear windscreen wash
Rear windscreen wiper
In the minute following switching
off of the ignition, any action on
the stalk positions the wipers
against the windscreen uprights.
This action enables you to position
the wiper blades for winter parking,
cleaning or replacement.
Page 108 of 200
106
Levels
Cooling system
Only use the fl uid recommended by the
manufacturer.
Otherwise, you risk seriously damaging
your engine.
When the engine is warm, the
temperature of the coolant is controlled
by the engine fan. As this fan can
operate with the ignition key removed
and because the cooling system is
pressurised, wait for at least one hour
after the engine has stopped before
carrying out any work.
Slacken the cap by 1/4 of a turn to
release the pressure to prevent any
risk of scalding. When the pressure
has dropped, remove the cap and top
up the level with coolant.
If fl uid has to be added frequently,
this indicates a fault which must be
checked by a PEUGEOT dealer as
soon as possible.
Power steering fluid level
The vehicle must be parked on level
ground with the engine cold. Unscrew
the cap integrated with the gauge and
check the level which must be between
the MIN and MAX marks. In order to regenerate the fi lter, you are
advised to drive at a speed higher than 40 mph (60 km/h) for at least fi ve minutes
as soon as possible, when traffi c conditions
permit (until the message disappears and
the service warning lamp goes off).
During regeneration of the particle
emission fi lter, the noise of a relay
operating may be heard under the
dashboard.
If the message is still displayed and if the
service warning lamp remains on, consult
a PEUGEOT dealer.
Topping up
The level must be between the MIN
and MAX marks on the expansion
bottle. If more than 1 litre of fl uid is
required to top up the level, have
the system checked by a PEUGEOT
dealer.
Screenwash and headlamp
wash level
For best quality cleaning and for your
safety, we would advise that you use
products of the PEUGEOT range.
For optimum cleaning and to avoid
freezing, this fl uid must not be topped
up or replaced with plain water.
Capacity of the screenwash reservoir:
approximately 3 litres.
If your vehicle is fi tted with headlamp
washers, the capacity of the reservoir
is 6 litres.
Diesel additive level
(Diesel with particle
emission filter)
The minimum level of this
additive is indicated by lighting of the
service warning lamp, accompanied by
an audible signal and a message in the
screen.
When this occurs with the engine
running it is due to the start of
saturation of the particle emission fi lter
(exceptionally prolonged urban type
driving conditions: low speed, long
traffi c jams, ...).
Topping up
It is imperative that this additive is
topped up by a PEUGEOT dealer
without delay.
Used oil
Avoid prolonged contact of used oil
with the skin.
Brake fl uid is harmful to health and
very corrosive.
Do not dispose of used oil, brake fl uid
or coolant into drains or into the ground
but into the containers dedicated to this
use at PEUGEOT dealer (France) or
an authorised waste disposal site.
106
Page 119 of 200
11 7
QUICK HEL
P
7
Changing a bulb
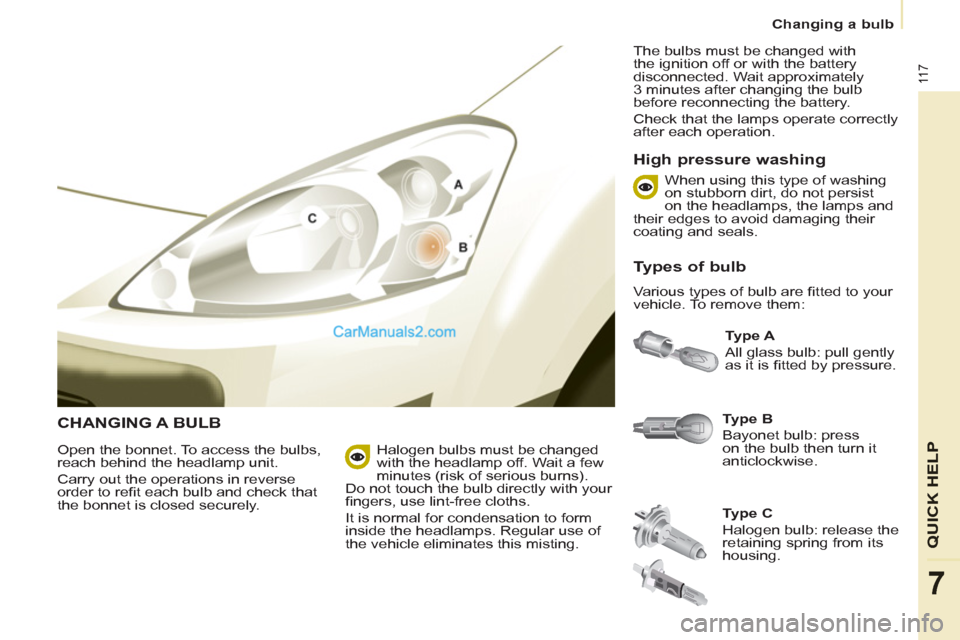
CHANGING A BULB
Type B
Bayonet bulb: press
on the bulb then turn it
anticlockwise.
Type A
All glass bulb: pull gently
as it is fi tted by pressure.
Open the bonnet. To access the bulbs,
reach behind the headlamp unit.
Carry out the operations in reverse
order to refi t each bulb and check that
the bonnet is closed securely.
Type C
Halogen bulb: release the
retaining spring from its
housing.
Halogen bulbs must be changed
with the headlamp off. Wait a few
minutes (risk of serious burns).
Do not touch the bulb directly with your
fi ngers, use lint-free cloths.
It is normal for condensation to form
inside the headlamps. Regular use of
the vehicle eliminates this misting. The bulbs must be changed with
the ignition off or with the battery
disconnected. Wait approximately
3 minutes after changing the bulb
before reconnecting the battery.
Check that the lamps operate correctly
after each operation.
High pressure washing
Types of bulb
Various types of bulb are fi tted to your
vehicle. To remove them: When using this type of washing
on stubborn dirt, do not persist
on the headlamps, the lamps and
their edges to avoid damaging their
coating and seals.