2011 PEUGEOT 308 key
[x] Cancel search: keyPage 86 of 328
84
ACCESS
A confi rmation message ap-
pears in the multifunction
screen, accompanied by an
audible signal.
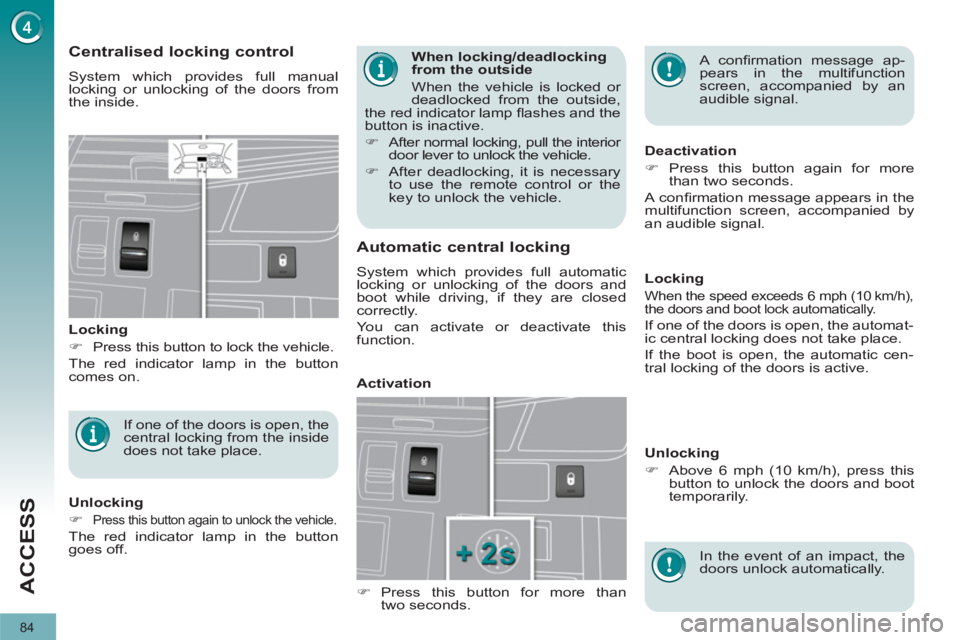
Centralised locking control
System which provides full manual
locking or unlocking of the doors from
the inside.
Locking
�)
Press this button to lock the vehicle.
The red indicator lamp in the button
comes on.
Automatic central locking
System which provides full automatic
locking or unlocking of the doors and
boot while driving, if they are closed
correctly.
You can activate or deactivate this
function.
Locking
When the speed exceeds 6 mph (10 km/h),
the doors and boot lock automatically.
If one of the doors is open, the automat-
ic central locking does not take place.
If the boot is open, the automatic cen-
tral locking of the doors is active.
Deactivation
�)
Press this button again for more
than two seconds.
A confi rmation message appears in the
multifunction screen, accompanied by
an audible signal.
If one of the doors is open, the
central locking from the inside
does not take place.
Unlocking
�)
Press this button again to unlock the vehicle.
The red indicator lamp in the button
goes off.
Activation
In the event of an impact, the
doors unlock automatically.
Unlocking
�)
Above 6 mph (10 km/h), press this
button to unlock the doors and boot
temporarily.
�)
Press this button for more than
two seconds.
When locking/deadlocking
from the outside
When the vehicle is locked or
deadlocked from the outside,
the red indicator lamp fl ashes and the
button is inactive.
�)
After normal locking, pull the interior
door lever to unlock the vehicle.
�)
After deadlocking, it is necessary
to use the remote control or the
key to unlock the vehicle.
Page 87 of 328
85
ACCESS
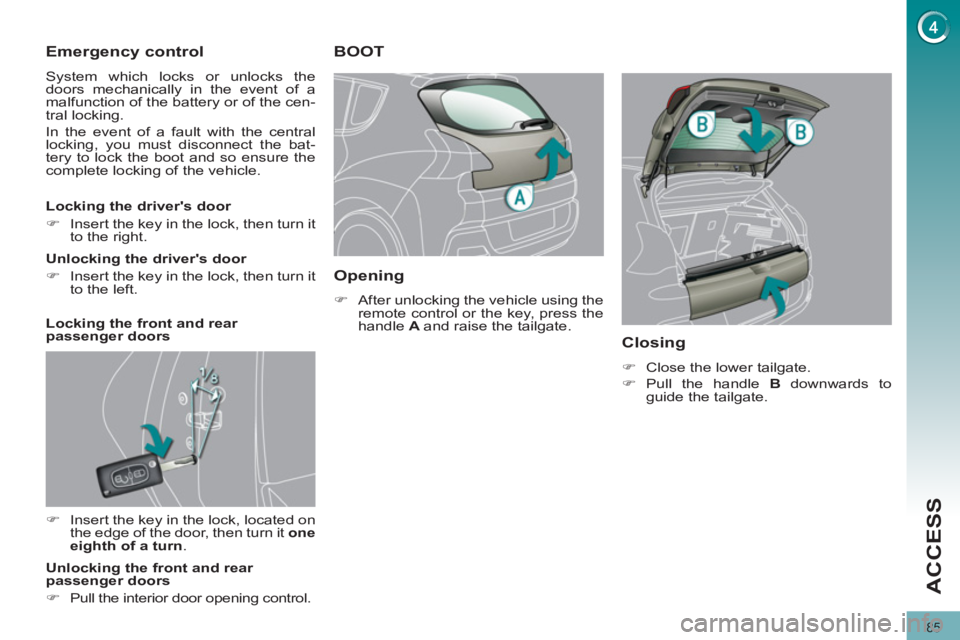
Emergency control
System which locks or unlocks the
doors mechanically in the event of a
malfunction of the battery or of the cen-
tral locking.
In the event of a fault with the central
locking, you must disconnect the bat-
tery to lock the boot and so ensure the
complete locking of the vehicle.
�)
Insert the key in the lock, located on
the edge of the door, then turn it one
eighth of a turn
.
Locking the driver's door
�)
Insert the key in the lock, then turn it
to the right.
Unlocking the driver's door
�)
Insert the key in the lock, then turn it
to the left.
Locking the front and rear
passenger doors
Unlocking the front and rear
passenger doors
�)
Pull the interior door opening control.
Opening
�)
After unlocking the vehicle using the
remote control or the key, press the
handle A
and raise the tailgate.
BOOT
Closing
�)
Close the lower tailgate.
�)
Pull the handle B
downwards to
guide the tailgate.
Page 89 of 328

87
ACCESS
The key cannot be removed
from the lock until the cap is
put back on the tank.
Opening the cap may trigger an in-
rush of air. This vacuum, which is
completely normal, is caused by the
sealing of the fuel system.
FUEL TANK
Capacity of the tank: approximately
60 litres.
To fi ll the tank safely:
�)
the engine must be switched off,
�)
open the fuel fi ller fl ap,
�)
insert the key in the cap, then turn it
to the left,
When refuelling is complete:
�)
put the cap back in place,
�)
turn the key to the right, then remove
it from the cap,
�)
close the fi ller fl ap.
�)
remove the cap and secure it on the
hook, located on the inside of the fl ap,
�)
fi ll the tank, but do not continue af-
ter the 3rd cut-off of the nozzle
;
this could cause malfunctions.
Low fuel level
Operating fault
A malfunction of the fuel gauge is indi-
cated by the return to zero of the fuel
gauge needle.
Have it checked by a PEUGEOT dealer
or a qualifi ed workshop.
Refuelling
A label affi xed to the inside of the fi ller
fl ap reminds you of the type of fuel to be
used according to your engine.
More than 5 litres of fuel must be add-
ed in order to be registered by the fuel
gauge. When the low fuel level is
reached, this warning lamp
comes on in the instrument
panel, accompanied by an
audible signal and a message
in the multifunction screen. When the
lamp fi rst comes on, there is approxi-
mately
6 litres
of fuel remaining.
Until suffi cient fuel has been added, this
warning lamp appears every time the
ignition is switched on, accompanied by
an audible signal and a message. When
driving, this audible signal and message
are repeated with increasing frequency,
as the fuel level drops towards "0"
.
You must refuel to avoid run-
ning out of fuel.
If you run out of fuel (Diesel), refer
also to the "Checks" section.
With Stop & Start, never re-
fuel with the system in STOP
mode; you must switch off the
ignition with the key.
Page 99 of 328
97
VISIBILITY
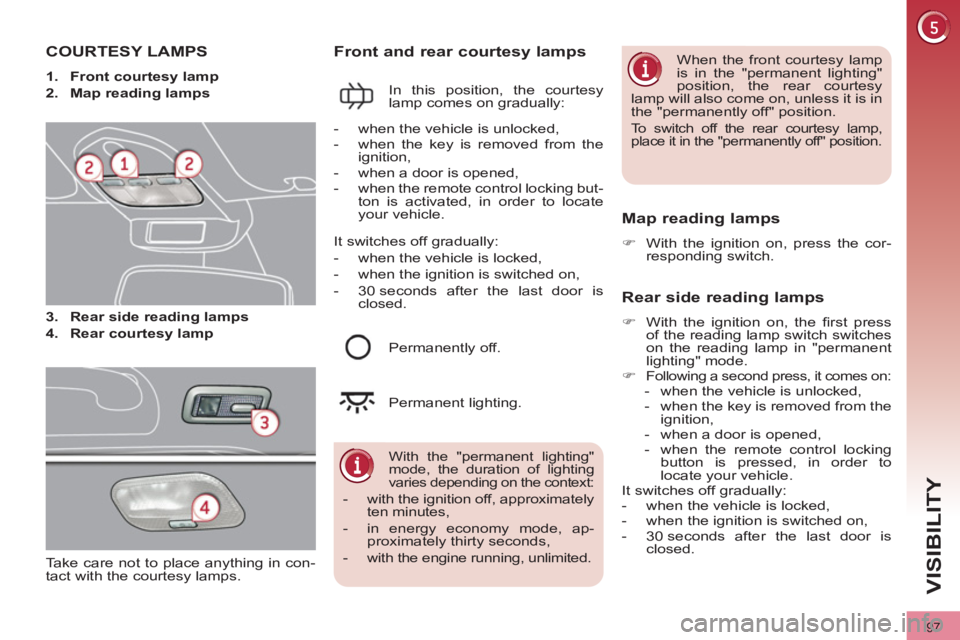
COURTESY LAMPS
1.
Front courtesy lamp
2.
Map reading lamps
3.
Rear side reading lamps
4.
Rear courtesy lamp
Front and rear courtesy lamps
In this position, the courtesy
lamp comes on gradually:
Map reading lamps
�)
With the ignition on, press the cor-
responding switch.
With the "permanent lighting"
mode, the duration of lighting
varies depending on the context:
- with the ignition off, approximately
ten minutes,
- in energy economy mode, ap-
proximately thirty seconds,
- with the engine running, unlimited.
- when the vehicle is unlocked,
- when the key is removed from the
ignition,
- when a door is opened,
- when the remote control locking but-
ton is activated, in order to locate
your vehicle.
Permanently off.
Permanent lighting. When the front courtesy lamp
is in the "permanent lighting"
position, the rear courtesy
lamp will also come on, unless it is in
the "permanently off" position.
To switch off the rear courtesy lamp,
place it in the "permanently off" position.
Rear side reading lamps
�)
With the ignition on, the fi rst press
of the reading lamp switch switches
on the reading lamp in "permanent
lighting" mode.
�)
Following a second press, it comes on:
- when the vehicle is unlocked,
- when the key is removed from the
ignition,
- when a door is opened,
- when the remote control locking
button is pressed, in order to
locate your vehicle.
It switches off gradually:
- when the vehicle is locked,
- when the ignition is switched on,
- 30 seconds after the last door is
closed.
It switches off gradually:
- when the vehicle is locked,
- when the ignition is switched on,
- 30 seconds after the last door is
closed.
Take care not to place anything in con-
tact with the courtesy lamps.
Page 100 of 328
98
VISIBILITY
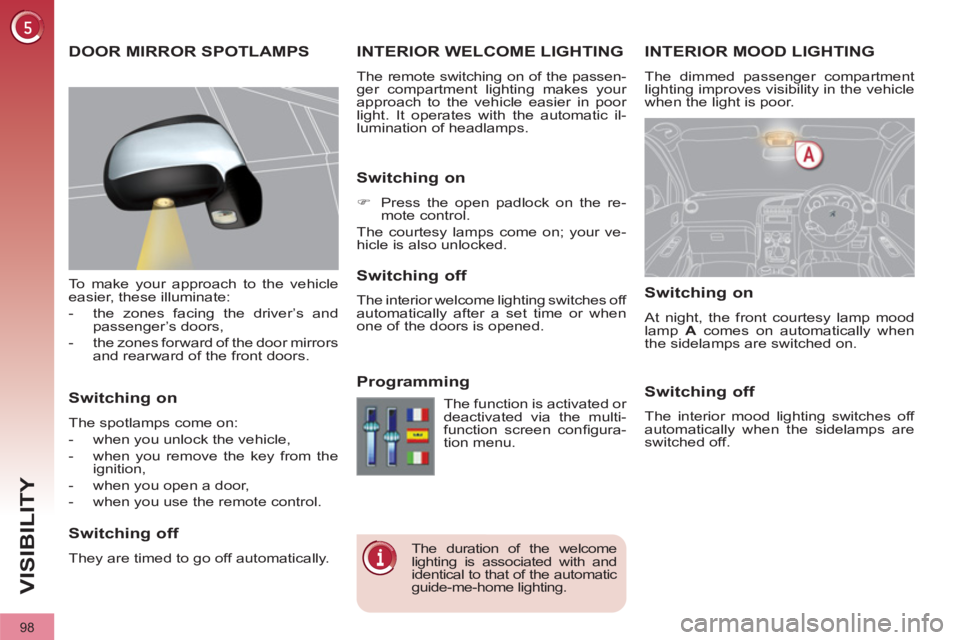
INTERIOR MOOD LIGHTING
The dimmed passenger compartment
lighting improves visibility in the vehicle
when the light is poor.
INTERIOR WELCOME LIGHTING
The remote switching on of the passen-
ger compartment lighting makes your
approach to the vehicle easier in poor
light. It operates with the automatic il-
lumination of headlamps.
Switching on
�)
Press the open padlock on the re-
mote control.
The courtesy lamps come on; your ve-
hicle is also unlocked.
Switching off
The interior welcome lighting switches off
automatically after a set time or when
one of the doors is opened.
Programming
Switching on
At night, the front courtesy lamp mood
lamp A
comes on automatically when
the sidelamps are switched on.
Switching off
The interior mood lighting switches off
automatically when the sidelamps are
switched off.
The duration of the welcome
lighting is associated with and
identical to that of the automatic
guide-me-home lighting. The function is activated or
deactivated via the multi-
function screen confi gura-
tion menu.
DOOR MIRROR SPOTLAMPS
To make your approach to the vehicle
easier, these illuminate:
- the zones facing the driver’s and
passenger’s doors,
- the zones forward of the door mirrors
and rearward of the front doors.
Switching on
The spotlamps come on:
- when you unlock the vehicle,
- when you remove the key from the
ignition,
- when you open a door,
- when you use the remote control.
Switching off
They are timed to go off automatically.
Page 111 of 328
109
FITTINGS
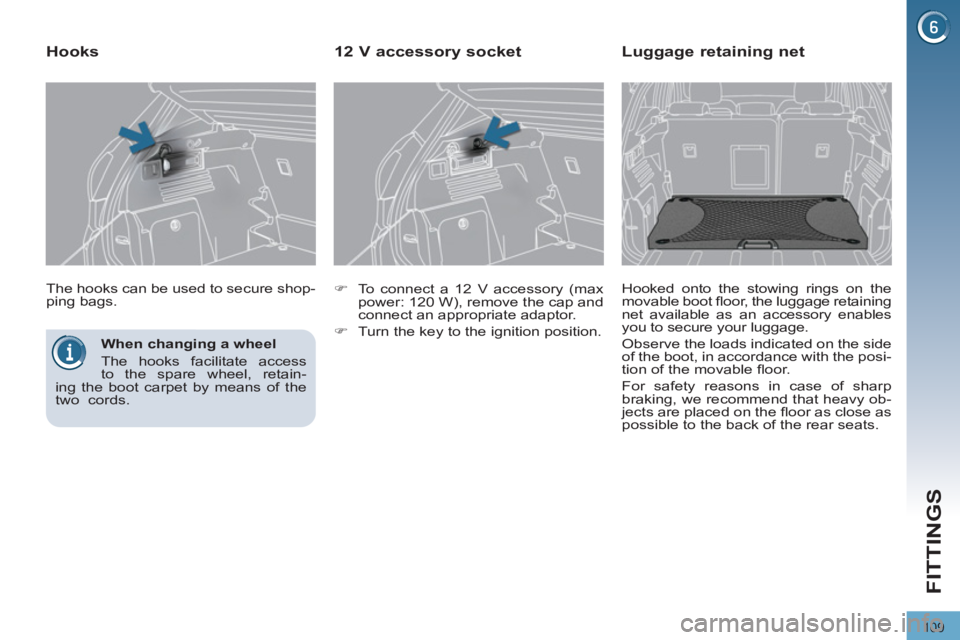
When changing a wheel
The hooks facilitate access
to the spare wheel, retain-
ing the boot carpet by means of the
two cords.
The hooks can be used to secure shop-
ping bags.
Hooks
�)
To connect a 12 V accessory (max
power: 120 W), remove the cap and
connect an appropriate adaptor.
�)
Turn the key to the ignition position.
12 V accessory socket
Luggage retaining net
Hooked onto the stowing rings on the
movable boot fl oor, the luggage retaining
net available as an accessory enables
you to secure your luggage.
Observe the loads indicated on the side
of the boot, in accordance with the posi-
tion of the movable fl oor.
For safety reasons in case of sharp
braking, we recommend that heavy ob-
jects are placed on the fl oor as close as
possible to the back of the rear seats.
Page 121 of 328
11 9
CHILD SAFETY
ADVICE ON CHILD SEATS
Installing a booster seat
The chest part of the seat belt must be
positioned on the child's shoulder with-
out touching the neck.
Ensure that the lap part of the seat belt
passes correctly over the child's thighs.
PEUGEOT recommends the use of a
booster seat which has a back, fi tted
with a seat belt guide at shoulder level.
As a safety precaution, do not leave:
- a child or children alone and unsu-
pervised in a vehicle,
- a child or an animal in a vehicle
which is exposed to the sun, with
the windows closed,
- the keys within reach of children
inside the vehicle. To prevent accidental opening of the
doors and rear windows, use the
"Child lock".
Take care not to open the rear win-
dows by more than one third.
To protect young children from the
rays of the sun, fi t side blinds on the
rear windows.
Children under the age of 10 must not
travel in the "forwards-facing" position
on the front passenger seat, unless the
rear seats are already occupied by other
children, cannot be used or are absent.
Deactivate the passenger airbag when
a "rearwards-facing" child seat is in-
stalled on the front seat.
Otherwise, the child would risk being
seriously injured or killed if the airbag
were to infl ate. The incorrect installation of a child seat
in a vehicle compromises the child's
protection in the event of an accident.
Remember to fasten the seat belts or
the child seat harnesses keeping the
slack relative to the child's body to a
minimum, even for short journeys.
When installing a child seat using the
seat belt, ensure that the seat belt is
tightened correctly on the child seat
and that it secures the child seat fi rmly
on the seat of your vehicle. Move the
seat forwards if necessary.
For optimum installation of the "for-
wards-facing" child seat, ensure that
the back of the child seat is in contact
with the back of the vehicle's seat and
that the head restraint does not cause
any discomfort.
If the head restraint has to be removed,
ensure that it is stored or attached se-
curely to prevent it from being thrown
around the vehicle in the event of sharp
braking.
Page 125 of 328
123
CHILD SAFETY
This system is independent
and in no circumstances does
it take the place of the central
locking control.
Check the status of the child lock
each time you switch on the ignition.
Always remove the key from the igni-
tion when leaving the vehicle, even
for a short time.
In the event of a serious impact,
the electric child lock is switched off
automatically to permit the exit of the
rear passengers.
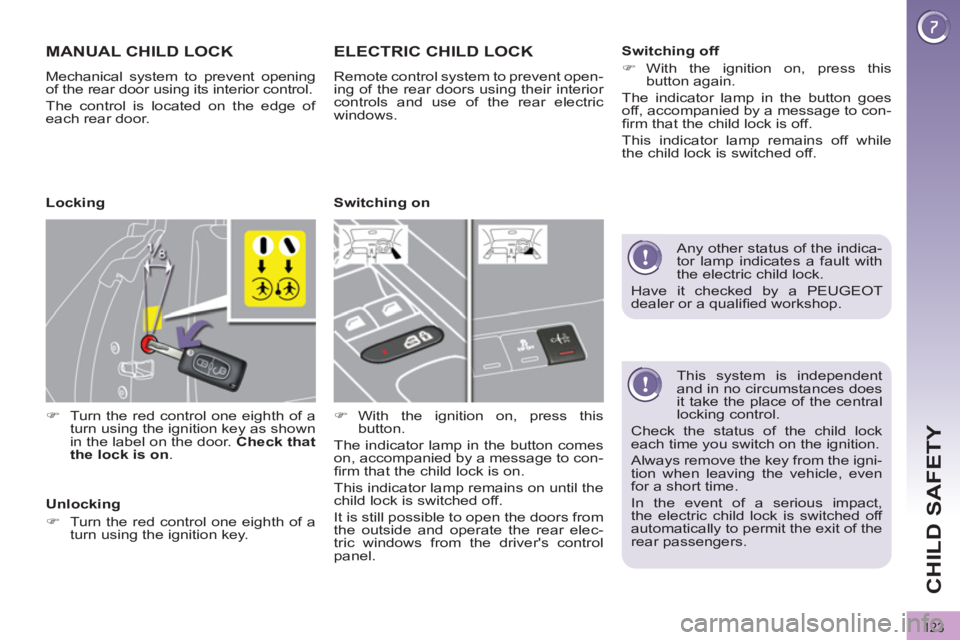
MANUAL CHILD LOCK
Mechanical system to prevent opening
of the rear door using its interior control.
The control is located on the edge of
each rear door.
�)
Turn the red control one eighth of a
turn using the ignition key as shown
in the label on the door. Check that
the lock is on
.
ELECTRIC CHILD LOCK
Remote control system to prevent open-
ing of the rear doors using their interior
controls and use of the rear electric
windows.
�)
With the ignition on, press this
button.
The indicator lamp in the button comes
on, accompanied by a message to con-
fi rm that the child lock is on.
This indicator lamp remains on until the
child lock is switched off.
It is still possible to open the doors from
the outside and operate the rear elec-
tric windows from the driver's control
panel.
Locking
Unlocking
�)
Turn the red control one eighth of a
turn using the ignition key.
Switching on
Switching off
�)
With the ignition on, press this
button again.
The indicator lamp in the button goes
off, accompanied by a message to con-
fi rm that the child lock is off.
This indicator lamp remains off while
the child lock is switched off.
Any other status of the indica-
tor lamp indicates a fault with
the electric child lock.
Have it checked by a PEUGEOT
dealer or a qualifi ed workshop.