Page 13 of 407
 (P. 4-52)
17. Power outlet (P. 2-38)
18. Heated seat switch (if so equipped)(P. 2-34)
19. Cup holder (P. 2-44)
20. Vehicle dynamic control (VDC) off
switch (P. 2-35)
21.")
16. Aux jack (if so equipped) (P. 4-52)
17. Power outlet (P. 2-38)
18. Heated seat switch (if so equipped)(P. 2-34)
19. Cup holder (P. 2-44)
20. Vehicle dynamic control (VDC) off
switch (P. 2-35)
21. Tow mode switch (P. 2-37)
22. Electronic locking rear differential
(E-Lock) system switch
(if so equipped) (P.2-35)
23. Shift selector (console)
(if so equipped) (P. 5-15)
24. Hazard warning flasher switch (P. 2-33)
25. Front passenger air bag status light
(P. 1-56)
26. Power outlet (P. 2-38)
27. 4WD shift switch (if so equipped)
(P. 5-27)
28. Windshield wiper/washer switch
(P. 2-27)
29. Tilt steering wheel control (P. 3-14)
30. Cargo lamp switch (if so equipped)
(P. 2-34)
31. Rear sonar system off switch
(if so equipped) (P. 2-36) 32. Pedal position adjustment switch
(if so equipped) (P. 3-14)
33. Rear power window switch
(if so equipped) (P. 2-51)
*: Refer to the separate Navigation System
Owner’s Manual (if so equipped) .
See the page number indicated in paren-
theses for operating details.
Illustrated table of contents0-7
Page 18 of 407

WARNING
●Do not ride in a moving vehicle when
the seatback is reclined. This can be
dangerous. The shoulder belt will not
be against your body. In an accident,
you could be thrown into it and receive
neck or other serious injuries. You
could also slide under the lap belt and
receive serious internal injuries. ●
For the most effective protection when
the vehicle is in motion, the seat should
be upright. Always sit well back in the
seat with both feet on the floor and
adjust the seat properly. See “Precau-
tions on seat belt usage” later in this
section.
● After adjustment, gently rock in the seat
to make sure it is securely locked.
● Do not leave children unattended inside
the vehicle. They could unknowingly ac-
tivate switches or controls. Unattended
children could become involved in seri-
ous accidents. ●
The seatback should not be reclined
any more than needed for comfort. Seat
belts are most effective when the pas-
senger sits well back and straight up in
the seat. If the seatback is reclined, the
risk of sliding under the lap belt and
being injured is increased.
Page 19 of 407
Forward and backward
Pull the lever up and hold it while you slide the
seat forward or backward to the desired position.
Release the lever to lock the seat in position.
Reclining
To recline the seatback, pull the lever up and lean
back. To bring the seatback forward, pull the lever
up and lean your body forward. Release the lever
to lock the seatback in position.
The reclining feature allows adjustment of the
seatback for occupants of different sizes for
added comfort and to help obtain proper seat
belt fit. See “Precautions on seat belt usage” later
in this section. Also, the seatback can be reclined
to allow occupants to rest when the vehicle is
stopped and the transmission is in the P (Park)
position.
FRONT MANUAL BENCH SEAT
ADJUSTMENT (if so equipped)
Forward and backward
Pull the lever up and hold it while you slide the
seat forward or backward to the desired position.
Release the lever to lock the seat in position.
Page 20 of 407

Reclining
To recline the seatback, pull the lever up and lean
back. To bring the seatback forward, pull the lever
up and lean your body forward. Release the lever
to lock the seatback in position.
The reclining feature allows adjustment of the
seatback for occupants of different sizes for
added comfort and to help obtain proper seat
belt fit (see “Precautions on seat belt usage” later
in this section) . Also, the seatback can be re-
clined to allow occupants to rest when the ve-
hicle is stopped and the transmission is in P
(Park) .
FRONT POWER SEAT
ADJUSTMENT (if so equipped)
Operating tips
●The power seat motor has an auto-reset
overload protection circuit. If the motor
stops during operation, wait 30 seconds,
then reactivate the switch.
● Do not operate the power seat switch for a
long period of time when the engine is off.
This will discharge the battery.
See “Automatic drive positioner ” in “Pre-driving
checks and adjustments” for automatic drive po-
sitioner operation.
Forward and backward
Moving the switch forward or backward will slide
the seat forward or backward to the desired
position.
Reclining
Move the recline switch backward until the de-
sired angle is obtained. To bring the seatback
forward again, move the switch forward and
move your body forward. The seatback will move
forward.
The reclining feature allows adjustment of the
seatback for occupants of different sizes for
added comfort and to help obtain proper seat
Page 23 of 407
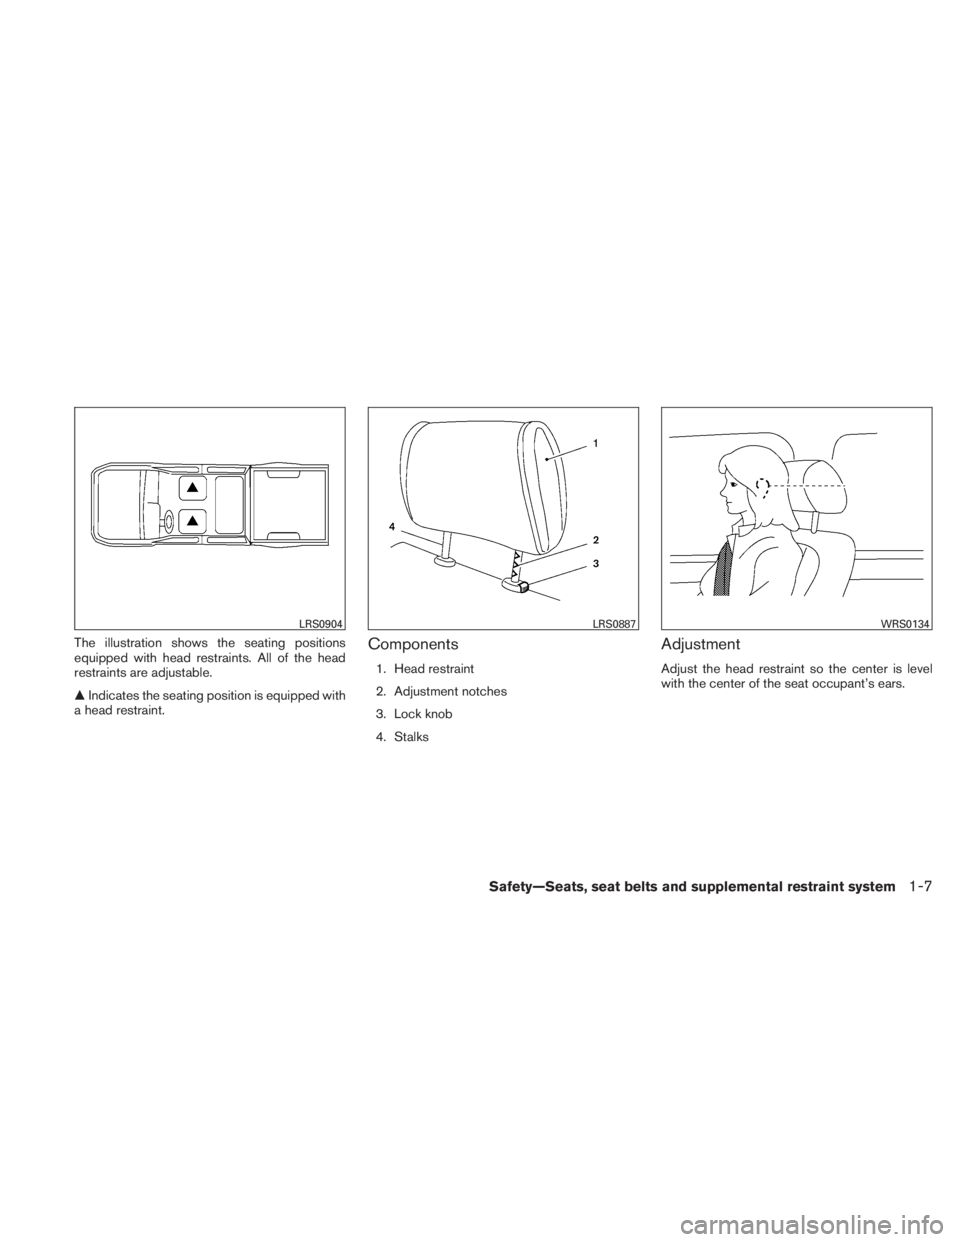
The illustration shows the seating positions
equipped with head restraints. All of the head
restraints are adjustable.
�Indicates the seating position is equipped with
a head restraint.Components
1. Head restraint
2. Adjustment notches
3. Lock knob
4. Stalks
Adjustment
Adjust the head restraint so the center is level
with the center of the seat occupant’s ears.
Page 25 of 407

Install
1. Align the head restraint stalks with the holesin the seat. Make sure the head restraint is
facing the correct direction. The stalk with
the adjustment notches
�1must be installed
in the hole with the lock button
�2.
2. Push and hold the lock knob and push the head restraint down.
3. Properly adjust the head restraint before an occupant uses the seating position.
Front-seat Active Head Restraints
The Active Head Restraint moves forward utiliz-
ing the force that the seatback receives from the
occupant in a rear-end collision. The movement
of the head restraint helps support the occu-
pant’s head by reducing its backward movement
and helping absorb some of the forces that may
lead to whiplash-type injuries.
Active Head Restraints are effective for collisions
at low to medium speeds in which it is said that
whiplash injury occurs most.
Active Head Restraints operate only in certain
rear-end collisions. After the collision, the head
restraints return to their original position. Adjust the Active Head Restraints properly as
described in this section.
ADJUSTABLE HEADREST (if so
equipped)
Page 26 of 407
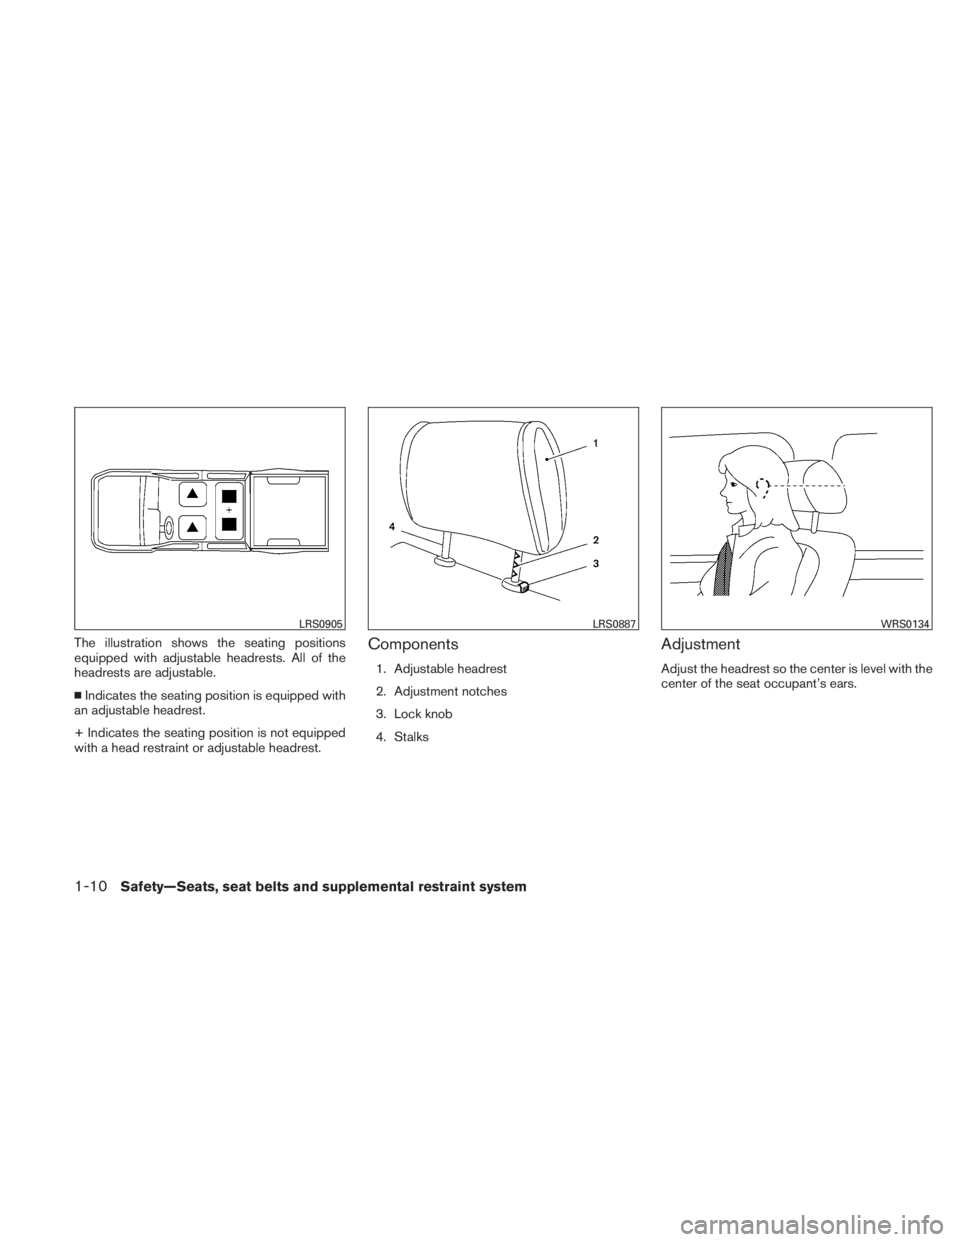
The illustration shows the seating positions
equipped with adjustable headrests. All of the
headrests are adjustable.
�Indicates the seating position is equipped with
an adjustable headrest.
+ Indicates the seating position is not equipped
with a head restraint or adjustable headrest.Components
1. Adjustable headrest
2. Adjustment notches
3. Lock knob
4. Stalks
Adjustment
Adjust the headrest so the center is level with the
center of the seat occupant’s ears.
Page 38 of 407
Shoulder belt height adjustment (front
outboard seats)
The shoulder belt anchor height should be ad-
justed to the position best for you. (See “Precau-
tions on seat belt usage” earlier in this section.)
To adjust, pull out
�1the adjustment button and
move the shoulder belt anchor
�2to the desired
position, so the belt passes over the center of the
shoulder. The belt should be away from your face
and neck, but not falling off your shoulder. Re-
lease the adjustment button to lock the shoulder
belt anchor into position.


The shoulder belt anchor height should be ad-
justed to the position best for you. (See “Precau-
tions on seat belt usage” earlier in this se")