Page 2 of 489

Welcome to the growing family of new NISSAN
owners. This vehicle is delivered to you with
confidence. It was produced using the latest
techniques and strict quality control.
This manual was prepared to help you under-
stand the operation and maintenance of your
vehicle so that you may enjoy many miles (kilome-
ters) of driving pleasure. Please read through this
manual before operating your vehicle.
A separate Warranty Information Booklet
explains details about the warranties cov-
ering your vehicle. The “NISSAN Service
and Maintenance Guide” explains details
about maintaining and servicing your ve-
hicle. Additionally, a separate Customer
Care/Lemon Law Booklet (U.S. only) will
explain how to resolve any concerns you
may have with your vehicle, as well as
clarify your rights under your state’s lemon
law.
Your NISSAN dealership knows your vehicle
best. When you require any service or have any
questions, they will be glad to assist you with the
extensive resources available to them.In addition to factory installed options, your ve-
hicle may also be equipped with additional ac-
cessories installed by NISSAN or by your
NISSAN dealer prior to delivery. It is important
that you familiarize yourself with all disclosures,
warnings, cautions and instructions concerning
proper use of such accessories prior to operating
the vehicle and/or accessory. See a NISSAN
dealer for details concerning the particular ac-
cessories with which your vehicle is equipped.
Before driving your vehicle, please read this
Owner’s Manual carefully. This will ensure famil-
iarity with controls and maintenance require-
ments, assisting you in the safe operation of your
vehicle.
Page 19 of 489

1 Safety—Seats, seat belts and
supplemental restraint system
Seats ............................................1-2
Front manual seat adjustment
(if so equipped for passenger’s seat) .............1-2
Front power seat adjustment
(for driver’s seat and if so equipped for
passenger’s seat) ..............................1-4
2nd row captain’s chair adjustment
(if so equipped) ................................1-5
2nd row bench seat adjustment
(if so equipped) ................................1-6
Armrests ......................................1-8
Head restraints (1st row only) ....................1-8
Head restraints (2nd row – outboard
positions only) ................................ 1-12
Adjustable headrest ........................... 1-14
Flexible seating ................................ 1-17
3rd row power folding seats (if so equipped) .....1-23
Seat belts ....................................... 1-25
Precautions on seat belt usage ..................1-25
Pregnant women .............................. 1-28
Injured persons ................................ 1-28
Three-point type seat belt with retractor ..........1-28
Seat belt extenders ............................ 1-34Seat belt maintenance
......................... 1-34
Child safety ...................................... 1-35
Infants ........................................ 1-35
Small children ................................. 1-35
Larger children ................................ 1-36
Child restraints ................................... 1-36
Precautions on child restraints ..................1-36
LATCH (Lower Anchors and Tethers for
CHildren) System ............................. 1-38
Rear-facing child restraint installation using
LATCH....................................... 1-42
Rear-facing child restraint installation using
the seat belts . . ............................... 1-44
Forward-facing child restraint installation
using LATCH. . . ............................... 1-47
Forward-facing child restraint installation
using the seat belts ............................ 1-49
Installing top tether strap (2nd row captain’s
chairs or 2nd row bench seat
[if so equipped] ) .............................. 1-52
Installing top tether strap
(3rd row bench seat) ........................... 1-53
Booster seats ................................. 1-54
Page 101 of 489

CAUTION
●This gauge is not designed to indicate
low engine oil level. Use the dipstick to
check the oil level. (See “Engine oil” in
the “Maintenance and do-it-yourself”
section.)
● If the gauge needle does not move with
the proper amount of engine oil, have
the vehicle checked by a NISSAN
dealer. Continued vehicle operation in
such a condition could cause serious
damage to the engine.
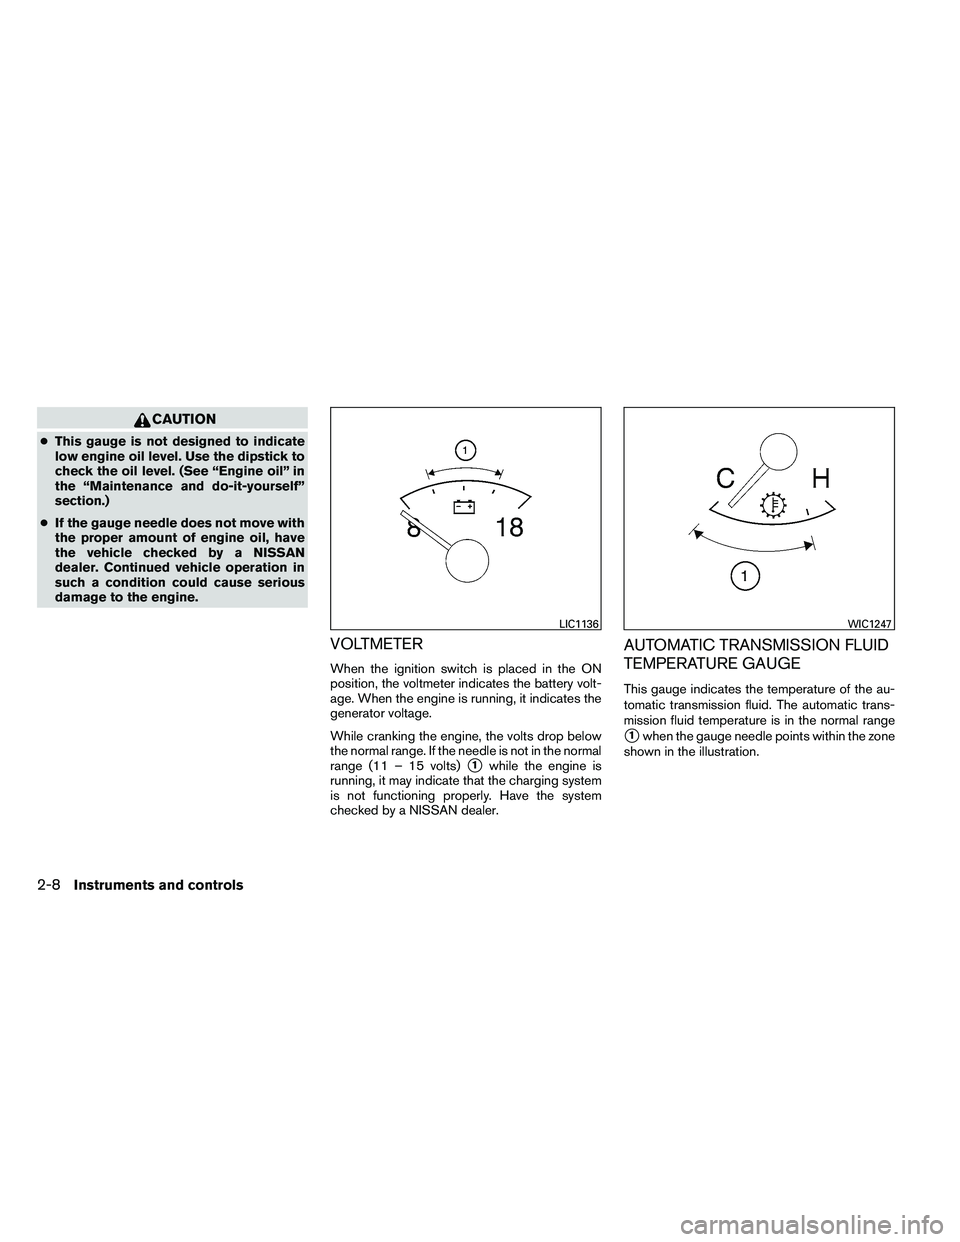
VOLTMETER
When the ignition switch is placed in the ON
position, the voltmeter indicates the battery volt-
age. When the engine is running, it indicates the
generator voltage.
While cranking the engine, the volts drop below
the normal range. If the needle is not in the normal
range (11 – 15 volts)
�1while the engine is
running, it may indicate that the charging system
is not functioning properly. Have the system
checked by a NISSAN dealer.
AUTOMATIC TRANSMISSION FLUID
TEMPERATURE GAUGE
This gauge indicates the temperature of the au-
tomatic transmission fluid. The automatic trans-
mission fluid temperature is in the normal range
�1when the gauge needle points within the zone
shown in the illustration.
Page 102 of 489
CAUTION
●This gauge is not designed to indicate
low automatic transmission fluid level.
Use the dipstick to check the fluid level.
(See “5-speed automatic transmission
fluid” in the “Maintenance and do-it-
yourself” section.)
● If the gauge indicates automatic trans-
mission fluid temperature over the nor-
mal range, stop the vehicle as soon as
safely possible. Have the vehicle
checked by a NISSAN dealer. Contin-
ued operation of the vehicle may seri-
ously damage the transmission. This unit measures terrestrial magnetism and in-
dicates the heading direction of the vehicle.
With the ignition switch in the ON position, press
the
Page 109 of 489
If the light flickers or comes on during normal
driving, pull off the road in a safe area, stop the
engine and allow it to cool. If the light remains on
after checking the oil and coolant, stop the en-
gineimmediately and call a NISSAN dealer or
other authorized repair shop.
This light is not designed to indicate a low
oil or low coolant level. Check the oil level
with the dipstick and check the coolant level on
the reservoir. See “Engine oil” and “Checking
engine coolant level” in the “Maintenance and
do-it-yourself” section of this manual. Also see “If
your vehicle overheats” in the “In case of emer-
gency” section of this manual.
Page 118 of 489
Cruise main switch indicator
This indicator illuminates when the cruise control
main switch is pushed. The indicator turns off
when the main switch is pushed again. When the
cruise main switch indicator illuminates, the
cruise control system is operational.
Cruise set switch indicator light
The light comes on while the vehicle speed is
controlled by the cruise control system. If the light
blinks while the engine is running, it may indicate
the cruise control system is not functioning prop-
erly. Have the system checked by a NISSAN
dealer.
NISSAN Intelligent Key™ battery dis-
charge indicator (NISSAN Intelligent Key™
model)
This indicator illuminates when the Intelligent Key
battery is running out of power.
If this indicator illuminates, replace the battery
with a new one. See “Battery replacement” in the
“Maintenance and do-it-yourself” section.
Transfer 4LO position indicator (
Page 202 of 489
Resetting the trip computer
Each item in the trip computer can be reset to 0.
Select the “Reset” key on the item that needs to
be reset using the NISSAN controller and press
the ENTER button.
To reset all of the items in the trip computer select
the “Reset ALL” key and press the ENTER button.
A confirmation screen will appear. Select the
“Yes” key and press the ENTER button.
Maintenance items
Press the INFO button and select the “Mainte-
nance” key using the NISSAN controller; the
maintenance information will be displayed on the
screen.Changing the maintenance interval
Select one of the “Reminder (1 – 4)” keys using
the NISSAN controller and press the ENTER
button to display the screen to change the main-
tenance interval.
Select the “Interval” key using the NISSAN con-
troller and press the ENTER button. Use the
NISSAN controller to change the maintenance
interval. To accept the changes, press the BACK
button.
Page 203 of 489

Resetting the maintenance interval
To reset the reminder schedule (distance) to 0 mi
(km) , select the “Reset Distance” key using the
NISSAN controller.Displaying the maintenance notice re-
minder
Select the “Interval Reminder ON” key to display
the MAINTENANCE INFORMATION automati-
cally at the set maintenance interval. The indica-
tor light will illuminate when it is ON.
The MAINTENANCE NOTICE screen will be au-
tomatically displayed as shown when both of the
following conditions are met:● The vehicle is driven the set distance and the
ignition switch is placed in the OFF position.
● The ignition switch is placed in the ON po-
sition the next time the vehicle will be driven. To return to the previous display after the MAIN-
TENANCE NOTICE screen is displayed, press
the BACK button.
The MAINTENANCE NOTICE screen displays
each time the key is turned ON until one of the
following conditions are met:
● The “Reset” key is selected.
● The “Interval Reminder ON” key is set to
OFF (indicator light not illuminated) .
● The maintenance interval is set again.