Page 214 of 489

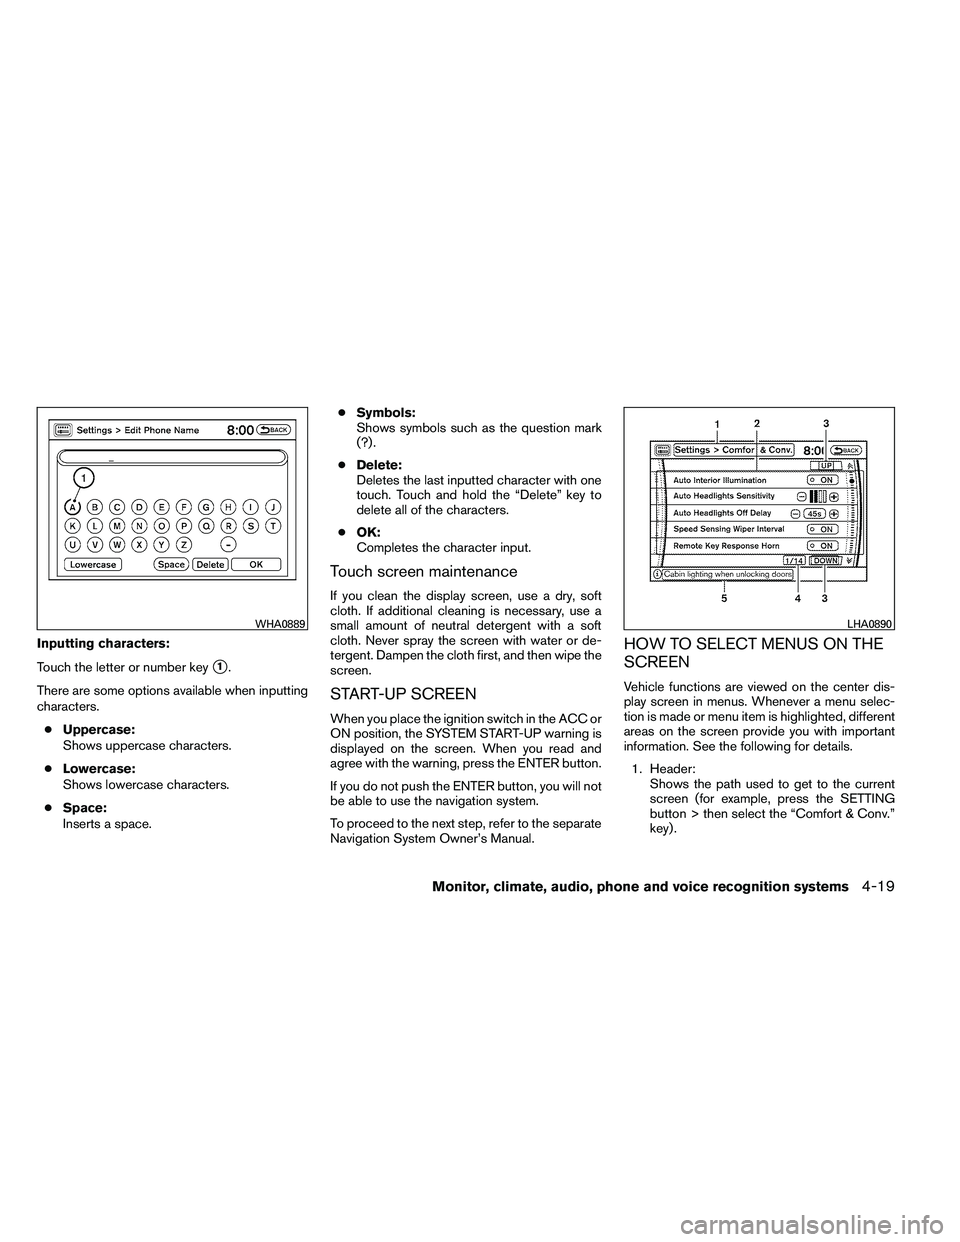
Inputting characters:
Touch the letter or number key
�1.
There are some options available when inputting
characters. ● Uppercase:
Shows uppercase characters.
● Lowercase:
Shows lowercase characters.
● Space:
Inserts a space. ●
Symbols:
Shows symbols such as the question mark
(?) .
● Delete:
Deletes the last inputted character with one
touch. Touch and hold the “Delete” key to
delete all of the characters.
● OK:
Completes the character input.
Touch screen maintenance
If you clean the display screen, use a dry, soft
cloth. If additional cleaning is necessary, use a
small amount of neutral detergent with a soft
cloth. Never spray the screen with water or de-
tergent. Dampen the cloth first, and then wipe the
screen.
START-UP SCREEN
When you place the ignition switch in the ACC or
ON position, the SYSTEM START-UP warning is
displayed on the screen. When you read and
agree with the warning, press the ENTER button.
If you do not push the ENTER button, you will not
be able to use the navigation system.
To proceed to the next step, refer to the separate
Navigation System Owner’s Manual.
HOW TO SELECT MENUS ON THE
SCREEN
Vehicle functions are viewed on the center dis-
play screen in menus. Whenever a menu selec-
tion is made or menu item is highlighted, different
areas on the screen provide you with important
information. See the following for details.
1. Header: Shows the path used to get to the current
screen (for example, press the SETTING
button > then select the “Comfort & Conv.”
key) .
Page 218 of 489
Resetting the trip computer
Each item in the trip computer can be reset to 0.
Select the “Reset” key on the item that needs to
be reset using the NISSAN controller and press
the ENTER button.
To reset all of the items in the trip computer select
the “Reset ALL” key and press the ENTER button.
A confirmation screen will appear; select the
“Yes” key and press the ENTER button.
Maintenance items
Press the INFO button and select the “Mainte-
nance” key using the NISSAN controller; the
maintenance information will be displayed on the
screen.Changing the maintenance interval
Select one of the “Reminder (1 – 4)” keys using
the NISSAN controller and press the ENTER
button to display the screen to change the main-
tenance interval.
Select the “Interval” key using the NISSAN con-
troller and press the ENTER button. Use the
NISSAN controller to change the maintenance
interval. To accept the changes, press the BACK
button.
Page 219 of 489

Resetting the maintenance interval
To reset the reminder schedule (distance) to 0 mi
(km) , select the “Reset Distance” key using the
NISSAN controller.Displaying the maintenance notice re-
minder
Select the “Interval Reminder ON” key to display
the MAINTENANCE INFORMATION automati-
cally at the set maintenance interval. The indica-
tor light will illuminate when it is ON.
The MAINTENANCE NOTICE screen will be au-
tomatically displayed as shown when both of the
following conditions are met:● The vehicle is driven the set distance and the
ignition switch is placed in the OFF position.
● The ignition switch is placed in the ON po-
sition the next time the vehicle will be driven. To return to the previous display after the MAIN-
TENANCE NOTICE screen is displayed, press
the BACK button.
The MAINTENANCE NOTICE screen displays
each time the key is turned ON until one of the
following conditions are met:
● The “Reset” key is selected.
● The “Interval Reminder ON” key is set to
OFF (indicator light not illuminated) .
● The maintenance interval is set again.
Page 266 of 489
●Title Text Priority:
Set the priority to CDDB (Compact Disc
Data Base) to acquire track information from
the Gracenote� Database or set to CD
TEXT to acquire the information from CDs.
● Delete ALL Music Box Data:
Delete all music data stored on the hard-
disk.
Gracenote�
NOTE:
● The information contained in the
Gracenote� Database is not fully guaran-
teed.
● The service of the Gracenote� Database on
the Internet may be stopped without prior
notice for maintenance.
Page 283 of 489

MENU:
If the media is in PLAY mode and the MENU
button is pressed, the DVD menu will appear on
the screen. Use the Navigation Keys to navigate
within the menu and use ENTER to select the
item.
Press the MENU button again to return to PLAY
mode.
TITLE:
Press the TITLE button to return the DVD media
to the “title” of the DVD.
Press the TITLE button again to return to the
previous stop point and play.
BACK:
Press the BACK button to exit the current active
menu and return to the previous menu.
SUBTITLE:
Press the SUBTITLE button to call up subtitle
selection menu.
Repeatedly press the SUBTITLE button to cycle
through each available subtitle.
AUDIO:
Press the AUDIO button to call up the audio
menu.Repeatedly press the AUDIO button to cycle
through each available audio track.
ANGLE:
Press the ANGLE button to call up the camera
angle menu.
Repeatedly press the ANGLE button to cycle
through each available angle.
CLEAR:
Press the CLEAR button to clear all numeric
inputs, if actuated prior to expiration of the
3-second timer.
NUMERIC KEYPAD (0–9 &
≥10):
Press the NUMERIC KEYPAD to directly access
disc chapters, titles or tracks by inputting their
numeric value.
Use the “≥10” button to input numbers greater
than or equal to 10. Up to 3 digits can be inputted
when selecting the chapter/title/track number.
The subsequent actuation of numeric buttons will
continuously shift the previously input number to
the “left”.
The chapter/title/track number will be automati-
cally selected (if valid, based on media content) if
3 seconds expire without any keypad inputs. The operator can cancel the input
chapter/title/track number by actuating the
CLEAR control prior to the expiration of the
3-second timer.
These functions can be used only for the DVD
discs which correspond to them.
CARE AND MAINTENANCE
Use a lightly dampened, lint free cloth to clean the
surfaces of your NISSAN Mobile Entertainment
System (DVD player face, screen, remote control,
etc.) .
Do not attempt to use the system in extreme
temperature conditions [below -4°F (-20°C) or
above 158°F (70°C)].
Do not attempt to operate the system in extreme
humidity conditions (less than 10% or more than
75%) .
Page 287 of 489
CAUTION
●Keep the antenna as far away as pos-
sible from the electronic control
modules.
● Keep the antenna wire more than 8 in
(20 cm) away from the electronic con-
trol system harnesses. Do not route the
antenna wire next to any harness.
● Adjust the antenna standing-wave ratio
as recommended by the manufacturer.
● Connect the ground wire from the CB
radio chassis to the body.
● For details, consult a NISSAN dealer.
● Do not ground electrical accessories
directly to the battery terminal. Doing
so will bypass the variable voltage con-
trol system and the vehicle battery may
not charge completely. Refer to “Vari-
able voltage control system” in the
“Maintenance and do-it-yourself” sec-
tion later in this manual.
● Use electrical accessories with the en-
gine running to avoid discharging the
vehicle battery.
Page 344 of 489
tires” in the “Maintenance and do-it-yourself”
section of this manual. If a tire rapidly loses air
pressure or “blows-out” while driving, maintain
control of the vehicle by following the procedure
below. Please note that this procedure is only a
general guide. The vehicle must be driven as
appropriate based on the conditions of the ve-
hicle, road and traffic.
Page 346 of 489
●If at all possible, avoid sharp turning
maneuvers, particularly at high speeds.
Your NISSAN four-wheel drive vehicle
has a higher center of gravity than a
passenger car. The vehicle is not de-
signed for cornering at the same
speeds as passenger cars.
● Always use tires of the same type, size,
brand, construction (bias, bias-belted,
or radial) , and tread pattern on all four
wheels. Install tire chains on the rear
wheels when driving on slippery roads
and drive carefully.
● Be sure to check the brakes immedi-
ately after driving in mud or water. See
“Brake system” later in this section for
“Wet brakes”.
● Avoid parking your vehicle on steep
hills. If you get out of the vehicle and it
rolls forward, backward or sideways,
you could be injured.
● Whenever you drive off-road through
sand, mud or water as deep as the
wheel hub, more frequent maintenance
may be required. See “Periodic mainte-
nance” in the “NISSAN Service and
Maintenance Guide.”