Page 135 of 489
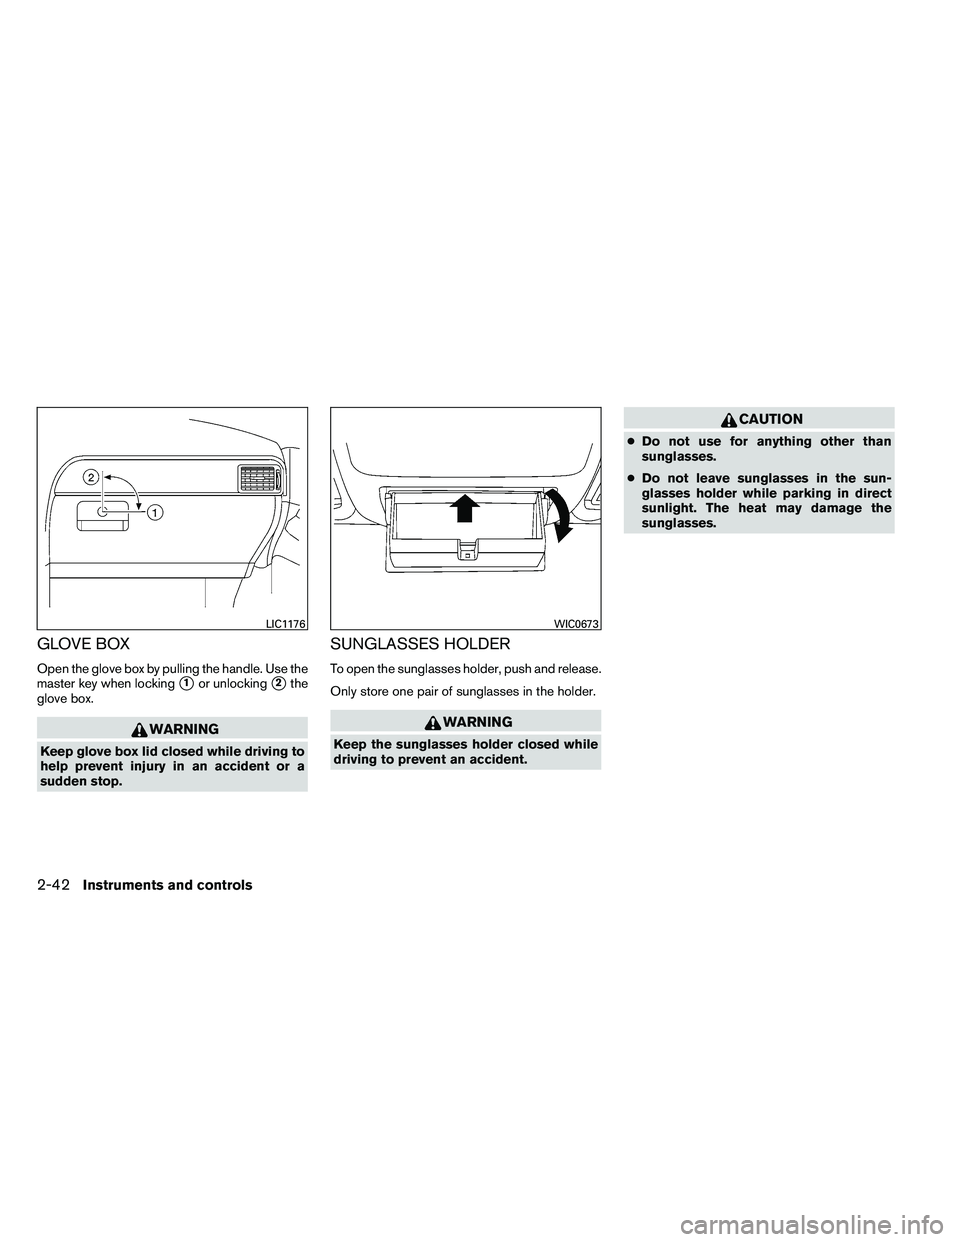
GLOVE BOX
Open the glove box by pulling the handle. Use the
master key when locking
�1or unlocking�2the
glove box.
Page 140 of 489
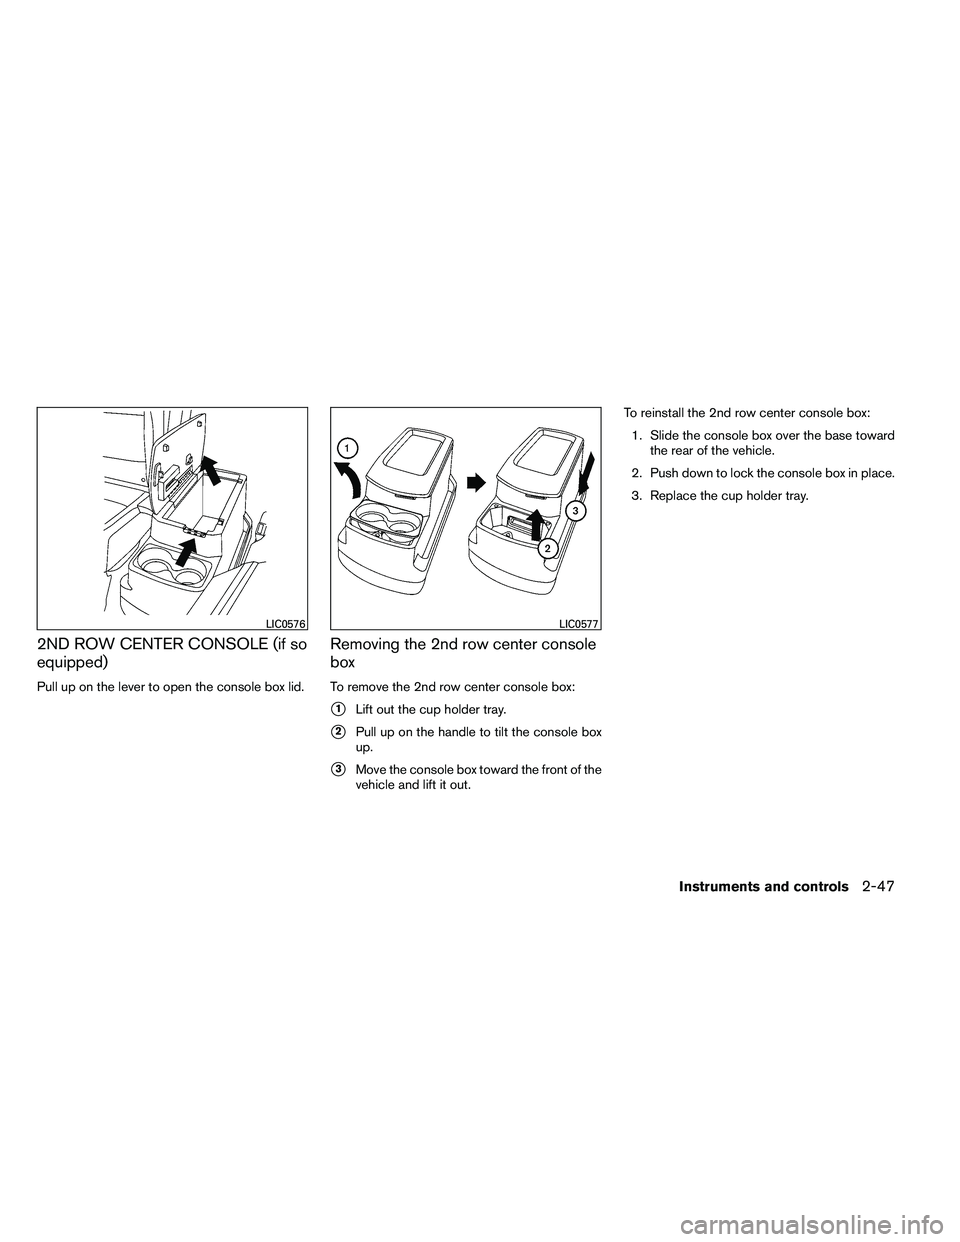
2ND ROW CENTER CONSOLE (if so
equipped)
Pull up on the lever to open the console box lid.
Removing the 2nd row center console
box
To remove the 2nd row center console box:
�1Lift out the cup holder tray.
�2Pull up on the handle to tilt the console box
up.
�3Move the console box toward the front of the
vehicle and lift it out. To reinstall the 2nd row center console box:
1. Slide the console box over the base toward the rear of the vehicle.
2. Push down to lock the console box in place.
3. Replace the cup holder tray.
Page 145 of 489
1. Window lock button
2. Power door lock switch
3. Front passenger side automatic switch
4. Right rear passenger window switch
5. Left rear passenger window switch
6. Driver side automatic switch
Driver’s side power window switch
The driver’s side control panel is equipped with
switches to open or close the front and rear
passenger windows.
To open a window, push the switch and hold it
down. To close a window, pull the switch and
hold it up. To stop the opening or closing function
at any time, simply release the switch.
Front passenger’s power window
switch
The passenger’s window switch operates only
the corresponding passenger’s window. To open
the window, push the switch and hold it down
�1.
To close the window, pull the switch up
�2.
Page 146 of 489

Rear power window switch
The rear power window switches open or close
only the corresponding windows. To open the
window, push the switch and hold it down
�1.To
close the window, pull the switch up
�2.
Locking passengers’ windows
When the window lock button is depressed, only
the driver’s side window can be opened or
closed. Push it again to cancel the window lock
function.
Automatic operation
To fully open a window equipped with automatic
operation, press the window switch down (only
driver’s side shown) to the second detent and
release it; it need not be held. The window auto-
matically opens all the way. To stop the window,
lift the switch up while the window is opening.
To fully close a window equipped with automatic
operation, pull the switch up to the second detent
and release it; it need not be held. To stop the
window, press the switch down while the window
is closing.
Auto-reverse function
The auto-reverse function can be activated when
a window is closed by automatic operation.
Depending on the environment or driving
conditions, the auto-reverse function may
be activated if an impact or load similar to
something being caught in the window oc-
curs.
Page 147 of 489
POWER VENT WINDOWS (if so
equipped)
Use the vent window switch located on the driv-
er’s side of the instrument panel to open and
close the power vent windows. The windows
cannot be operated separately.
To open the power vent windows press and hold
the switch.
To close the windows pull up and hold the switch.The power vent windows operate when the igni-
tion switch is placed in the ON position, or for a
period of time after the ignition switch is placed in
the OFF position. If the driver’s or passenger’s
door is opened during this period of time, the
power to the vent windows is cancelled.
MANUAL VENT WINDOWS (if so
equipped)
To open a manual vent window, pull the latch
handle toward you until it releases.
To lock the window in the open position, push the
latch handle rearward until it locks.
To close a manual vent window, pull the latch
handle toward you and push the rear portion of
the latch toward the rear of the vehicle until it
locks.
Page 150 of 489

●The driver’s door is opened and then closed
while the key is removed from the ignition
switch.
● The key is removed from the ignition switch
while all doors are closed.
The lights will turn off while the timer is activated
when: ● The driver’s door is locked by the keyfob, a
key, or the power door lock switch.
● The ignition switch is placed in the ON po-
sition.
When the switch is in the OFF position
�3, the
interior lights do not illuminate, regardless of door
position. The puddle lights (if so equipped) come
on when any front or rear passenger door is
opened.
The lights will turn off automatically after a period
of time while doors are open to prevent the bat-
tery from becoming discharged. NOTE:
The footwell lights (if so equipped) and
door step lights illuminate when the driver
and passenger doors are open regardless
of the interior light switch position. These
lights will turn off automatically after a
period of time while doors are open to
prevent the battery from becoming dis-
charged.
Page 152 of 489
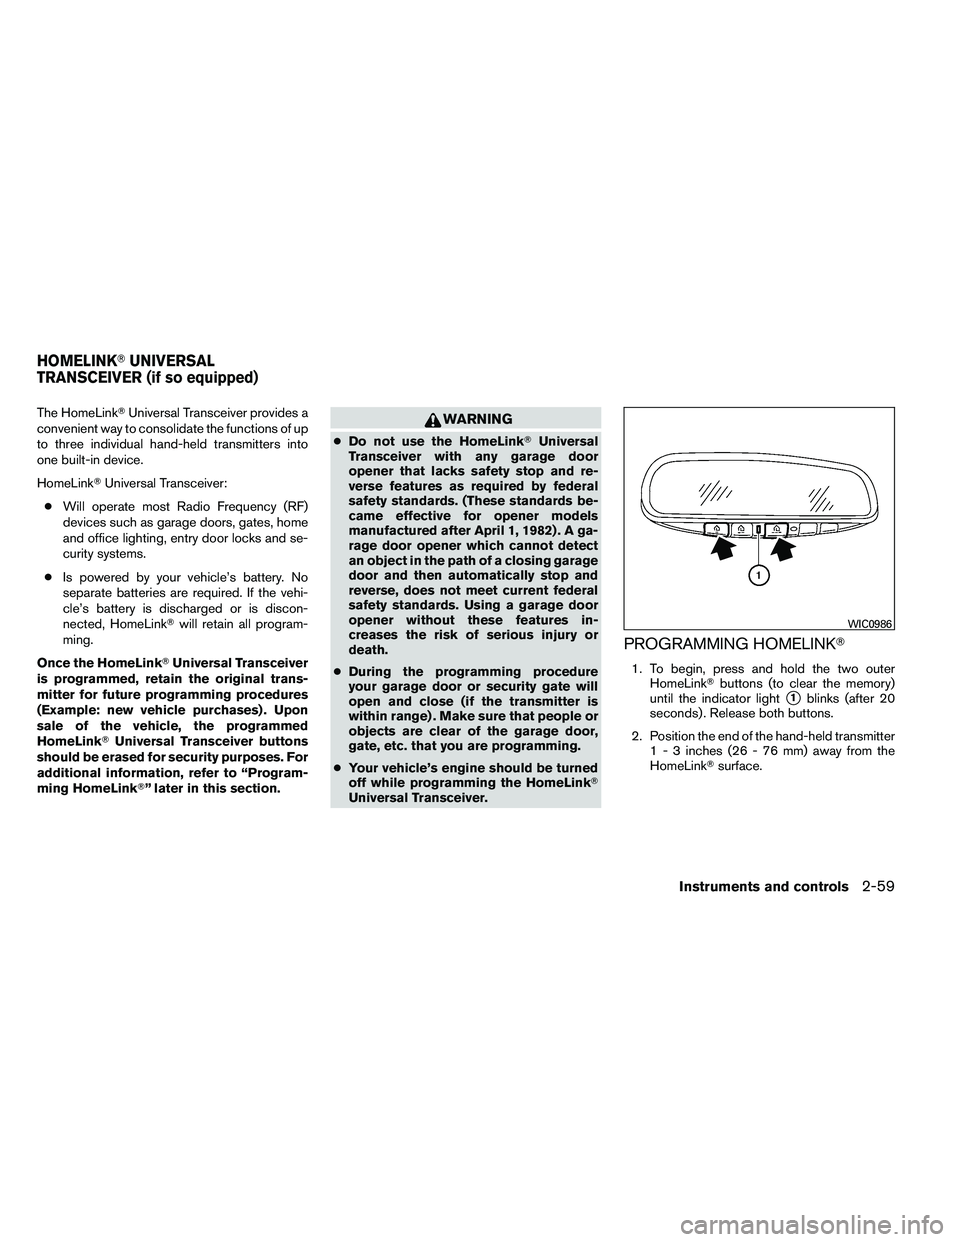
The HomeLink�Universal Transceiver provides a
convenient way to consolidate the functions of up
to three individual hand-held transmitters into
one built-in device.
HomeLink� Universal Transceiver:
● Will operate most Radio Frequency (RF)
devices such as garage doors, gates, home
and office lighting, entry door locks and se-
curity systems.
● Is powered by your vehicle’s battery. No
separate batteries are required. If the vehi-
cle’s battery is discharged or is discon-
nected, HomeLink� will retain all program-
ming.
Once the HomeLink� Universal Transceiver
is programmed, retain the original trans-
mitter for future programming procedures
(Example: new vehicle purchases) . Upon
sale of the vehicle, the programmed
HomeLink� Universal Transceiver buttons
should be erased for security purposes. For
additional information, refer to “Program-
ming HomeLink�” later in this section.
Page 159 of 489

CAUTION
Always carry the mechanical key installed
in the Intelligent Key slot.
See “Doors” in this section and “Storage” in the
“Instruments and controls” section of this manual.
Valet hand-off
When you have to leave a key with a valet, give
them the Intelligent Key itself and keep the me-
chanical key with you to protect your belongings.
To prevent the glove box or console box from
being opened during valet hand-off, follow the
procedure below. 1. Remove the mechanical key from the Intelli- gent Key.
2. Lock the glove box or console box with the mechanical key.
3. Hand the Intelligent Key to the valet and keep the mechanical key with you.
See “Storage” in the “Instruments and controls”
section of this manual.
NISSAN VEHICLE IMMOBILIZER
SYSTEM KEYS
You can only drive your vehicle using the master
or valet keys which are registered to the NISSAN
Vehicle Immobilizer System components in your
vehicle. These keys have a transponder chip in
the key head.
The master key can be used for all the locks.
The valet key cannot be used for the console box
lock.
To protect belongings when you leave a key with
someone, give them the valet key only.
Never leave these keys in the vehicle.
Additional or replacement keys:
If you still have a key, the key number is not
necessary when you need extra NISSAN Vehicle
Immobilizer System keys. Your dealer can dupli-
cate your existing key. As many as five NISSAN
Vehicle Immobilizer System keys can be used
with one vehicle. You should bring all NISSAN
Vehicle Immobilizer System keys that you have to
your NISSAN dealer for registration. This is be-
cause the registration process will erase the
memory of all key codes previously registered
into the NISSAN Vehicle Immobilizer System.
After the registration process, these components
will only recognize keys coded into the NISSAN Vehicle Immobilizer System during registration.
Any key that is not given to your dealer at the time
of registration will no longer be able to start your
vehicle.
Do not allow the immobilizer system key, which
contains an electrical transponder, to come into
contact with salt water. This could affect system
function.
3-4Pre-driving checks and adjustments


Use the vent window switch located on the driv-
er’s side of the instrument panel to open and
close the power vent windows. The windows
cannot be operated separat")