Page 110 of 489

The low tire pressure warning light warns of low
tire pressure or indicates that the TPMS is not
functioning properly.
After the ignition switch is placed in the ON
position, this light illuminates for about 1 second
and turns off.
Low tire pressure warning:
If the vehicle is being driven with low tire
pressure, the warning light will illuminate.
A CHECK TIRE PRESSURE warning also
appears in the vehicle information display.
If you select the tire pressure information
in the display (if so equipped) , the LOW
PRESSURE warning message will be dis-
played. The tire pressure for each tire will
also be displayed.
When the low tire pressure warning light
illuminates, you should stop and adjust the
tire pressure of all 4 tires to the recom-
mended COLD tire pressure shown on the
Tire and Loading Information label located
in the driver’s door opening. The low tire
pressure warning light does not automati-
cally turn off when the tire pressure is ad-
justed. After the tire is inflated to the rec-
ommended pressure, the vehicle must be
driven at speeds above 16 MPH (25 km/h)
to activate the TPMS and turn off the lowtire pressure warning light. Use a tire pres-
sure gauge to check the tire pressure.
The CHECK TIRE PRESSURE warning is active
as long as the low tire pressure warning light
remains illuminated.
For additional information, see “Vehicle informa-
tion display” in the “Instruments and controls”
section and “Tire Pressure Monitoring System
(TPMS)” in the “Starting and driving” section and
in the “In case of emergency” section.
TPMS malfunction:
If the TPMS is not functioning properly, the low
tire pressure warning light will flash for approxi-
mately 1 minute when the ignition switch is
placed in the ON position. The light will remain on
after the 1 minute. Have the system checked by a
NISSAN dealer. The CHECK TIRE PRESSURE
warning does not appear if the low tire pressure
warning light illuminates to indicate a TPMS mal-
function.
For additional information, see “Tire Pressure
Monitoring System (TPMS)” in the “Starting and
driving” section and “Tire pressure” in the “Main-
tenance and do-it-yourself” section in this
manual.
Page 111 of 489
●When a spare tire is mounted or a wheel
is replaced, tire pressure will not be
indicated, the TPMS will not function
and the low tire pressure warning light
will flash for approximately 1 minute.
The light will remain on after 1 minute.
Contact your NISSAN dealer as soon as
possible for tire replacement and/or
system resetting.
● Replacing tires with those not originally
specified by NISSAN could affect the
proper operation of the TPMS.
Page 112 of 489
WARNING
If the supplemental air bag warning light
is on, it could mean that the front air bag,
side air bag, curtain air bag systems
and/or pretensioner systems will not op-
erate in an accident. To help avoid injury
to yourself or others, have your vehicle
checked by a NISSAN dealer as soon as
possible.
INDICATOR LIGHTS
For additional information on warnings and indi-
cators, see “Vehicle information display” later in
this section.
Page 114 of 489
Light reminder chime
With the ignition switch placed in the OFF posi-
tion, a chime sounds when the driver’s door is
opened if the headlights or parking lights are on.
Turn the headlight control switch off before leav-
ing the vehicle.The vehicle information display
�1is located to
the left of the speedometer. It displays such items
as:
● automatic transmission position indicator
● cruise control system information
● Intelligent Key operation information (if so
equipped)
● some indicators and warnings
● other information
For details about the Intelligent Key, see
“NISSAN Intelligent Key™” in the “Pre-driving
checks and adjustments” section.HOW TO USE THE VEHICLE
INFORMATION DISPLAY
Press the vehicle information display INFO but-
ton
�1located on the instrument panel to toggle
through the following modes.
MPG →Range →Warning
Rotate the INFO button
�2to highlight the de-
sired menu option within the selected mode.
Press the INFO button
�1to enter the high-
lighted menu.
Page 131 of 489

WARNING
●The front sonar system is a convenience
but it is not a substitute for proper
driving.
● The rear sonar system is a convenience
but it is not a substitute for proper back-
ing. Always turn and check that it is safe
to do so before backing up. Always
back up slowly. The front sonar system:
● is active when the ignition is in the ON
position and the shift selector is in a forward
gear position.
● a beeping tone is emitted when the sensors
detect obstacles within 3 ft (1.0 m) of the
front bumper.
The rear sonar system: ● is active when the ignition is in the ON
position and the shift selector is in R (Re-
verse) .
● a beeping tone is emitted when the sensors
detect obstacles within 5.9 ft (1.8 m) of the
rear bumper.
The front and rear sonar system can be disabled
by pushing the OFF switch. When the system is
disabled, the indicator light on the switch will
illuminate. Push the switch again to enable the
system. The indicator light will go off.
The system will automatically reset the next time
the ignition switch is placed in the ON position.
See “Front sonar system” in the “Starting and
driving” section. Tow mode should be used when pulling a heavy
trailer or hauling a heavy load. Driving the vehicle
in the tow mode with no trailer/load or light
trailer/light load will not cause any damage. How-
ever, fuel economy may be reduced, and the
transmission/engine driving characteristics may
feel unusual.
Press the tow mode switch to activate tow mode.
The indicator light on the tow mode switch illumi-
nates when tow mode is selected. Press the tow
mode switch again to turn tow mode OFF.
Tow mode is automatically canceled when the
ignition switch is placed in the OFF position.
Page 167 of 489
WARNING
●Radio waves could adversely affect
electric medical equipment. Those who
use a pacemaker should contact the
electric medical equipment manufac-
turer for the possible influences before
use.
● The Intelligent Key transmits radio
waves when the buttons are pressed.
The FAA advises the radio waves may
affect aircraft navigation and communi-
cation systems. Do not operate the In-
telligent Key while on an airplane. Make
sure the buttons are not operated unin-
tentionally when the unit is stored for a
flight.
The Intelligent Key can operate all the door locks
using the remote controller function or pushing
the request switch on the vehicle without taking
the key out from a pocket or purse. The operating
environment and/or conditions may affect the
Intelligent Key operation.
Be sure to read the following before using the
Intelligent Key.
Page 170 of 489

●To prevent the Intelligent Key from being left
inside the vehicle, make sure you carry the
Intelligent Key with you and then lock the
doors.
● Do not pull the door handle before pushing
the door handle request switch. The door
will be unlocked but will not open. Release
the door handle once and pull it again to
open the door.
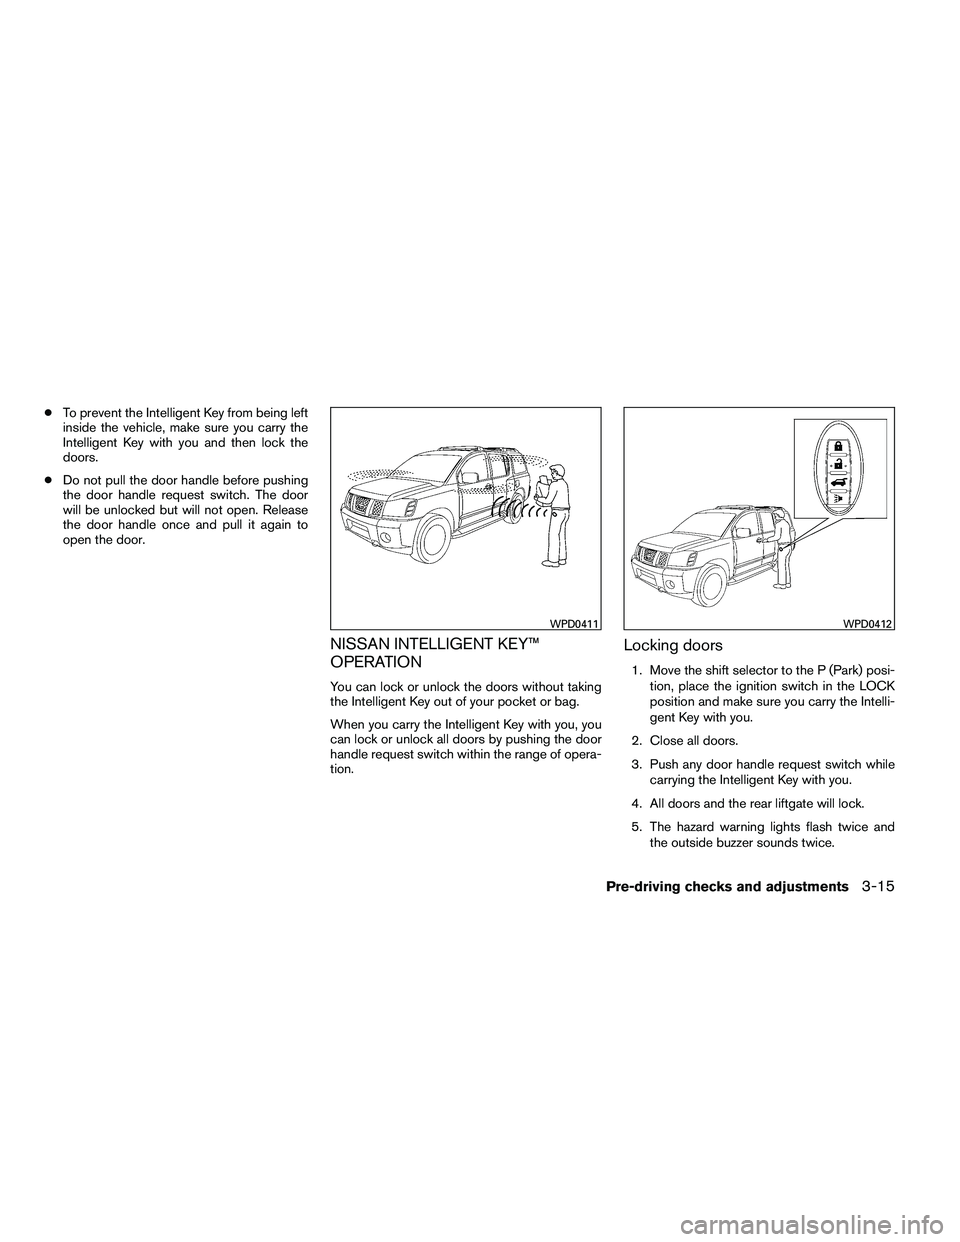
NISSAN INTELLIGENT KEY™
OPERATION
You can lock or unlock the doors without taking
the Intelligent Key out of your pocket or bag.
When you carry the Intelligent Key with you, you
can lock or unlock all doors by pushing the door
handle request switch within the range of opera-
tion.
Locking doors
1. Move the shift selector to the P (Park) posi-
tion, place the ignition switch in the LOCK
position and make sure you carry the Intelli-
gent Key with you.
2. Close all doors.
3. Push any door handle request switch while carrying the Intelligent Key with you.
4. All doors and the rear liftgate will lock.
5. The hazard warning lights flash twice and the outside buzzer sounds twice.
Page 172 of 489

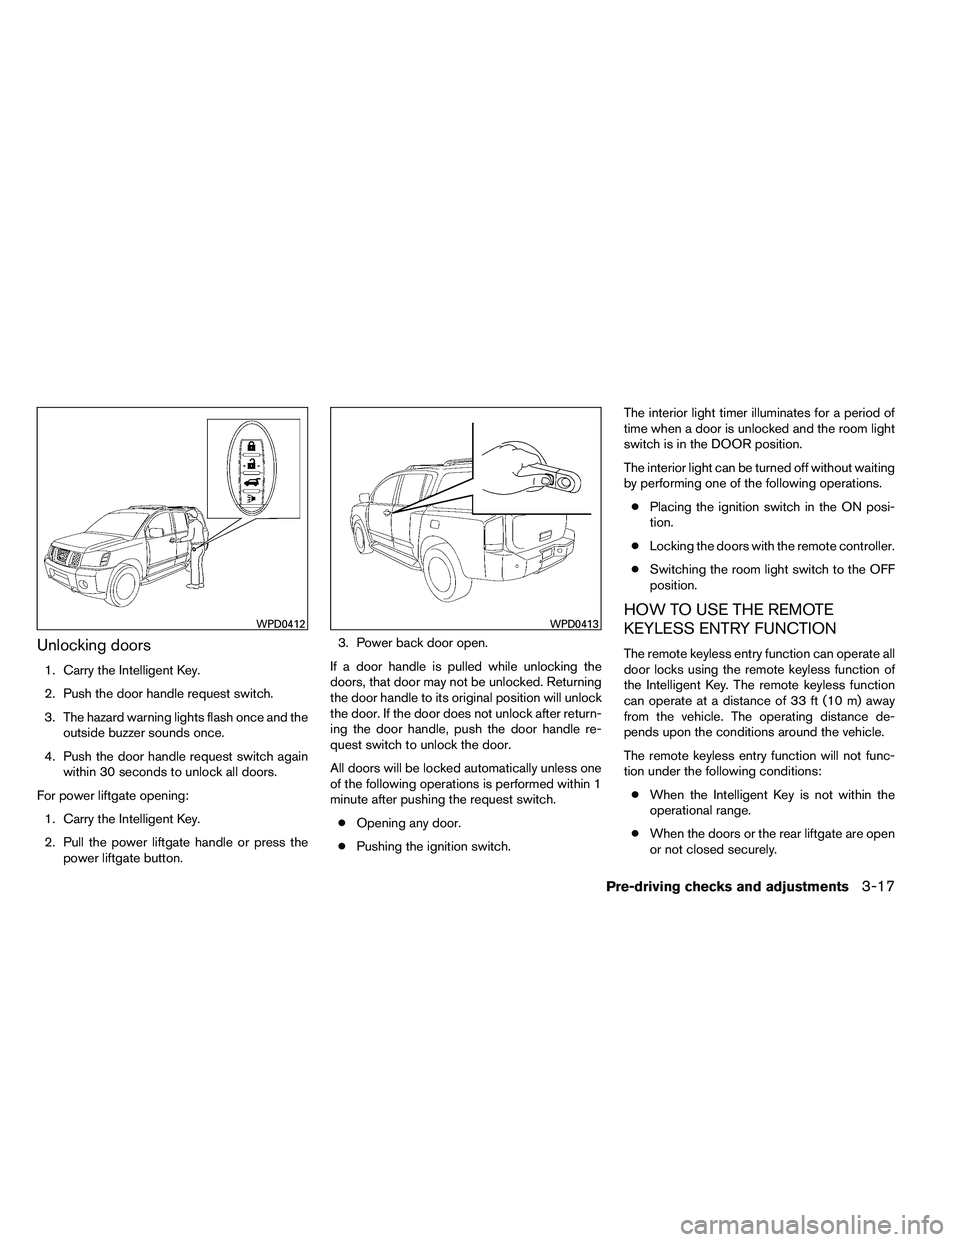
Unlocking doors
1. Carry the Intelligent Key.
2. Push the door handle request switch.
3. The hazard warning lights flash once and theoutside buzzer sounds once.
4. Push the door handle request switch again within 30 seconds to unlock all doors.
For power liftgate opening: 1. Carry the Intelligent Key.
2. Pull the power liftgate handle or press the power liftgate button. 3. Power back door open.
If a door handle is pulled while unlocking the
doors, that door may not be unlocked. Returning
the door handle to its original position will unlock
the door. If the door does not unlock after return-
ing the door handle, push the door handle re-
quest switch to unlock the door.
All doors will be locked automatically unless one
of the following operations is performed within 1
minute after pushing the request switch. ● Opening any door.
● Pushing the ignition switch. The interior light timer illuminates for a period of
time when a door is unlocked and the room light
switch is in the DOOR position.
The interior light can be turned off without waiting
by performing one of the following operations.
● Placing the ignition switch in the ON posi-
tion.
● Locking the doors with the remote controller.
● Switching the room light switch to the OFF
position.
HOW TO USE THE REMOTE
KEYLESS ENTRY FUNCTION
The remote keyless entry function can operate all
door locks using the remote keyless function of
the Intelligent Key. The remote keyless function
can operate at a distance of 33 ft (10 m) away
from the vehicle. The operating distance de-
pends upon the conditions around the vehicle.
The remote keyless entry function will not func-
tion under the following conditions:
● When the Intelligent Key is not within the
operational range.
● When the doors or the rear liftgate are open
or not closed securely.