Page 26 of 419

Black plate (22,1)
Model "Z34-D" EDITED: 2010/ 7/ 27
SSS0394
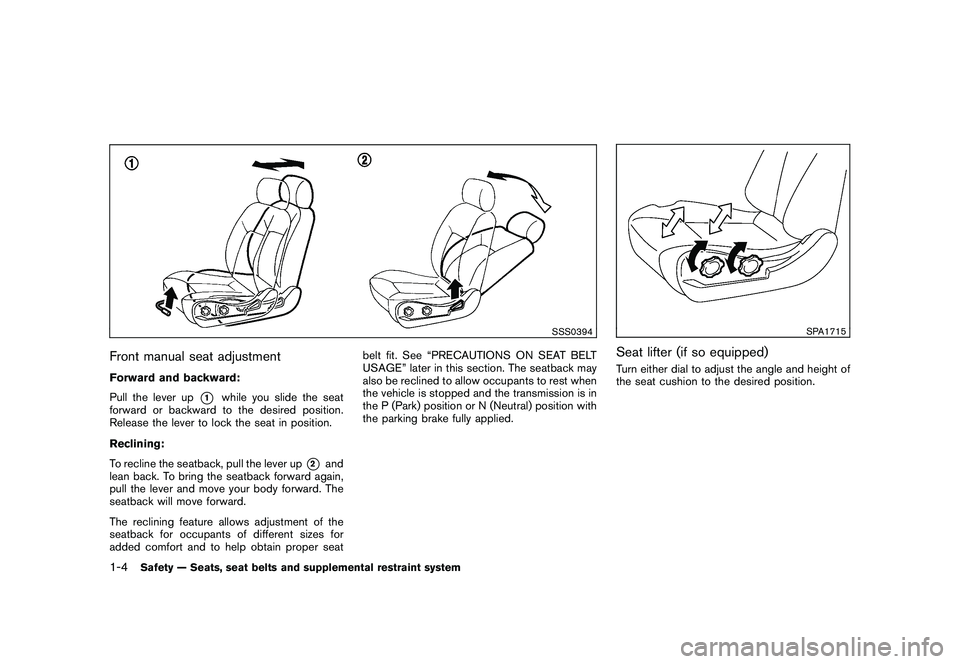
Front manual seat adjustmentForward and backward:
Pull the lever up
*1
while you slide the seat
forward or backward to the desired position.
Release the lever to lock the seat in position.
Reclining:
To recline the seatback, pull the lever up
*2
and
lean back. To bring the seatback forward again,
pull the lever and move your body forward. The
seatback will move forward.
The reclining feature allows adjustment of the
seatback for occupants of different sizes for
added comfort and to help obtain proper seat belt fit. See “PRECAUTIONS ON SEAT BELT
USAGE” later in this section. The seatback may
also be reclined to allow occupants to rest when
the vehicle is stopped and the transmission is in
the P (Park) position or N (Neutral) position with
the parking brake fully applied.
SPA1715
Seat lifter (if so equipped)Turn either dial to adjust the angle and height of
the seat cushion to the desired position.
1-4
Safety — Seats, seat belts and supplemental restraint system
Page 40 of 419

Black plate (36,1)
Model "Z34-D" EDITED: 2010/ 7/ 27
install a forward-facing child
restraint in the front seat, see
“FORWARD-FACING CHILD RE-
STRAINT INSTALLATION USING
THE SEAT BELTS (for Coupe
models)” later in this section.
— Even with the NISSAN Advanced Air Bag System, never install a
rear-facing child restraint in the
front seat. An inflating air bag
could seriously injure or kill a
child.
—Besuretopurchaseachild restraint that will fit the child
and vehicle. Some child re-
straints may not fit properly in
your vehicle.
— Child restraint anchor points are designed to withstand loads
from child restraints that are
properly fitted.
— Never use the anchor points for adult seat belts or harnesses.
— A child restraint with a top tether strap should not be used in the
front passenger seat.
— Keep seatbacks as upright as possible after fitting the child
restraint. — Infants and children should al-
ways be placed in an appropri-
ate child restraint while in the
vehicle.
CAUTION
A child restraint in a closed vehicle can
become very hot. Check the seating
surface and buckles before placing a
child in the child restraint.
In general, child restraints are designed to be
installed with the lap portion of a lap/shoulder
seat belt.
Several manufacturers offer child restraints for
children of various sizes. When selecting any
child restraint, keep the following points in mind:
. Choose only a restraint with a label certifying
that it complies with Federal Motor Vehicle
Safety Standard 213 or Canadian Motor
Vehicle Safety Standard 213.
. Check the child restraint in your vehicle to
be sure it is compatible with the vehicle’s
seat and seat belt system.
. If the child restraint is compatible with your
vehicle, place your child in the child restraint
and check the various adjustments to be sure the child restraint is compatible with
your child. Choose a child restraint that is
designed for your child’s height and weight.
Always follow all recommended procedures.
The passenger seat is not suitable for use with a
rear-facing child restraint for infants. Therefore,
infants should not be transported in this vehicle.
All U.S. states and Canadian provinces or
territories require that infants and small
children be restrained in an approved child
restraint at all times while the vehicle is
being operated. Canadian law requires the
top tether strap on front-facing child
restraints to be secured to the designated
anchor point on the vehicle.
TOP TETHER STRAP CHILD RE-
STRAINT (for Coupe models)If the manufacturer of your child restraint
requires the use of a top tether strap, it must
be secured to an anchor point.
WARNING
. If the cargo cover (if so equipped)
contacts the top tether strap when it
is attached to the top tether anchor,
remove the cargo cover from the
vehicle or secure it on the cargo
floor below its attachment location.
1-18
Safety — Seats, seat belts and supplemental restraint system
Page 151 of 419

Black plate (147,1)
Model "Z34-D" EDITED: 2010/ 7/ 27
SPA2447
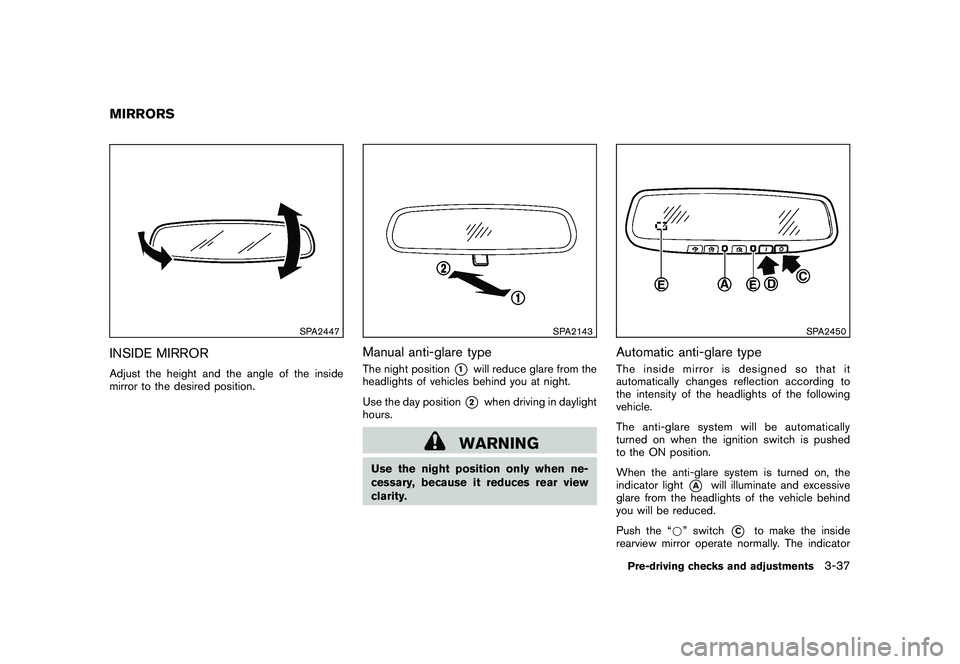
INSIDE MIRRORAdjust the height and the angle of the inside
mirror to the desired position.
SPA2143
Manual anti-glare typeThe night position
*1
will reduce glare from the
headlights of vehicles behind you at night.
Use the day position*2
when driving in daylight
hours.
WARNING
Use the night position only when ne-
cessary, because it reduces rear view
clarity.
SPA2450
Automatic anti-glare typeThe inside mirror is designed so that it
automatically changes reflection according to
the intensity of the headlights of the following
vehicle.
The anti-glare system will be automatically
turned on when the ignition switch is pushed
to the ON position.
When the anti-glare system is turned on, the
indicator light
*A
will illuminate and excessive
glare from the headlights of the vehicle behind
you will be reduced.
Push the “* ” switch
*C
to make the inside
rearview mirror operate normally. The indicator
MIRRORS
Pre-driving checks and adjustments
3-37