2011 NISSAN 370Z ROADSTER engine overheat
[x] Cancel search: engine overheatPage 68 of 419
Black plate (64,1)
Model "Z34-D" EDITED: 2010/ 7/ 27
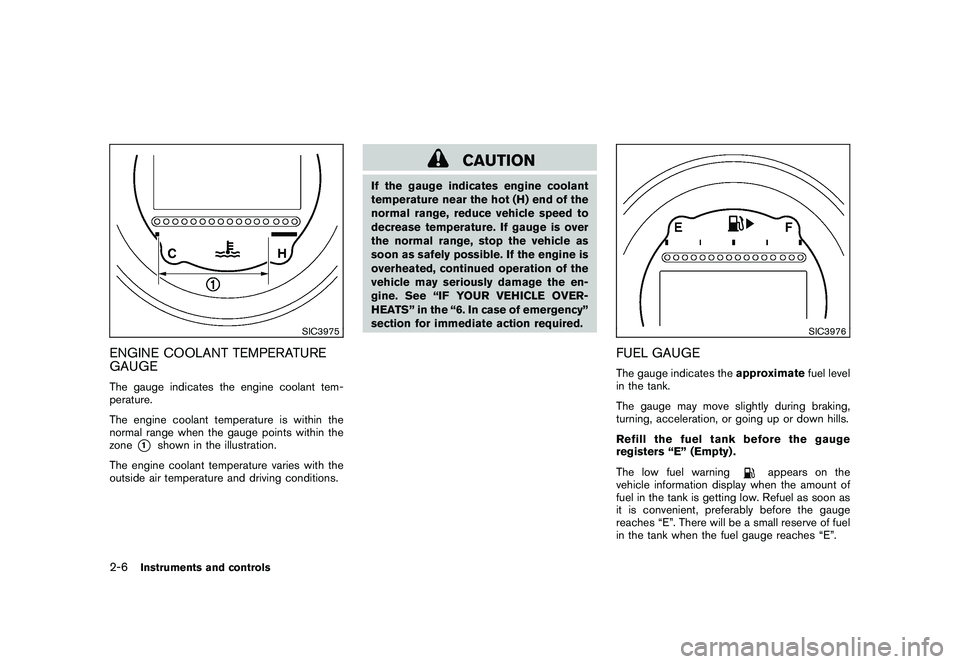
SIC3975
ENGINE COOLANT TEMPERATURE
GAUGEThe gauge indicates the engine coolant tem-
perature.
The engine coolant temperature is within the
normal range when the gauge points within the
zone
*1
shown in the illustration.
The engine coolant temperature varies with the
outside air temperature and driving conditions.
CAUTION
If the gauge indicates engine coolant
temperature near the hot (H) end of the
normal range, reduce vehicle speed to
decrease temperature. If gauge is over
the normal range, stop the vehicle as
soon as safely possible. If the engine is
overheated, continued operation of the
vehicle may seriously damage the en-
gine. See “IF YOUR VEHICLE OVER-
HEATS” in the “6. In case of emergency”
section for immediate action required.
SIC3976
FUEL GAUGEThe gauge indicates the approximatefuel level
in the tank.
The gauge may move slightly during braking,
turning, acceleration, or going up or down hills.
Refill the fuel tank before the gauge
registers “E” (Empty) .
The low fuel warning
appears on the
vehicle information display when the amount of
fuel in the tank is getting low. Refuel as soon as
it is convenient, preferably before the gauge
reaches “E”. There will be a small reserve of fuel
in the tank when the fuel gauge reaches “E”.
2-6
Instruments and controls
Page 96 of 419
Black plate (92,1)
Model "Z34-D" EDITED: 2010/ 7/ 27
.Turn signals do not work when the
hazard warning flasher lights are
on.
The flasher can be actuated with the ignition
switch in any position.
Some state laws may prohibit the use of
the hazard warning flasher switch while
driving.
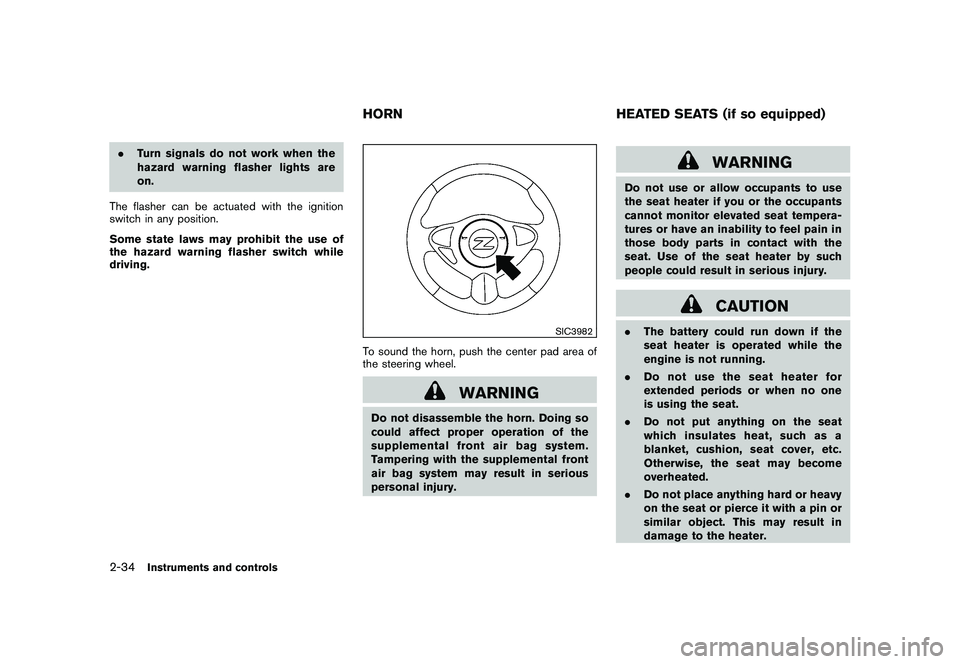
SIC3982
To sound the horn, push the center pad area of
the steering wheel.
WARNING
Do not disassemble the horn. Doing so
could affect proper operation of the
supplemental front air bag system.
Tampering with the supplemental front
air bag system may result in serious
personal injury.
WARNING
Do not use or allow occupants to use
the seat heater if you or the occupants
cannot monitor elevated seat tempera-
tures or have an inability to feel pain in
those body parts in contact with the
seat. Use of the seat heater by such
people could result in serious injury.
CAUTION
. The battery could run down if the
seat heater is operated while the
engine is not running.
. Do not use the seat heater for
extended periods or when no one
is using the seat.
. Do not put anything on the seat
which insulates heat, such as a
blanket, cushion, seat cover, etc.
Otherwise, the seat may become
overheated.
. Do not place anything hard or heavy
on the seat or pierce it with a pin or
similar object. This may result in
damage to the heater.
HORN HEATED SEATS (if so equipped)
2-34
Instruments and controls
Page 98 of 419
Black plate (94,1)
Model "Z34-D" EDITED: 2010/ 7/ 27
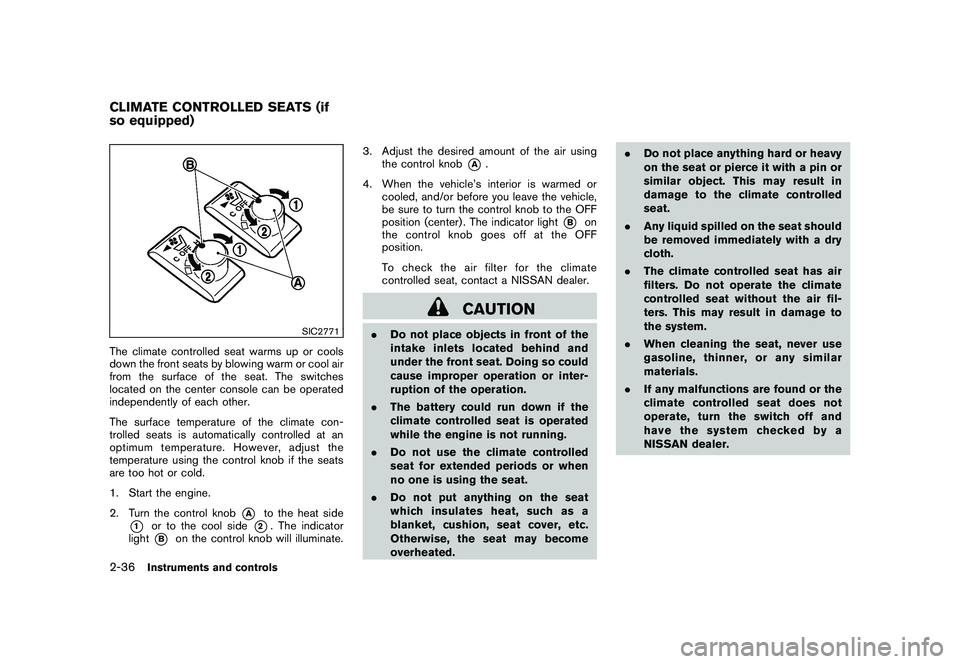
SIC2771
The climate controlled seat warms up or cools
down the front seats by blowing warm or cool air
from the surface of the seat. The switches
located on the center console can be operated
independently of each other.
The surface temperature of the climate con-
trolled seats is automatically controlled at an
optimum temperature. However, adjust the
temperature using the control knob if the seats
are too hot or cold.
1. Start the engine.
2. Turn the control knob
*A
to the heat side
*1
or to the cool side
*2. The indicator
light
*B
on the control knob will illuminate. 3. Adjust the desired amount of the air using
the control knob
*A
.
4. When the vehicle’s interior is warmed or cooled, and/or before you leave the vehicle,
be sure to turn the control knob to the OFF
position (center) . The indicator light
*B
on
the control knob goes off at the OFF
position.
To check the air filter for the climate
controlled seat, contact a NISSAN dealer.
CAUTION
. Do not place objects in front of the
intake inlets located behind and
under the front seat. Doing so could
cause improper operation or inter-
ruption of the operation.
. The battery could run down if the
climate controlled seat is operated
while the engine is not running.
. Do not use the climate controlled
seat for extended periods or when
no one is using the seat.
. Do not put anything on the seat
which insulates heat, such as a
blanket, cushion, seat cover, etc.
Otherwise, the seat may become
overheated. .
Do not place anything hard or heavy
on the seat or pierce it with a pin or
similar object. This may result in
damage to the climate controlled
seat.
. Any liquid spilled on the seat should
be removed immediately with a dry
cloth.
. The climate controlled seat has air
filters. Do not operate the climate
controlled seat without the air fil-
ters. This may result in damage to
the system.
. When cleaning the seat, never use
gasoline, thinner, or any similar
materials.
. If any malfunctions are found or the
climate controlled seat does not
operate, turn the switch off and
have the system checked by a
NISSAN dealer.
CLIMATE CONTROLLED SEATS (if
so equipped)2-36
Instruments and controls
Page 99 of 419
Black plate (95,1)
Model "Z34-D" EDITED: 2010/ 7/ 27
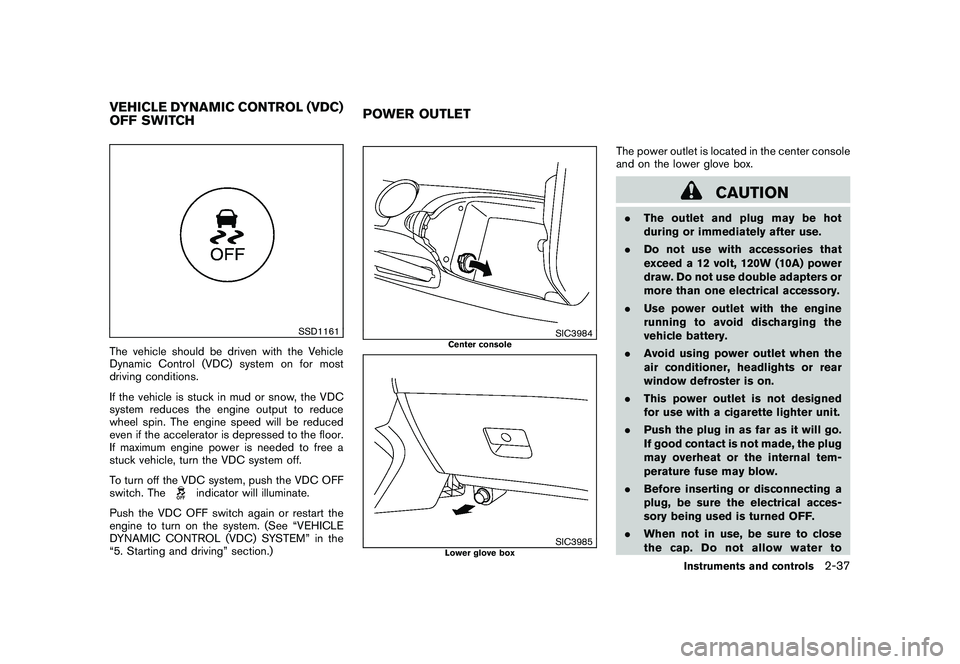
SSD1161
The vehicle should be driven with the Vehicle
Dynamic Control (VDC) system on for most
driving conditions.
If the vehicle is stuck in mud or snow, the VDC
system reduces the engine output to reduce
wheel spin. The engine speed will be reduced
even if the accelerator is depressed to the floor.
If maximum engine power is needed to free a
stuck vehicle, turn the VDC system off.
To turn off the VDC system, push the VDC OFF
switch. The
indicator will illuminate.
Push the VDC OFF switch again or restart the
engine to turn on the system. (See “VEHICLE
DYNAMIC CONTROL (VDC) SYSTEM” in the
“5. Starting and driving” section.)
SIC3984
Center console
SIC3985
Lower glove box
The power outlet is located in the center console
and on the lower glove box.
CAUTION
. The outlet and plug may be hot
during or immediately after use.
. Do not use with accessories that
exceed a 12 volt, 120W (10A) power
draw. Do not use double adapters or
more than one electrical accessory.
. Use power outlet with the engine
running to avoid discharging the
vehicle battery.
. Avoid using power outlet when the
air conditioner, headlights or rear
window defroster is on.
. This power outlet is not designed
for use with a cigarette lighter unit.
. Push the plug in as far as it will go.
If good contact is not made, the plug
may overheat or the internal tem-
perature fuse may blow.
. Before inserting or disconnecting a
plug, be sure the electrical acces-
sory being used is turned OFF.
. When not in use, be sure to close
the cap. Do not allow water to
VEHICLE DYNAMIC CONTROL (VDC)
OFF SWITCH POWER OUTLET
Instruments and controls
2-37
Page 285 of 419
Black plate (281,1)
Model "Z34-D" EDITED: 2010/ 7/ 27
high temperatures to help reduce pollutants.
WARNING
.The exhaust gas and the exhaust
system are very hot. Keep people,
animals or flammable materials
away from the exhaust system com-
ponents.
. Do not stop or park the vehicle over
flammable materials such as dry
grass, waste paper or rags. They
may ignite and cause a fire.
CAUTION
.Do not use leaded gasoline. Depos-
its from leaded gasoline seriously
reduce the three-way catalyst’s abil-
ity to help reduce exhaust pollu-
tants.
. Keep your engine tuned up. Mal-
functions in the ignition, fuel injec-
tion, or electrical systems can cause
overrich fuel flow into the three-way
catalyst, causing it to overheat. Do
not keep driving if the engine mis-
fires, or if noticeable loss of perfor-
mance or other unusual operating conditions are detected. Have the
vehicle inspected promptly by a
NISSAN dealer.
. Avoid driving with an extremely low
fuel level. Running out of fuel could
cause the engine to misfire, dama-
ging the three-way catalyst.
. Do not race the engine while warm-
ing it up.
. Do not push or tow your vehicle to
start the engine.
TIRE PRESSURE MONITORING SYS-
TEM (TPMS)Each tire, including the spare (if provided) ,
should be checked monthly when cold and
inflated to the inflation pressure recommended
by the vehicle manufacturer on the vehicle
placard or tire inflation pressure label. (If your
vehicle has tires of a different size than the size
indicated on the vehicle placard or tire inflation
pressure label, you should determine the proper
tire inflation pressure for those tires.)
As an added safety feature, your vehicle has
been equipped with a Tire Pressure Monitoring
System (TPMS) that illuminates a low tire
pressure telltale when one or more of your tires
is significantly under-inflated. Accordingly, when
the low tire pressure telltale illuminates, you should stop and check your tires as soon as
possible, and inflate them to the proper pres-
sure. Driving on a significantly under-inflated tire
causes the tire to overheat and can lead to tire
failure. Under-inflation also reduces fuel effi-
ciency and tire tread life, and may affect the
vehicle’s handling and stopping ability.
Please note that the TPMS is not a substitute for
proper tire maintenance, and it is the driver’s
responsibility to maintain correct tire pressure,
even if under-inflation has not reached the level
to trigger illumination of the TPMS low tire
pressure telltale.
Your vehicle has also been equipped with a
TPMS malfunction indicator to indicate when the
system is not operating properly. The TPMS
malfunction indicator is combined with the low
tire pressure telltale. When the system detects a
malfunction, the telltale will flash for approxi-
mately one minute and then remain continuously
illuminated. This sequence will continue upon
subsequent vehicle start-ups as long as the
malfunction exists. When the malfunction indi-
cator is illuminated, the system may not be able
to detect or signal low tire pressure as intended.
TPMS malfunctions may occur for a variety of
reasons, including the installation of replace-
ment or alternate tires or wheels on the vehicle
that prevent the TPMS from functioning properly.
Always check the TPMS malfunction telltale
after replacing one or more tires or wheels on
Starting and driving
5-3
Page 308 of 419
Black plate (304,1)
Model "Z34-D" EDITED: 2010/ 7/ 27
PARKING BRAKE BREAK-INBreak in the parking brake shoes whenever the
stopping effect of the parking brake is weakened
or whenever the parking brake shoes and/or
drums/rotors are replaced, in order to assure the
best braking performance.
This procedure is described in the vehicle
service manual and can be performed by a
NISSAN dealer.Using the brakesAvoid resting your foot on the brake pedal while
driving. This will cause overheating of the
brakes, wearing out the brake and pads faster
and reduce gas mileage.
To help save the brakes and to prevent the
brakes from overheating, reduce speed and
downshift to a lower gear before going down a
slope or long grade. Overheated brakes may
reduce braking performance and could result in
loss of vehicle control.
WARNING
.While driving on a slippery surface,
be careful when braking, accelerat-
ing or downshifting. Abrupt braking
or accelerating could cause the
wheelstoskidandresultinan
accident. .
If the engine is not running or is
turned off while driving, the power
assist for the brakes will not work.
Braking will be harder.
BRAKE ASSISTWhen the force applied to the brake pedal
exceeds a certain level, the Brake Assist is
activated generating greater braking force than a
conventional brake booster even with light pedal
force.
WARNING
The Brake Assist is only an aid to assist
braking operation and is not a collision
warning or avoidance device. It is the
driver’s responsibility to stay alert, drive
safely and be in control of the vehicle at
all times.ANTI-LOCK BRAKING SYSTEM (ABS)
WARNING
.The Anti-lock Braking System (ABS)
is a sophisticated device, but it
cannot prevent accidents resulting
from careless or dangerous driving
techniques. It can help maintain
vehicle control during braking on
slippery surfaces. Remember that
stopping distances on slippery sur-
faces will be longer than on normal
surfaces even with ABS. StoppingBRAKE ASSIST
5-26
Starting and driving
Page 315 of 419
Black plate (19,1)
6 In case of emergency
Model "Z34-D" EDITED: 2010/ 7/ 28
Emergency engine shut off................................... 6-2
Flat tire ............................................................ 6-2
Tire Pressure Monitoring System (TPMS) ............. 6-2
Changing a flat tire (for models with spare tire) ..... 6-3
Repairing flat tire (for models with emergency
tire puncture repair kit) .................................... 6-7
Jump starting .................................................. 6-13
Push starting ................................................... 6-15 If your vehicle overheats.
.................................... 6-15
Towing your vehicle .......................................... 6-16
Towing recommended by NISSAN
(except for NISMO models) ............................ 6-17
Towing recommended by NISSAN
(NISMO models) .......................................... 6-19
Vehicle recovery (freeing a stuck vehicle) ........... 6-19
Page 329 of 419
Black plate (327,1)
Model "Z34-D" EDITED: 2010/ 7/ 27
again.
7. After starting your engine, carefully discon- nect the negative cable and then the positive
cable (
*4
?
*3
?
*2
?
*1).
8. Replace the vent caps (if so equipped) . Be sure to dispose of the cloth used to cover
the vent holes as it may be contaminated
with corrosive acid.
9. Put the battery cover on. Do not attempt to start the engine by pushing.
CAUTION
.
Automatic transmission models
cannot be push-started or tow-
started. Attempting to do so may
cause transmission damage.
. Three way catalyst equipped models
should not be started by pushing
since the three way catalyst may be
damaged.
. Never try to start the vehicle by
towing it; when the engine starts,
the forward surge could cause the
vehicle to collide with the tow
vehicle.
CAUTION
.Do not continue to drive if your
vehicle overheats. Doing so could
cause engine damage or a vehicle
fire.
. To avoid the danger of being
scalded, never remove the radiator
cap while the engine is still hot.
When the radiator cap is removed,
pressurized hot water will spurt out,
possibly causing serious injury.
. Do not open the hood if steam is
coming out.
If your vehicle is overheating (indicated by an
extremely high temperature gauge reading) , or if
you feel a lack of engine power, detect abnormal
noise, etc., take the following steps:
1. Move the vehicle safely off the road, apply the parking brake and move the selector
lever to the P (Park) position (Automatic
transmission models) . Move the shift lever to
the N (Neutral) position (Manual transmis-
sion models) .
Do not stop the engine.
2. Turn off the air conditioner. Open all the windows, move the heater or air conditioner
PUSH STARTING IF YOUR VEHICLE OVERHEATS
In case of emergency
6-15