2011 NISSAN 370Z ROADSTER ECU
[x] Cancel search: ECUPage 42 of 419
Black plate (38,1)
Model "Z34-D" EDITED: 2010/ 7/ 27
passenger air bag. See “Front passen-
ger air bag and status light” later in this
section.
SSS0640
Front-facing (front passenger seat) — step 1
Refer to all Warnings and Cautions in the “Child
safety” and “Child restraints” sections before
installing a child restraint.
Follow these steps to install a front-facing child
restraint using the vehicle seat belt in the front
passenger seat:
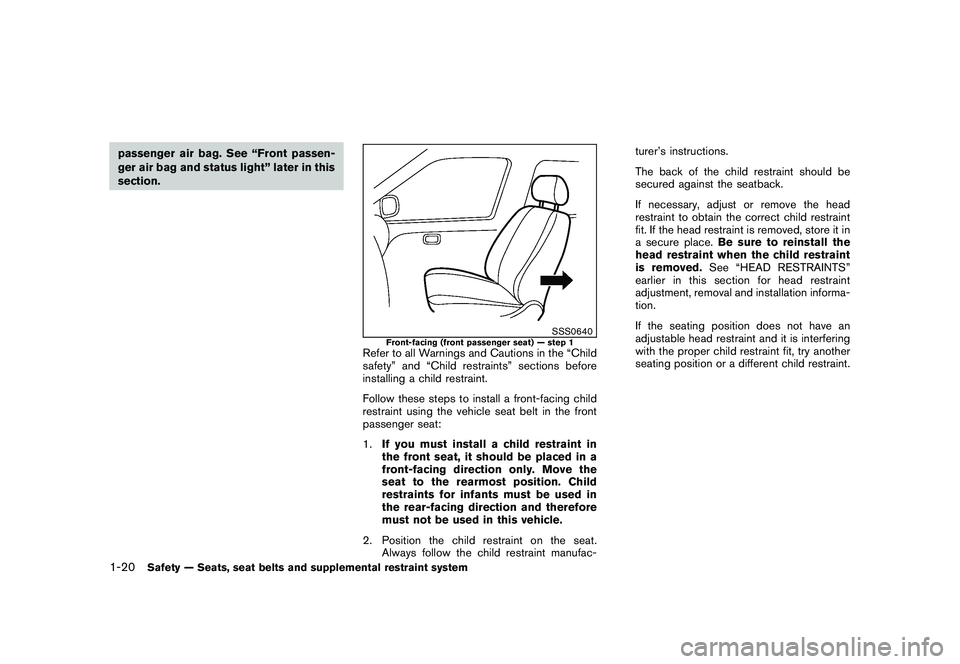
1.If you must install a child restraint in
the front seat, it should be placed in a
front-facing direction only. Move the
seat to the rearmost position. Child
restraints for infants must be used in
the rear-facing direction and therefore
must not be used in this vehicle.
2. Position the child restraint on the seat. Always follow the child restraint manufac- turer’s instructions.
The back of the child restraint should be
secured against the seatback.
If necessary, adjust or remove the head
restraint to obtain the correct child restraint
fit. If the head restraint is removed, store it in
a secure place.
Be sure to reinstall the
head restraint when the child restraint
is removed. See “HEAD RESTRAINTS”
earlier in this section for head restraint
adjustment, removal and installation informa-
tion.
If the seating position does not have an
adjustable head restraint and it is interfering
with the proper child restraint fit, try another
seating position or a different child restraint.
1-20
Safety — Seats, seat belts and supplemental restraint system
Page 44 of 419
Black plate (40,1)
Model "Z34-D" EDITED: 2010/ 7/ 27
SSS0653
Front-facing — step 6
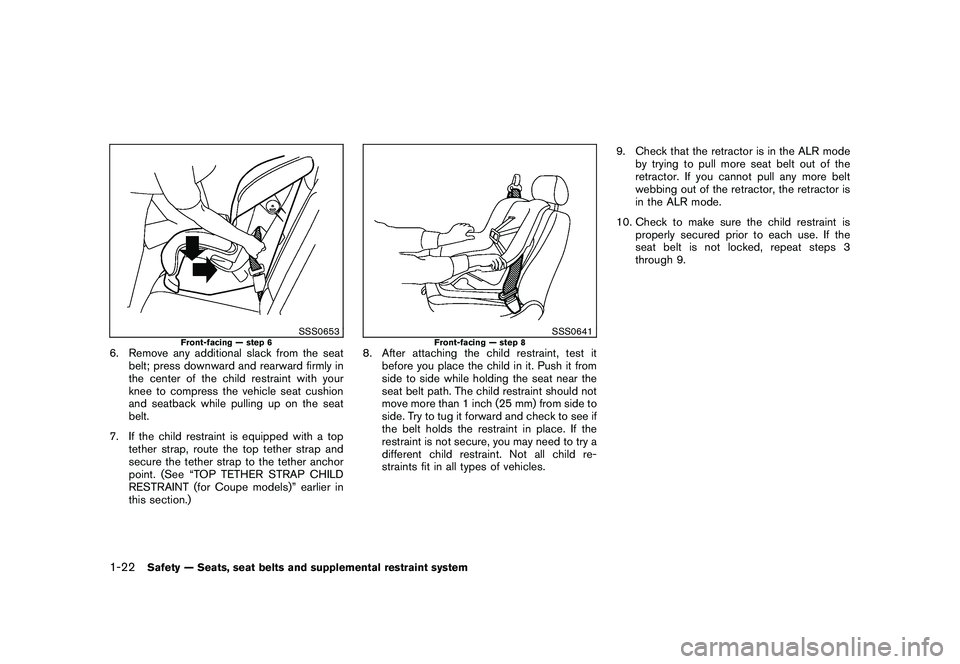
6. Remove any additional slack from the seatbelt; press downward and rearward firmly in
the center of the child restraint with your
knee to compress the vehicle seat cushion
and seatback while pulling up on the seat
belt.
7. If the child restraint is equipped with a top tether strap, route the top tether strap and
secure the tether strap to the tether anchor
point. (See “TOP TETHER STRAP CHILD
RESTRAINT (for Coupe models)” earlier in
this section.)
SSS0641
Front-facing — step 8
8. After attaching the child restraint, test itbefore you place the child in it. Push it from
side to side while holding the seat near the
seat belt path. The child restraint should not
move more than 1 inch (25 mm) from side to
side. Try to tug it forward and check to see if
the belt holds the restraint in place. If the
restraint is not secure, you may need to try a
different child restraint. Not all child re-
straints fit in all types of vehicles. 9. Check that the retractor is in the ALR mode
by trying to pull more seat belt out of the
retractor. If you cannot pull any more belt
webbing out of the retractor, the retractor is
in the ALR mode.
10. Check to make sure the child restraint is properly secured prior to each use. If the
seat belt is not locked, repeat steps 3
through 9.
1-22
Safety — Seats, seat belts and supplemental restraint system
Page 45 of 419
Black plate (41,1)
Model "Z34-D" EDITED: 2010/ 7/ 27
SSS0988
Front-facing — step 11
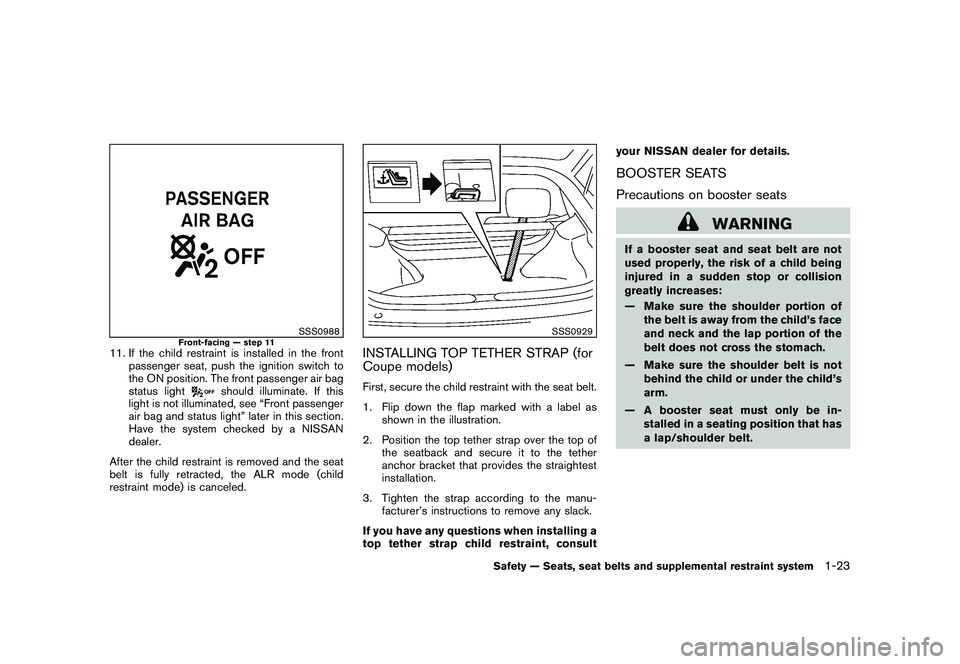
11. If the child restraint is installed in the frontpassenger seat, push the ignition switch to
the ON position. The front passenger air bag
status light
should illuminate. If this
light is not illuminated, see “Front passenger
air bag and status light” later in this section.
Have the system checked by a NISSAN
dealer.
After the child restraint is removed and the seat
belt is fully retracted, the ALR mode (child
restraint mode) is canceled.
SSS0929
INSTALLING TOP TETHER STRAP (for
Coupe models)First, secure the child restraint with the seat belt.
1. Flip down the flap marked with a label as shown in the illustration.
2. Position the top tether strap over the top of the seatback and secure it to the tether
anchor bracket that provides the straightest
installation.
3. Tighten the strap according to the manu- facturer’s instructions to remove any slack.
If you have any questions when installing a
top tether strap child restraint, consult your NISSAN dealer for details.
BOOSTER SEATS
Precautions on booster seats
WARNING
If a booster seat and seat belt are not
used properly, the risk of a child being
injured in a sudden stop or collision
greatly increases:
— Make sure the shoulder portion of
the belt is away from the child’s face
and neck and the lap portion of the
belt does not cross the stomach.
— Make sure the shoulder belt is not behind the child or under the child’s
arm.
— A booster seat must only be in- stalled in a seating position that has
a lap/shoulder belt.
Safety — Seats, seat belts and supplemental restraint system
1-23
Page 47 of 419
Black plate (43,1)
Model "Z34-D" EDITED: 2010/ 7/ 27
Booster seat installation
CAUTION
Do not use the lap/shoulder belt Auto-
matic Locking Retractor mode when
using a booster seat with the seat belts.
Refer to all Warnings and Cautions in the “Child
safety”, “Child restraints” and “Booster seats”
sections earlier in this section before installing a
child restraint.
Follow these steps to install a booster seat in the
front passenger seat:
SSS0640
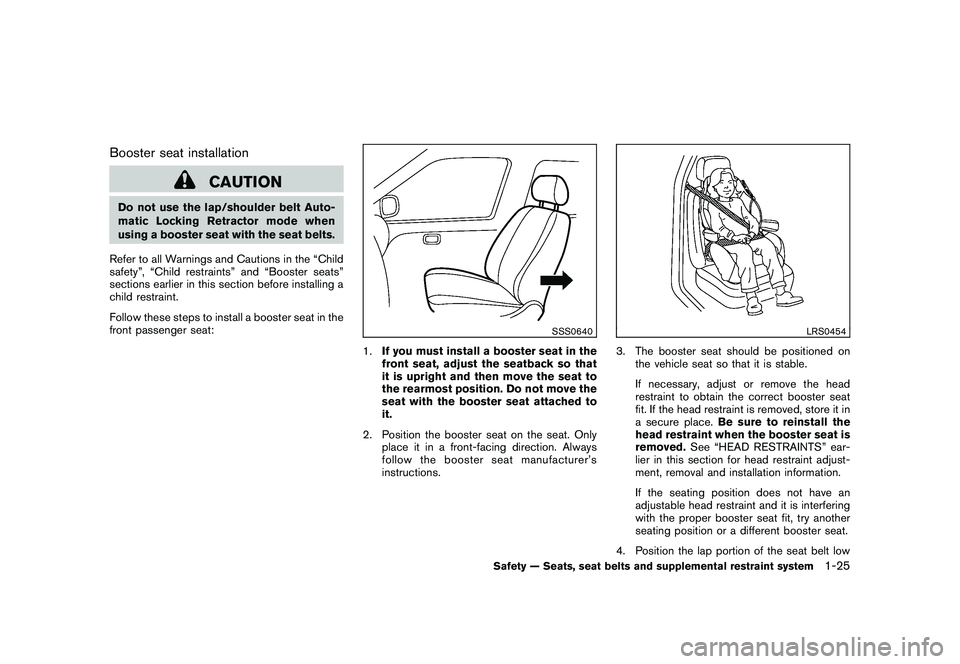
1. If you must install a booster seat in the
front seat, adjust the seatback so that
it is upright and then move the seat to
the rearmost position. Do not move the
seat with the booster seat attached to
it.
2. Position the booster seat on the seat. Only place it in a front-facing direction. Always
follow the booster seat manufacturer’s
instructions.
LRS0454
3. The booster seat should be positioned onthe vehicle seat so that it is stable.
If necessary, adjust or remove the head
restraint to obtain the correct booster seat
fit. If the head restraint is removed, store it in
a secure place. Be sure to reinstall the
head restraint when the booster seat is
removed. See “HEAD RESTRAINTS” ear-
lier in this section for head restraint adjust-
ment, removal and installation information.
If the seating position does not have an
adjustable head restraint and it is interfering
with the proper booster seat fit, try another
seating position or a different booster seat.
4. Position the lap portion of the seat belt low
Safety — Seats, seat belts and supplemental restraint system
1-25
Page 56 of 419
Black plate (52,1)
Model "Z34-D" EDITED: 2010/ 7/ 27
passenger air bag OFF for specified child
restraints. Failing to properly secure child
restrains and to use the ALR mode (child
restraint mode) may allow the restraint to tip or
move in an accident or sudden stop. This can
also result in the passenger air bag inflating in a
crash instead of being OFF. (See “CHILD
RESTRAINTS” earlier in this section for proper
use and installation.)
If the front passenger seat is not occupied, the
passenger air bag is designed not to inflate in a
crash. However, heavy objects placed on the
seat could result in air bag inflation, because of
the object being detected by the occupant
classification sensor. Other conditions could
also result in air bag inflation, such as if a child is
standing on the seat, or if two children are on the
seat, contrary to the instructions in this manual.
Always be sure that you and all vehicle
occupants are seated and restrained properly.
Using the passenger air bag status light, you can
monitor when the front passenger air bag is
automatically turned OFF with the seat occu-
pied. The light will not illuminate when the front
passenger seat is unoccupied.
If an adult occupant is in the seat but the
passenger air bag status light is illuminated
(indicating that the air bag is OFF) , it could be
that the person is a small adult, or is not sitting
on the seat properly.If a child restraint must be used in the front seat,
the passenger air bag status light may or may
not be illuminated, depending on the size of the
child and the type of child restraint being used. If
the passenger air bag status light is not
illuminated (indicating that the air bag might
inflate in a crash) , it could be that the child
restraint or seat belt is not being used properly.
Make sure that the child restraint is installed
properly, the seat belt is used properly and the
occupant is positioned properly. If the passen-
ger air bag status light is still not illuminated, try
a different child restraint.
If the passenger air bag status light will not
illuminate even though you believe that the child
restraint, the seat belts and the occupant are
properly positioned, the system may be sensing
an unoccupied seat (in which case the air bag is
OFF) . Your NISSAN dealer can check that the
system is OFF by using a special tool. However,
until you have confirmed with your dealer that
your air bag is working properly, do not transport
a child in this vehicle.
The NISSAN Advanced Air Bag System and
passenger air bag status light will take a few
seconds to register a change in the passenger
seat status. However, if the seat becomes
unoccupied, the air bag status light will remain
off.
If a malfunction occurs in the front passenger air
bag system, the supplemental air bag warninglight
, located in the meter and gauges area
will blink. Have the system checked by a
NISSAN dealer.
Other supplemental front-impact air bag
precautions
WARNING
. Do not place any objects on the
steering wheel pad or on the instru-
ment panel. Also, do not place any
objects between any occupant and
the steering wheel or instrument
panel. Such objects may become
dangerous projectiles and cause
injury if the front air bag inflates.
. Do not place objects with sharp
edges on the seat. Also, do not
place heavy objects on the seat that
will leave permanent impressions in
the seat. Such objects can damage
the seat or occupant classification
sensor (pattern sensor) . This can
affect the operation of the air bag
system and result in serious perso-
nal injury.
. Do not use water or acidic cleaners
(hot steam cleaners) on the seat.
This can damage the seat or occu-
1-34
Safety — Seats, seat belts and supplemental restraint system
Page 62 of 419
Black plate (7,1)
2 Instruments and controls
Model "Z34-D" EDITED: 2010/ 7/ 28
Cockpit............................................................ 2-2
Instrument panel ................................................ 2-3
Meters and gauges ............................................. 2-4
Speedometer and odometer ............................. 2-5
Tachometer ................................................... 2-5
Engine coolant temperature gauge ..................... 2-6
Fuel gauge ................................................... 2-6
Triple meter .................................................. 2-7
Warning/indicator lights and audible reminders ......... 2-8
Checking bulbs ............................................. 2-8
Warning lights ............................................... 2-9
Indicator lights ............................................. 2-12
Audible reminders ........................................ 2-15
Vehicle information display .................................. 2-16
Indicators for operation .................................. 2-16
Warnings and alerts ...................................... 2-18
Indicators for maintenance .............................. 2-19
Trip computer .............................................. 2-20
Security systems .............................................. 2-25
Vehicle Security System. ................................ 2-25
NISSAN Vehicle Immobilizer System ................. 2-26
Windshield wiper and washer switch .................... 2-27
Rear window defroster switch ............................. 2-29
Headlight and turn signal switch .......................... 2-29
Xenon headlights ......................................... 2-29
Headlight switch .......................................... 2-30 Turn signal switch
........................................ 2-33
Fog light switch (if so equipped) ...................... 2-33
Hazard warning flasher switch ............................. 2-33
Horn ............................................................. 2-34
Heated seats (if so equipped) ............................. 2-34
Climate controlled seats (if so equipped) ............... 2-36
Vehicle Dynamic Control (VDC) OFF switch ........... 2-37
Power outlet ................................................... 2-37
Storage ......................................................... 2-38
Instrument pocket (except for navigation system
equipped models) ........................................ 2-38
Cup holders ................................................ 2-38
Glove box .................................................. 2-39
Console box ............................................... 2-40
Rear parcel box ........................................... 2-40
Cargo cover (if so equipped) .......................... 2-41
Windows ....................................................... 2-42
Power windows ........................................... 2-42
Interior lights ................................................... 2-44
Map lights .................................................. 2-44
Interior light control switch ............................. 2-44
Vanity mirror lights ............................................ 2-45
Cargo area courtesy light (Roadster models) .......... 2-46
Cargo light (Coupe models) ............................... 2-46
Trunk light (Roadster models) .............................. 2-46
Page 70 of 419
Black plate (66,1)
Model "Z34-D" EDITED: 2010/ 7/ 27
Anti-lock Braking System (ABS) warning
light
Master warning light
Malfunction Indicator Light (MIL)
Seat belt warning light and chime
Rear fog light indicator light*
Automatic transmission check warning light*
Supplemental air bag warning light
Security indicator light
Brake warning light
Vehicle Dynamic Control (VDC) warning
light
Soft top indicator light (Roadster models)
Transmission position indicator*
SynchroRev Match mode (S-MODE) indi-
cator*
Charge warning light
Cruise indicator light
Turn signal/hazard indicator lights
Engine oil pressure warning light
Front passenger air bag status light
Vehicle Dynamic Control (VDC) off indicator
light
Intelligent Key system warning light
High beam indicator light*: if so equipped
Low tire pressure warning light
Low beam indicator light
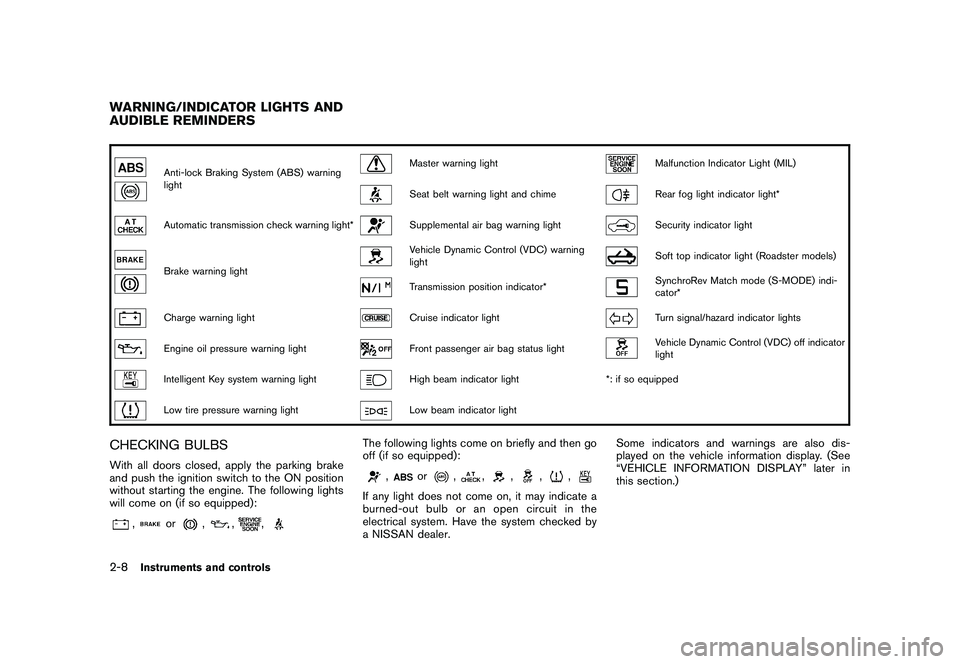
CHECKING BULBSWith all doors closed, apply the parking brake
and push the ignition switch to the ON position
without starting the engine. The following lights
will come on (if so equipped):
,
or
,
,
,
The following lights come on briefly and then go
off (if so equipped):
,
or
,
,
,
,
,
If any light does not come on, it may indicate a
burned-out bulb or an open circuit in the
electrical system. Have the system checked by
a NISSAN dealer. Some indicators and warnings are also dis-
played on the vehicle information display. (See
“VEHICLE INFORMATION DISPLAY” later in
this section.)
WARNING/INDICATOR LIGHTS AND
AUDIBLE REMINDERS2-8
Instruments and controls
Page 74 of 419
Black plate (70,1)
Model "Z34-D" EDITED: 2010/ 7/ 27
is securely fastened.
The seat belt warning light for the front
passenger will illuminate if the seat belt is not
fastened when the front passenger’s seat is
occupied. For 5 seconds after the ignition
switch is in the ON position, the system does
not activate the warning light for the front
passenger.
See “SEAT BELTS” in the “1. Safety — Seats,
seat belts and supplemental restraint system”
section for precautions on seat belt usage.
Supplemental air bag warning light
After pushing the ignition switch to the ON
position, the supplemental air bag warning light
will illuminate. The air bag warning light will turn
off after about 7 seconds if the front air bag, side
air bag and curtain air bag systems and/or
pretensioner system are operational.
If any of the following conditions occur, the front
air bag, side air bag and curtain air bag systems
and/or pretensioner system need servicing, and
your vehicle must be taken to your nearest
NISSAN dealer.
.The supplemental air bag warning light
remains on after approximately 7 seconds.
. The supplemental air bag warning light
flashes intermittently. .
The supplemental air bag warning light does
not come on at all.
Unless checked and repaired, the Supplemental
Restraint Systems and/or the pretensioner seat
belt may not function properly.
For additional information, see “SUPPLEMEN-
TAL RESTRAINT SYSTEM” in the “1. Safety —
Seats, seat belts and supplemental restraint
system” section.
WARNING
If the supplemental air bag warning
light is on, it could mean that the front
air bag, side air bag and curtain air bag
systems and/or pretensioner system
will not operate in an accident. To help
avoid injury to yourself or others, have
your vehicle checked by a dealer as
soon as possible.
Vehicle Dynamic Control (VDC)
warning light
The light will blink when the VDC system or the
traction control system is operating, thus alerting
the driver that the vehicle is nearing its traction
limits. The road surface may be slippery.
When the vehicle dynamic control warning light illuminates when the vehicle dynamic control
system is turned on, this light alerts the driver to
the fact that the vehicle dynamic control
system’s fail-safe mode is operating, for example
the vehicle dynamic control system may not be
functioning properly. Have the system checked
by a NISSAN dealer. If a malfunction occurs in
the system, the vehicle dynamic control system
function will be canceled but the vehicle is still
driveable. For additional information, see “VE-
HICLE DYNAMIC CONTROL (VDC) SYSTEM”
in the “5. Starting and driving” section of this
manual.
INDICATOR LIGHTS
Transmission position indicator
(if so equipped)
When the ignition switch is pushed to the ON
position, the indicator shows the transmission
position.
For AT models:
In the manual shift mode, when the transmission
does not shift to the selected gear due to the
transmission protection mode, the AT position
indicator light will blink and a buzzer will sound.
(See “DRIVING THE VEHICLE” in the “5.
Starting and driving” section.)
2-12
Instruments and controls