2011 MITSUBISHI TRITON turn signal
[x] Cancel search: turn signalPage 33 of 369

Keyless entry system*
E00300301860
Press the remote control switch,
and all doors will
be locked or unlocked as desired. 1- LOCK switch
2- UNLOCK switch
3- Indication lamp
To lock
Press the LOCK
switch (1), and all doors will be
locked. When they are locked with the room lamp
at the [•] position, the room lamp and the turn-sig-
nal lamps blink once.
To unlock
Press the UNLOCK switch (2), and all doors will
be unlocked. When unlocked with the room lamp
at the [•] position, the room lamp will be turned on
for approximately 15 seconds and the turn-signal
lamps will blink twice.
NOTE
l The indication lamp (3) comes on each time
a switch is pressed. l
If the UNLOCK switch
(2)
is pressed and
any of the doors is not opened within approx-
imately 30 seconds, relocking will automati-
cally occur.
l It is possible to modify functions as follows:
For further information, please contact your
MITSUBISHI MOTORS Authorized Service
Point.
• The time from pressing the UNLOCKswitch (2) to the moment of automatic
locking can be changed.
• The confirmation function (flashing of the turn-signal lamps) can be set to oper-
ate only when the doors are locked or on-
ly when the doors are unlocked.
• The confirmation function (this indicates locking or unlocking of the doors with
the blink of the turn-signal lamps) can be
deactivated.
• The number of times the turn-signal lamps are flashed by the confirmation
function can be changed.
l The keyless entry system does not operate in
the following conditions:
• The key is left in the key cylinder.
• The door is open.
l The remote control switch will operate with-
in approximately 4 m from the vehicle. How-
ever, the operating range of the remote con-
trol switch may change if the vehicle is loca-
ted near a power station, or radio/TV broad-
casting station.
l If either of the following problems occurs,
the battery may be exhausted.
• The remote control switch is operated atthe correct distance from the vehicle, but
the doors are not locked/unlocked in re-
sponse. • The indication lamp (3) is dim or does
not come on.
For further information, please
contact
your MITSUBISHI MOTORS Author-
ized Service Point.
If you replace the battery yourself, refer
to “Procedure for replacing the remote
control switch battery” on page 1-04.
l If your remote control switch is lost or dam-
aged, please contact your MITSUBISHI
MOTORS Authorized Service Point for a re-
placement remote control switch.
l If you wish to add a remote control switch,
we recommend you to contact a
MITSUBISHI MOTORS Authorized Service
Point.
A maximum of 4 remote control switches are
available for your vehicle.
Procedure for replacing the remote
control switch battery E00309500190
1. Before replacing the battery, remove static
electricity from your body by touching. Locking and unlocking
1-04
1
OCRE12E1
Presented by http://mmc-manuals.ru/ \251
Page 86 of 369

Instruments...................................................................................
3-02
Indication and warning lamps.......................................................3-06
Indication lamps ........................................................................... 3-07
Warning lamps .............................................................................. 3-08
Centre information display* ......................................................... 3-10
Combination headlamps and dipper switch ..................................3-30
Headlamp levelling switch* ......................................................... 3-32
Turn-signals lever ......................................................................... 3-33
Hazard warning flasher switch ..................................................... 3-34
Front fog lamp switch* ................................................................. 3-34
Rear fog lamp switch* .................................................................. 3-35
Wiper and washer switch .............................................................. 3-36
Rear window demister switch....................................................... 3-40
Horn switch................................................................................... 3-40Instruments and controls
3
OCRE12E1
Presented by http://mmc-manuals.ru/ \251
Page 91 of 369

Indication and warning lamps
E00501502174Type 1Type 21.
CRUISE indication lamp* ® p. 4-50
2. Turn-signal indication lamps/Hazard warning indication lamps ®
p. 3-07
3. High-beam indication lamp ® p. 3-07
4. Front fog lamp indication lamp* ® p. 3-07
5. “Rear fog lamp indication lamp*” on page 3-07
6. Seat belt reminder/warning lamp ® p. 2-10
7. Low fuel warning lamp ® p. 3-04
8. 2WD/4WD operation indication lamp* ® p. 4-28, 4-33
9. Rear differential lock indication lamp* ® p. 4-35
10. Check engine warning lamp ® p. 3-08
11. Diesel preheat indication lamp ® p. 3-07
12. Oil pressure warning lamp ® p. 3-09 13.
Fuel filter indication lamp ® p. 3-07
14. Charge warning lamp ® p. 3-09
15.
A/T (automatic transmission) fluid temperature warning lamp (vehicleswith A/T) ® p. 4-19
16. Overdrive off indication lamp (vehicles with 4A/T) ® p. 4-19
17. Selector lever position indicator (vehicles with A/T) ® p. 4-17, 4-24
18. “Diesel particulate filter (DPF) warning lamp* ” on page 4-14
19. “Brake warning lamp” on page 3-08
20. “Active Stability & Traction Control (ASTC) OFF indication lamp*” on page 4-48
21. “Anti-lock brake system (ABS) warning lamp*” on page 4-45
22. “Active Stability & Traction Control (ASTC) indication lamp*” on page 4-48
23- “Door ajar warning lamp” on page 3-10 24. “Supplement Restraint System (SRS) warning lamp” on page 2-38 Instruments and controls
3-06
3
OCRE12E1
Presented by http://mmc-manuals.ru/ \251
Page 92 of 369

Indication lamps
E00501600012Turn-signal indication lamps/
Hazard warning indication
lamps
E00501700185
These indication lamps blink on
and off
when a turn-signal lamp is operating.
NOTE
l If the blinking is too fast, the
cause may be a blown lamp bulb
or a faulty turn-signal connection.
When the hazard warning lamp switch is
pressed, all turn-signal lamps will flash
on and off continuously. High-beam indication lamp
E00501800115
This indication lamp illuminates when
the high-beam is used. Front fog lamp indication
lamp*
E00501900347
This indication lamp
illuminates while
the front fog lamps are on. Rear fog lamp indication
lamp*
E00502000068
This indication lamp illuminates while
the rear fog lamp is on. Diesel preheat indication lamp
E00502300250
This indication lamp illuminates when
the
ignition switch is placed in the “ON”
position. As the glow plug becomes hot,
the lamp goes out and the engine can be
started. CAUTION
l
If the diesel preheat
indication
lamp
comes on after the engine
is started, the engine speed may
not rise above the idling speed
because of fuel freezing. In this
case, keep the engine idling for
about ten minutes, then turn
off the ignition switch and im-
mediately turn it on again to
confirm that the diesel preheat
indication lamp is off.
NOTE l If
the engine is cold,
the diesel pre-
heat indication lamp is on for a lon-
ger time.
l When the engine has not been star-
ted within about 5 seconds after
the diesel preheat indication lamp
went out, return the ignition
switch to the “LOCK” position.
Then, turn the switch to the “ON”
position to preheat the engine
again. l
When
the engine is
warm,
the die-
sel preheat indication lamp does
not come on even if the ignition
switch is placed in the “ON” posi-
tion. Fuel filter indication lamp
E00509900170
This indication lamp illuminates when
the
ignition switch is turned to the “ON”
position and goes off after the engine
has started. If it lights up while the en-
gine is running, it indicates that water
has accumulated inside the fuel filter; if
this happens, remove the water from the
fuel filter.
Refer to “Removal of water from the
fuel filter” on page 6-06.
When the lamp goes out, you can re-
sume driving. If it either does not go out
or comes on from time to time, we rec-
ommend you to have the vehicle inspec-
ted. Instruments and controls
3-07 3
OCRE12E1
Presented by http://mmc-manuals.ru/ \251
Page 118 of 369

Switch position 0- Driver only
Switch position 3- Driver + Full luggage load-
ing
{Vehicles with heavy duty
suspension}
Switch position 4- Driver
+ Full luggage load-
ing
{Vehicles without heavy du-
ty suspension}
Double cab Vehicle condi-
tion Switch position “0”
“2” or “3” or
“4” ●: 1 person
: Full luggage loading Switch position 0- Driver only
Switch position 2- Driver + Full luggage load-
ing
{Vehicles with heavy duty
suspension for
Russia, Ka-
zakhstan and Ukraine}
Switch position 3- Driver + Full luggage load- ing
{Vehicles with heavy duty
suspension except
for Rus-
sia, Kazakhstan and Uk-
raine}
{Vehicles without heavy du-
ty suspension for Russia,
Kazakhstan and Ukraine}
Switch position 4- Driver + Full luggage load- ing
{Vehicles without heavy du-
ty suspension
except for
Russia, Kazakhstan and Uk-
raine} Turn-signals lever
E00506501273
The turn-signal lamps flash when
the lever is oper-
ated (with the ignition switch in the “ON” posi-
tion). At the same time, the turn-signal indication
lamps flash. 1- Turn-signals
When making a normal turn,
use position
(1). The lever will return automatically when
cornering is completed.
There are times when the lever will not re-
turn after cornering. This occurs when the
steering wheel is turned only slightly.
In such cases, return the lever by hand.
2- Lane-change signals When changing lanes, use position (2). It
will return to the neutral position when re-
leased.
NOTE l If the lamp flashes unusually quickly, the
bulb in a turn-signal lamp may have burned
out. We recommend you to have the vehicle
inspected. Instruments and controls
3-33 3
OCRE12E1
Presented by http://mmc-manuals.ru/ \251
Page 119 of 369

l
It is possible to
activate the following func-
tions. For further information, we recom-
mend you to consult a MITSUBISHI
MOTORS Authorized Service Point. • Flashing of the turn-signal lamps and theindication lamp in the instrument cluster
when the lever is operated with the igni-
tion switch in the “ACC” position
• Flashing of the turn-signal lamps and the indication lamp in the instrument cluster
three times when you move the lever to
(2) slightly then release it
• The time required to operate the lever for the 3-flash function can be adjusted. Hazard warning flasher switch
E00506600903
Use the hazard warning flasher
switch when the ve-
hicle has to be parked on the road for any emergency.
The hazard warning flashers can always be operat-
ed, regardless of the position of the ignition key.
Push the switch to turn on the hazard warning flash-
ers; push the switch again to turn them off.
When this switch is operated, all turn-signal lamps
flash continuously, as do the turn-signal indication
lamps in the instrument cluster. NOTE
l If
the lamps are kept
flashing for a long time,
the battery will be discharged, resulting in
hard engine starting or no start condition.
l If the lamp flashes unusually quickly, the
bulb in a turn-signal lamp may have burned
out.
We recommend you to have the vehicle in-
spected. Front fog lamp switch*
E00506801029
The front fog lamps
can
be used only when the head-
lamps or tail lamps are on. Turn the knob once in
the “ON” direction to turn on the front fog lamps.
The indication lamp in the instrument cluster will
also come on. To turn the front fog lamps off, turn
the knob once in the “OFF” direction. While the
rear fog lamp (if so equipped) is on, turn the knob
twice in the “OFF” direction to turn the front fog
lamps off. The knob will automatically return to its
original position when you release it. NOTE
l The
front fog lamps are
automatically turned
off when the headlamps or tail lamps are
turned off. To turn the front fog lamps on
again, turn the knob in the “ON” direction af-
ter turning on the headlamps or tail lamps.
l Do not use fog lamps except in conditions of
fog, otherwise excessive lamp glare may tem-
porarily blind oncoming vehicle drivers. Instruments and controls
3-34
3
OCRE12E1
Presented by http://mmc-manuals.ru/ \251
Page 200 of 369
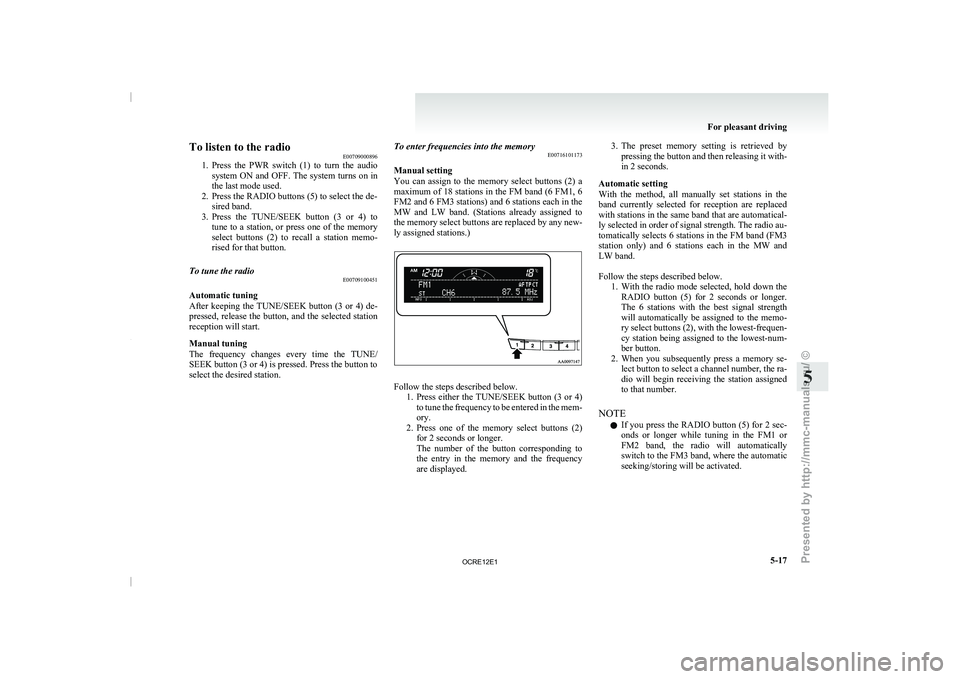
To listen to the radio
E00709000896
1. Press the PWR switch (1)
to turn the audio
system ON and OFF. The system turns on in
the last mode used.
2. Press the RADIO buttons (5) to select the de- sired band.
3. Press the TUNE/SEEK button (3 or 4) to tune to a station, or press one of the memory
select buttons (2) to recall a station memo-
rised for that button.
To tune the radio E00709100451
Automatic tuning
After keeping the TUNE/SEEK
button
(3 or 4) de-
pressed, release the button, and the selected station
reception will start.
Manual tuning
The frequency changes every time the TUNE/
SEEK button (3 or 4) is pressed. Press the button to
select the desired station. To enter frequencies into the memory
E00716101173
Manual setting
You can assign to
the
memory select buttons (2) a
maximum of 18 stations in the FM band (6 FM1, 6
FM2 and 6 FM3 stations) and 6 stations each in the
MW and LW band. (Stations already assigned to
the memory select buttons are replaced by any new-
ly assigned stations.) Follow the steps described below.
1. Press either the TUNE/SEEK button
(3 or 4)
to tune the frequency to be entered in the mem-
ory.
2. Press one of the memory select buttons (2) for 2 seconds or longer.
The number of the button corresponding to
the entry in the memory and the frequency
are displayed. 3. The preset memory setting is retrieved by
pressing the button and
then releasing it with-
in 2 seconds.
Automatic setting
With the method, all manually set stations in the
band currently selected for reception are replaced
with stations in the same band that are automatical-
ly selected in order of signal strength. The radio au-
tomatically selects 6 stations in the FM band (FM3
station only) and 6 stations each in the MW and
LW band.
Follow the steps described below. 1. With the radio mode selected, hold down theRADIO button (5) for 2 seconds or longer.
The 6 stations with the best signal strength
will automatically be assigned to the memo-
ry select buttons (2), with the lowest-frequen-
cy station being assigned to the lowest-num-
ber button.
2. When you subsequently press a memory se- lect button to select a channel number, the ra-
dio will begin receiving the station assigned
to that number.
NOTE l If you press the RADIO button (5) for 2 sec-
onds or longer while tuning in the FM1 or
FM2 band, the radio will automatically
switch to the FM3 band, where the automatic
seeking/storing will be activated. For pleasant driving
5-17 5
OCRE12E1
Presented by http://mmc-manuals.ru/ \251
Page 202 of 369

AF (Alternative Frequencies) function
E00720900061
The AF function finds a
station broadcasting the
same program and selects the station with the stron-
gest signal of AF lists.
The AF function is turned on (with the AF indica-
tor (12) shown on the display) at all times unless
you manually switch it off.
The AF function can be turned ON and OFF.
Refer to “Function setup mode” on page 5-21.
CT (Clock Time) function E00721000131
The clock can be set automatically by using the sig-
nal from the local RDS
stations. Refer to “Adjust-
ing the time” on page 3-12.
REG (Regional) function E00721100057
REG function limits to receive the stations broad-
casting regional programs.
Regional programming and regional networks
are
organized differently depending on the country or
area (they may be changed according to the hour,
state, or broadcast area), so if you don’t want to re-
ceive the regional programs automatically, you can
set up REG ON not to receive regional programs.
The REG function can be turned ON and OFF.
Refer to “Function setup mode” on page 5-21.
PI (Program Identification) search function E00721200221
When travelling long distance and the recalled pre-
set station is weak, the
radio searches another fre-
quency broadcasting the same programming with
the same PI code in AF list. If there are no frequencies broadcasting the same
programming, the radio searches
a
frequency broad-
casting the regional programming. The radio suc-
ceeds in searching the regional programming, then
the display shows the REG indicator (11).
If the radio does not succeed in searching the re-
gional programming, the radio returns to the recal-
led preset station.
The PI function can be turned ON and OFF.
Refer to “Function setup mode” on page 5-21.
NOTE
l While searching, the audio system is muted.
The display shows “WAIT” or “SEARCH”.
PTY (Program type) E00721300349
RDS broadcasts are classified according to pro-
gram type (PTY) as follows.
Use the TUNE/SEEK
button (3 or 4) to select your desired PTY.
1. NEWS
2. AFFAIRS (Current affairs)
3. INFO (Information)
4. SPORT
5. EDUCATE (Education)
6. DRAMA
7. CULTURE
8. SCIENCE
9. VARIED
10. POP M (Pop music)
11. ROCK M (Rock music)
12. EASY M (Easy music)
13. LIGHT M (Light classics)
14. CLASSICS
15. OTHER M (Other music)
16. WEATHER (Weather information)
17. FINANCE
18. CHILDREN 19. SOCIAL
20. RELIGION
21. PHONE IN
22. TRAVEL
23. LEISURE
24.
JAZZ
25. COUNTRY
26. NATION M (National music)
27. OLDIES
28. FOLK M (Folk music)
29. DOCUMENT
To search for a broadcast of desired program type: 1. Press the PTY button (7).
2. Press the TUNE/SEEK button (3 or 4) forless than 1 second repeatedly to select your
desired PTY.
3. Two seconds after a desired PTY has been se- lected, the radio will begin to search for a
broadcast of your selected PTY. During
search, the selected PTY on the display blinks.
4. When the radio picks up a station with your desired PTY, the display will show the name
of the station. For pleasant driving
5-19 5
OCRE12E1
Presented by http://mmc-manuals.ru/ \251