2011 MITSUBISHI PAJERO IV language
[x] Cancel search: languagePage 106 of 377

4. After setting the date, press the “INFO” but-
ton to return to the information display. Changing the calendar pattern
1. Press the “ADJ” button to select the calendar
setting display. Press the “←” or “→” func-
tion button to select “CALENDAR PAT-
TERN SELECT”. Then press the “SELECT”
function button. 2. Press function button “←” or “→” to select
your desired indication pattern.
Type 1
Type 2
Type 3 3. Press the function button “SET”. The display
will flash
twice, and the indication pattern
will be updated. NOTE
l You
can return
to the previous display by
pressing the “BACK” function button.
4. After setting the calendar pattern, press the “INFO” button to return to the information
display. User customization
E00519600095
You can set the indication of unit, language, and
the time notation.
In addition, you
can return these settings to the fac-
tory default settings. Instruments and controls
3-25 3
OBKE12E1
Page 107 of 377

Selecting the item to set
1. Press the “ADJ” button to select the user cus-tomization display. 2. Press the function button “←” or “→” to se-
lect the item you wish to set. •“UNIT”: Changing the unit
•
“LANGUAGE”: Changing the lan-guage
• “12h ↔ 24h”: Changing the time for- mat
• “DEFAULT”: Resetting to factory set- tings Push the function button “SELECT”. The set-
ting display
for
your selected item will appear. Changing display units
It is possible to change the display units for the fuel
consumption, driving range,
average speed, outside
temperature, elevation, and atmospheric pressure
as shown below.
FUEL ECONOMY km/L → L/100 km → mpg
(UK GALLON)
→
mpg
(US GALLON)
RANGE km → miles
SPEED km/h → mph
OUTSIDE TEM-
PERATURE °C → °F
ELEVATION m → ft
BAROMETER hPa → mb → kPa → inHg
l Changing the
display
unit for fuel consump-
tion 1. Press the “←” or “→” function button to se-
lect “FUEL
ECONOMY”. Then press the
“SELECT” function button. 2. Press the “←” or “→” function button to se-
lect “km/L”.
Then press the “SET” function
button. The display will flash twice, and the
display unit will be updated to the selected
one. NOTE
l You
can return
to the previous display by
pressing the “BACK” function button. Instruments and controls
3-26
3
OBKE12E1
Page 108 of 377

3. After setting, press the “INFO” button to re-
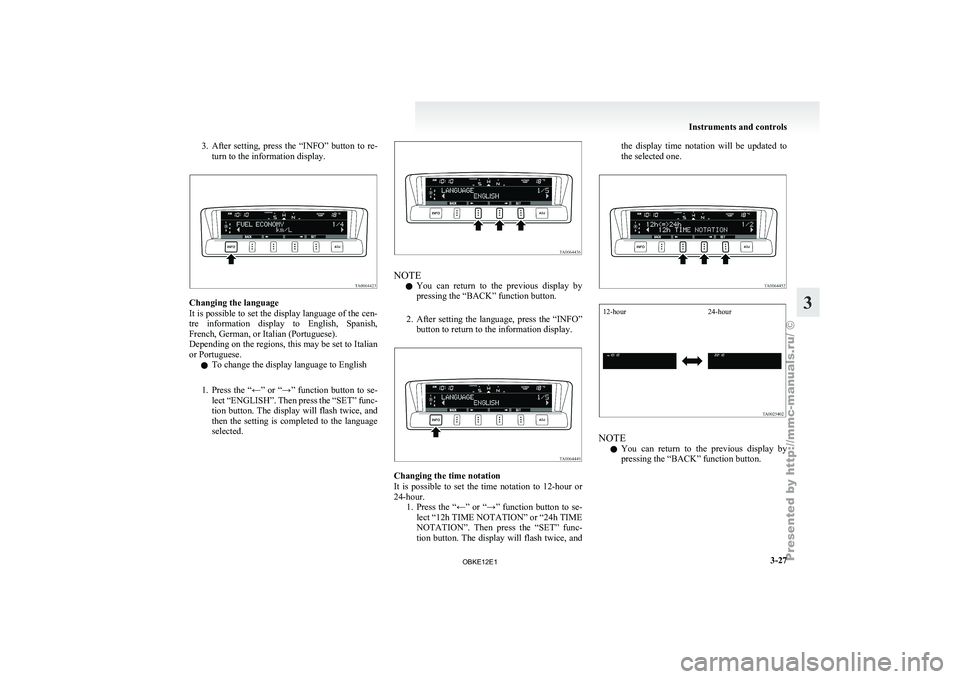
turn to the information display. Changing the language
It is possible
to set the display language of the cen-
tre information display to English, Spanish,
French, German, or Italian (Portuguese).
Depending on the regions, this may be set to Italian
or Portuguese.
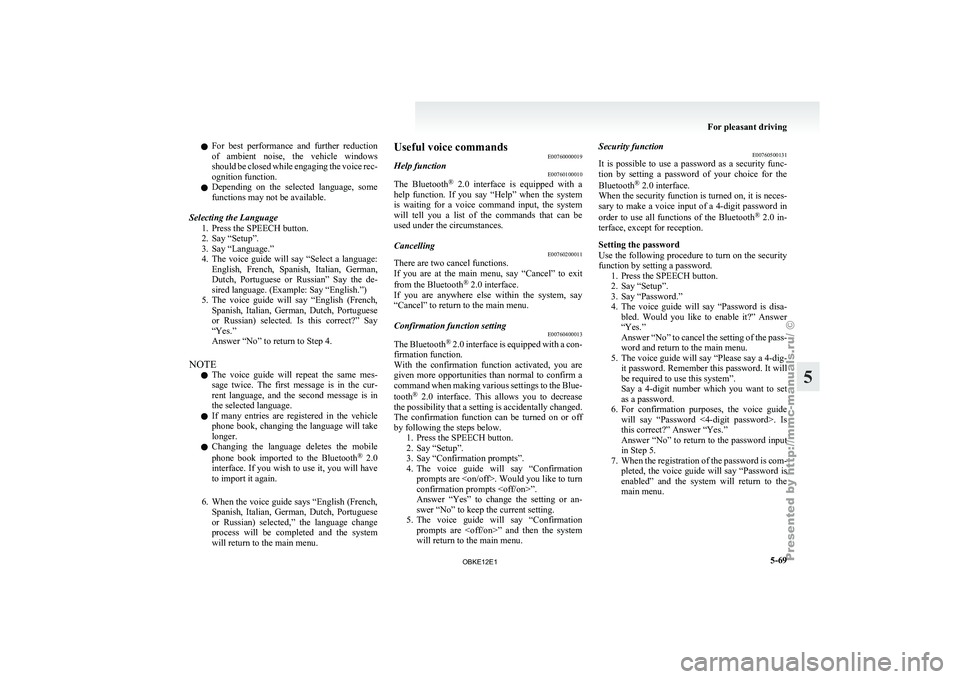
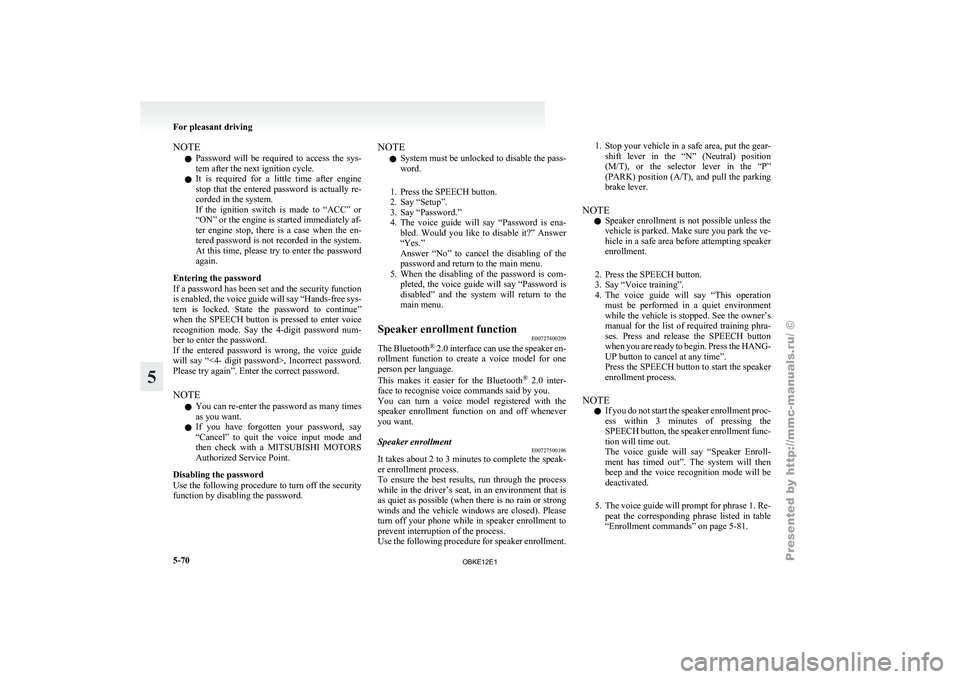
l To change the display language to English
1. Press the “←” or “→” function button to se- lect “ENGLISH”. Then press the “SET” func-
tion button. The display will flash twice, and
then the setting is completed to the language
selected. NOTE
l You
can return
to the previous display by
pressing the “BACK” function button.
2. After setting the language, press the “INFO” button to return to the information display. Changing the time notation
It is
possible
to set the time notation to 12-hour or
24-hour. 1. Press the “←” or “→” function button to se-lect “12h TIME NOTATION” or “24h TIME
NOTATION”. Then press the “SET” func-
tion button. The display will flash twice, and the display time notation will be updated to
the selected one.
12-hour
24-hour NOTE
l You
can return
to the previous display by
pressing the “BACK” function button. Instruments and controls
3-27 3
OBKE12E1
Page 109 of 377

2. After setting the time notation, press the “IN-
FO” button to return to the information dis-
play. Returning display items to their factory settings
You can return the setting of each item to the facto-
ry default settings.
NOTE
l The factory settings are as follows:
•Fuel consumption: L/100 km
• Driving range: km •
Average speed: km/h
• Outside temperature: °C
• Elevation: m
• Atmospheric pressure: hPa
• Display language: English
• Time notation: 12-hour 1. Push the “SELECT” function button.
2. Press the “←” function button to select
“YES”. 3. Press the “SELECT” function button.
4. Once more press the “←” function button to
select “YES”. Instruments and controls
3-28
3
OBKE12E1
Page 180 of 377

Check surroundings for safety.To change the indication on the screen
of the inside rear-view mirror
E00631300022
It is possible to turn off the screen of the inside rear-
view mirror and
change the language of the warn-
ing messages on the screen. To temporarily set the non- display mode
If you
press
the switch (1) while the image appears
on the display, it goes off temporarily.
To return to display mode, press the switch again
or turn the ignition key to the “ON” position after
turning to “LOCK” or “ACC” position. To permanently set the non- display mode
1. Turn the ignition key to the “ON” position. CAUTION
l
For safety
reasons,
do not perform follow-
ing operations with the engine running.
2. Put the shift lever (manual transmission) or
the selector
lever (automatic transmission) in
the “R” position.
3. Press and hold down the switch (1) (for about 15 seconds).
While you keep the switch pressed, the or-
ange indicator (2) comes on. When the im-
age goes off, the non-display mode setting is
completed.
To change the language of warning text(3) 1. Turn the ignition key to the “ON” position. CAUTION
l
For safety
reasons,
do not perform follow-
ing operations with the engine running.
2. Put the shift lever (manual transmission) or
the selector
lever (automatic transmission) in
the “R” position.
3. Press and hold down the switch (1) to enter language selection mode (for 6 to 11 seconds).
In this mode, the image appears and the
green indicator (2) comes on. 4. Press the switch until the desired language ap-
pears on the display.
Each time
you press the switch, the language
will change to the next one. When the warn-
ing text flashes, setting is completed. Starting and driving
4-55 4
OBKE12E1
Page 252 of 377

l
For best
performance and further reduction
of ambient noise, the vehicle windows
should be closed while engaging the voice rec-
ognition function.
l Depending on the selected language, some
functions may not be available.
Selecting the Language 1. Press the SPEECH button.
2. Say “Setup”.
3. Say “Language.”
4. The voice guide will say “Select a language:English, French, Spanish, Italian, German,
Dutch, Portuguese or Russian” Say the de-
sired language. (Example: Say “English.”)
5. The voice guide will say “English (French, Spanish, Italian, German, Dutch, Portuguese
or Russian) selected. Is this correct?” Say
“Yes.”
Answer “No” to return to Step 4.
NOTE l The voice guide will repeat the same mes-
sage twice. The first message is in the cur-
rent language, and the second message is in
the selected language.
l If many entries are registered in the vehicle
phone book, changing the language will take
longer.
l Changing the language deletes the mobile
phone book imported to the Bluetooth ®
2.0
interface. If you wish to use it, you will have
to import it again.
6. When the voice guide says “English (French, Spanish, Italian, German, Dutch, Portuguese
or Russian) selected,” the language change
process will be completed and the system
will return to the main menu. Useful voice commands
E00760000019
Help function E00760100010
The Bluetooth ®
2.0 interface
is equipped with a
help function. If you say “Help” when the system
is waiting for a voice command input, the system
will tell you a list of the commands that can be
used under the circumstances.
Cancelling E00760200011
There are two cancel functions.
If you are
at the main menu, say “Cancel” to exit
from the Bluetooth ®
2.0 interface.
If you are anywhere else within the system, say
“Cancel” to return to the main menu.
Confirmation function setting E00760400013
The Bluetooth ®
2.0 interface
is equipped with a con-
firmation function.
With the confirmation function activated, you are
given more opportunities than normal to confirm a
command when making various settings to the Blue-
tooth ®
2.0 interface. This allows you to decrease
the possibility that a setting is accidentally changed.
The confirmation function can be turned on or off
by following the steps below. 1. Press the SPEECH button.
2. Say “Setup”.
3. Say “Confirmation prompts”.
4. The voice guide will say “Confirmationprompts are
confirmation prompts
Answer “Yes” to change the setting or an-
swer “No” to keep the current setting.
5. The voice guide will say “Confirmation prompts are
will return to the main menu. Security function
E00760500131
It is
possible
to use a password as a security func-
tion by setting a password of your choice for the
Bluetooth ®
2.0 interface.
When the security function is turned on, it is neces-
sary to make a voice input of a 4-digit password in
order to use all functions of the Bluetooth ®
2.0 in-
terface, except for reception.
Setting the password
Use the following procedure to turn on the security
function by setting a password. 1. Press the SPEECH button.
2. Say “Setup”.
3. Say “Password.”
4. The voice guide will say “Password is disa-bled. Would you like to enable it?” Answer
“Yes.”
Answer “No” to cancel the setting of the pass-
word and return to the main menu.
5. The voice guide will say “Please say a 4-dig- it password. Remember this password. It will
be required to use this system”.
Say a 4-digit number which you want to set
as a password.
6. For confirmation purposes, the voice guide will say “Password <4-digit password>. Is
this correct?” Answer “Yes.”
Answer “No” to return to the password input
in Step 5.
7. When the registration of the password is com- pleted, the voice guide will say “Password is
enabled” and the system will return to the
main menu. For pleasant driving
5-69 5
OBKE12E1
Page 253 of 377

NOTE
l Password
will be
required to access the sys-
tem after the next ignition cycle.
l It is required for a little time after engine
stop that the entered password is actually re-
corded in the system.
If the ignition switch is made to “ACC” or
“ON” or the engine is started immediately af-
ter engine stop, there is a case when the en-
tered password is not recorded in the system.
At this time, please try to enter the password
again.
Entering the password
If a password has been set and the security function
is enabled, the voice guide will say “Hands-free sys-
tem is locked. State the password to continue”
when the SPEECH button is pressed to enter voice
recognition mode. Say the 4-digit password num-
ber to enter the password.
If the entered password is wrong, the voice guide
will say “<4- digit password>, Incorrect password.
Please try again”. Enter the correct password.
NOTE l You can re-enter the password as many times
as you want.
l If you have forgotten your password, say
“Cancel” to quit the voice input mode and
then check with a MITSUBISHI MOTORS
Authorized Service Point.
Disabling the password
Use the following procedure to turn off the security
function by disabling the password. NOTE
l System
must be
unlocked to disable the pass-
word.
1. Press the SPEECH button.
2. Say “Setup”.
3. Say “Password.”
4. The voice guide will say “Password is ena- bled. Would you like to disable it?” Answer
“Yes.”
Answer “No” to cancel the disabling of the
password and return to the main menu.
5. When the disabling of the password is com- pleted, the voice guide will say “Password is
disabled” and the system will return to the
main menu.
Speaker enrollment function E00727400209
The Bluetooth ®
2.0 interface
can use the speaker en-
rollment function to create a voice model for one
person per language.
This makes it easier for the Bluetooth ®
2.0 inter-
face to recognise voice commands said by you.
You can turn a voice model registered with the
speaker enrollment function on and off whenever
you want.
Speaker enrollment E00727500196
It takes about 2 to 3 minutes to complete the speak-
er enrollment process.
To ensure the
best results, run through the process
while in the driver’s seat, in an environment that is
as quiet as possible (when there is no rain or strong
winds and the vehicle windows are closed). Please
turn off your phone while in speaker enrollment to
prevent interruption of the process.
Use the following procedure for speaker enrollment. 1. Stop your vehicle in a safe area, put the gear-
shift lever
in the “N” (Neutral) position
(M/T), or the selector lever in the “P”
(PARK) position (A/T), and pull the parking
brake lever.
NOTE l Speaker enrollment is not possible unless the
vehicle is parked. Make sure you park the ve-
hicle in a safe area before attempting speaker
enrollment.
2. Press the SPEECH button.
3. Say “Voice training”.
4. The voice guide will say “This operation must be performed in a quiet environment
while the vehicle is stopped. See the owner’s
manual for the list of required training phra-
ses. Press and release the SPEECH button
when you are ready to begin. Press the HANG-
UP button to cancel at any time”.
Press the SPEECH button to start the speaker
enrollment process.
NOTE l If you do not start the speaker enrollment proc-
ess within 3 minutes of pressing the
SPEECH button, the speaker enrollment func-
tion will time out.
The voice guide will say “Speaker Enroll-
ment has timed out”. The system will then
beep and the voice recognition mode will be
deactivated.
5. The voice guide will prompt for phrase 1. Re- peat the corresponding phrase listed in table
“Enrollment commands” on page 5-81. For pleasant driving
5-70
5
OBKE12E1
Page 259 of 377

MUTE function
E00760300041
At any time
during a call, you can mute the vehicle
microphone.
Pressing the SPEECH button and then saying
“Mute” during a call will turn ON the MUTE func-
tion and mute the microphone.
Saying “Mute off” in the same way will turn off
the MUTE function and cancel the mute on the mi-
crophone.
Switching between hands-free mode and private
mode E00761400036
The Bluetooth ®
2.0 interface
can switch between
Hands-free mode (Hands-free calls) and private
mode (calls using cellular phone).
If you press the SPEECH button and say “Transfer
call” during a Hands-free call, you can stop the
Hands-free mode and talk in private mode.
To return to Hands-free mode, press the SPEECH
button again and say “Transfer call”.
Phone book function E00763700017
The Bluetooth ®
2.0 interface
has 2 types of unique
phone books that are different from the phone book
stored in the cellular phone. They are the vehicle
phone book and the mobile phone book.
These phone books are used to register telephone
numbers and to make calls to desired numbers via
the voice recognition function.
NOTE
l Disconnecting the battery cable will not de-
lete information registered in the phone book. Vehicle phone book
E00763800135
This phone book
is used when making calls with
the voice recognition function.
Up to 32 names can be registered in the vehicle
phone book per language.
Also, each entry has 4 locations associated with:
home, work, mobile and other. You can register
one telephone number for each location.
You can register a desired name as a name for any
phone book entry registered in the vehicle phone
book.
Names and telephone numbers can be changed lat-
er on.
The vehicle phone book can be used with all paired
cellular phones.
To register a telephone number in the vehicle
phone book
You can register a telephone number in the vehicle
phone book in the following 2 ways: Reading out a
telephone number, and selecting and transferring 1
phone book entry from the phone book of the cellu-
lar phone.
To register by reading out a telephone number
1. Press the SPEECH button.
2. Say “Phone book.”
3. The voice guide will say “Select one of thefollowing: new entry, edit number, edit
name, list names, delete, erase all, or import
contact.” Say “New entry.”
4. The voice guide will say “Name please.” Say your preferred name to register it. NOTE
l If
the maximum
number of entries are al-
ready registered, the voice guide will say
“The phone book is full. Would you like to
delete a name?” Say “Yes” if you want to de-
lete a registered name.
Say “No,” to return to the main menu.
5. When the name has been registered, the voice guide will say “home, work, mobile, or
other?” Say the location for which you want
to register a telephone number.
NOTE l When the confirmation function is on, the
voice guide will say “
rect?” Answer “Yes.”
Answer “No” to return to location selection
in Step 5.
If a telephone number has been registered for
the selected location, the voice guide will say
“The current number is
number please.”
If you do not want to change the telephone
number, say “cancel” or the original number
to keep it registered.
6. The voice guide will say “Number please.” Say the telephone number to register it.
NOTE l In the case of English, the system will recog-
nise both “zero” and “oh” (Letter “o”) for the
number “0.”
7. The voice guide will repeat the telephone number you have just read, and then register
the number. For pleasant driving
5-76
5
OBKE12E1