2011 MITSUBISHI PAJERO IV spare wheel
[x] Cancel search: spare wheelPage 291 of 377

The spare wheel is stored on the outside of the back-
door. (Refer to
“To remove the spare wheel” on
page 6-10). 1- Spare wheel
CAUTION
l
The tyre pressure
should be periodically
checked and maintained at the specified
pressure while the tyre is stowed.
Driving with an insufficient tyre pressure
can lead to an accident. If you have no
choice but to drive with an insufficient
tyre pressure, keep your speed down and
inflate the tyre to the correct pressure as
soon as possible. (Refer to “Tyre inflation
pressures” on page 8-13.) To remove the spare wheel
E00803500177 CAUTION
l
Grasp the
spare
wheel firmly when remov-
ing or attaching it.
l When removing the spare wheel, put on
gloves. Removing the spare wheel with
your bare hands may cause injury to the
fingers.
1. Open the backdoor.
2. Open the lids (A) inside of the backdoor. 3. Remove the bolts (B) by turning them anti-
clockwise with the wheel nut wrench. 4. Close the backdoor.
5. Open the spare wheel garnish (C).For emergencies
6-10
6
OBKE12E1
Page 292 of 377

CAUTION
l
Do not
open the backdoor with the spare
wheel garnish open. The spare wheel gar-
nish could swing out to the right of the ve-
hicle, resulting in an accident.
6. Loosen the spare wheel bolts with the wheel
nut wrench
(D), then remove the spare wheel. NOTE
l Put
the spare
wheel under the vehicle body
near the flat tyre. This makes it safer if the
jack slips out of position. To change a tyre
E00803200709
1. Loosen the wheel nuts a quarter turn with the
wheel nut
wrench. Do not remove the wheel
nuts yet. 2. Using the jack handle, turn the release valve
(A) clockwise until it stops. 3. Insert the jack handle in the bracket of the
jack and
hook the notch (B) on the jack han-
dle end to the claw (C) of the bracket. 4. Place
the jack under one of the jacking
points shown in the illustration. Use the jack-
ing point
closest to the tyre you wish to
change. For emergencies
6-11 6
OBKE12E1
Page 293 of 377

D- Front jacking point
E- Rear jacking point
WARNING
l Set the
jack only at the positions shown
here. If the jack is set at a wrong position,
it could dent your vehicle or the jack
might fall over and cause personal injury. WARNING
l Do not use
the jack on a tilted or soft sur-
face. Otherwise, the jack might slip and
cause personal injury. Always use the
jack on a flat, hard surface. Before set-
ting the jack, make sure there are no
sand or pebbles under the jack base.
5. Move the jack handle up and down to raise
the ram
until just before the jack contacts the
jacking point of the vehicle. Ensure that the
jack will properly contact the vehicle jacking
point.
NOTE l This jack is a 3 stage expansion type.
6. Raise the vehicle until the tyre is slightly off the ground. WARNING
l Stop jacking
up
the vehicle as soon as the
tyre is raised off the ground. It is danger-
ous to raise the vehicle any higher.
l Do not get under your vehicle while using
the jack.
l Do not bump the raised vehicle or leave it
sitting on the jack for a long time. Both
are very dangerous.
l Do not use a jack except the one that
came with your vehicle.
l The jack should not be used for any pur-
pose other than to change a tyre.
l No one should be in your vehicle when us-
ing the jack. WARNING
l Do not start
or run the engine while your
vehicle is on the jack.
l Do not turn the raised wheel. The tyres
still on the ground could turn and make
your vehicle fall off the jack.
7. Remove the wheel nuts with the wheel nut
wrench, then take the wheel off. CAUTION
l
Handle the
wheel
carefully when chang-
ing the tyre, to avoid scratching the wheel
surface.
8. Clean out any mud, etc. on the hub surface
(F), hub
bolts (G) or in the installation holes
(H) in the wheel, and then mount the spare
wheel. For emergencies
6-12
6
OBKE12E1
Page 294 of 377

WARNING
l Mount the spare wheel with the valve
stem (I) facing outboard. If you cannot
see the valve stem, you have installed the
wheel backwards.
Operating the vehicle with the spare
wheel installed backwards can cause vehi-
cle damage and result in an accident. 9. Finger-tighten the
wheel
nuts. (Turn them
clockwise.)
Vehicles with steel wheels
Tighten the wheel nuts (tapered nuts) until
the tapered parts of the wheel nuts make
light contact with the seats of the wheel
holes and the wheel is not loose. With a spare wheel, tighten the wheel nuts in
the same way.
Vehicles with aluminium wheels
Tighten the
wheel
nuts (flange nuts) until
their flange section comes in contact with the
wheel and is no longer loose. CAUTION
l
Never apply oil
to either the wheel bolts
or the nuts, or they will tighten too much.
NOTE l Flange
nuts can
be temporarily used on the
steel wheel as shown in the illustration, but
return to the original wheel and tyre as soon
as possible. l
If all
four
aluminium wheels are changed to
steel wheels, use tapered nuts.
10. Put the notch (J) provided on the jack handle end on the valve (K) of the jack. For emergencies
6-13 6
OBKE12E1
Page 296 of 377

CAUTION
l
After
changing
the tyre and driving the ve-
hicle about 1,000 km (620 miles), retight-
en the wheel nuts to make sure that they
have not come loose.
l If the steering wheel vibrates when driv-
ing after changing the tyre, we recom-
mend you to have the tyres checked for
balance.
l Do not mix one type of tyre with another
or use a different size from the one listed.
This would cause early wear and poor han-
dling.
To store the flat tyre or spare tyre E00803400192
1. Attach the wheel to the spare wheel hanger
(A) while
aligning the holes in the wheel
with the bolts on the spare wheel hanger.
Using the wheel nut wrench, tighten the
spare wheel bolts firmly.
Tightening torque
37 to 54 Nm (Achieved by applying a force of 140 to
200 N
at the end of the wheel nut wrench sup-
plied with the vehicle.) 2. Reverse the opening procedure when closing
the spare wheel garnish.
Tightening torque
for spare wheel garnish
mounting bolt
11 to 25 Nm
(Achieved by applying a force of 40 to 92 N
at the end of the wheel nut wrench supplied
with the vehicle.) CAUTION
l
The spare
wheel
should always be se-
cured during vehicle operation. If a flat
tyre is changed, put the flat tyre in the
spare wheel mounting position, and use
the wheel nut wrench to secure it firmly.
NOTE l Have
your damaged
tyre repaired as soon as
possible. Towing
E00801503552
If your vehicle needs to be towed
If towing
is
necessary, we recommend you to have
it done by your MITSUBISHI MOTORS Author-
ized Service Point or a commercial tow truck service.
In the following cases, transport the vehicle using a
tow truck.
l The engine runs but the vehicle does not
move or abnormal noise is produced.
l Inspection of the vehicle’s underside reveals
that oil or some other fluid is leaking.
If a wheel gets stuck in a ditch, do not try to tow
the vehicle. Please contact your authorized
MITSUBISHI MOTORS dealer or a commercial
tow truck service for assistance.
Only when you cannot receive a towing service
from a MITSUBISHI MOTORS Authorized Serv-
ice Point or commercial tow truck service, tow
your vehicle carefully in accordance with the in-
structions given in “Emergency towing” in this part.
For emergencies
6-15 6
OBKE12E1
Page 306 of 377

CAUTION
l
Do not use a scrubbing brush or other
hard tools as they may damage the plastic
part surface.
l Do not use wax containing compound (pol-
ishing powder) which may damage the
plastic part surface.
l Do not bring the plastic parts into contact
with petrol, light oil, brake fluids, engine
oils, greases, paint thinners, and sulphu-
ric acid (battery electrolyte) which may
crack, stain or discolour the plastic parts.
If they touch the plastic parts, wipe them
off with soft cloth, chamois or the like
and an aqueous solution of neutral deter-
gent then immediately rinse the affected
parts with water.
Chrome parts E00901400115
In order to prevent spots and corrosion of chrome
parts, wash with
water, dry thoroughly, and apply a
special protective coating. This should be done
more frequently in winter.
Aluminium wheels* E00901500321
1. Remove dirt using a sponge while sprinkling
water on the wheel.
2. Use
neutral detergent on any dirt that cannot
be removed easily with water.
Rinse off the neutral detergent after washing
the wheel.
3. Dry the vehicle thoroughly using a chamois leather or a soft cloth. CAUTION
l
Do not use
a brush or other hard imple-
ment on the wheels.
Doing so could scratch the wheels.
l Do not use any cleaner that contains an
abrasive substance or is acidic or alka-
line. Doing so could cause the coating on
the wheels to peel or become discoloured
or stained.
l Do not directly apply hot water using a
steam cleaner or by any other means.
l Contact with seawater and road deicer
can cause corrosion. Rinse off such sub-
stances as soon as possible.
Window glass E00901600032
The window glass can normally be cleaned using
only a sponge and water.
Glass cleaner can
be used to remove oil, grease,
dead insects, etc. After washing the glass, wipe dry
with a clean, dry, soft cloth. Never use the same
cloth to wipe the window glass as would be used to
wipe the paintwork; wax from the painted surfaces
could adhere to the glass and reduce its transparen-
cy and visibility.
NOTE
l To clean the inside of the backdoor window,
always use a soft cloth and wipe the window
glass along the demister heater element so as
not to cause damage. Wiper blades
E00901700059
Use a soft cloth and glass cleaner to remove grease,
dead insects, etc.,
from the wiper blades. Replace
the wiper blades when they no longer wipe proper-
ly. (Refer to page 8-17.)
Cleaning the sunroof* E00901800180
Clean the inside of the sunroof with a soft cloth.
Hard deposits should
be wiped away with a cloth
dipped in warm, neutral detergent solution. Wipe
away the solution with a sponge dipped in fresh wa-
ter.
NOTE
l The surface treatment on the inside of the
glass may be removed if hard cloth or organ-
ic solvent (benzine, kerosene, thinner, etc.) is
used.
Engine compartment E00902100311
Clean the engine compartment at the beginning and
end of winter.
Pay particular attention to flanges,
crevices and peripheral parts where dust containing
road chemicals and other corrosive materials might
collect.
If salt and other chemicals are used on the roads in
your area, clean the engine compartment at least ev-
ery three months.
Never spray or splash water on the electrical com-
ponents in the engine compartment, as this may
cause damage.
Do not bring the nearby parts, the plastic parts and
so on into contact with sulphuric acid (battery elec-
trolyte) which may crack, stain or discolour them. Vehicle care
7-05 7
OBKE12E1
Page 322 of 377

When rotating tyres, check for uneven wear and
damage. Abnormal wear
is usually caused by incor-
rect tyre pressure, improper wheel alignment, out
of balance wheel, or severe braking. We recom-
mend you to have it checked to determine the
cause of irregular tread wear.
Spare tyre used*
Spare tyre not used
Tyres that have arrows showing rotation direction Front
Front
Front
*- If the spare tyre wheel differs from the stand-
ard tyre
wheel,
do not perform tyre rotation us-
ing a spare wheel. CAUTION
l
If the tyres
have arrows (A) indicating
the correct direction of rotation, swap the
front and rear wheels on the left hand
side of the vehicle and the front and rear
wheels on the right hand side of the vehi-
cle separately. Keep each tyre on its origi-
nal side of the vehicle. When fitting the
tyres, make sure the arrows point in the
direction in which the wheels will turn
when the vehicle moves forward. Any
tyre whose arrow points in the wrong di-
rection will not perform to its full poten-
tial.
Front CAUTION
l
Avoid the
combined
use of different types
of tyres.
Using different types of tyres can affect ve-
hicle performance and safety. Snow tyres
E01002000523
The use of
snow tyres is recommended for driving
on snow and ice. To preserve driving stability,
mount snow tyres of the same size and tread pat-
tern on all 4 wheels.
Snow tyres worn more than 50% are no longer suit-
able for use as snow tyres.
Snow tyres which do not meet specifications must
not be used. CAUTION
l
Observe permissible
maximum
speed for
your snow tyres and the legal speed limit.
NOTE l The
laws and
regulations concerning snow
tyres (driving speed, required use, type, etc.)
vary. Find out and follow the laws and regu-
lations in the area you intend to drive.
l If flange nuts are used on your vehicle,
change to tapered nuts when steel wheels are
used.
Tyre chains E01002101794
On 4WD vehicles in which the driving power is dis-
tributed preferentially to
the rear wheels, ensure
that the tyre chains are fitted on the rear in accord-
ance with the manufacturer’s instructions.
Use only tyre chains which are designed for use
with the tyres mounted on the vehicle: use of the in-
correct size or type of chain could result in damage
to the vehicle body.
Before fitting tyre chains, we recommend you to
consult a MITSUBISHI MOTORS Authorized Serv-
ice Point. The max. chain height is as follows. Maintenance
8-15 8
OBKE12E1
Page 335 of 377
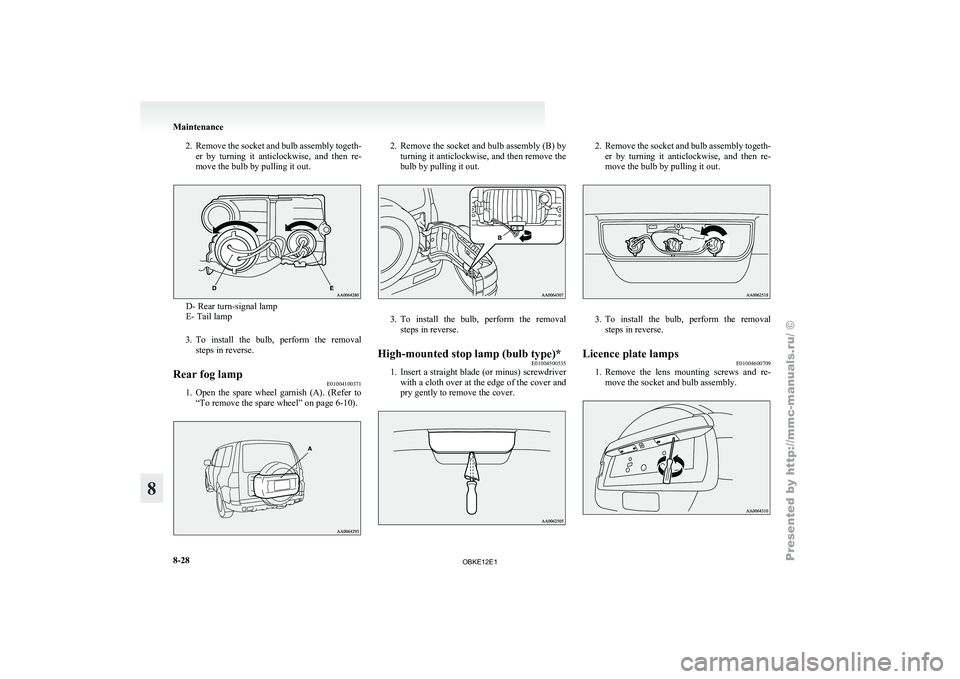
2. Remove the socket and bulb assembly togeth-
er by turning it anticlockwise, and then re-
move the bulb by pulling it out. D- Rear turn-signal lamp
E- Tail lamp
3. To install the
bulb, perform the removal
steps in reverse.
Rear fog lamp E01004100371
1. Open the spare wheel garnish (A). (Refer to
“To remove the spare wheel” on page 6-10). 2. Remove the socket and bulb assembly (B) by
turning it
anticlockwise, and then remove the
bulb by pulling it out. 3. To install the bulb, perform the removal
steps in reverse.
High-mounted stop lamp (bulb type)* E01004500535
1. Insert
a
straight blade (or minus) screwdriver
with a
cloth over at the edge of the cover and
pry gently to remove the cover. 2. Remove the socket and bulb assembly togeth-
er by
turning it anticlockwise, and then re-
move the bulb by pulling it out. 3. To install the bulb, perform the removal
steps in reverse.
Licence plate lamps E01004600709
1. Remove
the
lens mounting screws and re-
move the socket and bulb assembly. Maintenance
8-28
8
OBKE12E1