Page 662 of 714
Vehicle care and maintenance
7-65
7
Front fog lights
(if so equipped)
N00943600633
1. Turn the bezel (A) counterclockwise to remove it.2. Remove the 3 screws (B) and remove the light unit.*- Front of the vehicle
*- Front of the vehicle
BK0122500US.book 65 ページ 2010年5月12日 水曜日 午前11時11分
Page 664 of 714
Vehicle care and maintenance
7-67
7
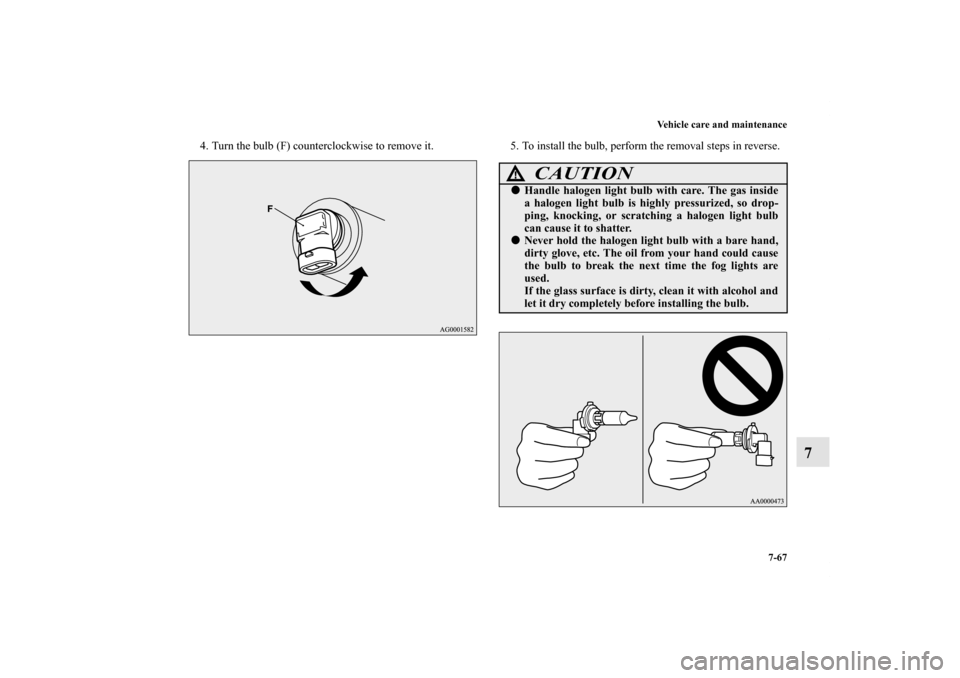
4. Turn the bulb (F) counterclockwise to remove it. 5. To install the bulb, perform the removal steps in reverse.
CAUTION
!�Handle halogen light bulb with care. The gas inside
a halogen light bulb is highly pressurized, so drop-
ping, knocking, or scratching a halogen light bulb
can cause it to shatter.�Never hold the halogen light bulb with a bare hand,
dirty glove, etc. The oil from your hand could cause
the bulb to break the next time the fog lights are
used.
If the glass surface is dirty, clean it with alcohol and
let it dry completely before installing the bulb.
BK0122500US.book 67 ページ 2010年5月12日 水曜日 午前11時11分
Page 665 of 714
7-68 Vehicle care and maintenance
7
Rear combination lights
N00943700432
1. Remove the screws (A) that hold the light unit and remove
the light unit.2. Turn the socket and bulb assembly counterclockwise to
remove it.
NOTE�The tail and stop light uses an LED instead of the bulb.
Check with an authorized Mitsubishi Motors dealer or a
repair facility of your choice when the light needs to be
repaired or replaced.B- Tail and stop light (LED) - cannot be replaced
C- Rear turn-signal light
BK0122500US.book 68 ページ 2010年5月12日 水曜日 午前11時11分
Page 667 of 714
7-70 Vehicle care and maintenance
7
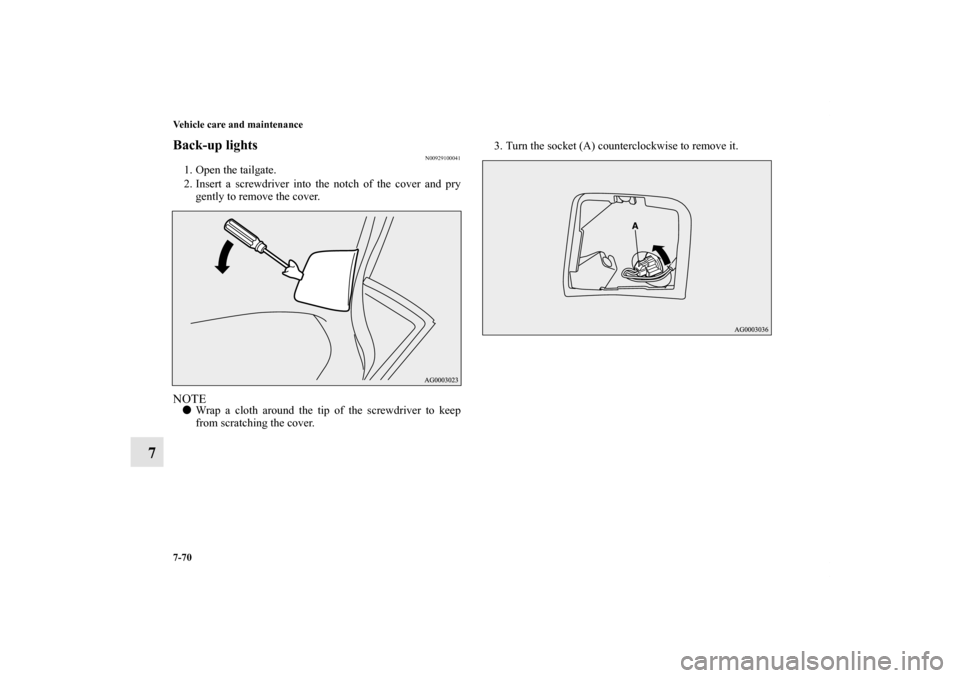
Back-up lights
N00929100041
1. Open the tailgate.
2. Insert a screwdriver into the notch of the cover and pry
gently to remove the cover.NOTE�Wrap a cloth around the tip of the screwdriver to keep
from scratching the cover.3. Turn the socket (A) counterclockwise to remove it.
BK0122500US.book 70 ページ 2010年5月12日 水曜日 午前11時11分
Page 669 of 714
7-72 Vehicle care and maintenance
7
3. Remove the light mounting screw (B) and remove the
light unit.4. Remove the socket and bulb assembly (C) together by
turning it counterclockwise, and then remove the bulb by
pulling it out.
5. To install the bulb, perform the removal steps in reverse.
BK0122500US.book 72 ページ 2010年5月12日 水曜日 午前11時11分
Page 676 of 714
Vehicle care and maintenance
7-79
7
Glove compartment light
N00954200062
1. Turn the socket (A) counterclockwise to remove it.2. Pull out the bulb.
3. To install the bulb, perform the removal steps in reverse.
BK0122500US.book 79 ページ 2010年5月12日 水曜日 午前11時11分
Page 679 of 714

7-82 Vehicle care and maintenance
7Cleaning the inside of your vehicle
N00945200095
After washing the inside of your vehicle with any cleaner, wipe
it dry in a shady, well ventilated area.NOTE�Always read the instructions on the cleaner label.Plastic, vinyl leather, fabric and flocked parts
N00945300155
1. Lightly wipe these off with a soft cloth soaked in a 3%
solution of gentle soap and water.
2. To rinse, dip the cloth in fresh water, wring it out well, and
wipe off all the soap.
NOTE�Do not use cleaners, conditioners, and protectants contain-
ing silicones or wax.
Such products, when applied to the instrument panels or
other parts, may cause reflections on the windshield and
obscure vision.
Also, if such products get on the switches of the electrical
accessories, it may lead to failure of these accessories.Upholstery
N00945500128
1. To maintain the value of your new vehicle, maintain the
upholstery carefully and keep the interior clean.
Use a vacuum cleaner and brush to clean the seats. If
stained, vinyl and synthetic leather should be cleaned with
an appropriate cleaner. Cloth fabrics can be cleaned with
either upholstery cleaner or a 3% solution of gentle soap
in lukewarm water.
2. Clean the carpeting with a vacuum cleaner and remove
any stains with carpet cleaner. Oil and grease can be
removed by lightly dabbing with a clean white cloth and
spot remover.NOTE�If fuzzing is difficult to remove from the seat upholstery,
draw a suitable defuzzing brush over the surface in one
direction.
CAUTION
!�Do not use organic substances (solvents, benzine,
kerosene, alcohol, gasoline, etc.) or alkaline or acidic
solutions.
These chemicals can cause discoloring, staining or
cracking of the surface.
If you use cleaners or polishing agents, make sure
their ingredients do not include the substances men-
tioned above.
BK0122500US.book 82 ページ 2010年5月12日 水曜日 午前11時11分
Page 694 of 714
Specifications
9-3
9
Chassis numberThe chassis number is stamped on the bulkhead as shown in
the illustration.
Engine serial numberThe engine serial number is stamped on the cylinder block as
shown in the illustrations.2.4 liter models
BK0122500US.book 3 ページ 2010年5月12日 水曜日 午前11時11分

N00943600633
1. Turn the bezel (A) counterclockwise to remove it.2. Remove the 3 screws (B) and remove the light unit.*- Front of")
 that hold the light unit and remove
the light unit.2. Turn the socket and bulb assembly counterclockwi")
 and remove the
light unit.4. Remove the socket and bulb assembly (C) together by
turning it counterclockwise, and then remove")
 counterclockwise to remove it.2. Pull out the bulb.
3. To install the bulb, perform the removal steps in")
