2011 MITSUBISHI L200 light
[x] Cancel search: lightPage 128 of 330

Economical drivingE00600100620
For economical driving, there are some technical re-
quirements that have to be met. The prerequisite
for low fuel consumption is a properly adjusted en-
gine. In order to achieve longer life of the vehicle
and the most economical operation, we recommend
you to have the vehicle checked at regular intervals
in accordance with the service standards.
Fuel economy and generation of exhaust gas and
noise are highly influenced by personal driving hab-
its as well as the particular operating conditions.
The following points should be observed in order
to minimize wear of brakes, tyres and engine as
well as to reduce environmental pollution.
Starting
Avoid rapid acceleration and sudden starts; such op-
eration will result in higher fuel consumption.
Shifting
Shift only at an appropriate speed and engine
speed. Always use the highest gear possible.
The transfer shift lever should be set to “2H” when
driving 4WD vehicles on normal roads and express
ways to obtain best possible fuel economy.
City traffic
Frequent starting and stopping increases the aver-
age fuel consumption. Use roads with smooth traf-
fic flow whenever possible. When driving on con-
gested roads, avoid use of a low gear at high en-
gine speeds.
Idling
The vehicle consumes fuel even during idling.
Avoid extended idling whenever possible.Speed
The higher the vehicle speed, the more fuel con-
sumed. Avoid driving at full speed. Even a slight re-
lease of the accelerator pedal will save a significant
amount of fuel.
Tyre inflation pressure
Check the tyre inflation pressures at regular inter-
vals. Low tyre inflation pressure increases road re-
sistance and fuel consumption. In addition, low
tyre pressures adversely affect tyre wear and driv-
ing stability.
Load
Do not drive with unnecessary articles in the cargo
area. Especially during city driving where frequent
starting and stopping is necessary, the increased
weight of the vehicle will greatly affect fuel con-
sumption.
Cold engine starting
Starting of a cold engine consumes more fuel.
Unnecessary fuel consumption is also caused by
keeping a hot engine running. After the engine is
started, commence driving as soon as possible.
Air conditioning*
The use of the air conditioning will increase the
fuel consumption.Driving, alcohol and drugs E00600200012
Driving after drinking alcohol is one of the most fre-
quent causes of accidents.
Your driving ability can be seriously impaired even
with blood alcohol levels far below the legal mini-
mum. If you have been drinking, don’t drive. Ride
with a designated non-drinking driver, call a cab or
a friend, or use public transportation.
Drinking coffee or taking a cold shower will not
make you sober.
Similarly, prescription and nonprescription drugs af-
fect your alertness, perception and reaction time.
Consult with your doctor or pharmacist before driv-
ing while under the influence of any of these medi-
cations.WARNINGl NEVER DRINK AND DRIVE.
Your perceptions are less accurate, your
reflexes are slower and your judgment is
impaired.
Starting and driving
4-02
4
Page 133 of 330

Parking brakeE00600501562
To park the vehicle, first bring it to a complete
stop, fully engage the parking brake, and then
move the gearshift lever to 1 st
(on an uphill) or Re-
verse (on a downhill) position for vehicles with man-
ual transmission or set the selector lever to “P”
(PARK) position on automatic transmission vehi-
cles.CAUTIONl Before driving, be sure that the parking
brake is fully released and brake warning
lamp is off.
If a vehicle is driven without releasing the
parking brake, the brake will be overhea-
ted, resulting in ineffective braking and
possible brake failure.
l When you intend to apply the parking
brake, firmly press the brake pedal to
bring the vehicle to a complete stop be-
fore pulling the parking brake lever. Pull-
ing the parking brake lever with the vehi-
cle moving could make the rear wheels
lock up, thereby making the vehicle unsta-
ble. It could also make the parking brake
malfunction.
l If the brake warning lamp does not extin-
guish when the parking brake is fully re-
leased, the brake system may be an abnor-
mal.
Have your vehicle checked immediately.
For details, refer to “Brake warning
lamp” on page 3-08.Type 1
To apply
1- Firmly depress and hold the brake pedal,
then pull the lever up without pushing the but-
ton at the end of hand grip.
To release
1- Firmly depress and hold the brake pedal,
then pull the lever up slightly.
2- Push the button at the end of hand grip.
3- Lower the lever fully.
Type 2
To apply
1- Firmly depress and hold the brake pedal,
then pull the lever out.
To release
Starting and driving
4-07
4 LHD RHD
Page 134 of 330

1-Firmly depress and hold the brake pedal,
then pull the lever out slightly and turn it
clockwise (LHD) or anticlockwise (RHD).
2- Push in the lever completely.
Parking E00600601202
Parking on a hill
To prevent the vehicle from rolling, follow these
procedures:
Parking on a downhill slope
Turn the front wheels towards the kerb and move
the vehicle forward until the kerb side wheel gently
touches the kerb.
Set the parking brake and place the gearshift lever
into the “R” (Reverse) position (with M/T) or the
selector lever into the “P” (PARK) position (with
A/T).
If necessary, apply chocks to wheels.
Parking on an uphill slope
Turn the front wheels away from the kerb and
move the vehicle back until the kerb side wheel gen-
tly touches the kerb.
Set the parking brake and place the gearshift lever
into the 1 st
position (with M/T) or the selector lever
into the “P” (PARK) position (with A/T).
If necessary, apply chocks to wheels.
NOTE l If your vehicle is equipped with
A/T, be sure
to apply the parking brake before moving the
selector lever to the “P” (PARK) position. If
you move the selector lever to the “P”
(PARK) position before applying the parking
brake, it may be difficult to disengage the se-
lector lever from the “P” (PARK) position
when next you drive the vehicle, requiring ap-
plication of a strong force to the selector lev-
er to move from the “P” (PARK) position.Parking with the engine running
Never leave the engine running while you take a
short sleep/rest. Also, never leave the engine run-
ning in a closed or poorly ventilated place.WARNINGl Leaving the engine running risks injury
or death from accidentally moving the
gearshift lever (on M/T vehicles) or the se-
lector lever (on A/T vehicles) or the accu-
mulation of toxic exhaust fumes in the pas-
senger compartment.
Where you park
Your front bumper can be damaged if you scrape it
over kerbs or parking stop blocks. Be careful when
travelling up or down steep slopes where your bump-
er can scrape the road.
WARNINGl Do not park your vehicle in areas where
combustible materials such as dry grass
or leaves can come in contact with a hot
exhaust, since a fire could occur.
When leaving the vehicle
Always remove the key from the ignition switch
and lock all doors when leaving the vehicle unatten-
ded.
Always try to park your vehicle in a well lit area.
Starting and driving
4-08
4LHD RHD
Page 136 of 330

Outside rear-view mirrorsE00600900149To adjust the mirror position E00601000482WARNINGlDo not attempt to adjust the rear-view
mirrors while driving. This can be danger-
ous.
Always adjust the mirrors before driving.
l Your vehicle is equipped with convex
type mirrors.
Please take into consideration, that ob-
jects you see in the mirror will look small-
er and farther away compared to a nor-
mal flat mirror.
Do not use this mirror to estimate dis-
tance of following vehicles when changing
lanes.
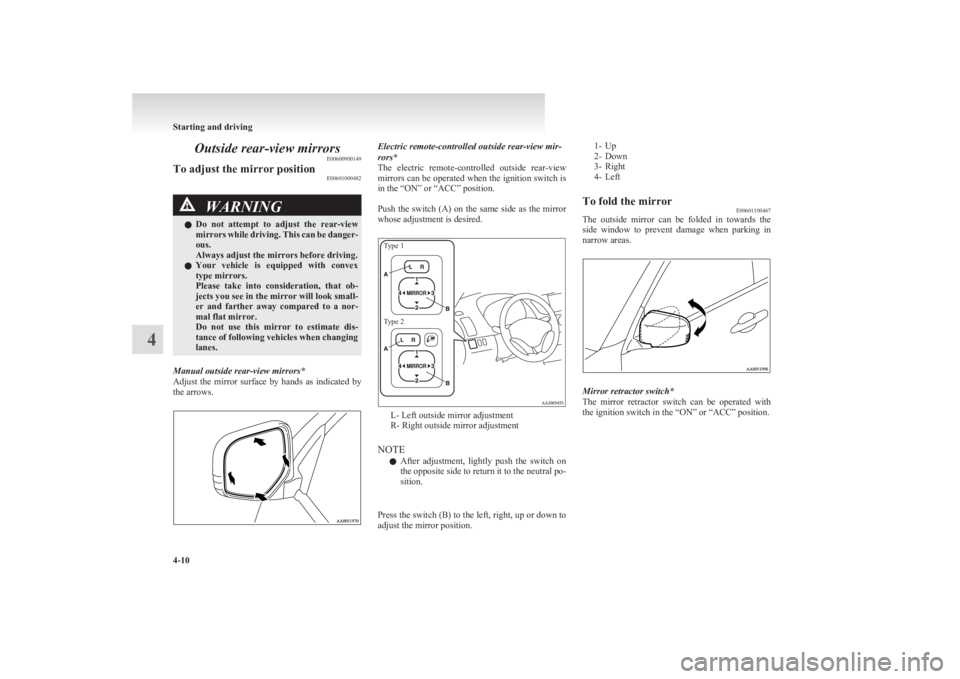
Manual outside rear-view mirrors*
Adjust the mirror surface by hands as indicated by
the arrows.
Electric remote-controlled outside rear-view mir-
rors*
The electric remote-controlled outside rear-view
mirrors can be operated when the ignition switch is
in the “ON” or “ACC” position.
Push the switch (A) on the same side as the mirror
whose adjustment is desired.Type 1Type 2
L- Left outside mirror adjustment
R- Right outside mirror adjustment
NOTE l After adjustment, lightly push the switch on
the opposite side to return it to the neutral po-
sition.
Press the switch (B) to the left, right, up or down to
adjust the mirror position.
1- Up
2- Down
3- Right
4- LeftTo fold the mirror E00601100467
The outside mirror can be folded in towards the
side window to prevent damage when parking in
narrow areas.
Mirror retractor switch*
The mirror retractor switch can be operated with
the ignition switch in the “ON” or “ACC” position.
Starting and driving
4-10
4
Page 137 of 330

Push the switch to fold the mirrors inward, and
push the switch again to return them to extended po-
sition.
NOTE
l It is also possible to fold and return the mir-
rors by hand.
l When freezing has occurred and mirrors fail
to operate as intended, please refrain from re-
peated pushing of the retractor switch as this
action can result in burn-out of the mirror mo-
tor circuits.
Heated mirror* E00601200253
When the rear window demister switch (C) is press-
ed, the outside rear-view mirrors are demisted or de-
frosted. Current will flow through the heater ele-
ment inside the mirrors, thus clearing away frost or
condensation.
The indication lamp (D) will illuminate while the
demister is on. The heater will be turned off auto-
matically in about 20 minutes.Type 1Type 2
Ignition switch E00601401874
LOCK
The engine is stopped and the steering wheel
locked. The key can only be inserted and removed
when the switch in this position.
ACC
The engine is stopped, but the electrical devices
such as the radio and cigarette lighter can be operat-
ed.
ON
The engine is running, and all the vehicle’s electri-
cal devices can be operated.
START
The starter motor operates. After the engine has star-
ted, release the key and it will automatically return
to the “ON” position.
Starting and driving
4-11
4
Page 138 of 330

NOTEl If your vehicle is equipped with the Daytime
Running Lamp, when the ignition switch is
in the “ON”, the headlamp low beams etc.
are turned on.
Refer to “Headlamps” on page 3-30.
l Your vehicle is equipped with an electronic
immobilizer.
To start the engine, the ID code which the
transponder inside the key sends must match
the one registered in the immobilizer comput-
er.
Refer to “Electronic immobilizer” on page
1-03.
To remove the key
Push the key in at the “ACC” position and keep it
depressed until it is turned to the “LOCK” position
and remove it.CAUTIONl Do not remove the ignition key from the
ignition switch while driving. The steer-
ing wheel will be locked, causing loss of
control.
l If the engine is stopped while driving, the
brake servomechanism will cease to func-
tion and braking efficiency will deterio-
rate. Also, the power steering system will
not function and it will require greater
manual effort to operate the steering.
l Do not leave the key in the “ON” position
for a long time when the engine is not run-
ning, doing so will cause the battery to be
discharged.
l Do not turn the key to the “START” posi-
tion when the engine is running, doing so
could damage the starter motor.Steering wheel lock E00601500227
To lock
Remove the key at the “LOCK” position.
Turn the steering wheel until it is locked.
To unlock
Turn the key to the “ACC” position while moving
the steering wheel slightly.
CAUTIONl Remove the key when leaving the vehicle.
NOTE
l If the front wheels are turned, the anti-theft
lock may sometimes make it difficult to turn
the key from “LOCK” to “ACC”. Firmly
turn the steering wheel to the left or to the
right as you turn the key.
Starting and driving
4-12
4
Page 140 of 330

lWhen the engine has not been started within
about 5 seconds after the diesel preheat indi-
cation lamp went out, return the ignition key
to the “LOCK” position. Then, turn the key
to the “ON” position to preheat the engine
again.
l When the engine is warm, the diesel preheat
indication lamp does not come on even if the
ignition key is placed in the “ON” position.
Start the engine by turning the ignition key
right to the “START” position.
6. Operate the accelerator pedal as described be-
low in accordance with the atmospheric tem-
perature and/or engine condition and then
start the engine.
l When the atmospheric temperature is
moderate or the engine is warm, start the
engine without depressing the accelerator
pedal.
l When the atmospheric temperature is low
and the engine is cold, start the engine
while depressing the accelerator pedal.Fuel injection amount learning process E00616000028
To keep exhaust emissions and engine noise low,
the engine very occasionally performs a learning
process for the fuel injection amount.
The engine sounds slightly different from usual
while the learning process is taking place. The
change in the engine sound does not indicate a fault.
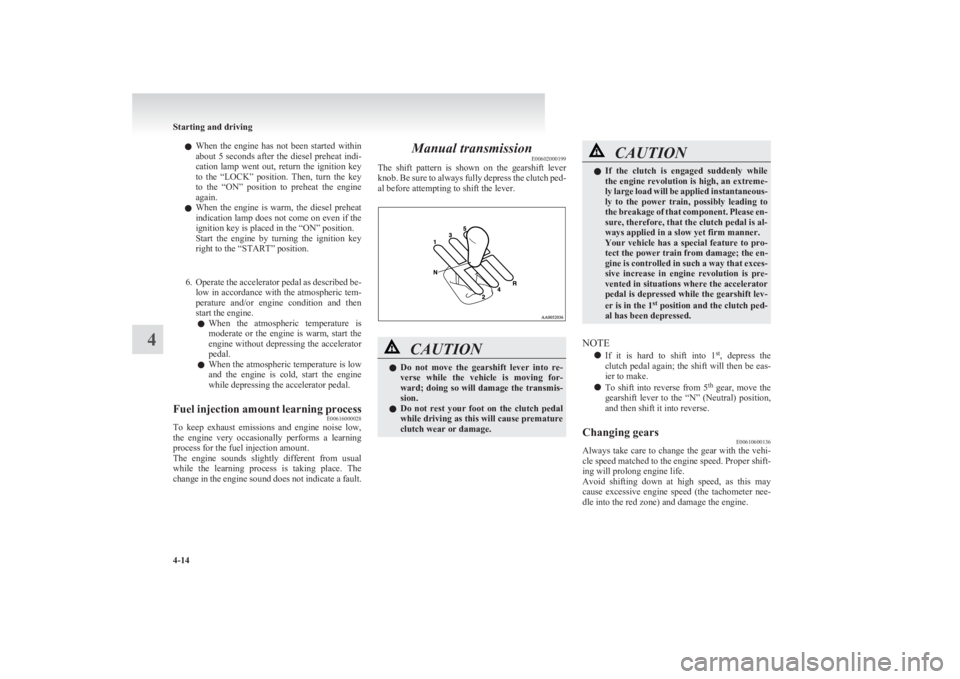
Manual transmission E00602000199
The shift pattern is shown on the gearshift lever
knob. Be sure to always fully depress the clutch ped-
al before attempting to shift the lever.CAUTIONl Do not move the gearshift lever into re-
verse while the vehicle is moving for-
ward; doing so will damage the transmis-
sion.
l Do not rest your foot on the clutch pedal
while driving as this will cause premature
clutch wear or damage.CAUTIONl If the clutch is engaged suddenly while
the engine revolution is high, an extreme-
ly large load will be applied instantaneous-
ly to the power train, possibly leading to
the breakage of that component. Please en-
sure, therefore, that the clutch pedal is al-
ways applied in a slow yet firm manner.
Your vehicle has a special feature to pro-
tect the power train from damage; the en-
gine is controlled in such a way that exces-
sive increase in engine revolution is pre-
vented in situations where the accelerator
pedal is depressed while the gearshift lev-
er is in the 1 st
position and the clutch ped-
al has been depressed.
NOTE
l If it is hard to shift into 1 st
, depress the
clutch pedal again; the shift will then be eas-
ier to make.
l To shift into reverse from
5th
gear, move the
gearshift lever to the “N” (Neutral) position,
and then shift it into reverse.
Changing gears E00610600136
Always take care to change the gear with the vehi-
cle speed matched to the engine speed. Proper shift-
ing will prolong engine life.
Avoid shifting down at high speed, as this may
cause excessive engine speed (the tachometer nee-
dle into the red zone) and damage the engine.
Starting and driving
4-14
4
Page 144 of 330

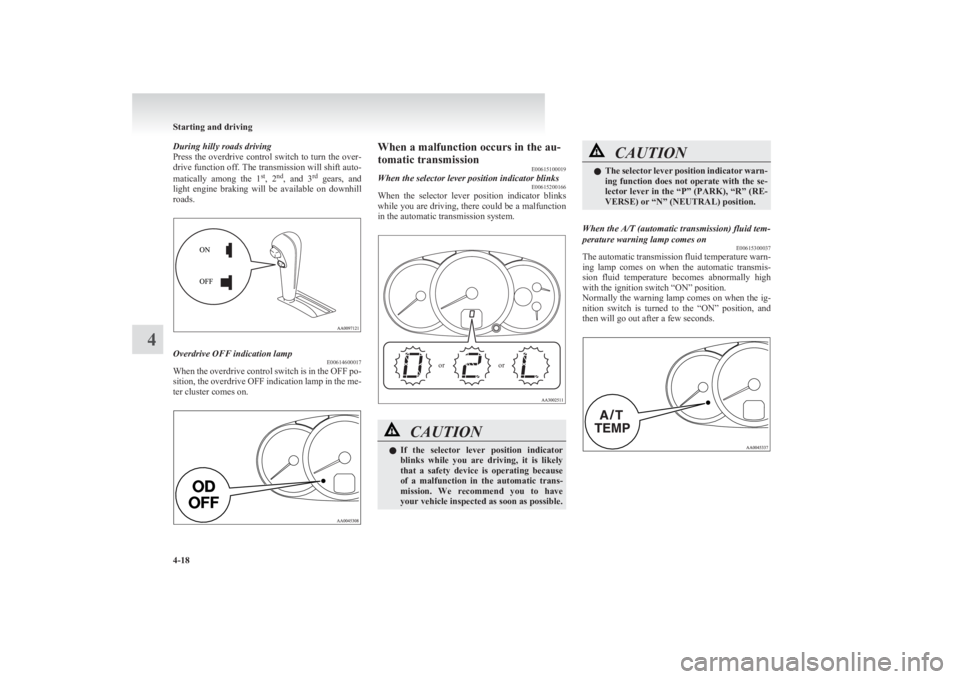
During hilly roads driving
Press the overdrive control switch to turn the over-
drive function off. The transmission will shift auto-
matically among the 1 st
, 2 nd
, and 3 rd
gears, and
light engine braking will be available on downhill
roads.Overdrive OFF indication lamp E00614600017
When the overdrive control switch is in the OFF po-
sition, the overdrive OFF indication lamp in the me-
ter cluster comes on.
When a malfunction occurs in the au-
tomatic transmission E00615100019When the selector lever position indicator blinksE00615200166
When the selector lever position indicator blinks
while you are driving, there could be a malfunction
in the automatic transmission system.
oror
CAUTIONl If the selector lever position indicator
blinks while you are driving, it is likely
that a safety device is operating because
of a malfunction in the automatic trans-
mission. We recommend you to have
your vehicle inspected as soon as possible.CAUTIONl The selector lever position indicator warn-
ing function does not operate with the se-
lector lever in the “P” (PARK), “R” (RE-
VERSE) or “N” (NEUTRAL) position.When the A/T (automatic transmission) fluid tem-
perature warning lamp comes on E00615300037
The automatic transmission fluid temperature warn-
ing lamp comes on when the automatic transmis-
sion fluid temperature becomes abnormally high
with the ignition switch “ON” position.
Normally the warning lamp comes on when the ig-
nition switch is turned to the “ON” position, and
then will go out after a few seconds.
Starting and driving
4-18
4