2011 MERCEDES-BENZ SLS battery location
[x] Cancel search: battery locationPage 26 of 436
U
Uniform Tire Quality Grading
Standards .................................. 339, 346
Units Selecting speedometer display
mode ............................................. 283
Units of measurement, navigation .. 103
Unleaded gasoline, premium ........... 427
Unlocking the vehicle Manually ........................................ 398
SmartKey ....................................... 236
Updating Gracenote ®
Media
Database ............................................ 188
Updating map software .................... 100
Upholstery, cleaning ......................... 359
USB devices connecting to ................................. 192
playback options ............................ 197
playlists and folders .......................195
selecting active partition ...............197
selecting tracks .....................195, 196
Useful features .................................. 306
V
Valet locking ...................................... 241
Vehicle Battery ........................................... 410
Care ............................................... 354
Control system .............................. 272
Identification Number (VIN) ...........420
Locking/unlocking ........................236
Modifications and alterations,
Operating safety .............................. 28
Towing ........................................... 415
Unlocking/locking manually ..........398
Vehicle dimensions
see Vehicle specification
Vehicle Identification Number
(VIN) ................................................... 420
Vehicle jack see Jack
Vehicle lighting .................................. 249
Vehicle loading Load limit ....................................... 335
Terminology ................................... 345
Vehicle location (current)
displaying ...................................... 110
GPS reception ................................ 103
moving map to ............................... 107
saving in Last Destinations ....106, 147
Vehicle maximum load on the tire ... 347
Vehicle specification SLS AMG (197) .............................. 421
Vehicle status message memory .... 282
Vehicle tool kit .................................. 362
Vehicle washing see Vehicle care
Vehicle weights
see Vehicle specification
Video .................................................. 198
control menu, displaying/hiding ....201
handling and care of discs .............199
interactive content ........................205
operating DVD menu .....................203
picture settings .............................. 203
voice control with .......................... 230
Video Aux (auxiliary)
main system .................................. 205
Voice control ..................................... 206
canceling the dialog .......................208
command list ................................. 225
creating voice names .....................219
general operation .......................... 207
help function .................................. 232
interrupting the dialog ...................208
operating safety ............................. 206
starting the dialog ..........................208
switching help screen on or off ........95
troubleshooting ............................. 231
with address book .........166, 218, 231
with DVD changer ..........................224
with external equipment (Aux) .......225
with navigation .............................. 212
with phone ..................................... 209
with radio and satellite radio .........221
Voice Control
delete name ................................... 220
find address ................................... 217
Individualization ............................... 95
Settings ........................................... 95
Voice mail, voice control for ............ 211
Voice names, creating ...................... 21924IndexBA 197 USA, CA Edition A 2011; 1; 27, en-UShereepeVersion: 3.0.3.52010-03-24T15:31:10+01:00 - Seite 24
Page 195 of 436
Supported Data Formats (USB devices)
The following data types are supported:
RMP3: CBR, VBR (up to 320 kbit/s)
RWMA: CBR, VBR (up to 320 kbit/s)
In order to display the metadata during
playback, ID3 tags (version 1.x, 2.3, 2.4) and
WMA tags in ASCII and UTF16 coding are
supported.
Notes on USB Devices
RIn order to keep the initialisation time short,
do not store data other than music files on
the USB device.
RUp to eight directory levels with up to 1,000
tracks are supported.
RDo not use a USB extension cable or
adapter. These may impair functionality.
RPlaylists are searched for in the
background on the USB device and, if
available, are offered beside folders in a
separate category.
RYou can only use USB devices formatted
with the file system format FAT (File
Allocation Table).
iFiles protected with DRM (Digital Rights
Management) are not supported by the
Media Interface.
Connecting External Devices
You will find the connection sockets in the
glove compartment.
Never connect more than one device at a
time. Please consult a Mercedes-Benz
Service Center for further information.
iDo not leave external devices in the
vehicle, as functionality cannot be
guaranteed above certain temperatures
(such as inside a vehicle in direct sunlight).
Mercedes-Benz does not take
responsibility for any damage to external
devices.
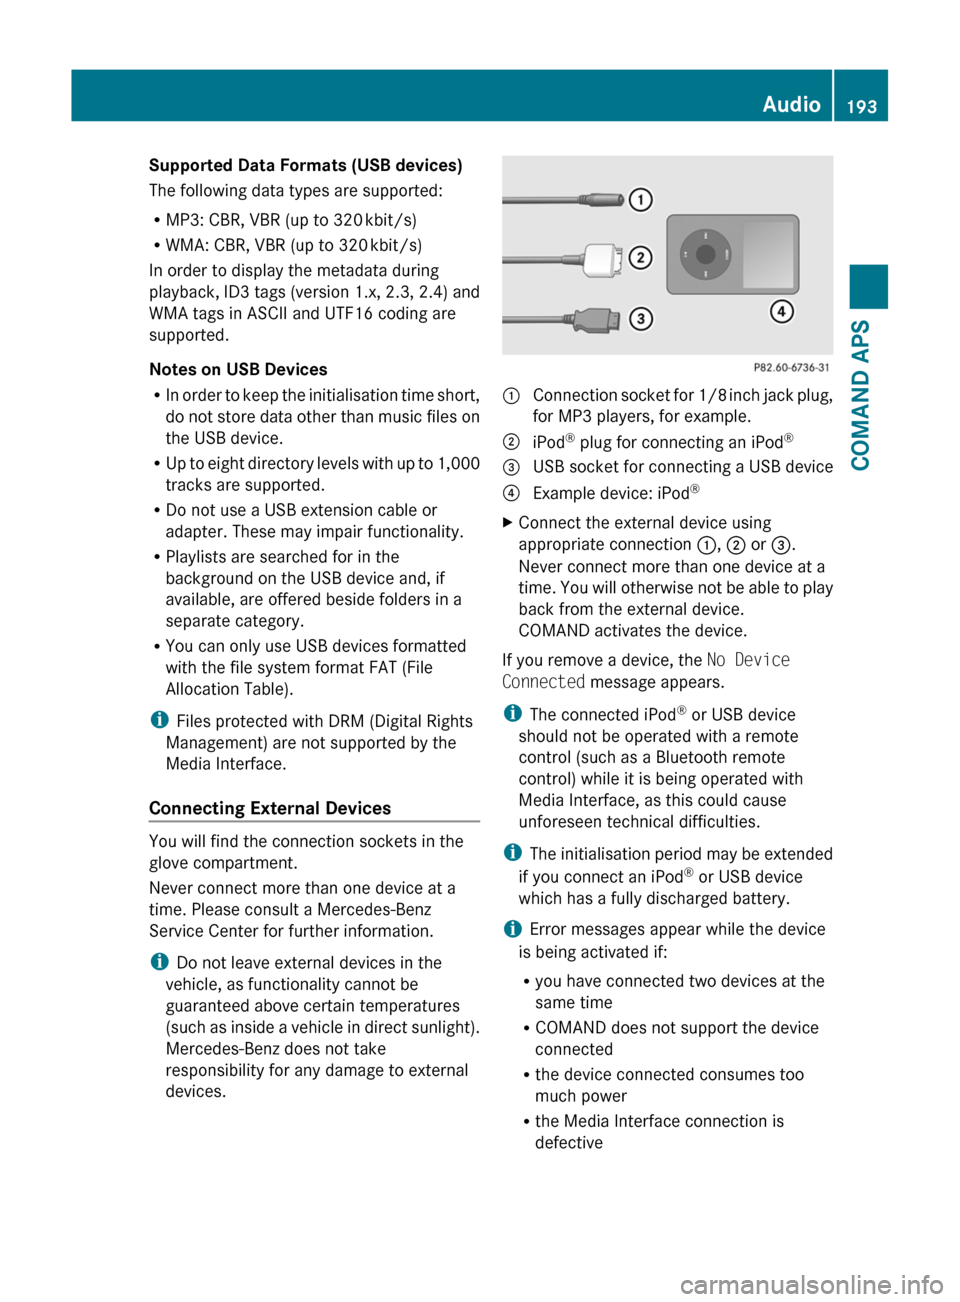
1 Connection socket for 1/8 inch jack plug,
for MP3 players, for example.
2 iPod® plug for connecting an iPod®3 USB socket for connecting a USB device4 Example device: iPod®XConnect the external device using
appropriate connection 1, 2 or 3.
Never connect more than one device at a
time. You will otherwise not be able to play
back from the external device.
COMAND activates the device.
If you remove a device, the No Device
Connected message appears.
iThe connected iPod® or USB device
should not be operated with a remote
control (such as a Bluetooth remote
control) while it is being operated with
Media Interface, as this could cause
unforeseen technical difficulties.
iThe initialisation period may be extended
if you connect an iPod® or USB device
which has a fully discharged battery.
iError messages appear while the device
is being activated if:
Ryou have connected two devices at the
same time
RCOMAND does not support the device
connected
Rthe device connected consumes too
much power
Rthe Media Interface connection is
defective
Audio193COMAND APSBA 197 USA, CA Edition A 2011; 1; 27, en-UShereepeVersion: 3.0.3.52010-03-24T15:31:10+01:00 - Seite 193Z
Page 311 of 436
steps may result in a system that is not
activated.
If you have any questions regarding
activation, please call the Response Center
at 866-990-9007 (USA only) or
1-888-923-8367 (Canada only).
Shortly after the completion of your mbrace
acquaintance call, you will receive an account
number via email. You will also receive a two-
part welcome kit via mail that will provide
your account and Personal Identification
Number (PIN). You will only need the PIN once
to access the mbrace account section in
“Owners Online” at
http://www.MBUSA.com (USA only).
The mbrace system is available if
R it has been activated and is operational.
Activation requires a subscription for
monitoring services, connection and
cellular air time
R vehicle battery power is available
R the relevant cellular phone network and
GPS signals are available
i Location of the vehicle on a map is only
possible if the vehicle is able to receive
signals from the GPS satellite network and
pass the information on to the Response
Center.
The mbrace system
The mbrace system consists of three types of
response:
R Automatic and manual emergency
R Roadside Assistance
R Information
To adjust the speaker volume during a
mbrace call do the following:
XPress button W or X on the
multifunction steering wheel.
or
XUse the volume adjustment button on your
COMAND system.Be sure to check “Owners Online” at
http://www.MBUSA.com (USA only) for
more information and a description of all
available features.
System self-test
The system performs a self-test after you
have switched on the ignition.
GWarning!
A malfunction in the system has been
detected if any or all of the following
conditions occur:
R The indicator lamp in the SOS button does
not come on during the system self-test.
R The indicator lamp in the wrench button
F does not come on during the system
self-test.
R The indicator lamp in the Information
button ï does not come on during the
system self-test.
R The indicator lamp in the SOS button,
wrench button F, or Information button
ï remains illuminated constantly in red
after the system self-test.
R The message Tele Aid Inoperative or
Tele Aid Not Activated appears in the
multifunction display after the system self-
test.
If a malfunction is indicated as outlined above,
the system may not operate as expected. In
case of an emergency, help will have to be
summoned by other means.
Have the system checked at the nearest
Mercedes-Benz Center or contact the
Response Center at 866-990-9007 (USA
only) or 1-888-923-8367 (Canada only) as
soon as possible.
Emergency calls
! In order to activate the mbrace system, a
subscriber agreement must be completed.
To ensure your system is activated and
operational, please press Information
button ï to perform the acquaintance
Useful features309Controls in detailBA 197 USA, CA Edition A 2011; 1; 27, en-UShereepeVersion: 3.0.3.52010-03-24T15:31:10+01:00 - Seite 309Z
Page 385 of 436
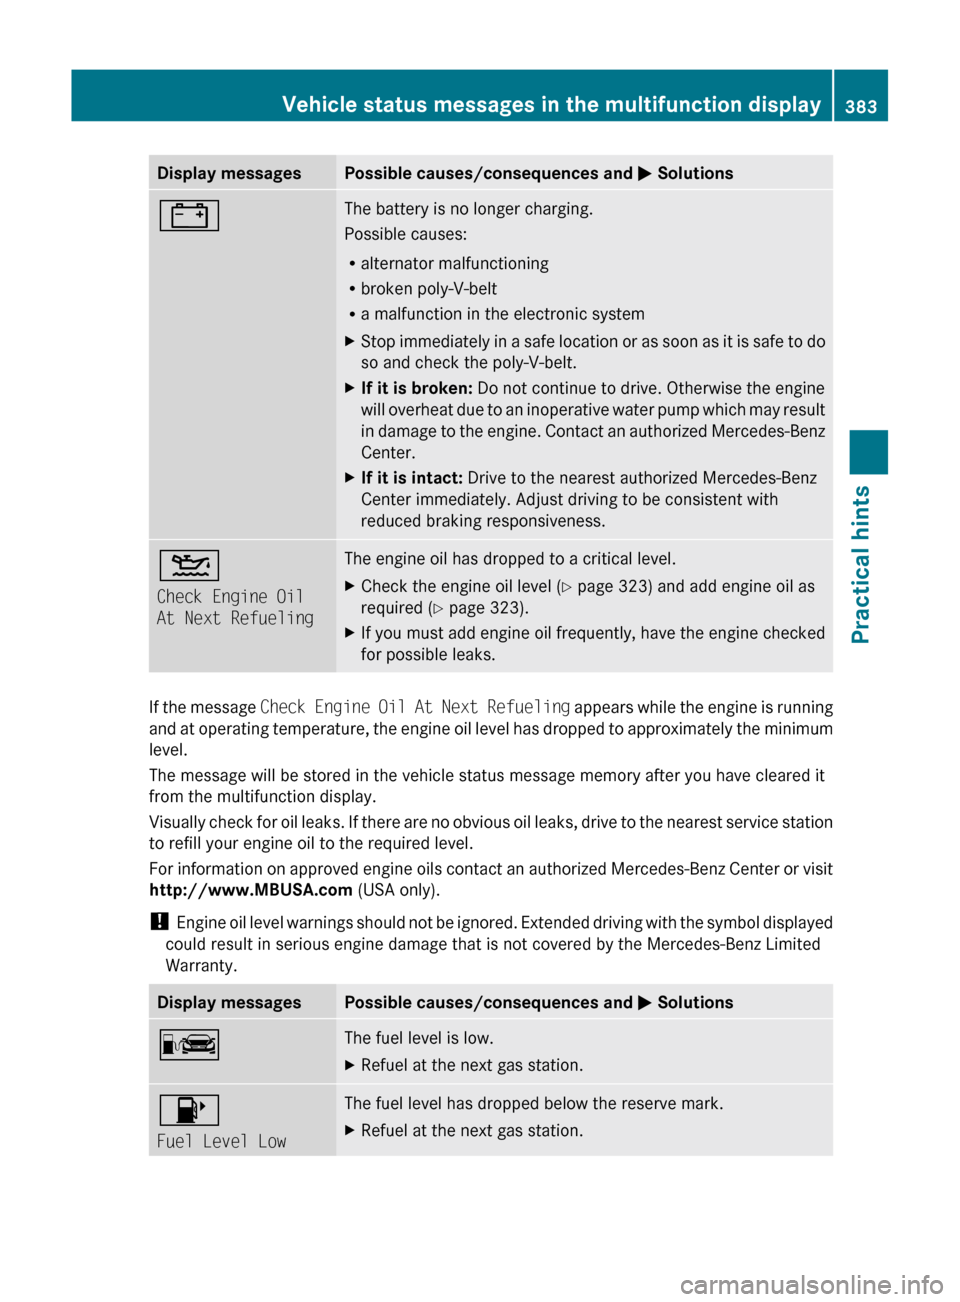
Display messagesPossible causes/consequences and M Solutions#The battery is no longer charging.
Possible causes:
R alternator malfunctioning
R broken poly-V-belt
R a malfunction in the electronic systemXStop immediately in a safe location or as soon as it is safe to do
so and check the poly-V-belt.XIf it is broken: Do not continue to drive. Otherwise the engine
will overheat due to an inoperative water pump which may result
in damage to the engine. Contact an authorized Mercedes-Benz
Center.XIf it is intact: Drive to the nearest authorized Mercedes-Benz
Center immediately. Adjust driving to be consistent with
reduced braking responsiveness.4
Check Engine Oil
At Next RefuelingThe engine oil has dropped to a critical level. XCheck the engine oil level ( Y page 323) and add engine oil as
required ( Y page 323).XIf you must add engine oil frequently, have the engine checked
for possible leaks.
If the message Check Engine Oil At Next Refueling appears while the engine is running
and at operating temperature, the engine oil level has dropped to approximately the minimum
level.
The message will be stored in the vehicle status message memory after you have cleared it
from the multifunction display.
Visually check for oil leaks. If there are no obvious oil leaks, drive to the nearest service station
to refill your engine oil to the required level.
For information on approved engine oils contact an authorized Mercedes-Benz Center or visit
http://www.MBUSA.com (USA only).
! Engine oil level warnings should not be ignored. Extended driving with the symbol displayed
could result in serious engine damage that is not covered by the Mercedes-Benz Limited
Warranty.
Display messagesPossible causes/consequences and M SolutionsCThe fuel level is low.XRefuel at the next gas station.8
Fuel Level LowThe fuel level has dropped below the reserve mark. XRefuel at the next gas station.Vehicle status messages in the multifunction display383Practical hintsBA 197 USA, CA Edition A 2011; 1; 27, en-UShereepeVersion: 3.0.3.52010-03-24T15:31:10+01:00 - Seite 383Z
Page 413 of 436
Do not rub the battery with rags or cloths. The
battery could explode if touched due to
electrostatic charge or due to spark
formation.
! The battery is a Valve-Regulated Lead
Acid (VRLA) battery, also referred to as
“fleece” battery.
Such batteries do not require topping-up of
the electrolyte level. VRLA batteries
therefore do not have cell caps and the
battery cover is non-removable. Do not
attempt to open the battery as otherwise
the battery will be damaged.
VRLA batteries do not require topping-up of
the electrolyte level. They cannot be
opened to check the electrolyte level.
However, the battery condition must be
checked periodically by performing a
battery conductance test. Refer to
Maintenance Booklet for battery condition
testing intervals.
The factory-equipped battery may only be
replaced with a battery that
Rhas the same security features
Ris of identical size
Ris of identical voltage
Ris of identical capacity
! As any other battery, the battery may
discharge if you do not operate the vehicle
for an extended period of time. Have the
battery disconnected at a qualified
workshop or an authorized Mercedes-Benz
Center in such a case. You may also
connect an accessory battery charge unit
expressly approved by Mercedes-Benz for
your vehicle model to maintain the battery
charge. Contact an authorized Mercedes-
Benz Center for further information.
The battery, the battery ventilation hose
and the lateral plug must always be
securely installed when the vehicle is in
operation.
! Never loosen or detach battery terminal
clamps while the engine is running or the
SmartKey is in the starter switch or
KEYLESS-GO button is in position 1.
Otherwise the alternator and other
electronic components could be severely
damaged.
Have the battery checked regularly at an
authorized Mercedes-Benz Center.
Refer to Maintenance Booklet for
maintenance intervals or contact an
authorized Mercedes-Benz Center for
further information.
iMake sure the vehicle’s on-board
electronics have status 0 when you turn off
the engine and no longer require any
electrical consumers. The vehicle then
uses very little power and the battery is
spared.
iIf the battery is discharged, you must use
the mechanical key to unlock the vehicle.
iAfter battery power was interrupted, do
the following:
RSynchronize the power windows
(Y page 256).
RSynchronize the exterior rear view
mirrors (Y page 248).
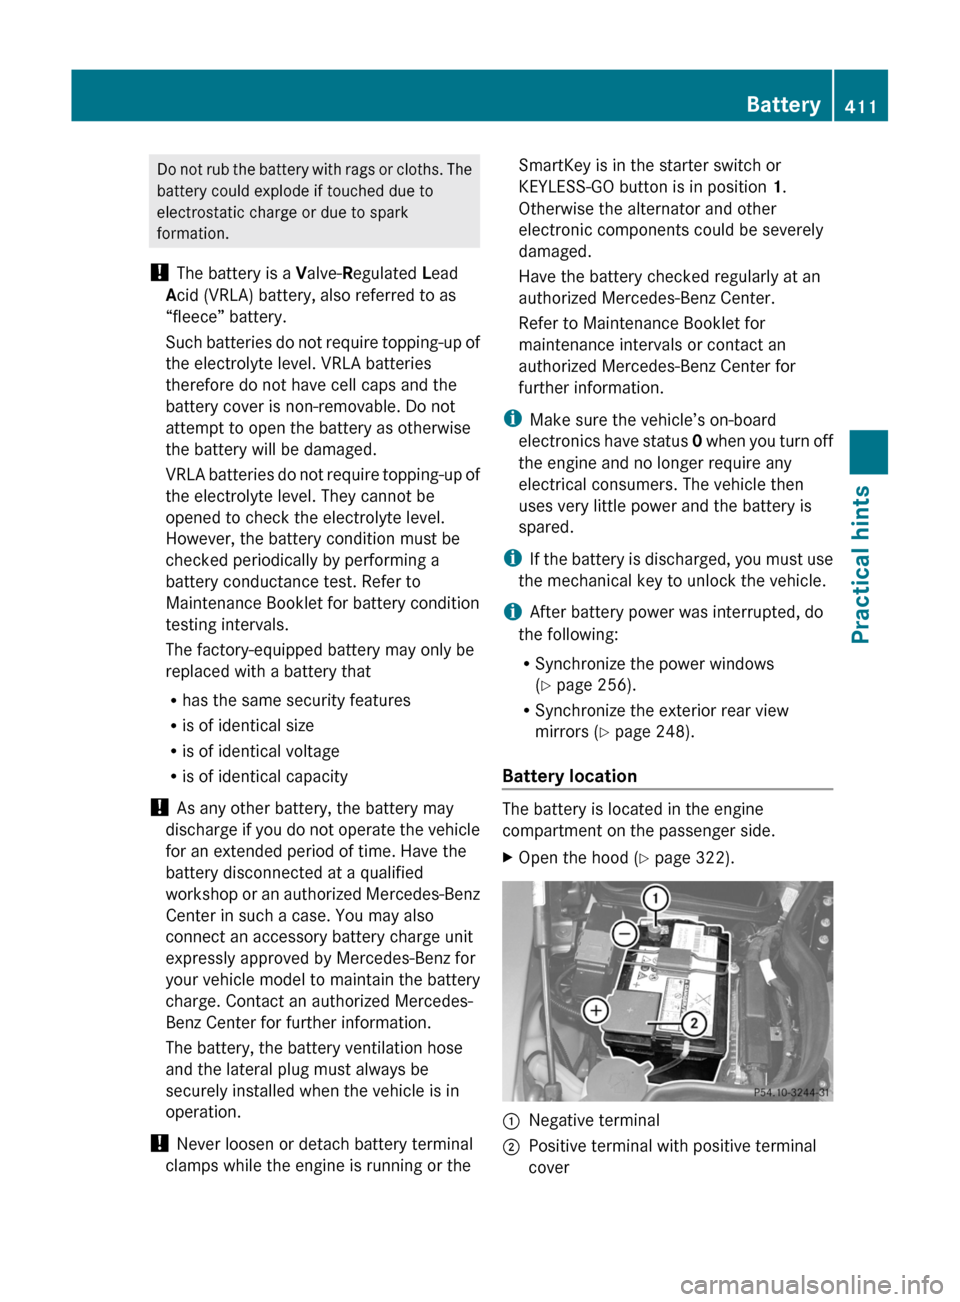
Battery location
The battery is located in the engine
compartment on the passenger side.
XOpen the hood (Y page 322).:Negative terminal;Positive terminal with positive terminal
cover
Battery411Practical hintsBA 197 USA, CA Edition A 2011; 1; 27, en-UShereepeVersion: 3.0.3.52010-03-24T15:31:10+01:00 - Seite 411Z
Page 417 of 436
Towing the vehicle
Safety notes
Mercedes-Benz recommends that the vehicle
be transported with all wheels off the ground
using flatbed or appropriate wheel lift/dolly
equipment. This method is preferable to other
types of towing.
! To prevent damage during transport, do
not tie down vehicle by its chassis or
suspension parts.
If circumstances do not permit the
recommended towing methods, the vehicle
may be towed with all wheels on the ground
or rear axle raised only so far as necessary to
have the vehicle moved to a safe location
where the recommended towing methods
can be employed.
! Before towing the vehicle observe the
following instructions:
RDo not tow-start the vehicle. You could
otherwise seriously damage the
transmission which is not covered by the
Mercedes-Benz Limited Warranty.
RDo not tow with sling-type equipment.
Towing with sling-type equipment over
bumpy roads will damage radiator and
supports.
RTowing of the vehicle should only be
done using the properly installed towing
eye bolt. Never attach a tow cable, tow
rope or tow rod to the vehicle chassis,
frame or suspension parts.
GWarning!
With the engine not running, there is no power
assistance for the brake and steering
systems. In this case, it is important to keep
in mind that a considerably higher degree of
effort is necessary to brake and steer the
vehicle. Adapt your driving accordingly.
! Avoid pulling the vehicle abruptly or
diagonally, since it could result in damage
to the chassis alignment.
! Do not use the towing eye bolt for
recovery, as this could damage the vehicle.
If in doubt, recover the vehicle with a crane.
iIf the battery is disconnected or
discharged
Rthe transmission will remain in park
position P
Rthe SmartKey will not turn in the starter
switch
For more information see “Battery”
(Y page 410) or “Jump starting”
(Y page 413).
Installing towing eye bolt
The towing eye bolt is supplied with the
vehicle tool kit, located in the storage
compartment underneath the trunk floor
(Y page 362).
XTake the towing eye bolt and the wheel
wrench out of the trunk.
Your vehicle is equipped with a front towing
eye bolt only. You cannot tow other vehicles
with your vehicle.
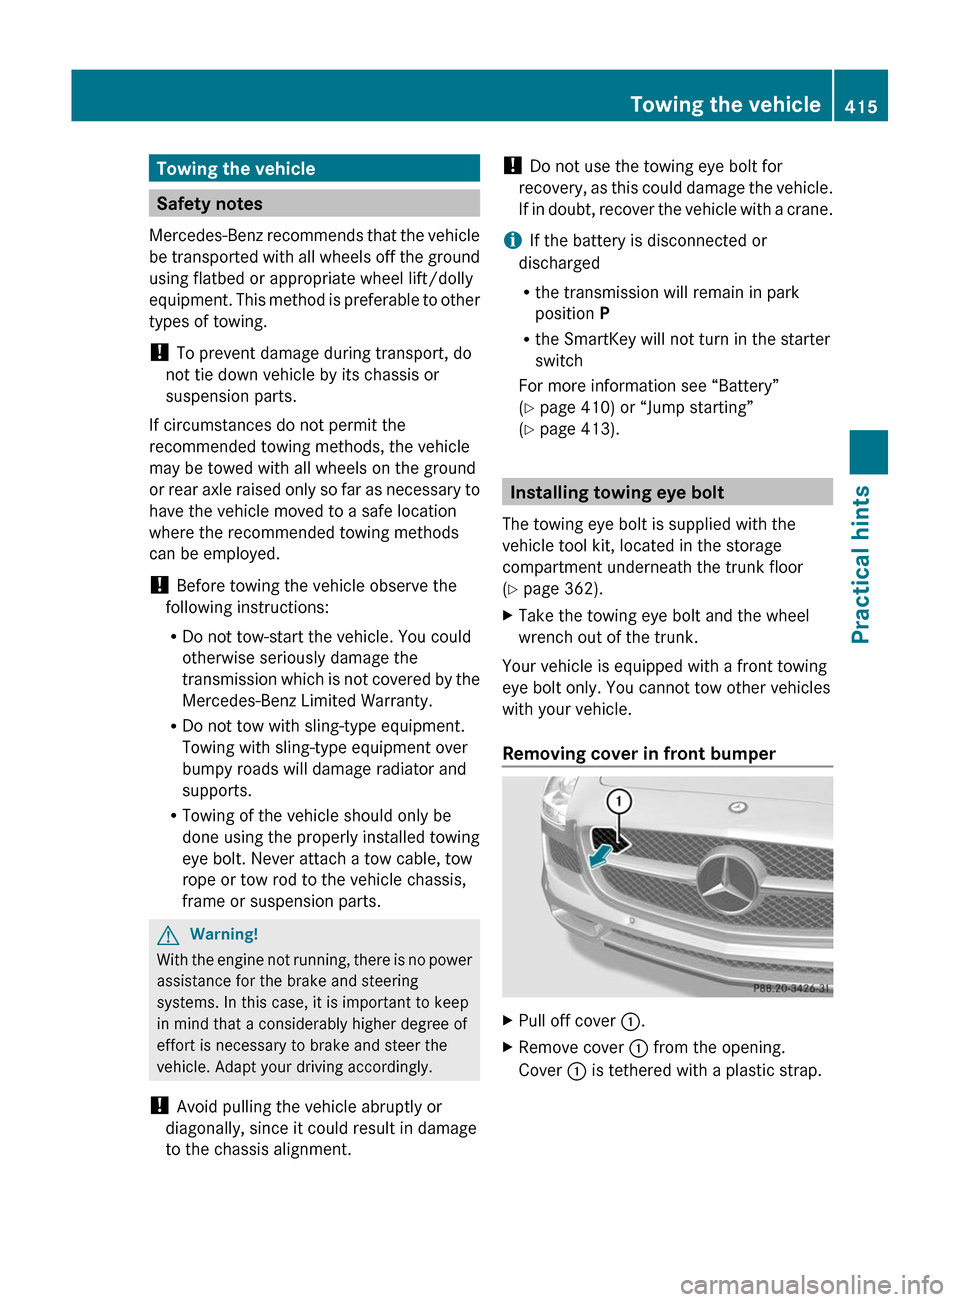
Removing cover in front bumper
XPull off cover :.XRemove cover : from the opening.
Cover : is tethered with a plastic strap.
Towing the vehicle415Practical hintsBA 197 USA, CA Edition A 2011; 1; 27, en-UShereepeVersion: 3.0.3.52010-03-24T15:31:10+01:00 - Seite 415Z