2011 MERCEDES-BENZ SLS wheel
[x] Cancel search: wheelPage 355 of 436

Starting approximately 1 month before the
next maintenance service is required, one of
the following messages will appear in the
multifunction display. The messages will
appear while you are driving or when you
switch on the ignition (example service A):
Next Service A in XXXX mi (km)
Next Service A in XX days
Service A Due
An additional number or a further letter in
combination with the maintenance type can
be indicated. This indicates that further
auxiliary maintenance work is required.
Contact an authorized Mercedes-Benz Center
for more information.
Clearing the maintenance service
indicator message
The maintenance service indicator message
is cleared automatically
R after approximately 10 seconds when you
switch on the ignition
R after approximately 10 seconds when
reaching the service threshold while driving
R after approximately 30 seconds, once the
suggested maintenance service term has
passed
XClearing the maintenance service
indicator message manually: Press
button % or button a on the
multifunction steering wheel.
The standard display appears in the
multifunction display.
Maintenance service term exceeded
If you have exceeded the suggested
maintenance service term, you will see the
following message in the multifunction
display:
Service A Exceeded by XXXXX mi (km)
Service A Exceeded by XXX days
In addition, a signal sounds when the
message appears.
Any authorized Mercedes-Benz Center will
reset the maintenance service indicator
following a completed maintenance service.
Calling up the maintenance service
indicator display
i The menu overview can be found on
( Y page 275).
You can call up the maintenance service
indicator display at any time to check when
the next maintenance service is required.
XSwitch on the ignition.
The standard display of the control system
appears ( Y page 275).XPress button = or ; on the
multifunction steering wheel to select the
Service menu.XPress button : or 9 to select
ASSYST PLUS .XPress button a on the multifunction
steering wheel to confirm.
The maintenance service indicator display
with the maintenance service deadline
appears in the multifunction display.
i If the battery was disconnected, the days
of disconnection will not be included in the
count shown by the maintenance service
indicator. To arrive at the true maintenance
service deadline, you will need to subtract
these days from the days shown in the
maintenance service indicator message or
maintenance service indicator display.
Maintenance353OperationBA 197 USA, CA Edition A 2011; 1; 27, en-UShereepeVersion: 3.0.3.52010-03-24T15:31:10+01:00 - Seite 353Z
Page 358 of 436

Have paintwork repairs performed at an
authorized Mercedes-Benz Center.
Have stone chipping repairs as soon as
possible.
Remove the following immediately if possible.
Do not apply strong force.
R Soak insect remains with insect remover
and rinse them of with water afterwards.
Use a soft bristle toothbrush for remains
that have not come off.
R Soak bird droppings with water and rinse
them of with water afterwards. Use a soft
bristle toothbrush for remains that have not
come off.
R Remove tree resins, grease, oil, wax, and
gasoline with commercially available
benzine.
R Dab off tar splashes or tar stains with tar
remover.
Engine cleaning
Prior to cleaning the engine compartment,
make sure to protect electrical components
and connectors from contact with water and
cleaning agents.
Corrosion protection, such as MB
Anticorrosion Wax should be applied to the
engine compartment after every engine
cleaning. Before applying, all control linkage
bushings and joints should be lubricated. The
poly-V-belt and all pulleys should be
protected from any wax.
Vehicle washing
In the winter, thoroughly remove all traces of
road salt as soon as possible.
When washing the vehicle underbody, do not
forget to clean the inner sides of the wheels.
GWarning!
After washing the vehicle, braking efficiency
may be reduced. Reduced braking efficiency
could cause an accident.
Brake the vehicle significantly after washing
the vehicle. Observe the traffic situation when
doing so. The brake discs will warm up and
dry faster. Drive carefully after washing the
vehicle until the brakes have dried and you
can notice that brake efficiency has been
restored.
Hand-washXDo not use hot water or wash your vehicle
in direct sunlight.XOnly use a soft, wet cloth or sponge to
clean the vehicle.XOnly use a mild vehicle wash detergent,
such as Mercedes-Benz approved Car
Shampoo.XThoroughly spray the vehicle with a
diffused jet of water.XDo not spray directly towards the
ventilation intake.XUse plenty of water and rinse the sponge
and chamois frequently.XRinse with clean water and dry with a
chamois thoroughly.
Do not allow cleaning agents to dry on the
finish.
Automatic car wash
You can have your vehicle washed in an
automatic car wash from the start. Brushless
car washes are preferable.
XTo protect the filter system, activate the air
recirculation mode using button g on
the climate control panel.
! Do not clean your vehicle in an automatic
touchless car wash which uses caustic
spray. Caustic spray will damage the paint
or ornamental moldings.
If the vehicle is very dirty, prewash it before
running it through the automatic car wash.
! Make sure the combination switch is set
to wiper setting $. Otherwise, the rain
sensor could activate and cause the wipers
to move unintentionally. This may lead to
vehicle damage.
356Vehicle careOperation
BA 197 USA, CA Edition A 2011; 1; 27, en-UShereepeVersion: 3.0.3.52010-03-24T15:31:10+01:00 - Seite 356
Page 360 of 436

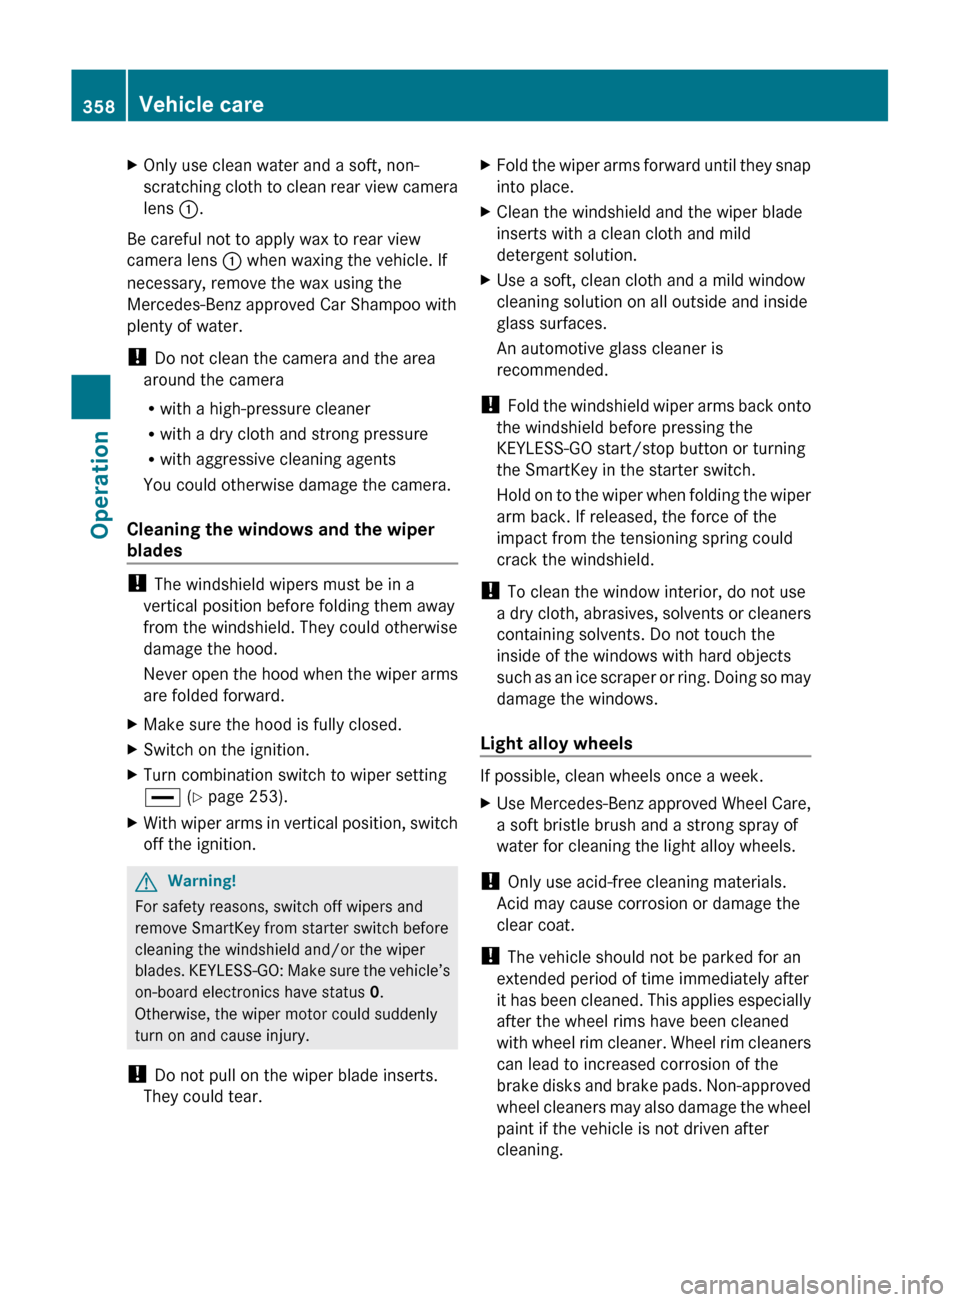
XOnly use clean water and a soft, non-
scratching cloth to clean rear view camera
lens :.
Be careful not to apply wax to rear view
camera lens : when waxing the vehicle. If
necessary, remove the wax using the
Mercedes-Benz approved Car Shampoo with
plenty of water.
! Do not clean the camera and the area
around the camera
R with a high-pressure cleaner
R with a dry cloth and strong pressure
R with aggressive cleaning agents
You could otherwise damage the camera.
Cleaning the windows and the wiper
blades
! The windshield wipers must be in a
vertical position before folding them away
from the windshield. They could otherwise
damage the hood.
Never open the hood when the wiper arms
are folded forward.
XMake sure the hood is fully closed.XSwitch on the ignition.XTurn combination switch to wiper setting
° (Y page 253).XWith wiper arms in vertical position, switch
off the ignition.GWarning!
For safety reasons, switch off wipers and
remove SmartKey from starter switch before
cleaning the windshield and/or the wiper
blades. KEYLESS-GO: Make sure the vehicle’s
on-board electronics have status 0.
Otherwise, the wiper motor could suddenly
turn on and cause injury.
! Do not pull on the wiper blade inserts.
They could tear.
XFold the wiper arms forward until they snap
into place.XClean the windshield and the wiper blade
inserts with a clean cloth and mild
detergent solution.XUse a soft, clean cloth and a mild window
cleaning solution on all outside and inside
glass surfaces.
An automotive glass cleaner is
recommended.
! Fold the windshield wiper arms back onto
the windshield before pressing the
KEYLESS-GO start/stop button or turning
the SmartKey in the starter switch.
Hold on to the wiper when folding the wiper
arm back. If released, the force of the
impact from the tensioning spring could
crack the windshield.
! To clean the window interior, do not use
a dry cloth, abrasives, solvents or cleaners
containing solvents. Do not touch the
inside of the windows with hard objects
such as an ice scraper or ring. Doing so may
damage the windows.
Light alloy wheels
If possible, clean wheels once a week.
XUse Mercedes-Benz approved Wheel Care,
a soft bristle brush and a strong spray of
water for cleaning the light alloy wheels.
! Only use acid-free cleaning materials.
Acid may cause corrosion or damage the
clear coat.
! The vehicle should not be parked for an
extended period of time immediately after
it has been cleaned. This applies especially
after the wheel rims have been cleaned
with wheel rim cleaner. Wheel rim cleaners
can lead to increased corrosion of the
brake disks and brake pads. Non-approved
wheel cleaners may also damage the wheel
paint if the vehicle is not driven after
cleaning.
358Vehicle careOperation
BA 197 USA, CA Edition A 2011; 1; 27, en-UShereepeVersion: 3.0.3.52010-03-24T15:31:10+01:00 - Seite 358
Page 361 of 436

Therefore, the vehicle’s brake system
should always be warmed-up before it is
parked after cleaning. Drive your vehicle for
several minutes to allow the brakes to dry.
When applying Mercedes-Benz approved
Tire Care and Mercedes-Benz approved
Wheel Care products, take care not to
spray them on the brake disks.
Plastic and rubber partsXUse a gentle dishwashing detergent or mild
detergent for delicate fabrics as a washing
solution.XWipe with a cloth moistened in a lukewarm
solution.
The surface may temporarily change color.
If this is the case, wait for it to dry.GWarning!
Do not use cleaners or cockpit care sprays
containing solvents to clean the cockpit or the
steering wheel. Cleaners containing solvents
will make the surface porous and vehicle
occupants could suffer serious injuries from
plastic parts coming loose in the event of air
bag deployment.
! Do not use oil, wax or scouring agents.
Otherwise you may scratch or damage the
surface.
Hard plastic trim items
XUse Mercedes-Benz approved Interior Care
on a soft, lint-free cloth and apply with light
pressure.
COMAND display
! You must switch off the COMAND display
and allow it to cool prior to cleaning.
! Do not use any liquids or cleaning agents.
These can damage or even destroy the
COMAND display screen.
XUse a standard microfiber cloth and apply
with light pressure.Steering wheel and gear selector leverXWipe with a damp cloth and dry thoroughly
or clean with Mercedes-Benz approved
Leather Care.
Carpets
XUse Mercedes-Benz approved Carpet and
Fabric Care for cleaning the carpets.
Headliner
XUse a soft bristle brush or a dry-shampoo
cleaner in case of excessive dirt.
Seat belts
XOnly use clear, lukewarm water and soap.
! The seat belts must not be treated with
chemical cleaning agents. Do not dry the
seat belts at temperatures above 176‡
(80†) or in direct sunlight.
GWarning!
Do not bleach or dye seat belts as this may
severely weaken them. In a crash they may
not be able to provide adequate protection.
Upholstery
Using aftermarket seat covers or wearing
clothing that have the tendency to give off
coloring (e.g. when wet, etc.) may cause the
upholstery to become permanently
discolored. By lining the seats with a proper
intermediate cover, contact-discoloration will
be prevented.
GWarning!
Only use seat covers which have been tested
and approved by Mercedes-Benz for your
vehicle model. Using other seat covers may
interfere with or prevent the deployment of
the side impact air bags. Contact an
authorized Mercedes-Benz Center for
availability.
Vehicle care359OperationBA 197 USA, CA Edition A 2011; 1; 27, en-UShereepeVersion: 3.0.3.52010-03-24T15:31:10+01:00 - Seite 359Z
Page 362 of 436

Leather upholstery
Please note that leather upholstery is a
natural product and is therefore subject to a
natural aging process. Leather upholstery
may also react to certain ambient influences
such as high humidity or high temperature by
showing wrinkles for example.
XWipe leather upholstery with a damp cloth
and dry thoroughly or clean with Mercedes-
Benz approved Leather Care.
! To avoid damage to leather upholstery:
RWipe with light pressure only.
RDo not clean with abrasive cleaning
agents such as scouring milk or powder.
RDo not soak the leather upholstery.
As leather is a natural product, it could
otherwise harden or become porous.
RExercise particular care when cleaning
perforated leather as its underside
should not become wet.
Chrome-plated exhaust tip
Regular cleaning and care of chrome-plated
exhaust tips will help to maintain their shine
and the classy appearance.
XUse Mercedes-Benz approved Chrome
Polishing Paste each time the vehicle has
been washed, especially during the winter.
! Do not use alkaline cleaners such as
wheel cleaners as they could cause
corrosion.
Trunk Wing
You can extend and retract the Trunk Wing
manually for cleaning.
GWarning!
Make sure that nobody can become trapped
when you retract the Trunk Wing manually. If
there is a risk of entrapment, release the
Trunk Wing switch to stop the retraction
process. The Trunk Wing will then extend
again.
Never leave children unattended in the
vehicle. They could inadvertently retract the
extended Trunk Wing. Somebody could
become trapped and be seriously injured.
! Do not enter an automatic car wash with
the Trunk Wing extended. Otherwise, the
Trunk Wing could be damaged.
Only extend the Trunk Wing in order to
clean it by hand. Retract it again after
cleaning.
XClose the trunk lid (Y page 240).XSwitch on the ignition.XTo extend: Press Trunk Wing switch :.
The Trunk Wing extends.
Trunk Wing switch : flashes for as long as
the Trunk Wing extends. It remains
illuminated in red when the Trunk Wing is
fully extended.
XTo retract: Press and hold Trunk Wing
switch : until the Trunk Wing has
retracted completely.
Trunk Wing switch : flashes for as long as
the Trunk Wing retracts. It goes out when
the Trunk Wing is fully retracted.
The message Rear Spoiler retracts
manually appears in the multifunction
display.
iWhen you release Trunk Wing switch :
during the retraction process, the Trunk
Wing extends again automatically.
360Vehicle careOperation
BA 197 USA, CA Edition A 2011; 1; 27, en-UShereepeVersion: 3.0.3.52010-03-24T15:31:10+01:00 - Seite 360
Page 363 of 436

Vehicle equipment ............................362
Where will I find...? ...........................362
Vehicle status messages in the
multifunction display .......................364
What to do if... ................................... 388
Unlocking/locking manually ...........397
Replacing SmartKey battery ............399
Replacing bulbs ................................. 400
Replacing wiper blades ....................400
Flat tire .............................................. 402
Wheel change .................................... 405
Battery ............................................... 410
Jump starting .................................... 413
Towing the vehicle ............................415
Fuses .................................................. 417361Practical hintsBA 197 USA, CA Edition A 2011; 1; 27, en-UShereepeVersion: 3.0.3.52010-03-24T15:31:10+01:00 - Seite 361
Page 364 of 436

Vehicle equipment
iThis Operator’s Manual describes all
features, standard or optional, potentially
available for your vehicle at the time of
purchase. Please be aware that your
vehicle might not be equipped with all
features described in this manual.
Where will I find...?
First aid kit
iCheck expiration dates and contents for
completeness at least once a year and
replace missing/expired items.
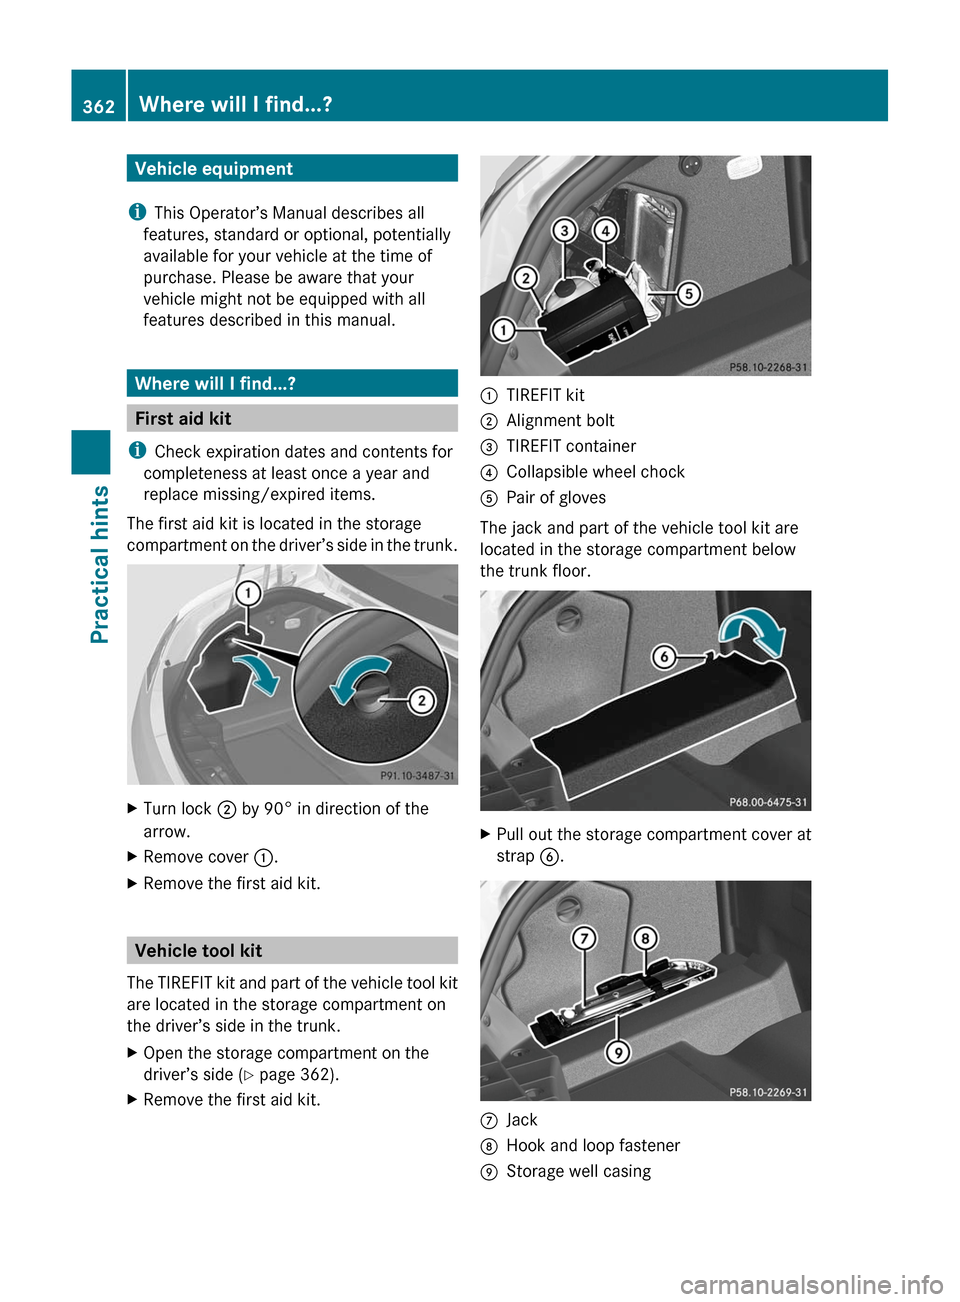
The first aid kit is located in the storage
compartment on the driver’s side in the trunk.
XTurn lock ; by 90° in direction of the
arrow.
XRemove cover :.XRemove the first aid kit.
Vehicle tool kit
The TIREFIT kit and part of the vehicle tool kit
are located in the storage compartment on
the driver’s side in the trunk.
XOpen the storage compartment on the
driver’s side (Y page 362).
XRemove the first aid kit.:TIREFIT kit;Alignment bolt=TIREFIT container?Collapsible wheel chockAPair of gloves
The jack and part of the vehicle tool kit are
located in the storage compartment below
the trunk floor.
XPull out the storage compartment cover at
strap B.CJackDHook and loop fastenerEStorage well casing362Where will I find...?Practical hints
BA 197 USA, CA Edition A 2011; 1; 27, en-UShereepeVersion: 3.0.3.52010-03-24T15:31:10+01:00 - Seite 362
Page 365 of 436

XTo remove jack C from storage well casing
E, loosen hook and loop fastener D.
XRemove jack C with storage well casing
E.
FFuse chartGWheel wrenchHTowing eye bolt
Collapsible wheel chock
The collapsible wheel chock serves to secure
the vehicle, e.g. while changing a wheel.
XTake the collapsible wheel chock from the
vehicle tool kit (Y page 362).
XSetting up: Tilt both plates upward :.XFold the lower plate outward ;.XGuide the tabs of the lower plate all the way
into the openings of base plate =.
For information on where to place wheel
chocks when changing a wheel, see
“Preparing the vehicle” (Y page 405).
Jack GWarning!
Only use the jack supplied with your vehicle
to lift the vehicle briefly for wheel changes. If
you use the jack for any other purpose, you or
others could be injured, as the jack is
designed only for the purpose of changing a
wheel.
When using the jack, observe the safety notes
in the “Removing the wheel” section and the
notes on the jack.
XTake the jack from the vehicle tool kit
(Y page 362).
Storage position
XTurn the crank handle in the direction of
arrow as far as it will go.
Operational position
XTurn the crank handle clockwise.Where will I find...?363Practical hintsBA 197 USA, CA Edition A 2011; 1; 27, en-UShereepeVersion: 3.0.3.52010-03-24T15:31:10+01:00 - Seite 363Z