2011 MERCEDES-BENZ SLS AMG steering
[x] Cancel search: steeringPage 253 of 436
Once the low-beam headlamps are on, the
high-beam headlamps are also available.
Daytime running lamp mode
In Canada, the daytime running lamp mode is
mandatory and therefore in a constant mode.
In the USA, the daytime running lamp mode
is activated by default.
XMake sure the daytime running lamp mode
is activated in the control system, see
“Switching daytime running lamp mode on
or off (USA only)” ( Y page 284).XTurn the exterior lamp switch to position
0066 .
When the engine is running and the
ambient light is bright, the daytime running
lamps come on.
In low ambient lighting conditions, the
following lamps will come on additionally:
R Low-beam headlamps
R Parking lamps 5
R green indicator lamp 0064 in the
instrument cluster
You can only switch on the high-beam
headlamps when the low-beam headlamps
are on.
The high-beam flasher is available at all times.
Canada only
When the engine is running, and you
R shift from a driving position to park
position P with the vehicle at a standstill,
the daytime running lamps or the low-beam
headlamps will go out with a delay of
3 minutes
R turn the exterior lamp switch to position
006C , the daytime running lamps and the
parking lamps 5
come on in bright ambient
lighting conditions.
R turn the exterior lamp switch to position
0064 , the manual headlamp mode has
priority over the daytime running lamp
mode
The corresponding exterior lamps come on
( Y page 250).
USA only
When the engine is running, and you turn the
exterior lamp switch to position 006C or
0064 , the manual headlamp mode has
priority over the daytime running lamp mode.
The corresponding exterior lamps come on
( Y page 250).
Locator lighting
The locator lighting is described in the
“Control system” section, see “Switching
locator lighting on or off” ( Y page 285).
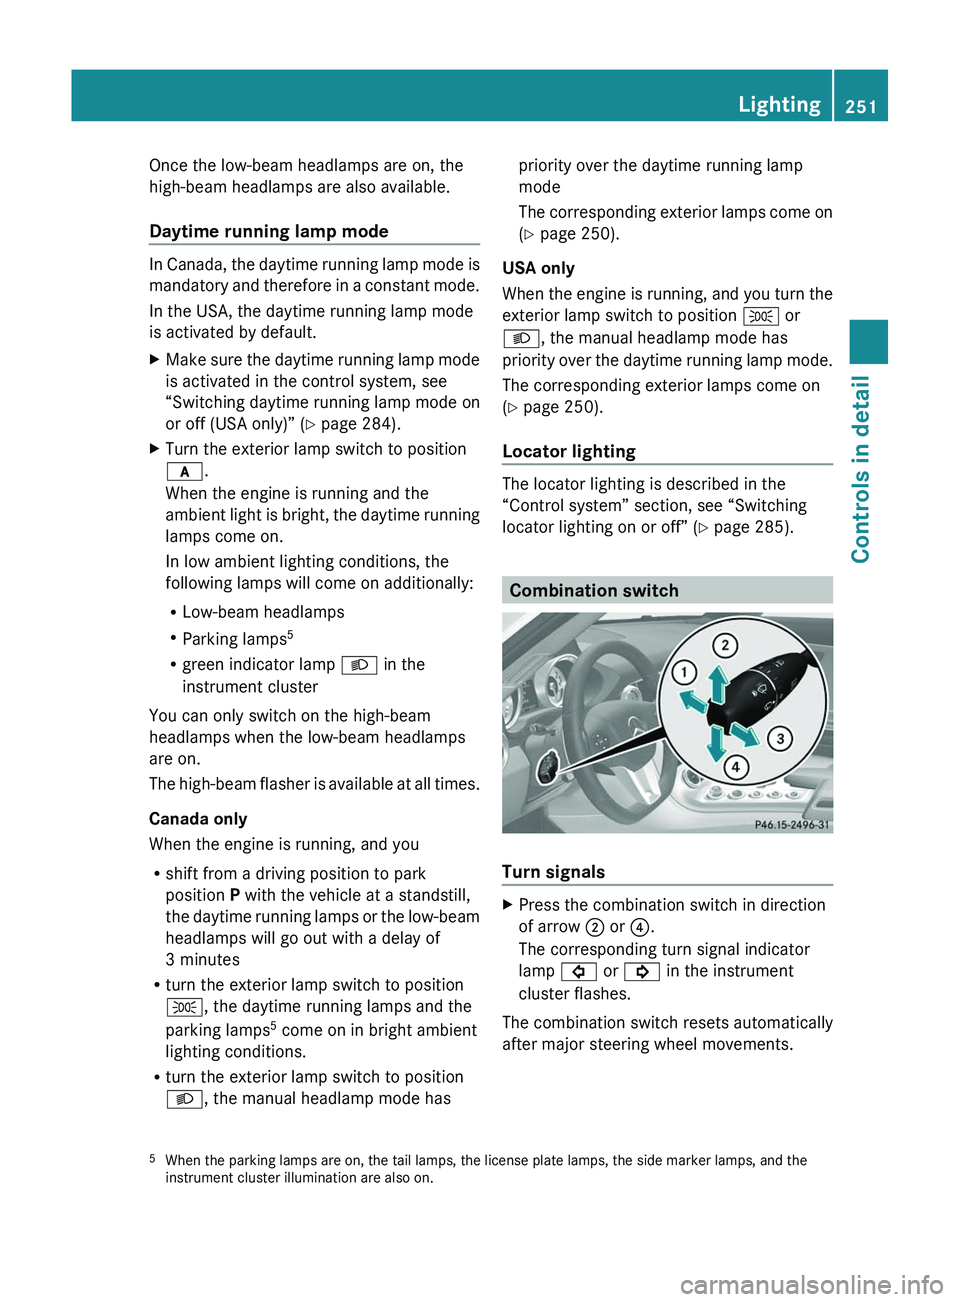
Combination switch
Turn signals
XPress the combination switch in direction
of arrow 0047 or 0088.
The corresponding turn signal indicator
lamp 0026 or 0024 in the instrument
cluster flashes.
The combination switch resets automatically
after major steering wheel movements.
5 When the parking lamps are on, the tail lamps, the license plate lamps, the side marker lamps, and the
instrument cluster illumination are also on.Lighting251Controls in detailBA 197 USA, CA Edition A 2011; 1; 27, en-UShereepeVersion: 3.0.3.52010-03-24T15:31:10+01:00 - Seite 251Z
Page 259 of 436
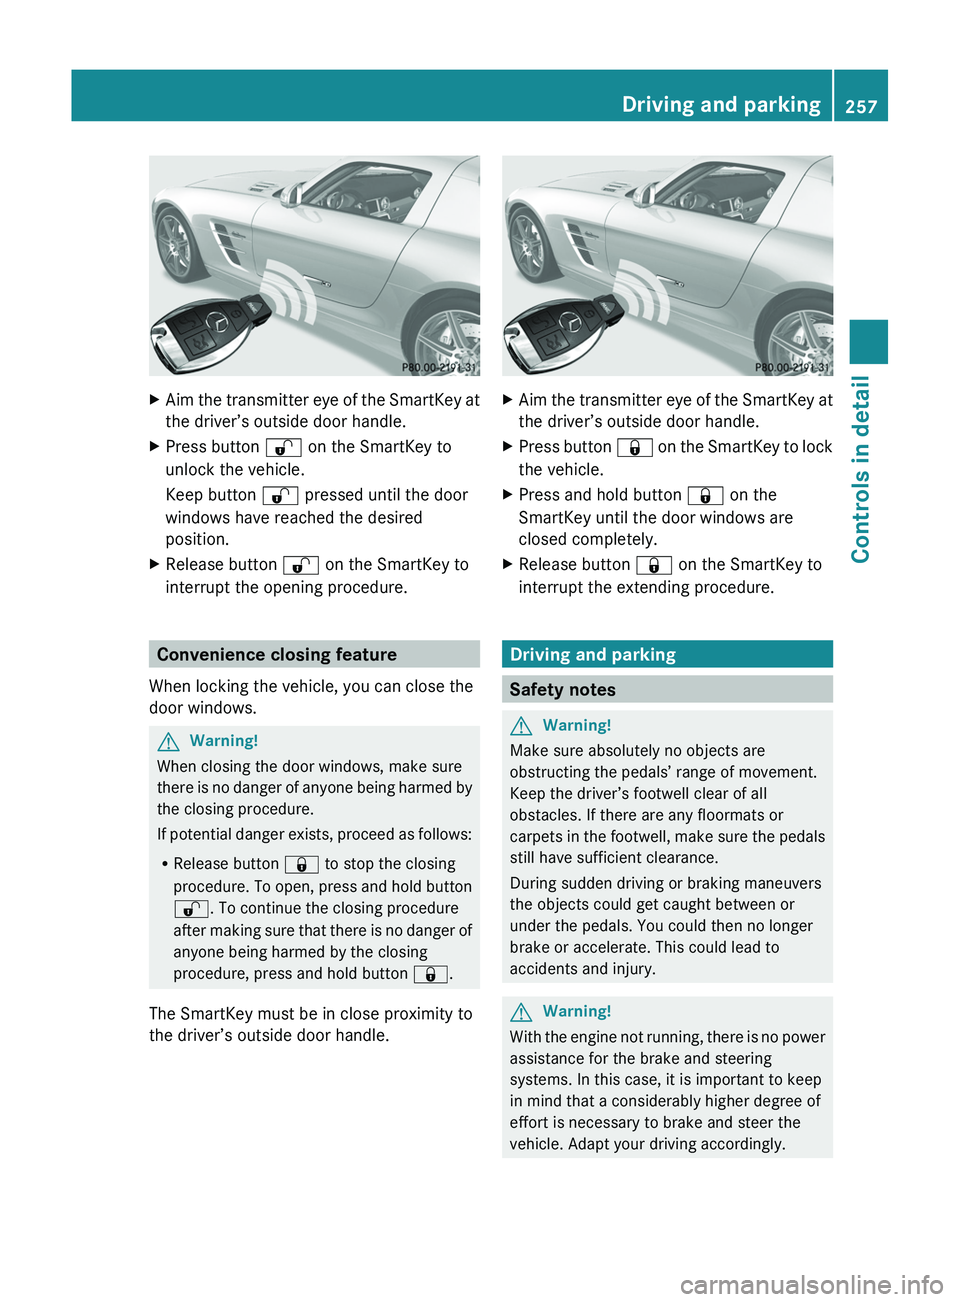
XAim the transmitter eye of the SmartKey at
the driver’s outside door handle.XPress button 0036 on the SmartKey to
unlock the vehicle.
Keep button 0036 pressed until the door
windows have reached the desired
position.XRelease button 0036 on the SmartKey to
interrupt the opening procedure.
Convenience closing feature
When locking the vehicle, you can close the
door windows.
GWarning!
When closing the door windows, make sure
there is no danger of anyone being harmed by
the closing procedure.
If potential danger exists, proceed as follows:
R Release button 0037 to stop the closing
procedure. To open, press and hold button
0036 . To continue the closing procedure
after making sure that there is no danger of
anyone being harmed by the closing
procedure, press and hold button 0037.
The SmartKey must be in close proximity to
the driver’s outside door handle.
XAim the transmitter eye of the SmartKey at
the driver’s outside door handle.XPress button 0037 on the SmartKey to lock
the vehicle.XPress and hold button 0037 on the
SmartKey until the door windows are
closed completely.XRelease button 0037 on the SmartKey to
interrupt the extending procedure.
Driving and parking
Safety notes
GWarning!
Make sure absolutely no objects are
obstructing the pedals’ range of movement.
Keep the driver’s footwell clear of all
obstacles. If there are any floormats or
carpets in the footwell, make sure the pedals
still have sufficient clearance.
During sudden driving or braking maneuvers
the objects could get caught between or
under the pedals. You could then no longer
brake or accelerate. This could lead to
accidents and injury.
GWarning!
With the engine not running, there is no power
assistance for the brake and steering
systems. In this case, it is important to keep
in mind that a considerably higher degree of
effort is necessary to brake and steer the
vehicle. Adapt your driving accordingly.
Driving and parking257Controls in detailBA 197 USA, CA Edition A 2011; 1; 27, en-UShereepeVersion: 3.0.3.52010-03-24T15:31:10+01:00 - Seite 257Z
Page 264 of 436
iIf you have not fastened your seat belt,
the following conditions must be met in
order for the electronic parking brake to
release automatically:
R The driver’s door is closed and you shift
the transmission out of park position P.
or
R The driver’s door is closed and you drive
faster than 2 mph (3 km/h).
Emergency braking with electronic
parking brake
In an emergency situation, you can also brake
your vehicle by using the electronic parking
brake.XWhile driving, press handle 0046.
All four wheels of the vehicle will be braked
for as long as you press and hold the handle
for the electronic parking brake. The longer
you keep the handle pressed, the stronger
your vehicle will be braked.
During the braking procedure
R an acoustic warning sounds
R the message Release Parking Brake
appears in the multifunction display
R the red indicator lamp for the electronic
parking brake 0049 (USA only) or 0024
(Canada only) in the instrument cluster
flashes
Once the vehicle comes to a complete stop,
the electronic parking brake will engage
automatically.
Turning off the engine
GWarning!
Do not turn off the engine before the vehicle
has come to a complete stop. With the engine
not running, there is no power assistance for
the brake and steering systems. In this case,
it is important to keep in mind that a
considerably higher degree of effort is
necessary to brake and steer the vehicle.
XShift the transmission into park position P .With KEYLESS-GOXPress the KEYLESS-GO start/stop button.
With the driver’s door closed, the starter
switch is now in position 1. With the driver’s
door opened, the starter switch is set to
position 0, same as the SmartKey removed
from the starter switch ( Y page 242).
Read and observe messages that may appear
in the multifunction display ( Y page 367).
i The transmission will shift into neutral
position N automatically when you turn off
the engine with the transmission in reverse
gear R or drive position D.
The transmission will remain in neutral
position N for approximately 30 minutes
when you have shifted the transmission to
neutral position N before turning off the
engine.
The transmission will shift into park
position P automatically when you open a
door during this period.
i In an emergency you can turn off the
engine while driving by pressing and
holding the KEYLESS-GO start/stop button
for approximately 3 seconds.
With SmartKey
! Do not remove the SmartKey from the
starter switch while driving. When driving
at low speed, the transmission will
otherwise shift into park position P
automatically. The transmission could be
damaged as a result.
XTurn the SmartKey in the starter switch to
position 0.XRemove the SmartKey from the starter
switch.
Read and observe messages that may appear
in the multifunction display ( Y page 367).
i The transmission will shift into neutral
position N automatically when you turn off
the engine with the transmission in reverse
gear R or drive position D.
262Driving and parkingControls in detail
BA 197 USA, CA Edition A 2011; 1; 27, en-UShereepeVersion: 3.0.3.52010-03-24T15:31:10+01:00 - Seite 262
Page 269 of 436
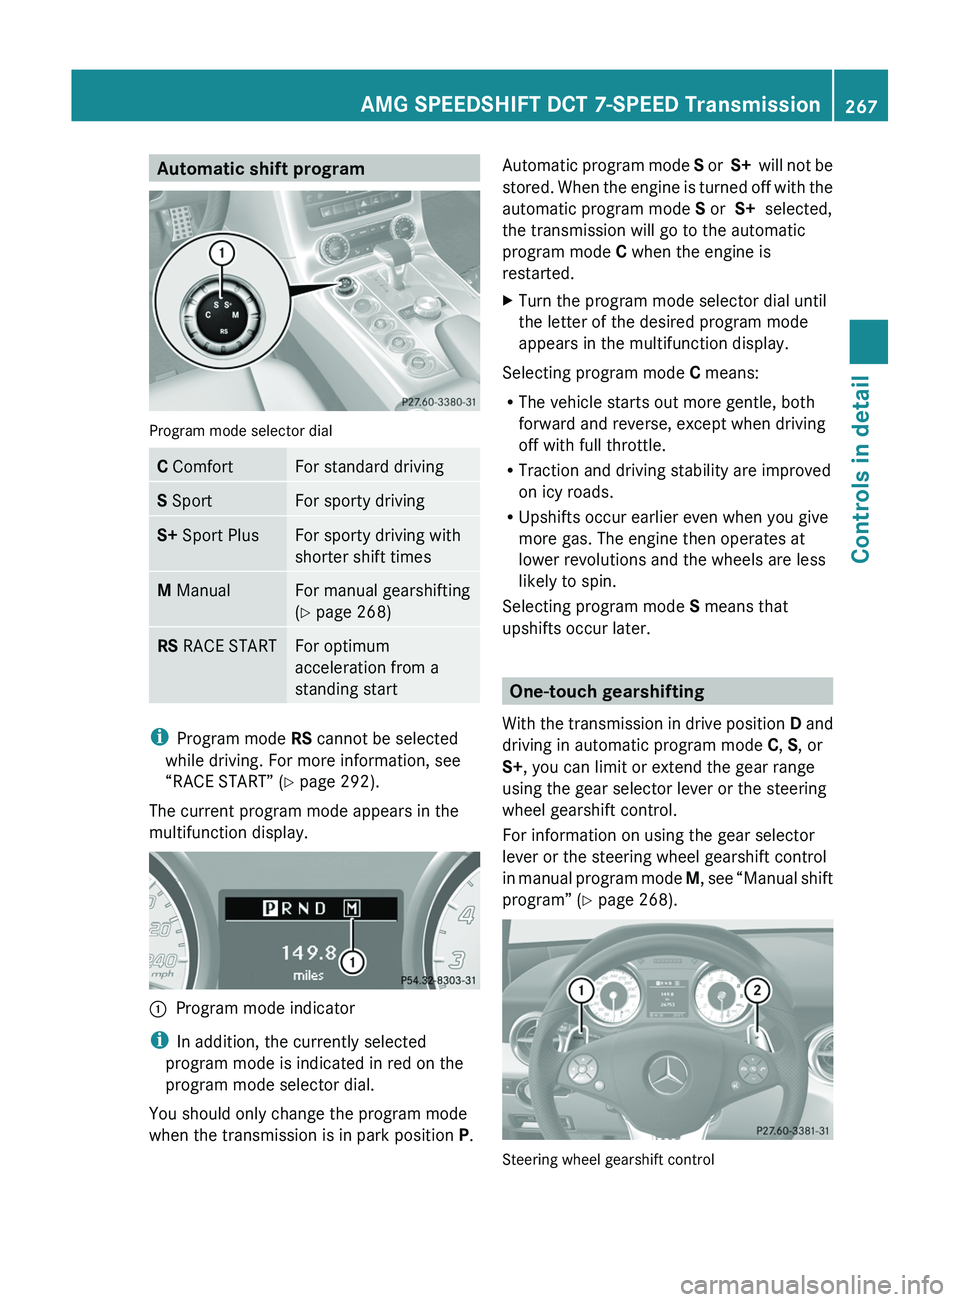
Automatic shift program
Program mode selector dial
C ComfortFor standard drivingS SportFor sporty drivingS+ Sport PlusFor sporty driving with
shorter shift times
M ManualFor manual gearshifting
(Y page 268)
RS RACE STARTFor optimum
acceleration from a
standing start
iProgram mode RS cannot be selected
while driving. For more information, see
“RACE START” (Y page 292).
The current program mode appears in the
multifunction display.
\000FProgram mode indicator
iIn addition, the currently selected
program mode is indicated in red on the
program mode selector dial.
You should only change the program mode
when the transmission is in park position P.
Automatic program mode S or S+ will not be
stored. When the engine is turned off with the
automatic program mode S or S+ selected,
the transmission will go to the automatic
program mode C when the engine is
restarted.
XTurn the program mode selector dial until
the letter of the desired program mode
appears in the multifunction display.
Selecting program mode C means:
RThe vehicle starts out more gentle, both
forward and reverse, except when driving
off with full throttle.
RTraction and driving stability are improved
on icy roads.
RUpshifts occur earlier even when you give
more gas. The engine then operates at
lower revolutions and the wheels are less
likely to spin.
Selecting program mode S means that
upshifts occur later.
One-touch gearshifting
With the transmission in drive position D and
driving in automatic program mode C, S, or
S+, you can limit or extend the gear range
using the gear selector lever or the steering
wheel gearshift control.
For information on using the gear selector
lever or the steering wheel gearshift control
in manual program mode M, see “Manual shift
program” (Y page 268).
Steering wheel gearshift control
AMG SPEEDSHIFT DCT 7-SPEED Transmission267Controls in detailBA 197 USA, CA Edition A 2011; 1; 27, en-UShereepeVersion: 3.0.3.52010-03-24T15:31:10+01:00 - Seite 267Z
Page 270 of 436
iYou cannot shift with the steering wheel
gearshift control when the transmission is
in park position P, neutral position N, or
reverse gear R.
Limiting gear range GWarning!
On slippery road surfaces, never downshift in
order to obtain braking action. This could
result in drive wheel slip and reduced vehicle
control. Your vehicle’s ABS will not prevent
this type of loss of control.
XBriefly pull left gearshift control 0046.
or
XMove the gear selector lever forward briefly
( Y page 263).
The transmission will shift into the next
lower gear as permitted by the shift
program. This action simultaneously limits
the gear range of the transmission.
i To avoid overrevving the engine when
downshifting, the transmission will not shift
into a lower gear if the engine’s maximum
speed would be exceeded.
Extending gear range
XBriefly pull right gearshift control 0047.
or
XMove the gear selector lever back briefly
( Y page 263).
The transmission will shift into the next
higher gear as permitted by the shift
program. This action simultaneously
extends the gear range of the transmission.
i If you press on the accelerator pedal
when the engine has reached the
revolution limit of the current gear range,
the transmission will upshift beyond any
gear range limit selected.
Canceling gear range limitXPull and hold right gearshift control 0047 until
the gear range indicator disappears from
the multifunction display.
or
XMove the gear selector lever back and hold
it there until the numeral for the current
gear disappears from the multifunction
display.
The transmission will shift from the current
gear range directly into drive position D.
Shifting into optimal gear range
XPull and hold left gearshift control 0046.
or
XMove the gear selector lever forward and
hold it there.
The transmission will select the gear range
suited for optimal acceleration and
deceleration automatically. This will involve
shifting down one or more gears.
Manual shift program
Manual program mode M differs with regard
to spontaneity, response time, and shifting
smoothness from automatic program modes
S or S+.
In manual program mode M, system-
controlled automatic gearshifting is switched
off. You need to change the gears by manually
upshifting or downshifting using the gear
selector lever or the steering wheel gearshift
control.
268AMG SPEEDSHIFT DCT 7-SPEED TransmissionControls in detail
BA 197 USA, CA Edition A 2011; 1; 27, en-UShereepeVersion: 3.0.3.52010-03-24T15:31:10+01:00 - Seite 268
Page 274 of 436
Control system
Introduction
The control system is activated as soon as the
starter switch is in position 2.
The control system enables you to call up
information about your vehicle and to change
vehicle settings.
For example, you can use the control system
to find out when your vehicle is next due for
maintenance service, to call up statistical
data on your vehicle, and much more.
GWarning!
A driver’s attention to the road and traffic
conditions must always be his/her primary
focus when driving.
For your safety and the safety of others,
selecting features through the multifunction
steering wheel should only be done by the
driver when traffic and road conditions permit
it to be done safely.
Bear in mind that at a speed of just 30 mph
(approximately 50 km/h), your vehicle is
covering a distance of 44 feet (approximately
14 m) every second.
The control system relays information to the
multifunction display.
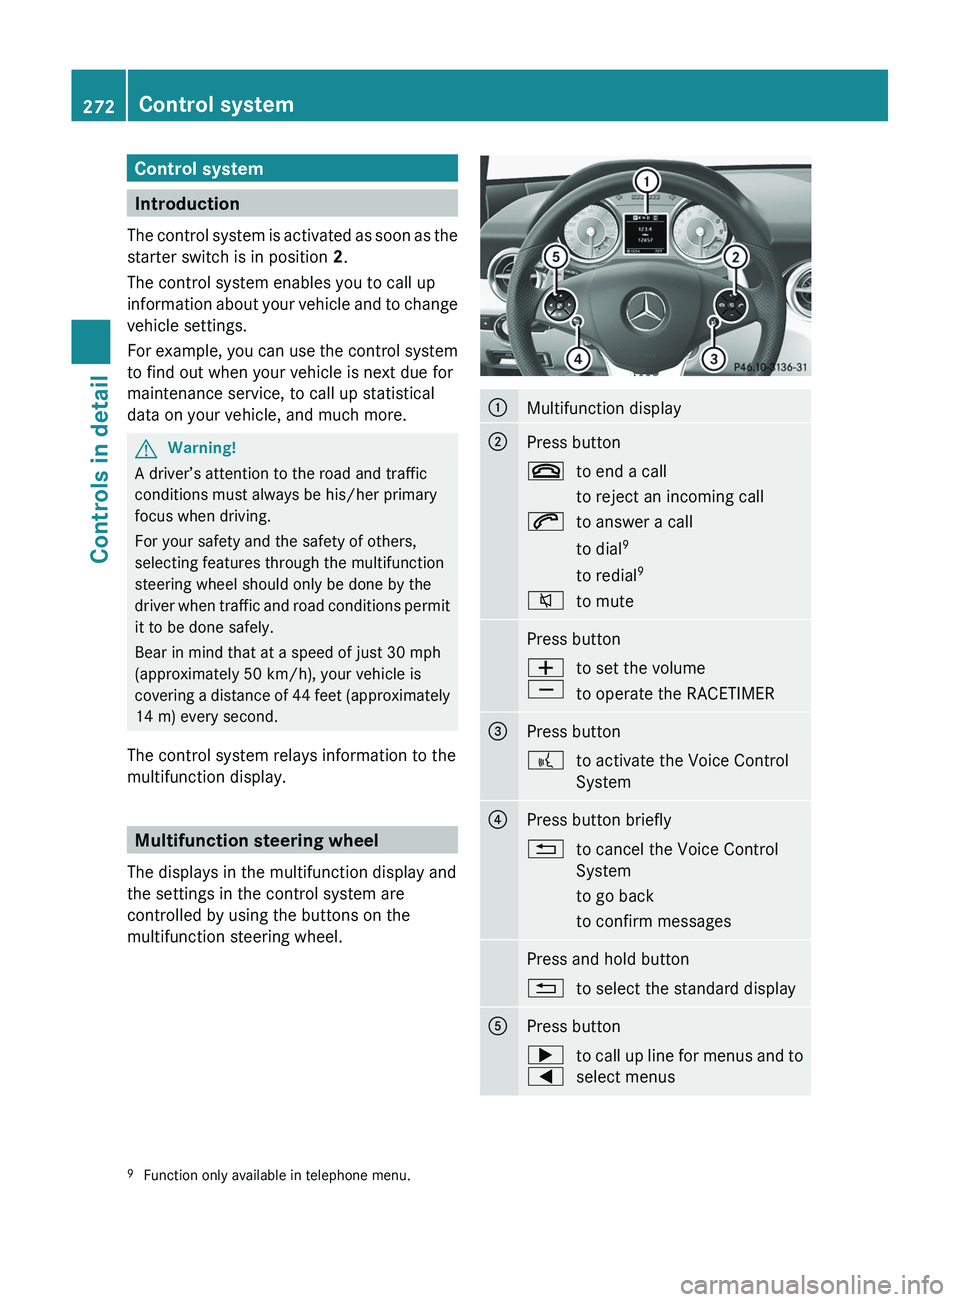
Multifunction steering wheel
The displays in the multifunction display and
the settings in the control system are
controlled by using the buttons on the
multifunction steering wheel.
0046Multifunction display0047Press button007Fto end a call
to reject an incoming call006Ato answer a call
to dial 9
to redial 9006Cto mutePress button005A
005Bto set the volume
to operate the RACETIMER008APress button0062to activate the Voice Control
System0088Press button briefly0041to cancel the Voice Control
System
to go back
to confirm messagesPress and hold button0041to select the standard display0086Press button003E
0040to call up line for menus and to
select menus9 Function only available in telephone menu.272Control systemControls in detail
BA 197 USA, CA Edition A 2011; 1; 27, en-UShereepeVersion: 3.0.3.52010-03-24T15:31:10+01:00 - Seite 272
Page 275 of 436
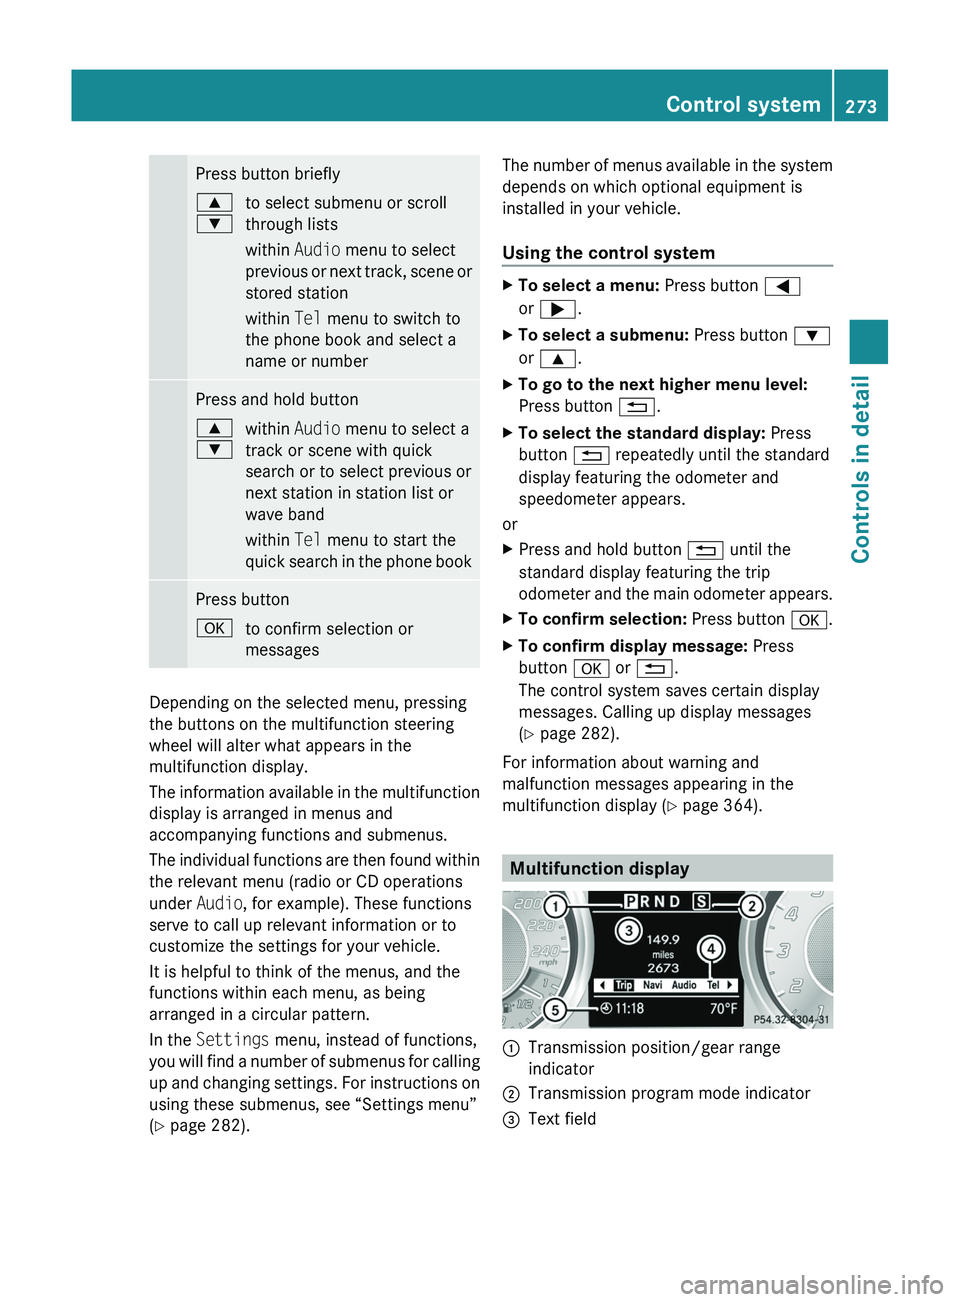
Press button briefly003C
003Dto select submenu or scroll
through lists
within Audio menu to select
previous or next track, scene or
stored station
within Tel menu to switch to
the phone book and select a
name or numberPress and hold button003C
003Dwithin Audio menu to select a
track or scene with quick
search or to select previous or
next station in station list or
wave band
within Tel menu to start the
quick search in the phone bookPress button0064to confirm selection or
messages
Depending on the selected menu, pressing
the buttons on the multifunction steering
wheel will alter what appears in the
multifunction display.
The information available in the multifunction
display is arranged in menus and
accompanying functions and submenus.
The individual functions are then found within
the relevant menu (radio or CD operations
under Audio, for example). These functions
serve to call up relevant information or to
customize the settings for your vehicle.
It is helpful to think of the menus, and the
functions within each menu, as being
arranged in a circular pattern.
In the Settings menu, instead of functions,
you will find a number of submenus for calling
up and changing settings. For instructions on
using these submenus, see “Settings menu”
( Y page 282).
The number of menus available in the system
depends on which optional equipment is
installed in your vehicle.
Using the control systemXTo select a menu: Press button 0040
or 003E .XTo select a submenu: Press button 003D
or 003C .XTo go to the next higher menu level:
Press button 0041.XTo select the standard display: Press
button 0041 repeatedly until the standard
display featuring the odometer and
speedometer appears.
or
XPress and hold button 0041 until the
standard display featuring the trip
odometer and the main odometer appears.XTo confirm selection: Press button 0064.XTo confirm display message: Press
button 0064 or 0041 .
The control system saves certain display
messages. Calling up display messages
( Y page 282).
For information about warning and
malfunction messages appearing in the
multifunction display ( Y page 364).
Multifunction display
0046Transmission position/gear range
indicator0047Transmission program mode indicator008AText fieldControl system273Controls in detailBA 197 USA, CA Edition A 2011; 1; 27, en-UShereepeVersion: 3.0.3.52010-03-24T15:31:10+01:00 - Seite 273Z
Page 281 of 436
The vehicle is either on a road that has not
been digitized ( Y page 135) or on the side
of a road, e.g. in a parking space.
R No Route
The COMAND system cannot calculate a
route to the selected destination.
R Direct. of Dest.
The vehicle has gone off the map during
route guidance ( Y page 135).
For more information on status displays, see
( Y page 135).
Audio menu
The functions in the Audio menu operate the
audio equipment which you have currently
switched on.
The following functions are available:
R Selecting radio station ( Y page 279)
R Operating audio devices/audio media
( Y page 279)
R Operating video DVD ( Y page 280)
If the COMAND system is currently switched
off, the message Audio Off appears in the
multifunction display.
XTo adjust the volume: Press button
005A or 005B on the multifunction steering
wheel.
Selecting radio station
i The SIRIUS XM Satellite Radio is treated
as a radio application.
For more information on SIRIUS XM
Satellite Radio, see ( Y page 173).
Additional optional satellite radio
equipment and a subscription to a satellite
radio service provider are required for
satellite radio operation. Contact an
authorized Mercedes-Benz Center for
details and availability for your vehicle.
XSwitch on the COMAND system
( Y page 75) and select radio.XPress button 0040 or 003E to select the
Audio menu.
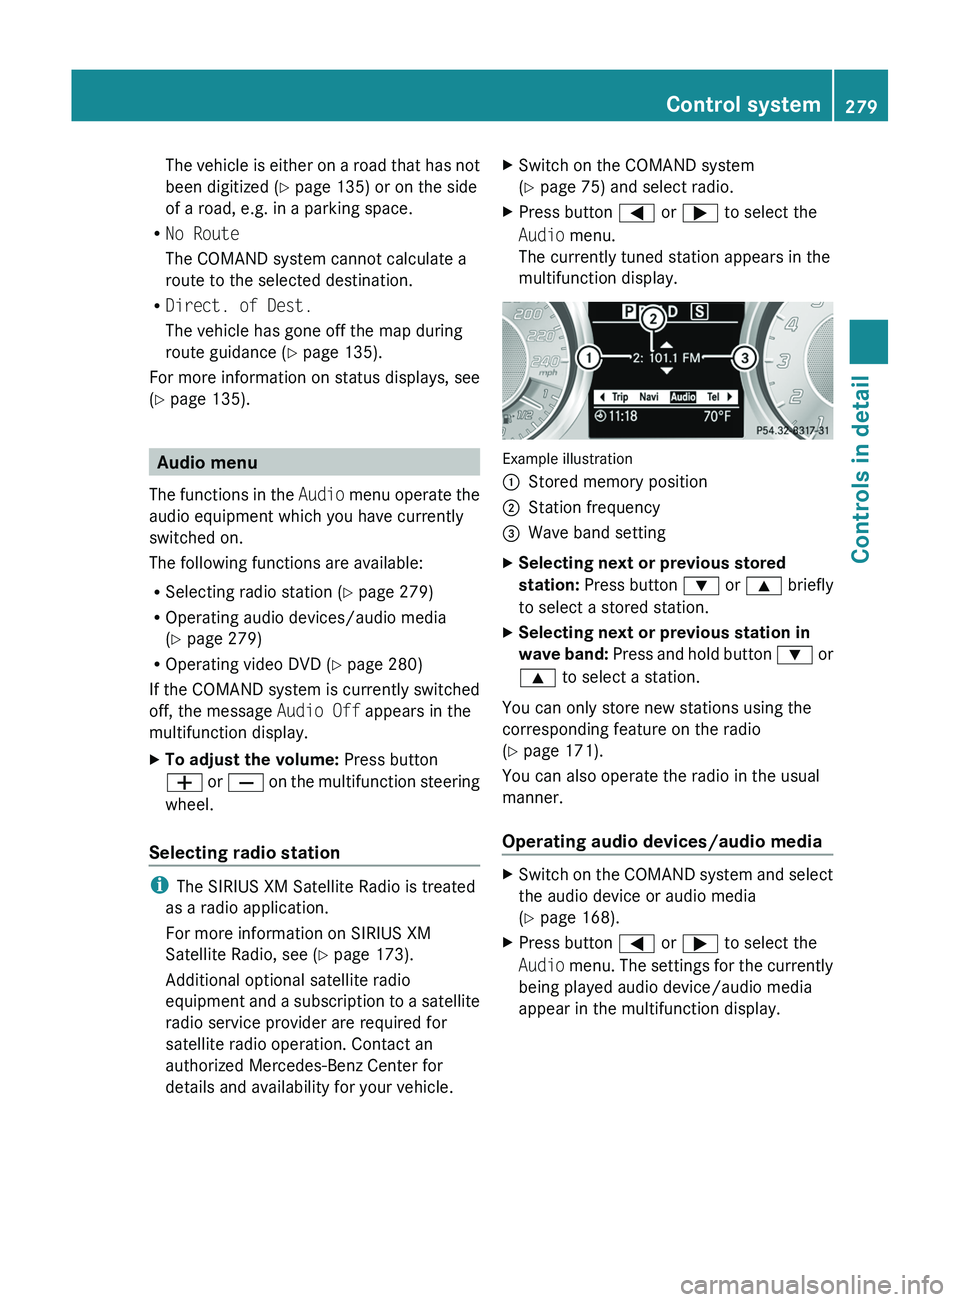
The currently tuned station appears in the
multifunction display.
Example illustration
0046Stored memory position0047Station frequency008AWave band settingXSelecting next or previous stored
station: Press button 003D or 003C briefly
to select a stored station.XSelecting next or previous station in
wave band: Press and hold button 003D or
003C to select a station.
You can only store new stations using the
corresponding feature on the radio
( Y page 171).
You can also operate the radio in the usual
manner.
Operating audio devices/audio media
XSwitch on the COMAND system and select
the audio device or audio media
( Y page 168).XPress button 0040 or 003E to select the
Audio menu. The settings for the currently
being played audio device/audio media
appear in the multifunction display.Control system279Controls in detailBA 197 USA, CA Edition A 2011; 1; 27, en-UShereepeVersion: 3.0.3.52010-03-24T15:31:10+01:00 - Seite 279Z