2011 MERCEDES-BENZ SLS AMG instrument cluster
[x] Cancel search: instrument clusterPage 367 of 436
Text messages
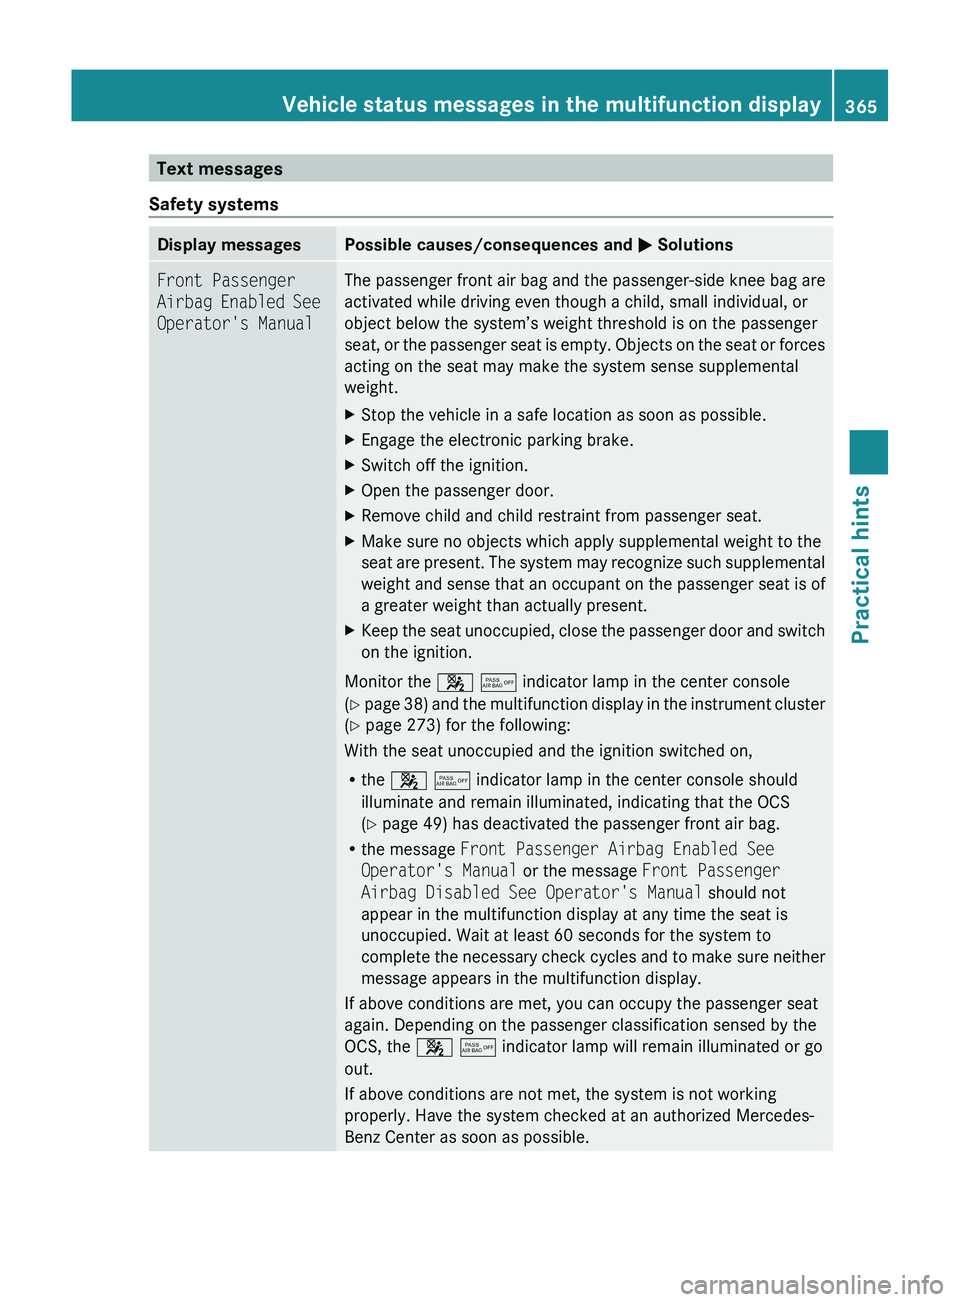
Safety systemsDisplay messagesPossible causes/consequences and 0050 SolutionsFront Passenger
Airbag Enabled See
Operator's ManualThe passenger front air bag and the passenger-side knee bag are
activated while driving even though a child, small individual, or
object below the system’s weight threshold is on the passenger
seat, or the passenger seat is empty. Objects on the seat or forces
acting on the seat may make the system sense supplemental
weight. XStop the vehicle in a safe location as soon as possible.XEngage the electronic parking brake.XSwitch off the ignition.XOpen the passenger door.XRemove child and child restraint from passenger seat.XMake sure no objects which apply supplemental weight to the
seat are present. The system may recognize such supplemental
weight and sense that an occupant on the passenger seat is of
a greater weight than actually present.XKeep the seat unoccupied, close the passenger door and switch
on the ignition.
Monitor the 007F 0080 indicator lamp in the center console
( Y page 38) and the multifunction display in the instrument cluster
( Y page 273) for the following:
With the seat unoccupied and the ignition switched on,
R the 007F 0080 indicator lamp in the center console should
illuminate and remain illuminated, indicating that the OCS
( Y page 49) has deactivated the passenger front air bag.
R the message Front Passenger Airbag Enabled See
Operator's Manual or the message Front Passenger
Airbag Disabled See Operator's Manual should not
appear in the multifunction display at any time the seat is
unoccupied. Wait at least 60 seconds for the system to
complete the necessary check cycles and to make sure neither
message appears in the multifunction display.
If above conditions are met, you can occupy the passenger seat
again. Depending on the passenger classification sensed by the
OCS, the 007F 0080 indicator lamp will remain illuminated or go
out.
If above conditions are not met, the system is not working
properly. Have the system checked at an authorized Mercedes-
Benz Center as soon as possible.
Vehicle status messages in the multifunction display365Practical hintsBA 197 USA, CA Edition A 2011; 1; 27, en-UShereepeVersion: 3.0.3.52010-03-24T15:31:10+01:00 - Seite 365Z
Page 368 of 436
GWarning!
If the 007F 0080 indicator lamp remains out even after performing the above corrective steps,
do not have any children 12 years old and under and other small individuals use the passenger
seat until the system has been repaired.
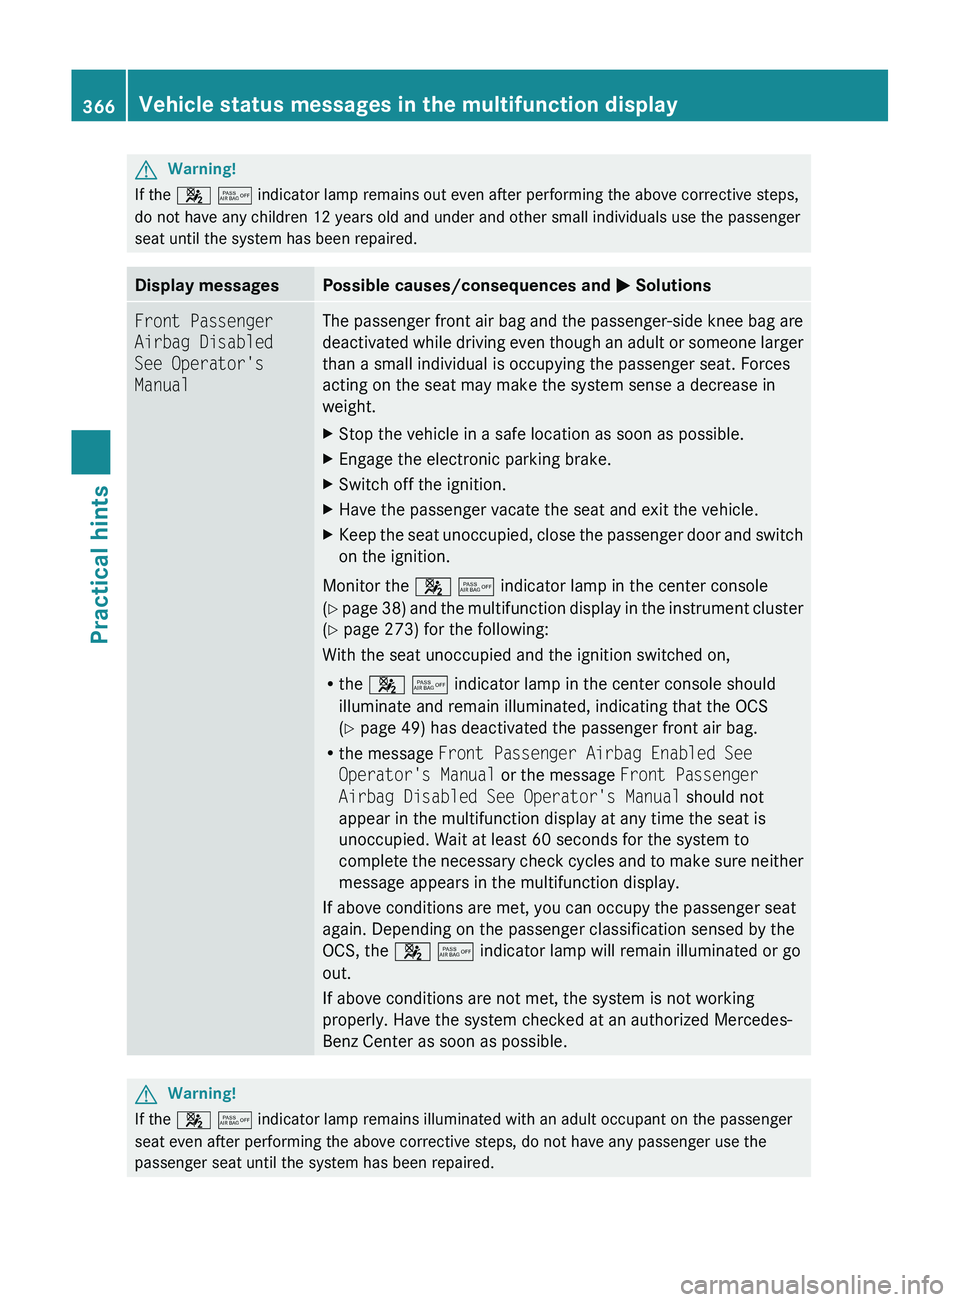
Display messagesPossible causes/consequences and 0050 SolutionsFront Passenger
Airbag Disabled
See Operator's
ManualThe passenger front air bag and the passenger-side knee bag are
deactivated while driving even though an adult or someone larger
than a small individual is occupying the passenger seat. Forces
acting on the seat may make the system sense a decrease in
weight.XStop the vehicle in a safe location as soon as possible.XEngage the electronic parking brake.XSwitch off the ignition.XHave the passenger vacate the seat and exit the vehicle.XKeep the seat unoccupied, close the passenger door and switch
on the ignition.
Monitor the 007F 0080 indicator lamp in the center console
( Y page 38) and the multifunction display in the instrument cluster
( Y page 273) for the following:
With the seat unoccupied and the ignition switched on,
R the 007F 0080 indicator lamp in the center console should
illuminate and remain illuminated, indicating that the OCS
( Y page 49) has deactivated the passenger front air bag.
R the message Front Passenger Airbag Enabled See
Operator's Manual or the message Front Passenger
Airbag Disabled See Operator's Manual should not
appear in the multifunction display at any time the seat is
unoccupied. Wait at least 60 seconds for the system to
complete the necessary check cycles and to make sure neither
message appears in the multifunction display.
If above conditions are met, you can occupy the passenger seat
again. Depending on the passenger classification sensed by the
OCS, the 007F 0080 indicator lamp will remain illuminated or go
out.
If above conditions are not met, the system is not working
properly. Have the system checked at an authorized Mercedes-
Benz Center as soon as possible.
GWarning!
If the 007F 0080 indicator lamp remains illuminated with an adult occupant on the passenger
seat even after performing the above corrective steps, do not have any passenger use the
passenger seat until the system has been repaired.
366Vehicle status messages in the multifunction displayPractical hints
BA 197 USA, CA Edition A 2011; 1; 27, en-UShereepeVersion: 3.0.3.52010-03-24T15:31:10+01:00 - Seite 366
Page 390 of 436
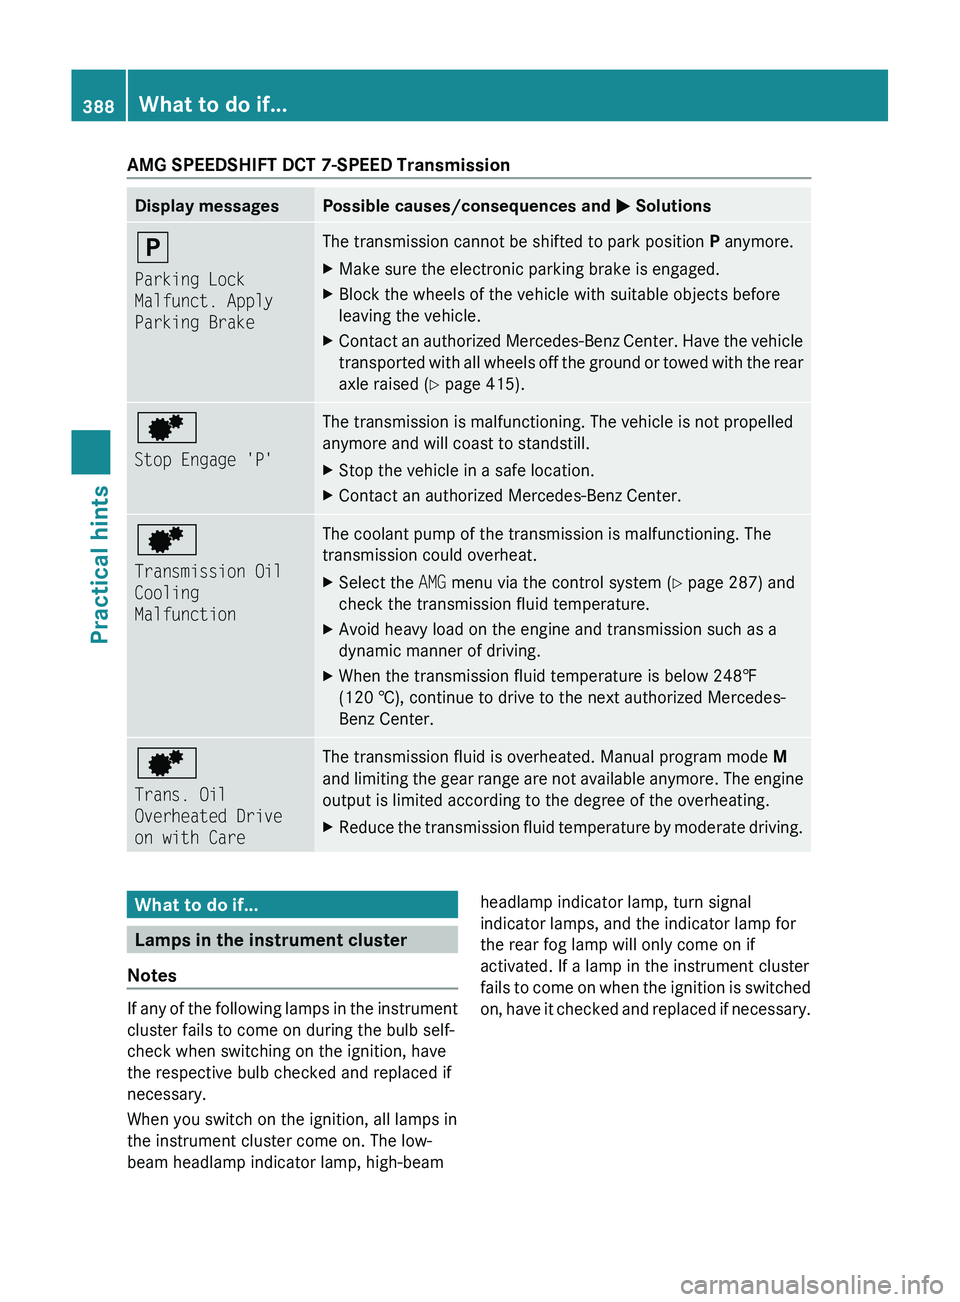
AMG SPEEDSHIFT DCT 7-SPEED TransmissionDisplay messagesPossible causes/consequences and 0050 Solutions0060
Parking Lock
Malfunct. Apply
Parking BrakeThe transmission cannot be shifted to park position P anymore.XMake sure the electronic parking brake is engaged.XBlock the wheels of the vehicle with suitable objects before
leaving the vehicle.XContact an authorized Mercedes-Benz Center. Have the vehicle
transported with all wheels off the ground or towed with the rear
axle raised ( Y page 415).0093
Stop Engage 'P'The transmission is malfunctioning. The vehicle is not propelled
anymore and will coast to standstill.XStop the vehicle in a safe location.XContact an authorized Mercedes-Benz Center.0093
Transmission Oil
Cooling
MalfunctionThe coolant pump of the transmission is malfunctioning. The
transmission could overheat.XSelect the AMG menu via the control system ( Y page 287) and
check the transmission fluid temperature.XAvoid heavy load on the engine and transmission such as a
dynamic manner of driving.XWhen the transmission fluid temperature is below 248‡
(120 †), continue to drive to the next authorized Mercedes-
Benz Center.0093
Trans. Oil
Overheated Drive
on with CareThe transmission fluid is overheated. Manual program mode M
and limiting the gear range are not available anymore. The engine
output is limited according to the degree of the overheating.XReduce the transmission fluid temperature by moderate driving.What to do if...
Lamps in the instrument cluster
Notes
If any of the following lamps in the instrument
cluster fails to come on during the bulb self-
check when switching on the ignition, have
the respective bulb checked and replaced if
necessary.
When you switch on the ignition, all lamps in
the instrument cluster come on. The low-
beam headlamp indicator lamp, high-beam
headlamp indicator lamp, turn signal
indicator lamps, and the indicator lamp for
the rear fog lamp will only come on if
activated. If a lamp in the instrument cluster
fails to come on when the ignition is switched
on, have it checked and replaced if necessary.388What to do if...Practical hints
BA 197 USA, CA Edition A 2011; 1; 27, en-UShereepeVersion: 3.0.3.52010-03-24T15:31:10+01:00 - Seite 388
Page 404 of 436
Flat tire
Notes
Your vehicle is equipped with a TIREFIT kit
(Y page 362).
Preparing the vehicle
XWhenever possible, park the vehicle in a
safe distance from moving traffic on a hard,
flat surface.
XTurn on the hazard warning flasher.XTurn the steering wheel so that the front
wheels are in a straight-ahead position.
XEngage the electronic parking brake.XShift the transmission into park position P.XTurn off the engine.XKEYLESS-GO: Open the driver’s door (this
puts the starter switch in position 0, same
as with the SmartKey removed from the
starter switch). The driver’s door can then
be closed again. Open doors only when
conditions are safe to do so.
or
XRemove the SmartKey from the starter
switch.
XHave any passenger exit the vehicle at a
safe distance from the roadway. Open
doors only when conditions are safe to do
so.
Sealing tires with TIREFIT
Small tire punctures, particularly those in the
tread, can be sealed with TIREFIT.
TIREFIT can be used in ambient temperatures
down to -40‡ (-40†).
GWarning!
TIREFIT is a limited repair device. TIREFIT
cannot be used for cuts or punctures larger
than approximately 0.16 in (4 mm) and tire
damage caused by driving with extremely low
tire inflation pressure, or on a flat tire, or a
damaged wheel.
Do not drive the vehicle under such
circumstances.
Contact the nearest authorized Mercedes-
Benz Center for assistance or call Roadside
Assistance.
XForeign objects (e.g. screws or nails)
should not be removed from the tire.
XTake the TIREFIT kit, the sticker, and the
electric air pump out of the trunk
(Y page 362).
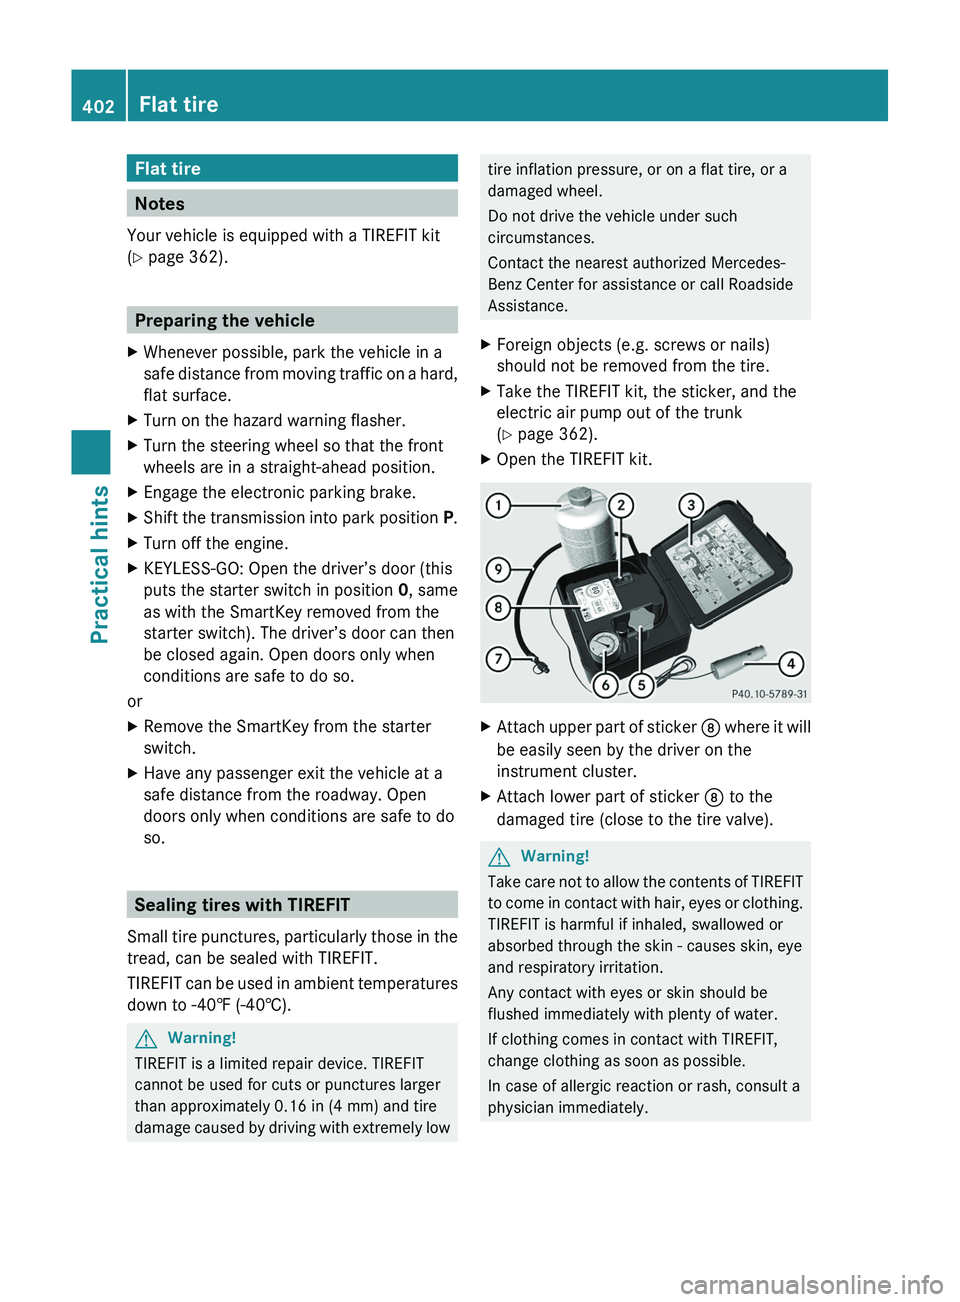
XOpen the TIREFIT kit.XAttach upper part of sticker \000o where it will
be easily seen by the driver on the
instrument cluster.
XAttach lower part of sticker \000o to the
damaged tire (close to the tire valve).
GWarning!
Take care not to allow the contents of TIREFIT
to come in contact with hair, eyes or clothing.
TIREFIT is harmful if inhaled, swallowed or
absorbed through the skin - causes skin, eye
and respiratory irritation.
Any contact with eyes or skin should be
flushed immediately with plenty of water.
If clothing comes in contact with TIREFIT,
change clothing as soon as possible.
In case of allergic reaction or rash, consult a
physician immediately.
402Flat tirePractical hints
BA 197 USA, CA Edition A 2011; 1; 27, en-UShereepeVersion: 3.0.3.52010-03-24T15:31:10+01:00 - Seite 402
Page 407 of 436
GWarning!
Do not exceed a vehicle speed of 50 mph
( 80 km/h). A TIREFIT repair is not designed to
operate at higher speeds.
The sticker must be attached on the
instrument cluster where it will be easily seen
by the driver.
Vehicle handling characteristics of a TIREFIT
repaired tire may change. Adapt your driving
accordingly.
XAfter driving for approximately 5 miles
(3 km) or 10 minutes, stop the vehicle and
check the tire inflation pressure using the
electric air pump.
i The TIREFIT sealing may impair the
function of the sensors in the tire. Proper
operating sensors are necessary to check
the tire inflation pressure with the
Advanced Tire Pressure Monitoring
System. When the sensors are not
operating properly, the measured tire
inflation pressure may be inaccurate or the
tire inflation pressure may not be displayed
at all. Error messages may appear.
Therefore, check and adjust the tire
inflation pressure with pressure gauge 0087
on the electric air pump.
GWarning!
If tire inflation pressure has fallen below
130 kPA (1.3 bar, 20 psi) do not continue to
drive the vehicle.
Park your vehicle safely away from the
roadway and contact the nearest authorized
Mercedes-Benz Center or Roadside
Assistance.
Have the damaged tire replaced.
If the tire inflation pressure is at least 130 kPA
(1.3 bar, 20 psi), inflate or deflate the tire to
the correct tire inflation pressure (see Tire
and Loading Information placard on the
driver’s door B-pillar):XTo increase tire inflation pressure:
Switch on the electric air pump.XTo decrease tire inflation pressure:
Open vent screw 006E on air hose 0070.XDrive to the nearest qualified workshop,
e.g. an authorized Mercedes-Benz Center,
to have the damaged tire replaced.XContact an authorized Mercedes-Benz
Center as soon as possible to obtain a new
TIREFIT kit.XBring used TIREFIT materials to an
authorized Mercedes-Benz Center for
proper disposal.XReplace your TIREFIT container every
4 years. Replacement containers are
available at any authorized Mercedes-Benz
Center.
Wheel change
Preparing the vehicle
XPark the vehicle on a hard, flat surface.XTurn the steering wheel so that the front
wheels are in a straight-ahead position.XEngage the electronic parking brake.XShift the transmission into park position P.XTurn off the engine.XKEYLESS-GO: Open the driver’s door (this
puts the starter switch in position 0, same
as with the SmartKey removed from the
starter switch). The driver’s door can then
be closed again. Open doors only when
conditions are safe to do so.
or
XRemove the SmartKey from the starter
switch.XTake the following out of the vehicle:Wheel change405Practical hintsBA 197 USA, CA Edition A 2011; 1; 27, en-UShereepeVersion: 3.0.3.52010-03-24T15:31:10+01:00 - Seite 405Z
Page 419 of 436
Leave the engine running under all
circumstances.
Removing the SmartKey from the starter
switch or opening a door with the ignition
switched off will automatically shift the into
park position P.XStart the engine ( Y page 259).XWith the vehicle at a standstill, depress the
brake pedal and keep it pressed.XShift the transmission into neutral position
N .XCheck the transmission position in the
instrument cluster ( Y page 265).XRelease the brake pedal.XIf engaged, release the electronic parking
brake.XSwitch on the hazard warning flasher
( Y page 252).XLeave the engine running throughout the
entire towing procedure.
! The vehicle may be towed only for
distances up to 30 miles (50 km) and at a
speed not to exceed 30 mph (50 km/h).
! Make sure the electronic parking brake is
released. If the electronic parking brake is
malfunctioning, contact an authorized
Mercedes-Benz Center.
! While towing, check the temperature of
the transmission fluid via the control
system in the AMG menu. The transmission
fluid temperature may not rise above 248‡
(120†). Otherwise, the towing procedure
must be stopped immediately.
i While being towed with the hazard
warning flasher in use, use the combination
switch in the usual manner to signal turns.
Only the selected turn signal will operate.
Upon canceling the turn signal, the hazard
warning flasher will operate again.
Fuses
Introduction
The electrical fuses in your vehicle serve to
switch off malfunctioning power circuits.
If a fuse is blown, the components and
systems secured by that fuse will stop
operating.
GWarning!
Only use fuses approved by Mercedes-Benz
with the specified amperage for the system in
question and do not attempt to repair or
bridge a blown fuse. Using other than
approved fuses or using repaired or bridged
fuses may cause an overload leading to a fire,
and/or cause damage to electrical
components and/or systems. Have the cause
determined and remedied by an authorized
Mercedes-Benz Center.
A blown fuse must be replaced by an
appropriate spare fuse (recognizable by its
color or the fuse rating given on the fuse) of
the amperage recommended in the fuse
chart. Any Mercedes-Benz Center will be glad
to advise you on this subject.
i In case of a blown fuse contact Roadside
Assistance or an authorized Mercedes-
Benz Center.
If a newly inserted fuse blows again, have the
cause determined and rectified by an
authorized Mercedes-Benz Center.
The fuse chart is located in the trunk with the
vehicle tool kit ( Y page 362). The fuse chart
explains the fuse allocation and fuse
amperages.
Before replacing fuses
XEngage the electronic parking brake.XMake sure the transmission is in park
position P.XSwitch off all electrical consumers.XTurn off the engine.Fuses417Practical hintsBA 197 USA, CA Edition A 2011; 1; 27, en-UShereepeVersion: 3.0.3.52010-03-24T15:31:10+01:00 - Seite 417Z