2011 MERCEDES-BENZ SLS AMG navigation
[x] Cancel search: navigationPage 91 of 436
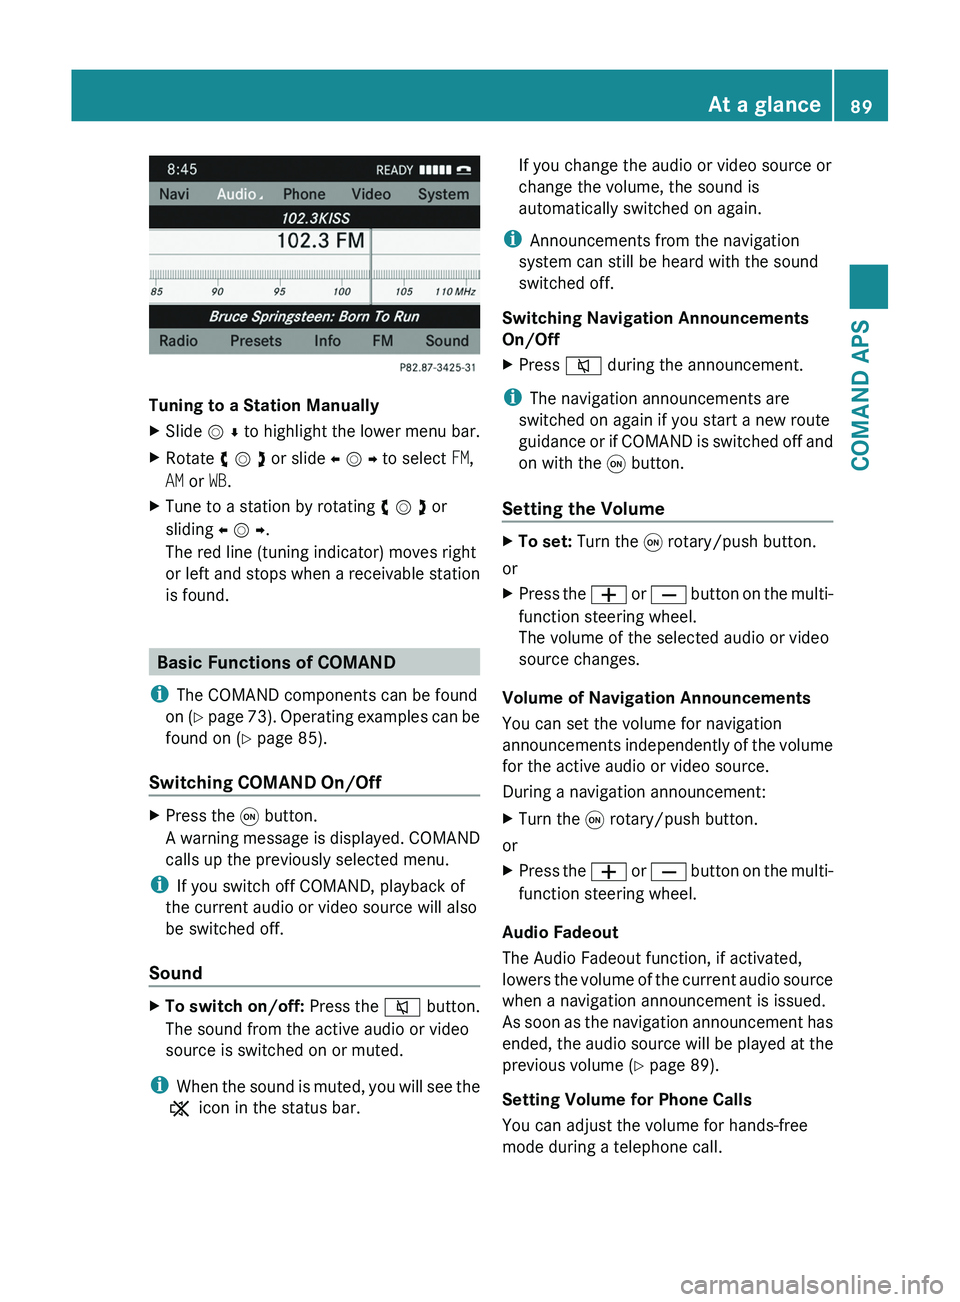
Tuning to a Station Manually
XSlide m r to highlight the lower menu bar.XRotate y m z or slide o m p to select FM,
AM or WB.
XTune to a station by rotating y m z or
sliding o m p.
The red line (tuning indicator) moves right
or left and stops when a receivable station
is found.
Basic Functions of COMAND
iThe COMAND components can be found
on (Y page 73). Operating examples can be
found on (Y page 85).
Switching COMAND On/Off
XPress the \000C button.
A warning message is displayed. COMAND
calls up the previously selected menu.
iIf you switch off COMAND, playback of
the current audio or video source will also
be switched off.
Sound
XTo switch on/off: Press the \000l button.
The sound from the active audio or video
source is switched on or muted.
iWhen the sound is muted, you will see the
X icon in the status bar.
If you change the audio or video source or
change the volume, the sound is
automatically switched on again.
iAnnouncements from the navigation
system can still be heard with the sound
switched off.
Switching Navigation Announcements
On/Off
XPress \000l during the announcement.
iThe navigation announcements are
switched on again if you start a new route
guidance or if COMAND is switched off and
on with the \000C button.
Setting the Volume
XTo set: Turn the \000C rotary/push button.
or
XPress the \000Z or \000[ button on the multi-
function steering wheel.
The volume of the selected audio or video
source changes.
Volume of Navigation Announcements
You can set the volume for navigation
announcements independently of the volume
for the active audio or video source.
During a navigation announcement:
XTurn the \000C rotary/push button.
or
XPress the \000Z or \000[ button on the multi-
function steering wheel.
Audio Fadeout
The Audio Fadeout function, if activated,
lowers the volume of the current audio source
when a navigation announcement is issued.
As soon as the navigation announcement has
ended, the audio source will be played at the
previous volume (Y page 89).
Setting Volume for Phone Calls
You can adjust the volume for hands-free
mode during a telephone call.
At a glance89COMAND APSBA 197 USA, CA Edition A 2011; 1; 27, en-UShereepeVersion: 3.0.3.52010-03-24T15:31:10+01:00 - Seite 89Z
Page 95 of 436
SettingsDisplay OffDisplay
(Y page 93)
Time (Y page 93)
Text reader speed
(Y page 94)
Voice
Control(Y page
95)
Setting the language
(Y page 99)
Bluetooth®
(Y page 96)
Rear View Camera
(Y page 99)
Reset COMAND
(Y page 99)
iUse this function
to delete your
personal data,
e.g. before selling
your vehicle.
Display Settings
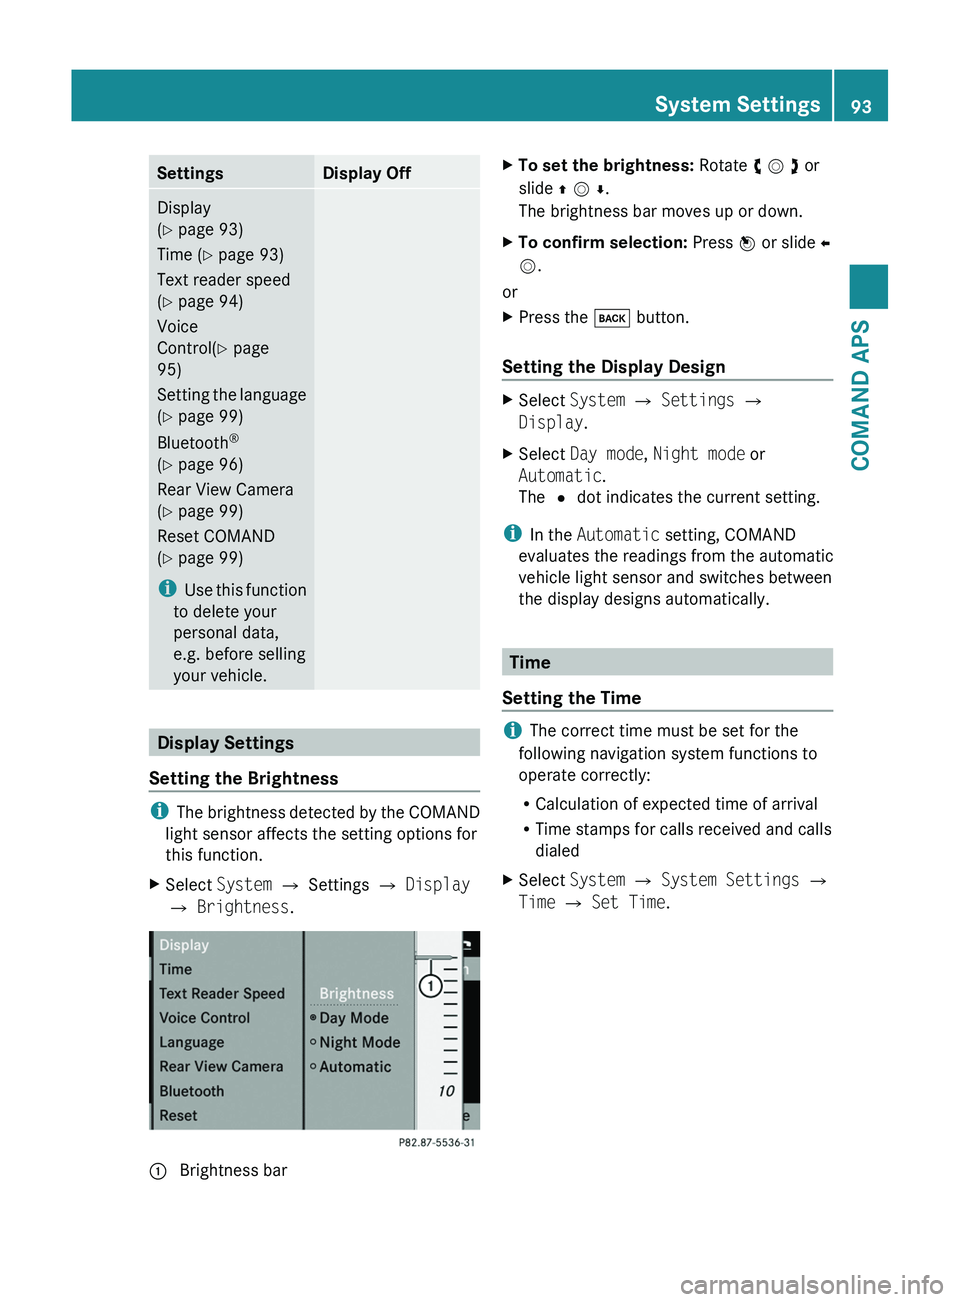
Setting the Brightness
iThe brightness detected by the COMAND
light sensor affects the setting options for
this function.
XSelect System £ Settings £ Display
£ Brightness.
1 Brightness barXTo set the brightness: Rotate y m z or
slide q m r.
The brightness bar moves up or down.
XTo confirm selection: Press n or slide o
m.
or
XPress the \000= button.
Setting the Display Design
XSelect System £ Settings £
Display.
XSelect Day mode, Night mode or
Automatic.
The R dot indicates the current setting.
iIn the Automatic setting, COMAND
evaluates the readings from the automatic
vehicle light sensor and switches between
the display designs automatically.
Time
Setting the Time
iThe correct time must be set for the
following navigation system functions to
operate correctly:
RCalculation of expected time of arrival
RTime stamps for calls received and calls
dialed
XSelect System £ System Settings £
Time £ Set Time.
System Settings93COMAND APSBA 197 USA, CA Edition A 2011; 1; 27, en-UShereepeVersion: 3.0.3.52010-03-24T15:31:10+01:00 - Seite 93Z
Page 96 of 436
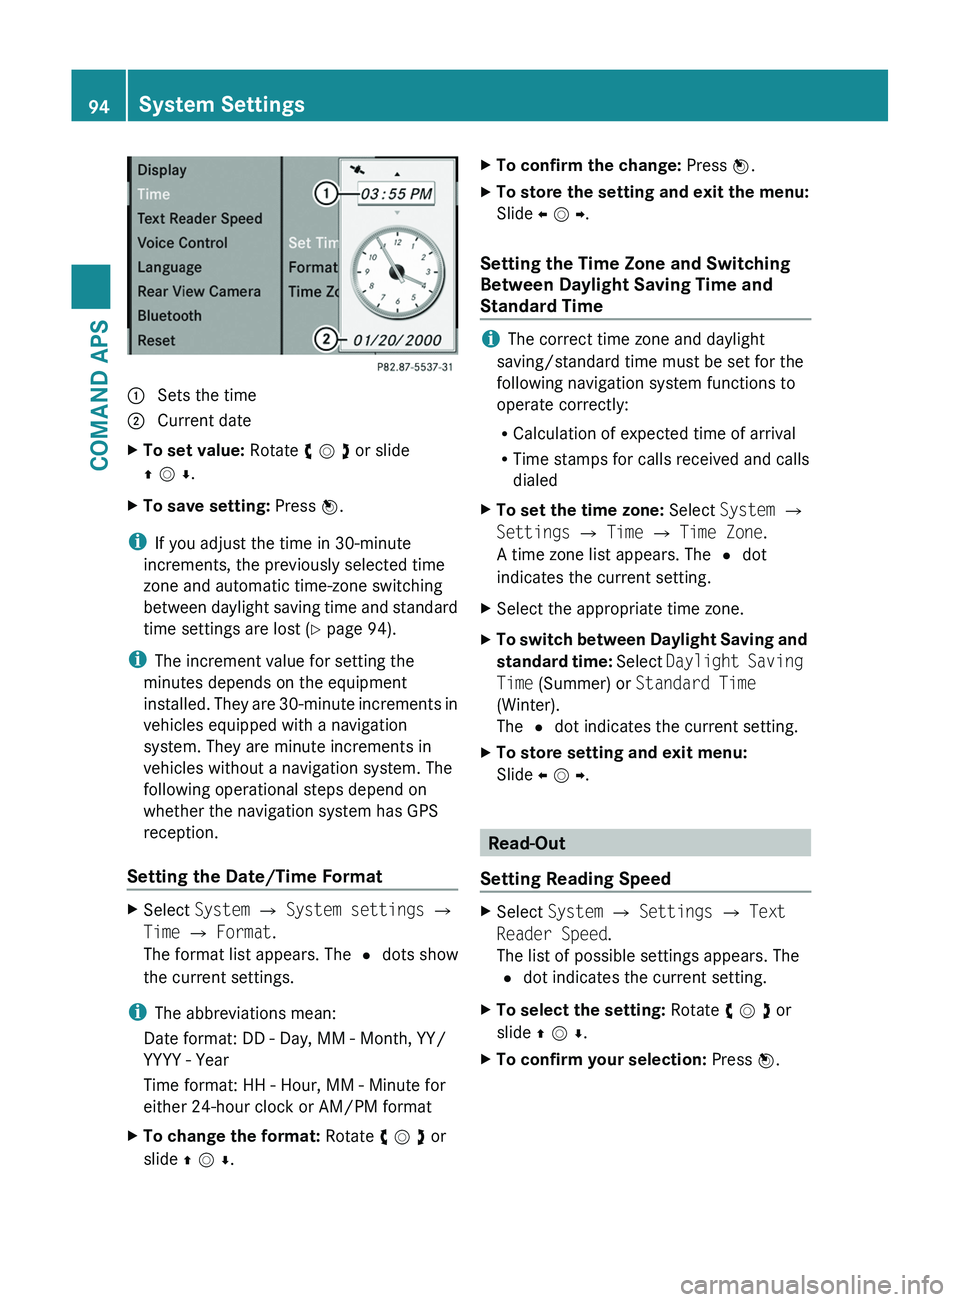
1 Sets the time2 Current dateXTo set value: Rotate y m z or slide
q m r.
XTo save setting: Press n.
iIf you adjust the time in 30-minute
increments, the previously selected time
zone and automatic time-zone switching
between daylight saving time and standard
time settings are lost (Y page 94).
iThe increment value for setting the
minutes depends on the equipment
installed. They are 30-minute increments in
vehicles equipped with a navigation
system. They are minute increments in
vehicles without a navigation system. The
following operational steps depend on
whether the navigation system has GPS
reception.
Setting the Date/Time Format
XSelect System £ System settings £
Time £ Format.
The format list appears. The R dots show
the current settings.
iThe abbreviations mean:
Date format: DD - Day, MM - Month, YY/
YYYY - Year
Time format: HH - Hour, MM - Minute for
either 24-hour clock or AM/PM format
XTo change the format: Rotate y m z or
slide q m r.
XTo confirm the change: Press n.XTo store the setting and exit the menu:
Slide o m p.
Setting the Time Zone and Switching
Between Daylight Saving Time and
Standard Time
iThe correct time zone and daylight
saving/standard time must be set for the
following navigation system functions to
operate correctly:
RCalculation of expected time of arrival
RTime stamps for calls received and calls
dialed
XTo set the time zone: Select System £
Settings £ Time £ Time Zone.
A time zone list appears. The R dot
indicates the current setting.
XSelect the appropriate time zone.XTo switch between Daylight Saving and
standard time: Select Daylight Saving
Time (Summer) or Standard Time
(Winter).
The R dot indicates the current setting.
XTo store setting and exit menu:
Slide o m p.
Read-Out
Setting Reading Speed
XSelect System £ Settings £ Text
Reader Speed.
The list of possible settings appears. The
R dot indicates the current setting.
XTo select the setting: Rotate y m z or
slide q m r.
XTo confirm your selection: Press n.94System SettingsCOMAND APS
BA 197 USA, CA Edition A 2011; 1; 27, en-UShereepeVersion: 3.0.3.52010-03-24T15:31:10+01:00 - Seite 94
Page 97 of 436
Voice Control
Switching the Help Screen On or Off
XSelect System £ Settings £ Voice
Control.
XSelect Help Window.
You have switched the help window on
Ç or off c.
iIn addition to the audible instructions, the
help screen displays other information
during the individualization process and the
later voice control mode.
Individualization
You can use the individualization function
option to adapt the Voice control system to
your own voice and therefore improve voice
recognition. This will affect the ability of the
system to recognize the voices of other users,
and for this reason it can be switched off
(Y page 96).
The individualization function comprises two
parts and lasts around five minutes. During
the process you will practice a few number
sequences and voice commands.
Starting New Individualization
iIt is only possible to start individualization
when the vehicle is stationary. Before
starting, switch off all devices or functions
which could interfere, such as the radio or
the navigation system. After starting the
session, the system guides you through the
training with spoken instructions.
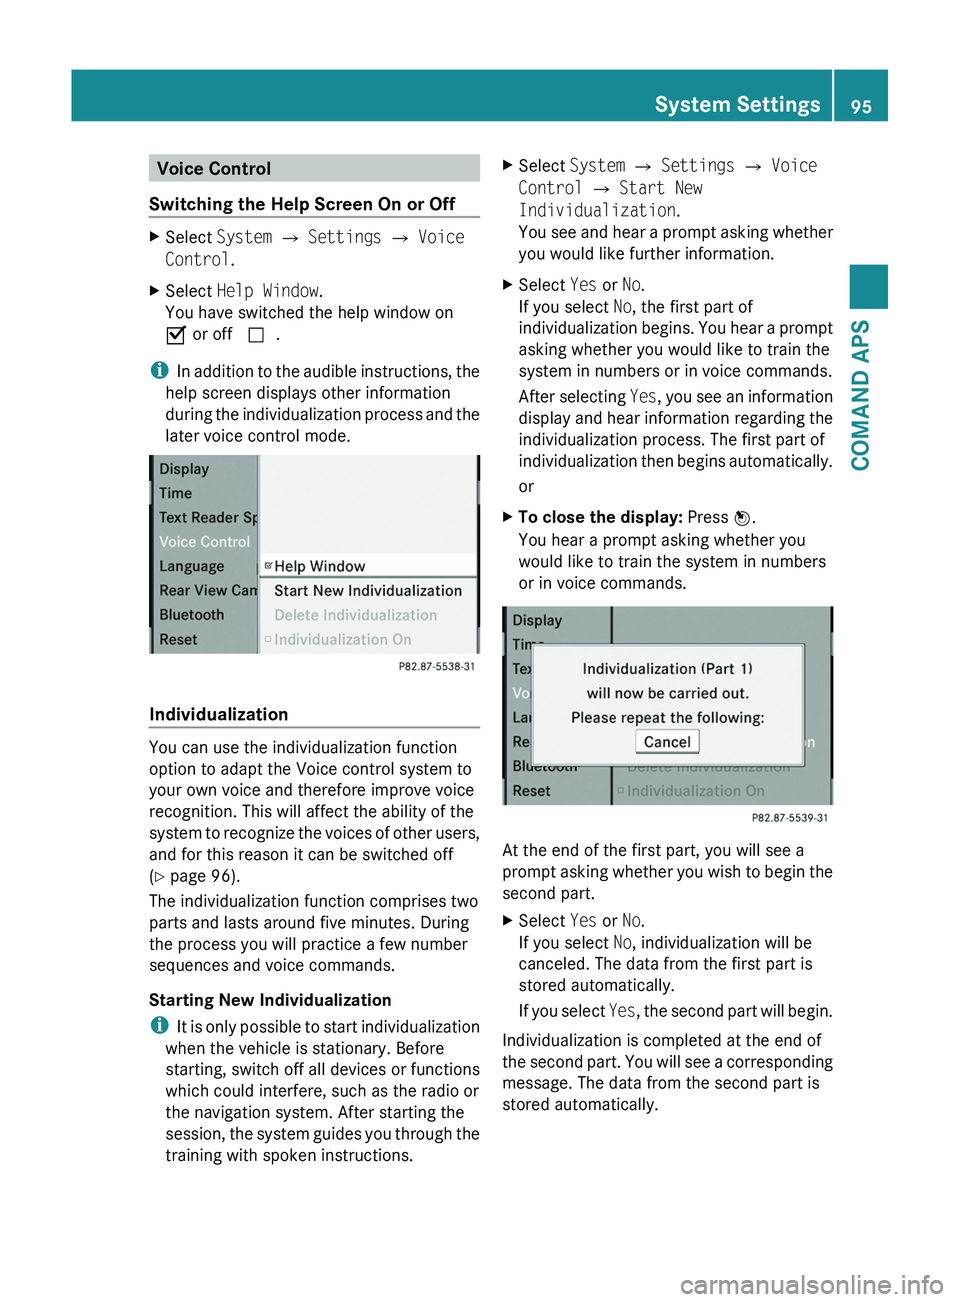
XSelect System £ Settings £ Voice
Control £ Start New
Individualization.
You see and hear a prompt asking whether
you would like further information.
XSelect Yes or No.
If you select No, the first part of
individualization begins. You hear a prompt
asking whether you would like to train the
system in numbers or in voice commands.
After selecting Yes, you see an information
display and hear information regarding the
individualization process. The first part of
individualization then begins automatically.
or
XTo close the display: Press n.
You hear a prompt asking whether you
would like to train the system in numbers
or in voice commands.
At the end of the first part, you will see a
prompt asking whether you wish to begin the
second part.
XSelect Yes or No.
If you select No, individualization will be
canceled. The data from the first part is
stored automatically.
If you select Yes, the second part will begin.
Individualization is completed at the end of
the second part. You will see a corresponding
message. The data from the second part is
stored automatically.
System Settings95COMAND APSBA 197 USA, CA Edition A 2011; 1; 27, en-UShereepeVersion: 3.0.3.52010-03-24T15:31:10+01:00 - Seite 95Z
Page 101 of 436
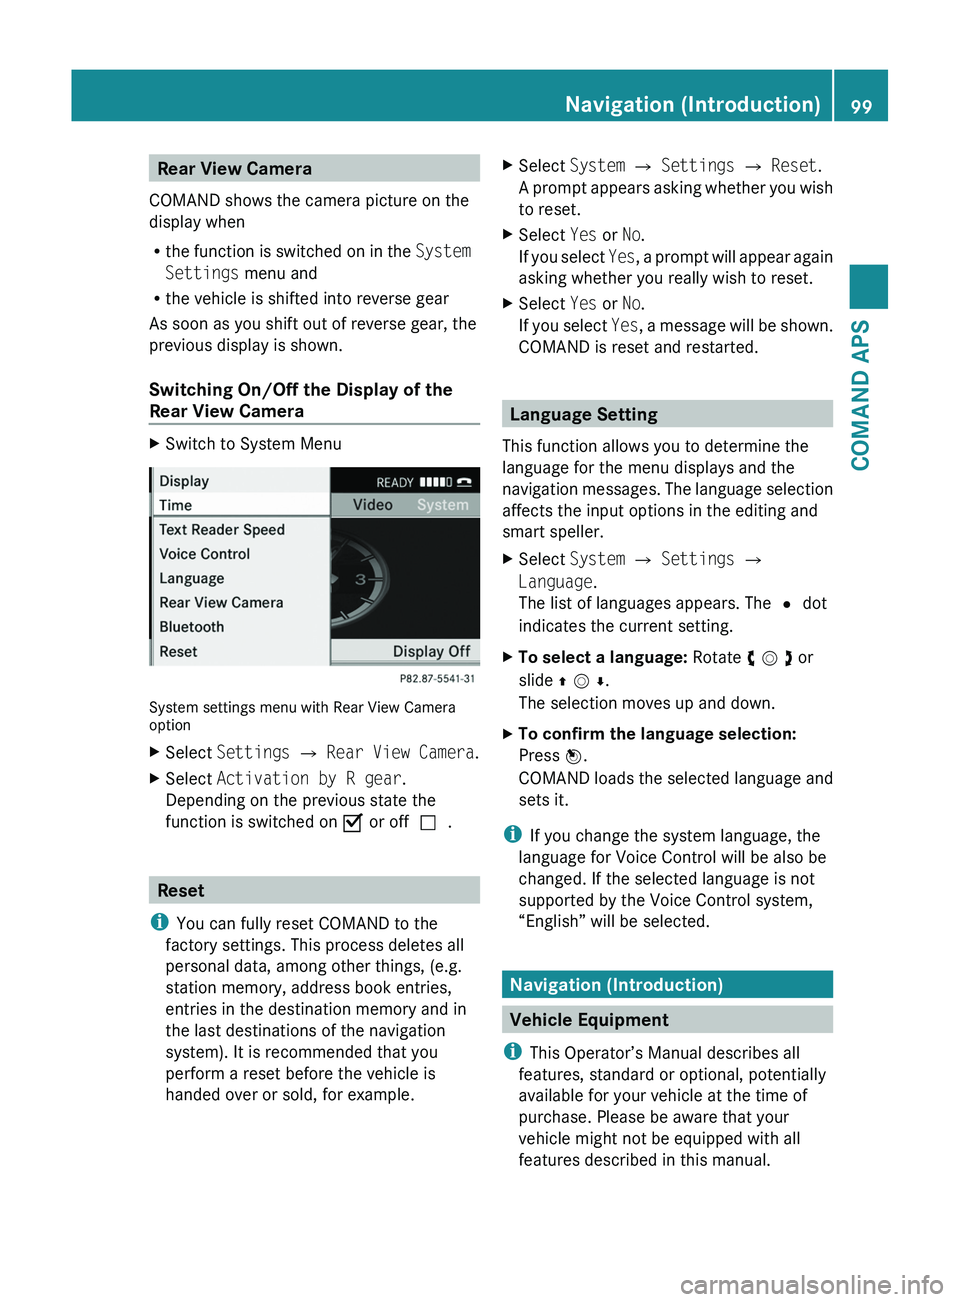
Rear View Camera
COMAND shows the camera picture on the
display when
Rthe function is switched on in the System
Settings menu and
Rthe vehicle is shifted into reverse gear
As soon as you shift out of reverse gear, the
previous display is shown.
Switching On/Off the Display of the
Rear View Camera
XSwitch to System Menu
System settings menu with Rear View Cameraoption
XSelect Settings £ Rear View Camera.XSelect Activation by R gear.
Depending on the previous state the
function is switched on Ç or offc.
Reset
iYou can fully reset COMAND to the
factory settings. This process deletes all
personal data, among other things, (e.g.
station memory, address book entries,
entries in the destination memory and in
the last destinations of the navigation
system). It is recommended that you
perform a reset before the vehicle is
handed over or sold, for example.
XSelect System £ Settings £ Reset.
A prompt appears asking whether you wish
to reset.
XSelect Yes or No.
If you select Yes, a prompt will appear again
asking whether you really wish to reset.
XSelect Yes or No.
If you select Yes, a message will be shown.
COMAND is reset and restarted.
Language Setting
This function allows you to determine the
language for the menu displays and the
navigation messages. The language selection
affects the input options in the editing and
smart speller.
XSelect System £ Settings £
Language.
The list of languages appears. The R dot
indicates the current setting.
XTo select a language: Rotate y m z or
slide q m r.
The selection moves up and down.
XTo confirm the language selection:
Press n.
COMAND loads the selected language and
sets it.
iIf you change the system language, the
language for Voice Control will be also be
changed. If the selected language is not
supported by the Voice Control system,
“English” will be selected.
Navigation (Introduction)
Vehicle Equipment
iThis Operator’s Manual describes all
features, standard or optional, potentially
available for your vehicle at the time of
purchase. Please be aware that your
vehicle might not be equipped with all
features described in this manual.
Navigation (Introduction)99COMAND APSBA 197 USA, CA Edition A 2011; 1; 27, en-UShereepeVersion: 3.0.3.52010-03-24T15:31:10+01:00 - Seite 99Z
Page 102 of 436
Safety InstructionsGWarning
For safety reasons, only enter a destination
when the vehicle is stationary. When the
vehicle is in motion, a passenger should enter
the destination. Study manual and select
route before driving.
Bear in mind that at a speed of just 30 mph
(approximately 50 km/h), your vehicle is
covering a distance of 44 feet (approximately
14 m) every second.
COMAND calculates the route to the
destination without taking account of the
following:
R Traffic lights
R Stop and right-of-way-signs
R Lane merging
R Parking or stopping prohibited areas
R Other road and traffic rules and regulations
R Narrow bridges
GWarning
COMAND may give incorrect navigation
commands if the data in the digital map does
not correspond with the actual road/traffic
situation. Digital maps do not cover all areas
nor all routes within an area. For example, if
the traffic routing has been changed or the
direction of a one-way road has been
reversed.
For this reason, you must always observe
applicable road and traffic rules and
regulations during your journey. Road and
traffic rules and regulations always have
priority over the navigation commands
generated by the system.
GWarning
Navigation announcements are intended to
direct you while driving without diverting your
attention from the road and driving.
Please always use this feature instead of
consulting the map display for directions.
Consulting the symbols or map display for
directions may cause you to divert your
attention from driving and increase your risk
of an accident.
Updating the Map Software
The digital data for the map software will
become obsolete, just like conventional road
maps. Optimum route guidance by the
navigation system is only achieved with up-
to-date map software. Information on new
map software versions is available from an
authorized Mercedes-Benz Center.
You can have the map software updated there
by means of a DVD or perform the update
process yourself.
Notes on DVD Discs
R Only touch the discs at the edges.
R Handle the discs with care in order to
prevent reading errors.
R Avoid scratching, leaving fingerprints and
dust on the discs.
R Use a commercially available cleaning cloth
to clean discs. Always wipe in a straight line
from the inside outwards, never in a circular
motion.
R After use, put the discs back into the box.
R Protect the discs from heat and direct
sunlight.
Update Sequence
The sequence includes the following stages:
R Loading DVD into the DVD changer
R Update process
i The update process may take between 60
and 150 minutes, depending on the size of
the map software.
If possible, perform the update when the
vehicle is stationary. The DVD read speed
is faster when the vehicle is stationary than
when the vehicle is moving and the update
therefore takes less time. If you perform
the update with the engine off and the
100Navigation (Introduction)COMAND APS
BA 197 USA, CA Edition A 2011; 1; 27, en-UShereepeVersion: 3.0.3.52010-03-24T15:31:10+01:00 - Seite 100
Page 103 of 436
vehicle battery is no longer powerful
enough, COMAND may shut off
automatically during the process to protect
the battery. In this case, restart the update
with the engine running.
You can interrupt the update process and
continue it at later time. If you cancel the
update process, the navigation system is
not ready for operation.
GWarning
Never leave the engine running in an enclosed
space. The exhaust gases contain carbon
monoxide. Inhaling exhaust gases constitutes
a health hazard and could lead to loss of
consciousness or even death.
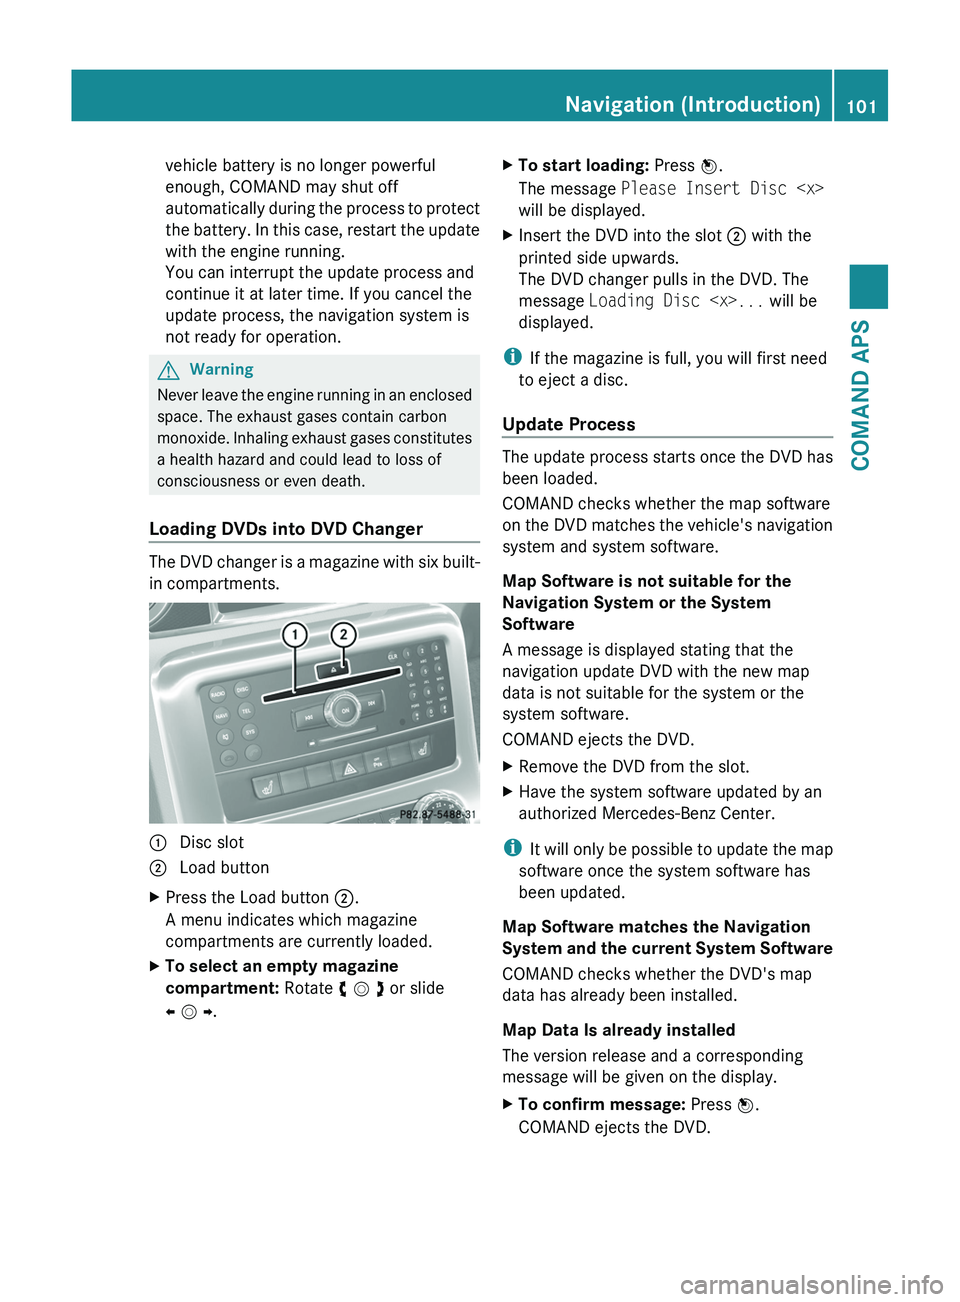
Loading DVDs into DVD Changer
The DVD changer is a magazine with six built-
in compartments.
1 Disc slot2 Load buttonXPress the Load button 2.
A menu indicates which magazine
compartments are currently loaded.
XTo select an empty magazine
compartment: Rotate y m z or slide
o m p.
XTo start loading: Press n.
The message Please Insert Disc
will be displayed.
XInsert the DVD into the slot 2 with the
printed side upwards.
The DVD changer pulls in the DVD. The
message Loading Disc
displayed.
iIf the magazine is full, you will first need
to eject a disc.
Update Process
The update process starts once the DVD has
been loaded.
COMAND checks whether the map software
on the DVD matches the vehicle's navigation
system and system software.
Map Software is not suitable for the
Navigation System or the System
Software
A message is displayed stating that the
navigation update DVD with the new map
data is not suitable for the system or the
system software.
COMAND ejects the DVD.
XRemove the DVD from the slot.XHave the system software updated by an
authorized Mercedes-Benz Center.
iIt will only be possible to update the map
software once the system software has
been updated.
Map Software matches the Navigation
System and the current System Software
COMAND checks whether the DVD's map
data has already been installed.
Map Data Is already installed
The version release and a corresponding
message will be given on the display.
XTo confirm message: Press n.
COMAND ejects the DVD.
Navigation (Introduction)101COMAND APSBA 197 USA, CA Edition A 2011; 1; 27, en-UShereepeVersion: 3.0.3.52010-03-24T15:31:10+01:00 - Seite 101Z
Page 104 of 436
Map Data is not yet installed
The version release and a query as to whether
the update should be carried out will be given
on the display.XSelect Yes or No.
If No is selected, COMAND ejects the DVD
automatically and the map data is not
updated.XRemove the DVD from the slot.
If Yes is selected, the map data is updated.
Updating the Map Data
While the update is in progress, a
corresponding message and a progress bar
are displayed. The progress bar fills from left
to right over the course of the update. The
navigation system is not functional until the
update is complete.
You cannot eject the DVD during the update.
If you switch COMAND off during the update,
this will interrupt the update and the update
will resume at the point of interruption when
the system is restarted.
While updating, COMAND may prompt you to
change the DVD. A corresponding message
is then displayed.
XPress the Load button 003B.
The magazine menu appears. The magazine
compartment containing the current disc is
highlighted.XPress 008B.
COMAND ejects the DVD.XRemove the DVD from the slot.XInsert the DVD requested by COMAND.
If the update has been completed
successfully, a corresponding message is
displayed.XTo confirm message: Press n.
COMAND ejects the DVD.XRemove the DVD from the slot.
The update is complete.
If the update has not been completed
successfully, a message is displayed
indicating that the map update is not
possible.
XTo confirm message: Press n.
COMAND ejects the DVD.XRemove the DVD from the slot.
An unsucessful update may be caused by one
of the following:
R DVD dirty or scratched.
R Overheating as a result of excessively high
temperatures in the passenger
compartment.
Input Restriction
There is an input restriction for vehicles in
certain countries.
The restriction is active for vehicle speeds
above approx. 3 mph. The restriction is
deactivated as soon as the speed falls below
approx. 2 mph.
Certain entries cannot be made when the
restriction is active, e.g. a city or road entry.
This is indicated by the fact that certain menu
items cannot be selected.
General Information
Operational Readiness of the
Navigation System after the System
Software Update
Sometimes the installed map software is no
longer compatible following a system
software update by an authorized Mercedes-
Benz Center. In this case, the navigation
system is not operational.
XTo update map software: Proceed as
described in the “Update Process” section
( Y page 101). Use map software
compatible with the system software.
i Please note that in this case the update
must run through right to the end. If you
cancel beforehand, the navigation system
will still not be ready for operation.
After start-up or initial start-up, the navigation
system must perform a position finding
102Navigation (Introduction)COMAND APS
BA 197 USA, CA Edition A 2011; 1; 27, en-UShereepeVersion: 3.0.3.52010-03-24T15:31:10+01:00 - Seite 102