2011 MERCEDES-BENZ SLK55AMG change wheel
[x] Cancel search: change wheelPage 120 of 312
X
Adjusting: Turn rotary control :.
The volume will increase or decrease
depending on the direction turned.
Adjusting volume for telephone calls
In hands-free mode, you can adjust the
volume of a telephone call while the call is
currently active.
During a telephone call:
X Turn rotary control :.
The volume will increase or decrease
depending on the direction turned.
i The volume of the audio system or a
telephone call can also be adjusted by
pressing the button W or X on the
multifunction steering wheel ( Y page 94).
Sound X
Switching on/off: Press button 8 on
the audio control unit (Y page 113).
The sound of the current audio source is
switched on or off.
i When the sound is switched off, the
symbol 8 appears in the status line.
If you change the audio source, or alter the
volume, the sound is automatically
switched on again.
In CD and MP3 mode, button 8
switches the pause function on or off.
Selecting sound settings You can select different bass and treble
settings for each individual audio source. The
particular
Sound menu can be opened from
the basic menu for the desired operating
mode, or by pressing the button J on the
audio control unit.
Example:
$ Q Sound Q Bass Adjusting bass or treble
X
J Q Bass or Treble.
or
X Select Sound Q Bass or Treble.
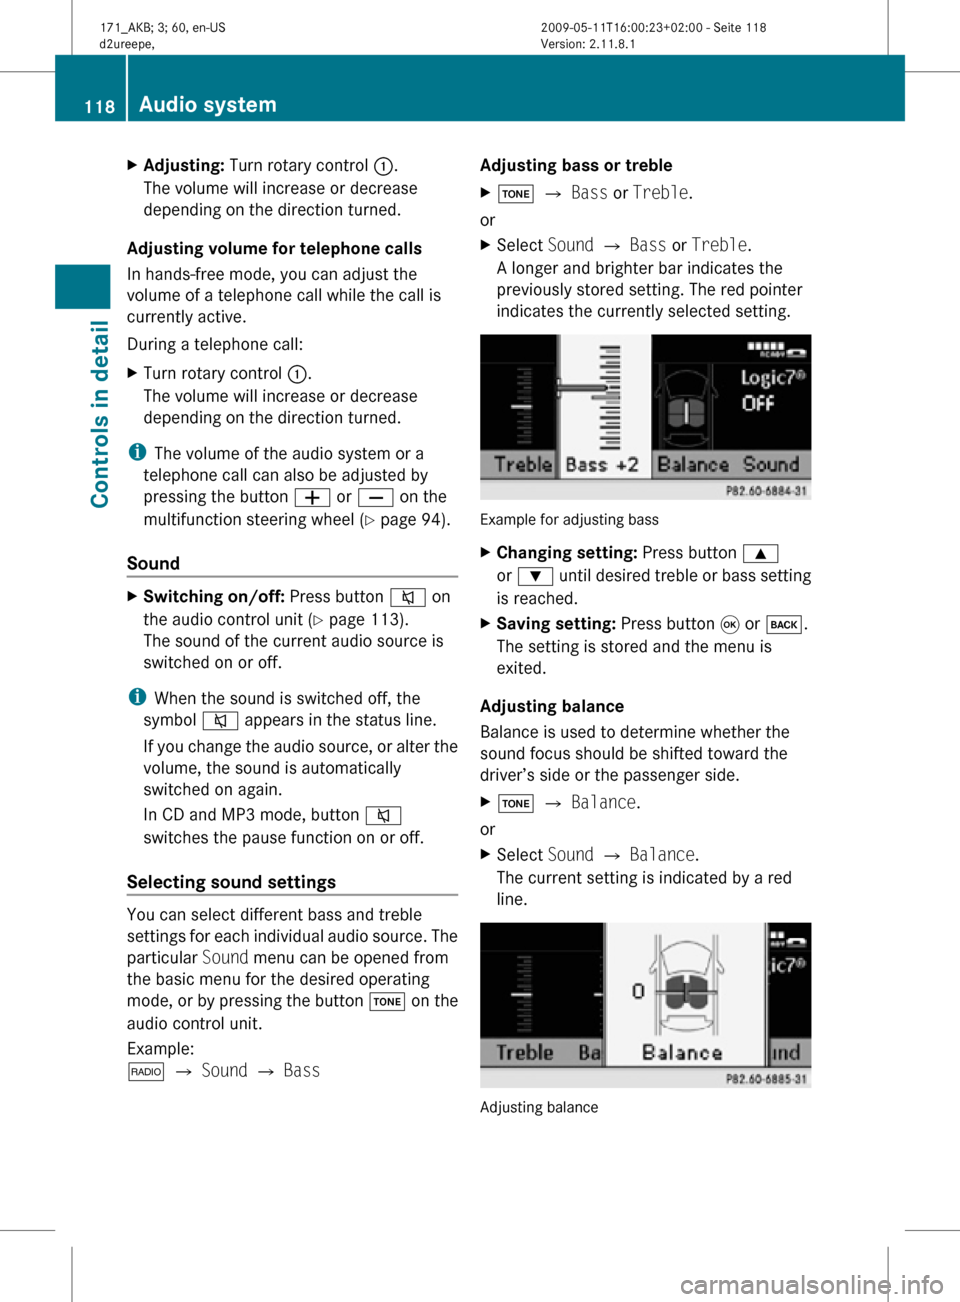
A longer and brighter bar indicates the
previously stored setting. The red pointer
indicates the currently selected setting. Example for adjusting bass
X
Changing setting: Press button 9
or : until desired treble or bass setting
is reached.
X Saving setting: Press button 9 or k.
The setting is stored and the menu is
exited.
Adjusting balance
Balance is used to determine whether the
sound focus should be shifted toward the
driver’s side or the passenger side.
X J Q Balance.
or
X Select Sound Q Balance.
The current setting is indicated by a red
line. Adjusting balance118
Audio systemControls in detail
171_AKB; 3; 60, en-US
d2ureepe,
Version: 2.11.8.1 2009-05-11T16:00:23+02:00 - Seite 118
Page 160 of 312
X
Selecting a call: Press button 9
or : until the desired entry is
highlighted.
X Initiating call: Press button 9 or 6.
Aborting dial or ending a call X
% Q ¢ and press button 9.
or
X Press button ~ on the audio control unit
or on the multifunction steering wheel.
Rejecting or accepting calls You will be notified of an incoming call by the
ringing tone and a message on the display.
i
Depending on the mobile phone you are
using, the audio system’s ringing tone may
differ from the one you have set on your
mobile phone. You may hear
R the ringing tone set on the mobile phone
R the audio system’s preset ringing tone
R the audio system’s preset ringing tone
and the ringing tone set on the mobile
phone
If the caller’s name and number are among
the entries in the audio system’s phone book
and the caller has not withheld this
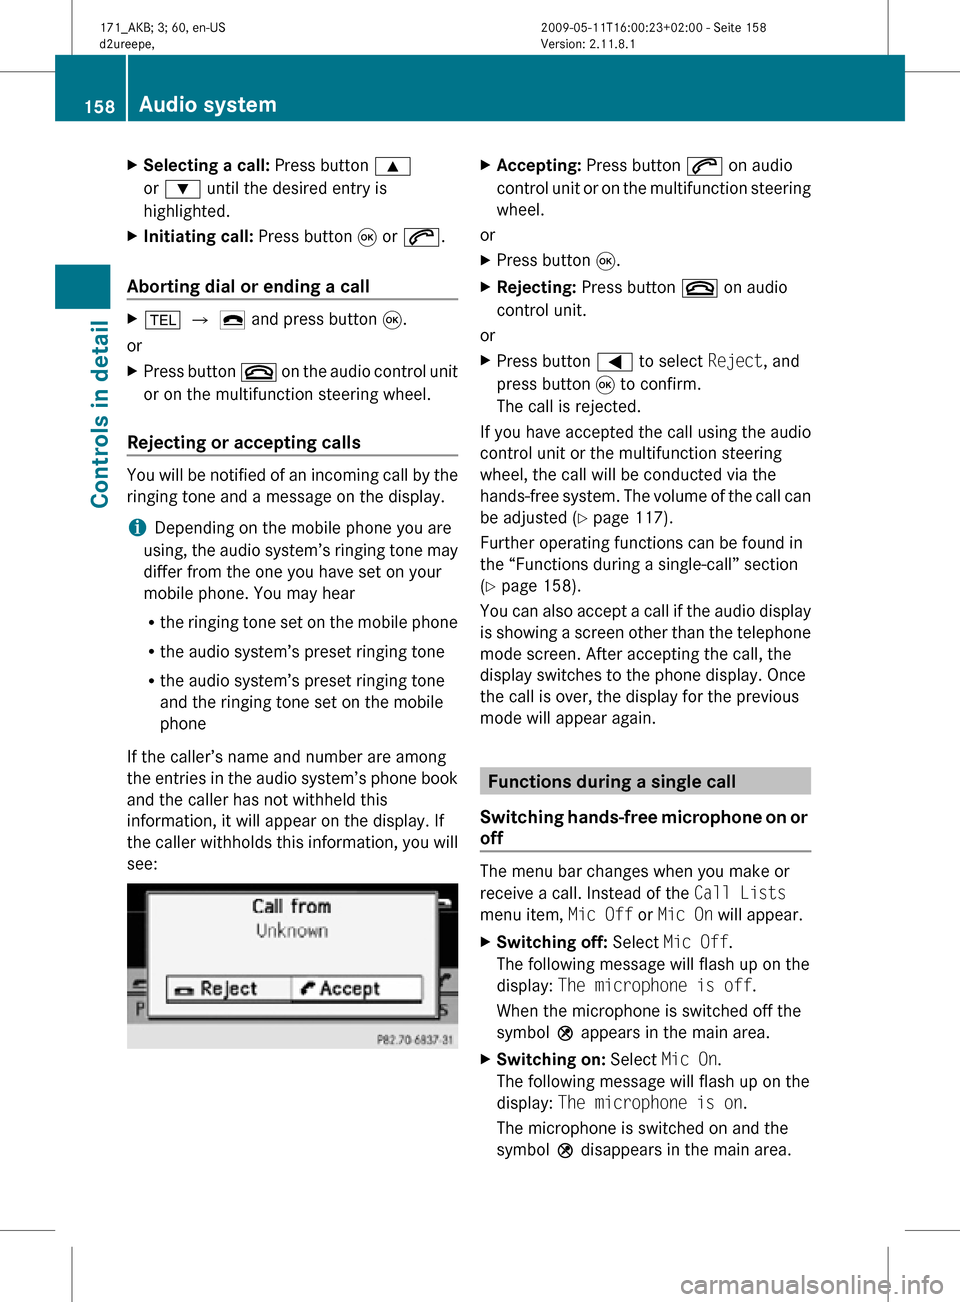
information, it will appear on the display. If
the caller withholds this information, you will
see: X
Accepting: Press button 6 on audio
control unit or on the multifunction steering
wheel.
or
X Press button 9.
X Rejecting: Press button ~ on audio
control unit.
or
X Press button = to select Reject, and
press button 9 to confirm.
The call is rejected.
If you have accepted the call using the audio
control unit or the multifunction steering
wheel, the call will be conducted via the
hands-free system. The volume of the call can
be adjusted ( Y page 117).
Further operating functions can be found in
the “Functions during a single-call” section
(Y page 158).
You can also accept a call if the audio display
is showing a screen other than the telephone
mode screen. After accepting the call, the
display switches to the phone display. Once
the call is over, the display for the previous
mode will appear again. Functions during a single call
Switching hands-free microphone on or
off The menu bar changes when you make or
receive a call. Instead of the Call Lists
menu item, Mic Off or Mic On will appear.
X
Switching off: Select Mic Off.
The following message will flash up on the
display: The microphone is off.
When the microphone is switched off the
symbol Q appears in the main area.
X Switching on: Select Mic On.
The following message will flash up on the
display: The microphone is on.
The microphone is switched on and the
symbol Q disappears in the main area. 158
Audio systemControls in detail
171_AKB; 3; 60, en-US
d2ureepe,
Version: 2.11.8.1 2009-05-11T16:00:23+02:00 - Seite 158
Page 161 of 312
i
You can also switch the microphone on or
off by pressing button 8.
Sending DTMF tones i
This function is not possible with all
mobile phones.
Answering
machines or other devices can be
controlled via DTMF tones, e.g. for remote
query functions.
X Transmitting individual characters:
During a call select the required
characters.
or
X Press the corresponding button on the
audio control unit.
Every selected character is transmitted
immediately.
X Transmitting a phone number of a
phone book entry as a sequence of
characters: Select Name.
X Select the desired phone book entry.
The entry is transmitted immediately as a
sequence of characters.
X Switching back to call display: Select
Back. Driving systems
Introduction
The
cruise control driving system is described
on the following pages.
The driving safety systems ABS, BAS and
ESP ®
are described in the “Safety and
security” section (Y page 47). Cruise control
The cruise control maintains the speed you
set for your vehicle automatically.
The
use of the cruise control is recommended
for driving at a constant speed for extended
periods of time. The currently set speed or last set speed
(“Resume” function) appears in the status
indicator of the multifunction display:
R
USA only: e.g. CRUISE 55 Miles
R Canada only: e.g. ¯ 90 Km/h G
Warning!
The cruise control is a convenience system
designed to assist the driver during vehicle
operation. The driver is and must always
remain responsible for the vehicle’s speed
and for safe brake operation.
Only
use the cruise control if the road, traffic,
and weather conditions make it advisable to
travel at a constant speed.
R The use of the cruise control can be
dangerous on winding roads or in heavy
traffic because conditions do not allow safe
driving at a constant speed.
R The use of the cruise control can be
dangerous on slippery roads. Rapid
changes in tire traction can result in wheel
spin and loss of control.
R Deactivate the cruise control when driving
in fog.
The “Resume” function should only be
operated if the driver is fully aware of the
previously set speed and wishes to resume
this particular preset speed. G
Warning!
When the cruise control is braking, the brake
pedal is retracted (i.e. depressed
automatically). The pedals’ range of motion
must not be impeded by any obstacles:
R Do not place any objects in the footwell.
R Make sure that the floormats and carpets
are securely in place.
R Do
not rest your foot underneath the brake
pedal, as it could otherwise be trapped.
You could otherwise cause an accident and
injure yourself and/or others. Driving systems
159
Controls in detail
171_AKB; 3; 60, en-US
d2ureepe, Version: 2.11.8.1 2009-05-11T16:00:23+02:00 - Seite 159 Z
Page 182 of 312

Initiating an emergency call manually
X
Briefly press on cover : to open.
X Press SOS button ; briefly.
The indicator lamp in SOS button ; will
flash until the emergency call is concluded.
X Wait for a voice connection to the
Customer Assistance Center.
X Close cover : after the emergency call is
concluded. G
Warning!
If you feel at any way in jeopardy when in the
vehicle (e.g. smoke or fire in the vehicle,
vehicle in a dangerous road location), please
do not wait for voice contact after you have
pressed the emergency button. Carefully
leave the vehicle and move to a safe location.
The Customer Assistance Center will
automatically contact local emergency
officials with the vehicle’s approximate
location if they receive an automatic SOS
signal and cannot make voice contact with the
vehicle occupants. X
Terminating calls: Press button ~ on
the multifunction steering wheel.
or
X Press the respective button for ending a
telephone call on the audio system or the
COMAND system.
Roadside Assistance button X
Open the storage compartment under the
armrest (Y page 175). X
Press and hold Roadside Assistance
button : for longer than 2 seconds.
A call to a Mercedes-Benz Roadside
Assistance dispatcher will be initiated. The
indicator lamp in Roadside Assistance
button : will flash while the call is in
progress. The message Connecting
Call will appear in the multifunction
display and the audio system or the
COMAND system is muted.
When the connection is established, the
message Call Connected appears in the
multifunction display. The Tele Aid system will
transmit data generating the vehicle
identification number, model, color and
location (subject to availability of cellular and
GPS signals).
i The audio system or COMAND system
display indicates that a Tele Aid call is in
progress. While the call is connected you
can change to the navigation menu by
pressing the NAVI button on the COMAND 180
Useful featuresControls in detail
171_AKB; 3; 60, en-US
d2ureepe,
Version: 2.11.8.1 2009-05-11T16:00:23+02:00 - Seite 180
Page 183 of 312

system. Spoken commands are not
available.
A voice connection between the Roadside
Assistance dispatcher and the occupants of
the vehicle will be established.
X Describe the nature of the need for
assistance.
The Mercedes-Benz Roadside Assistance
dispatcher will either dispatch a qualified
Mercedes-Benz technician or arrange to tow
your vehicle to the nearest authorized
Mercedes-Benz Center. For services such as
labor and/or towing, charges may apply.
Refer to the Roadside Assistance manual for
more information.
Sign and Drive services (USA only):
Services such as a jump start, a few gallons
of fuel or the replacement of a flat tire with
the vehicle spare wheel are obtainable at no
charge.
i If the indicator lamp in Roadside
Assistance button : is flashing
continuously and there was no voice
connection to the Customer Assistance
Center established, then the Tele Aid
system could not initiate a Roadside
Assistance call (e.g. the relevant cellular
phone network is not available). The
message Call Failed appears in the
multifunction display.
X Terminating calls: Press button ~ on
the multifunction steering wheel.
or
X Press the respective button for ending a
telephone call on the audio system or the
COMAND system.
Information button X
Open the storage compartment under the
armrest (Y page 175). X
Press and hold Information button : for
longer than 2 seconds.
A call to the Customer Assistance Center
will be initiated. The indicator lamp in
Information button : will flash while the
call is in progress. The message
Connecting Call will appear in the
multifunction display and the COMAND
system is muted.
When the connection is established, the
message Call Connected appears in the
multifunction display. The Tele Aid system will
transmit data generating the vehicle
identification number, model, color and
location (subject to availability of cellular and
GPS signals).
i The audio system or COMAND system
display indicates that a Tele Aid call is in
progress. While the call is connected you
can change to the navigation menu by
pressing the NAVI button on the COMAND
system. Spoken commands are not
available.
A voice connection between the Customer
Assistance Center representative and the
occupants of the vehicle will be established.
Information regarding the operation of your
vehicle, the nearest authorized Mercedes-
Benz Center or Mercedes-Benz USA products
and services is available to you.
For more details concerning the Tele Aid
system, please visit www.mbusa.com (USA
only), log in to “Owner’s Online” and visit the
“My Tele Aid” section to learn more. Useful features
181Controls in detail
171_AKB; 3; 60, en-US
d2ureepe, Version: 2.11.8.1 2009-05-11T16:00:23+02:00 - Seite 181 Z
Page 197 of 312

i
If you want to interrupt the checking
procedure, press button * or & on
the multifunction steering wheel.
If there is excess engine oil with the engine at
normal operating temperature, the following
message appears in the multifunction
display:
Engine Oil Level
Reduce Oil Level
X Have excess oil siphoned or drained off.
Contact an authorized Mercedes-Benz
Center.
! Excess oil must be siphoned or drained
off. It could cause damage to the engine
and emission control system not covered
by the Mercedes-Benz Limited Warranty.
For information on messages in the
multifunction display concerning engine oil,
see the “Practical hints” section
(Y page 251).
Adding engine oil !
Only use approved engine oils and oil
filters required for vehicles with
Maintenance System. For a listing of
approved engine oils and oil filters, contact
an authorized Mercedes-Benz Center or
visit www.mbusa.com (USA only).
The following will result in engine or
emission control system damage not
covered by the Mercedes-Benz Limited
Warranty:
R Using engine oils and oil filters of
specification other than those expressly
required for the Maintenance System.
R Changing of oil and oil filter at change
intervals longer than those called for by
the Maintenance System.
R Using any oil additives. Example illustration: SLK 350 (SLK 300 similar)
SLK 55 AMG
X
Unscrew filler cap : from filler neck.
X Add engine oil as required. Be careful not
to overfill with oil.
Be careful not to spill any oil when adding.
Avoid environmental damage caused by oil
entering the ground or water.
! Excess oil must be siphoned or drained
off. It could cause damage to the engine
and emission control system not covered
by the Mercedes-Benz Limited Warranty.
X Screw filler cap : back on filler neck.
For more information on engine oil, see the
“Technical data” section ( Y page 300) and
(Y page 302). Transmission fluid level
Vehicles with automatic transmission:
The transmission fluid level does not need to
be checked. If you notice transmission fluid
loss or gearshifting malfunctions, have an Engine compartment
195Operation
171_AKB; 3; 60, en-US
d2ureepe, Version: 2.11.8.1 2009-05-11T16:00:23+02:00 - Seite 195 Z
Page 201 of 312
1 mile (1.6 km). Depending on the ambient
temperature, the driving speed and the tire
load, the tire temperature changes. When the
tire temperature changes by 18‡ (10†), the
tire inflation pressure will change by
approximately 1.5 psi (0.1 bar). Keep this in
mind when checking tire inflation pressure on
warm tires and adjust the tire pressure only
if the tire inflation pressure is too low for the
current operating conditions. If you check the
tire inflation pressure when the tires are
warm, the reading will be higher than the cold
reading. This is normal. Do not let air out to
match the specified cold tire inflation
pressure. Otherwise, the tire will be
underinflated.
Follow recommended cold tire inflation
pressures listed on Tire and Loading
Information placard on the driver’s door
B-pillar.
Keeping the tires properly inflated provides
the best handling, tread life and riding
comfort.
In addition to the Tire and Loading
Information placard on the driver’s door
B-pillar, also consult the tire inflation
pressure label on the inside of the filler flap
for any additional information pertaining to
special driving situations. For more
information, see “Important notes on tire
inflation pressure” (
Y page 199).
i Data shown on Tire and Loading
Information placard example are for
illustration purposes only. Tire data are
specific to each vehicle and may vary from
data shown in the following illustration.
Refer to Tire and Loading Information
placard on vehicle for actual data specific
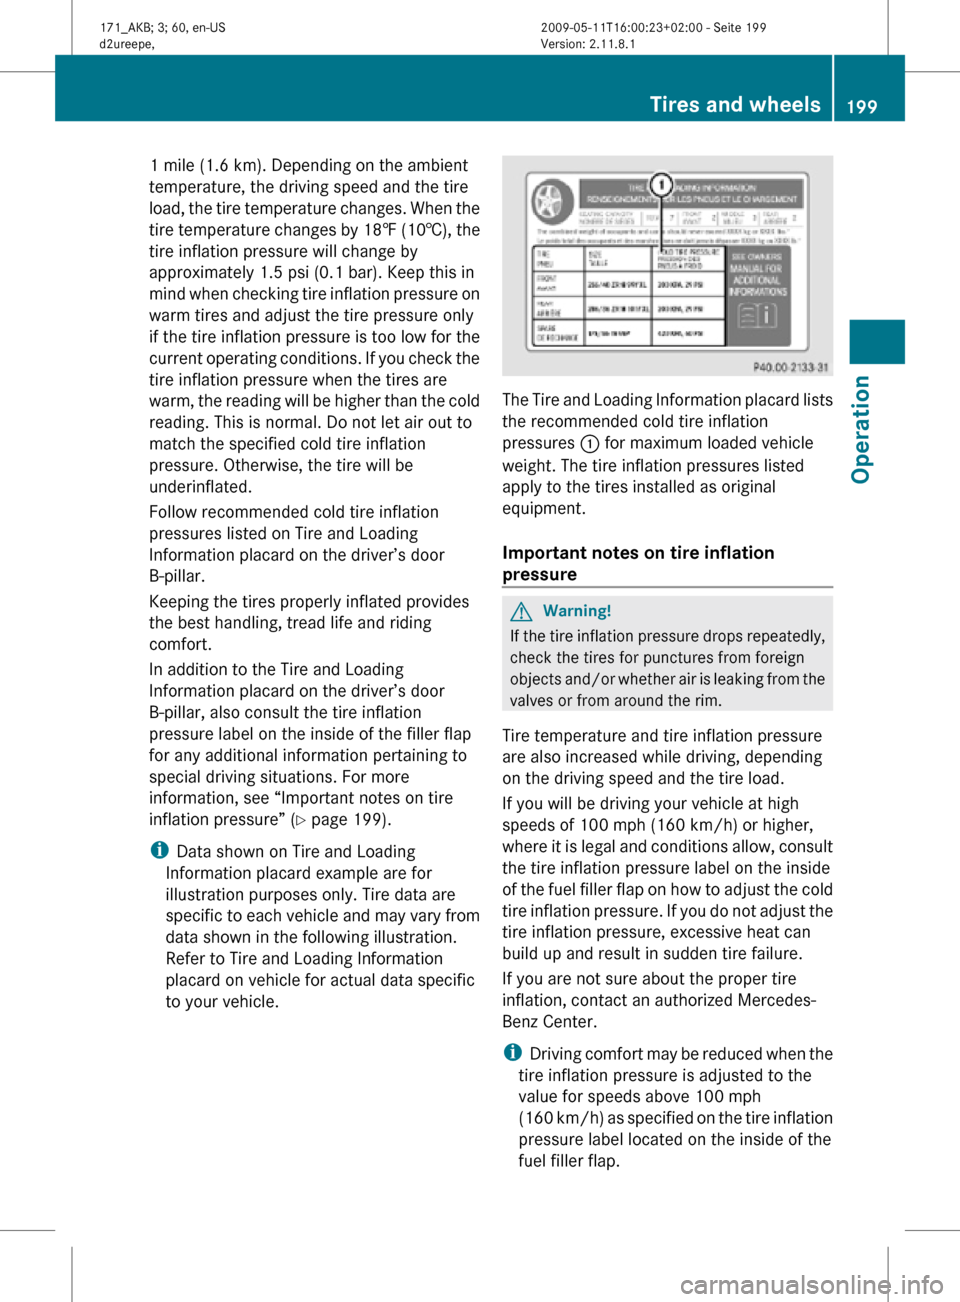
to your vehicle. The Tire and Loading Information placard lists
the recommended cold tire inflation
pressures
: for maximum loaded vehicle
weight. The tire inflation pressures listed
apply to the tires installed as original
equipment.
Important notes on tire inflation
pressure G
Warning!
If the tire inflation pressure drops repeatedly,
check the tires for punctures from foreign
objects and/or whether air is leaking from the
valves or from around the rim.
Tire temperature and tire inflation pressure
are also increased while driving, depending
on the driving speed and the tire load.
If you will be driving your vehicle at high
speeds of 100 mph (160 km/h) or higher,
where it is legal and conditions allow, consult
the tire inflation pressure label on the inside
of the fuel filler flap on how to adjust the cold
tire inflation pressure. If you do not adjust the
tire inflation pressure, excessive heat can
build up and result in sudden tire failure.
If you are not sure about the proper tire
inflation, contact an authorized Mercedes-
Benz Center.
i Driving comfort may be reduced when the
tire inflation pressure is adjusted to the
value for speeds above 100 mph
(160 km/h) as specified on the tire inflation
pressure label located on the inside of the
fuel filler flap. Tires and wheels
199Operation
171_AKB; 3; 60, en-US
d2ureepe, Version: 2.11.8.1 2009-05-11T16:00:23+02:00 - Seite 199 Z
Page 206 of 312
Restart the TPMS after adjusting the tire
inflation pressure to the inflation pressure
recommended for the vehicle operating
condition. Tire inflation pressure should only
be adjusted on cold tires. Observe the
recommended tire inflation pressure on the
Tire and Loading Information placard on the
driver’s door B-pillar. Some vehicles may have
supplemental tire inflation pressure
information for driving at high speeds or for
vehicle loads less than the maximum loaded
vehicle condition. If such information is
provided, it can be found on the inside of the
fuel filler flap.
X
Using the Tire and Loading Information
placard on the driver’s door B-pillar
(Y page 205) or the supplemental tire
inflation pressure information on the inside
of the fuel filler flap, make sure the tire
inflation pressure of all four tires is correct.
X Switch on the ignition.
X Press button V or U on the
multifunction steering wheel repeatedly
until the standard display appears in the
multifunction display ( Y page 96).
X Press button & or * repeatedly until
you see the current inflation pressures for
each tire appear in the display or the
following message appears in the
multifunction display:
Tire pressure is
only displayed
after driving for
a few minutes.
X Press the reset button (Y page 92).
The following message will appear in the
multifunction display:
Restart tire
pressure monitor?
X If you wish to confirm: Press button
W.
The following message will appear in the
multifunction display:
Tire Pressure Monitor
Restarted After driving a few minutes the system
verifies that the current tire inflation
pressures are within the system’s specified
range. Afterwards the current tire inflation
pressures are accepted as reference values
and then monitored.
X If you wish to cancel: Press button X.
i When the wheel positions have been
changed, the inflation pressure of a tire
may be displayed for the wrong position
temporarily. After driving for a few minutes,
the inflation pressure will be shown for the
correct position. Maximum tire inflation pressure
G
Warning!
Never exceed the maximum tire inflation
pressure. Follow recommended tire inflation
pressures.
Do not underinflate tires. Underinflated tires
wear excessively and/or unevenly, adversely
affect handling and fuel economy, and are
more likely to fail from being overheated.
Do not overinflate tires. Overinflated tires can
adversely affect handling and ride comfort,
wear unevenly, increase stopping distance,
and result in sudden deflation (blowout)
because they are more likely to become
punctured or damaged by road debris,
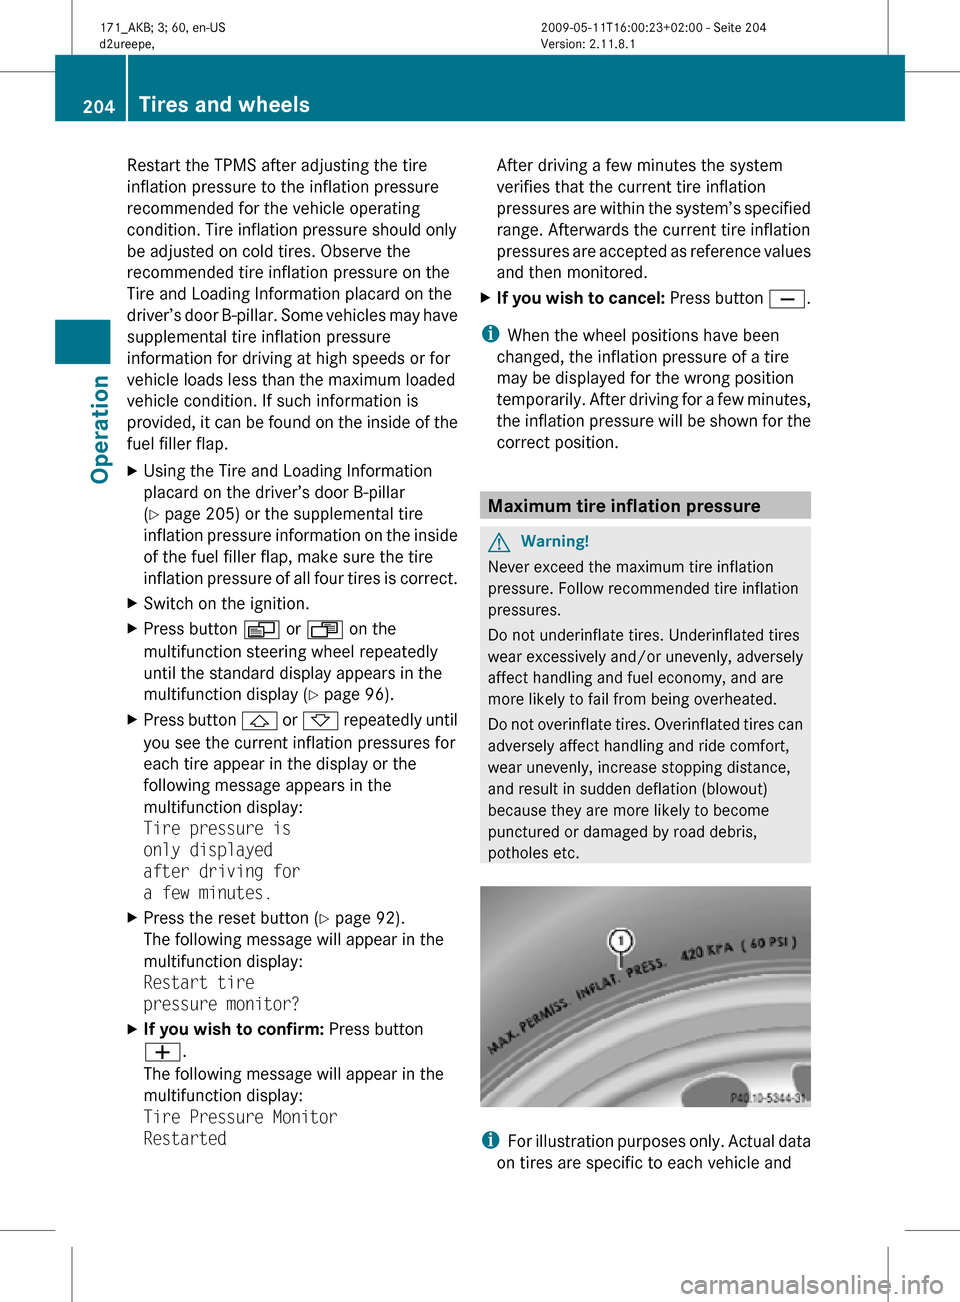
potholes etc. i
For illustration purposes only. Actual data
on tires are specific to each vehicle and 204
Tires and wheelsOperation
171_AKB; 3; 60, en-US
d2ureepe,
Version: 2.11.8.1 2009-05-11T16:00:23+02:00 - Seite 204