2011 MERCEDES-BENZ S-Class warning light
[x] Cancel search: warning lightPage 100 of 524
If the sliding sunroof is obstructed during
closing and reopens again slightly:XImmediately after the sliding sunroof
blocks, pull the 3 switch in the
overhead control panel down to the point
of resistance and hold it until the sliding
sunroof is closed.
The sliding sunroof is closed with increased
force.
If the sliding sunroof is obstructed again
during closing and reopens again slightly:
XImmediately after the sliding sunroof
blocks, pull the 3 switch in the
overhead control panel down to the point
of resistance and hold it until the sliding
sunroof is closed.
The sliding sunroof is closed without the
anti-entrapment feature.GWarning!
Pressing and holding the sliding sunroof
switch to close the sliding sunroof
immediately after it had been blocked two
times will cause the sliding sunroof to close
without the anti-entrapment feature for as
long as you hold the switch.
98Sliding sunroofOpening and closing
Page 103 of 524
Seats
Important safety notes
GWarning
In order to avoid possible loss of vehicle
control, all seat, head restraint, steering
wheel and rear view mirror adjustments, as
well as fastening of seat belts, must be done
before setting the vehicle in motion.
GWarning
Do not adjust the driver's seat while driving.
Adjusting the seat while driving could cause
the driver to lose control of the vehicle.
Never travel in a moving vehicle with the seat
backrest in an excessively reclined position as
this can be dangerous. You could slide under
the seat belt in a collision. If you slide under
it, the seat belt would apply force at the
abdomen or neck. This could cause serious or
fatal injuries. The seat backrest and seat belts
provide the best restraint when the wearer is
in a position that is as upright as possible and
seat belts are properly positioned on the
body.
GWarning
Your seat belt must be adjusted so that you
can correctly fasten your seat belt.
Observe the following points:
R adjust the seat backrest until your arms are
slightly angled when holding the steering
wheel.
R adjust the seat to a comfortable seating
position that still allows you to reach the
accelerator/brake pedal safely. The
position should be as far back as possible
with the driver still able to operate the
controls properly.
R adjust the head restraint so that it is as
close to the head as possible and the center
of the head restraint supports the back of
the head at eye level.
R never place hands under the seat or near
any moving parts while a seat is being
adjusted.
Failure to do so could result in an accident
and/or serious personal injury.GWarning
The electrically adjustable seats can be
operated at any time. Therefore, do not leave
children unattended in the vehicle, or with
access to an unlocked vehicle. A child's
unsupervised access to a vehicle could result
in an accident and/or serious personal injury.
GWarning!
According to accident statistics, children are
safer when properly restrained in the rear
seating positions than in the front seating
position. Thus, we strongly recommend that
children be placed in the rear seats whenever
possible. Regardless of seating position,
children 12 years old and under must be
seated and properly secured in an
appropriately sized infant restraint, toddler
restraint, or booster seat recommended for
the size and weight of the child. For additional
information, see "Children in the vehicle".
A child's risk of serious or fatal injuries is
significantly increased if the child restraints
are not properly secured in the vehicle and/
or the child is not properly secured in the child
restraint.
GWarning
For your protection, drive only with properly
positioned head restraints.
Adjust the head restraint so that it is as close
to the head as possible and the center of the
head restraint supports the back of the head
at eye level. This will reduce the potential for
injury to the head and neck in the event of an
accident or similar situation.
Seats101Seats, steering wheel and mirrorsZ
Page 109 of 524
iIf the battery voltage is too low, the seat
heating may switch off.
The system automatically switches down
from level 3 to level 2 after approximately
eight minutes.
The system automatically switches down
from level 2 to level 1 after approximately ten
minutes.
The system automatically switches off
approximately 20 minutes after it is set to
level 1.
XMake sure that the SmartKey is in position
2 in the ignition lock.
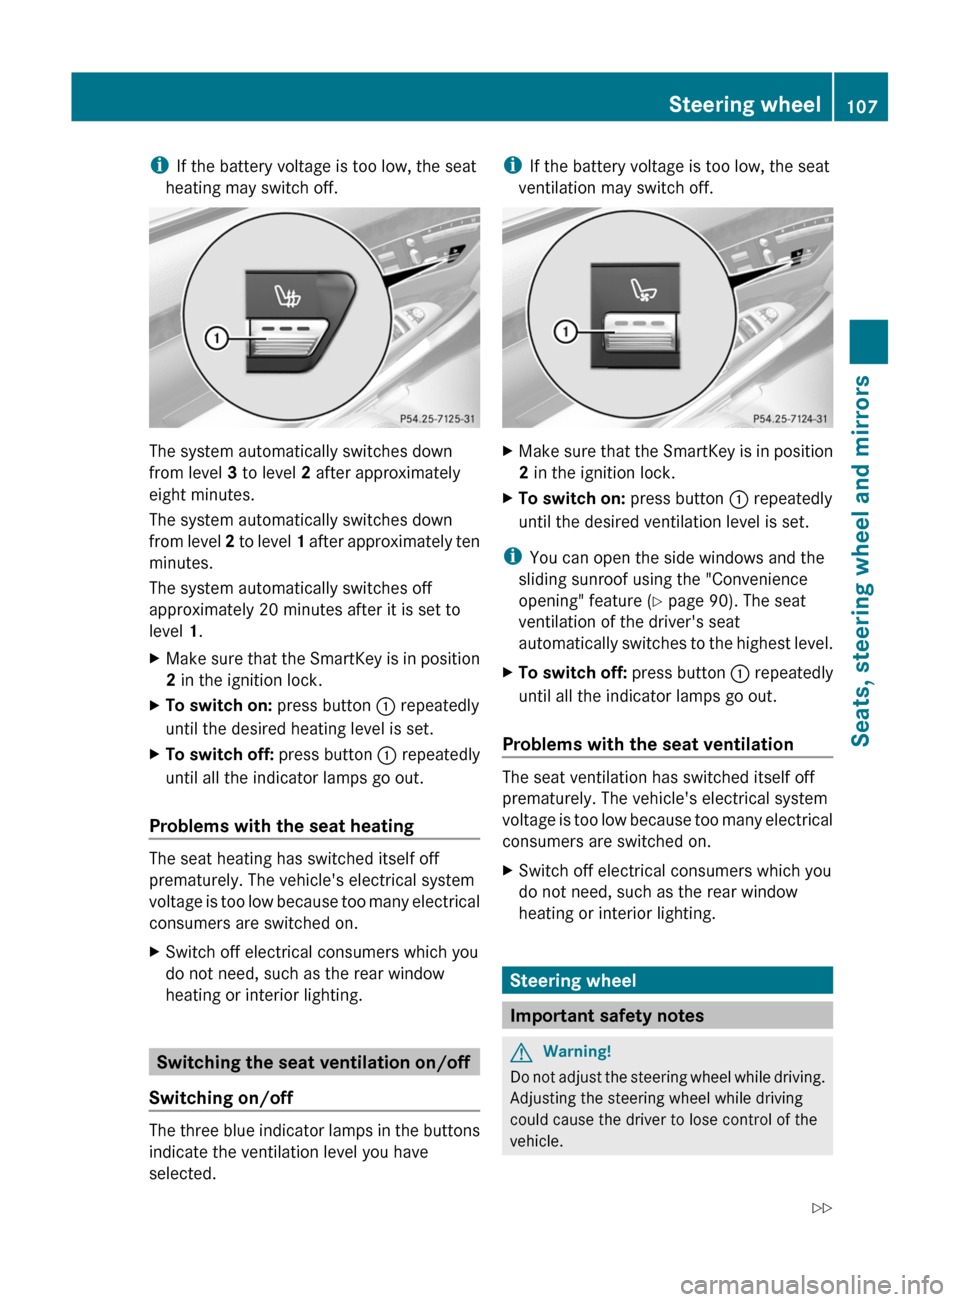
XTo switch on: press button : repeatedly
until the desired heating level is set.
XTo switch off: press button : repeatedly
until all the indicator lamps go out.
Problems with the seat heating
The seat heating has switched itself off
prematurely. The vehicle's electrical system
voltage is too low because too many electrical
consumers are switched on.
XSwitch off electrical consumers which you
do not need, such as the rear window
heating or interior lighting.
Switching the seat ventilation on/off
Switching on/off
The three blue indicator lamps in the buttons
indicate the ventilation level you have
selected.
iIf the battery voltage is too low, the seat
ventilation may switch off.
XMake sure that the SmartKey is in position
2 in the ignition lock.
XTo switch on: press button : repeatedly
until the desired ventilation level is set.
iYou can open the side windows and the
sliding sunroof using the "Convenience
opening" feature (Y page 90). The seat
ventilation of the driver's seat
automatically switches to the highest level.
XTo switch off: press button : repeatedly
until all the indicator lamps go out.
Problems with the seat ventilation
The seat ventilation has switched itself off
prematurely. The vehicle's electrical system
voltage is too low because too many electrical
consumers are switched on.
XSwitch off electrical consumers which you
do not need, such as the rear window
heating or interior lighting.
Steering wheel
Important safety notes
GWarning!
Do not adjust the steering wheel while driving.
Adjusting the steering wheel while driving
could cause the driver to lose control of the
vehicle.
Steering wheel107Seats, steering wheel and mirrorsZ
Page 112 of 524

XMake sure that the SmartKey is in position
1 or 2 in the ignition lock.XPress button ; for the right-hand exterior
mirror or button = for the left-hand
exterior mirror.
The indicator lamp lights up in the button
that has been pressed.XPress adjustment button : up, down, to
the right or to the left until the exterior
mirror is set in a way which provides you
with a good overview of traffic conditions.
Folding the exterior mirrors in or out
electrically
XMake sure that the SmartKey is in position
1 or 2 in the ignition lock.XBriefly press button :.
Both exterior mirrors fold in or out.
i Make sure that the exterior mirrors are
always folded out fully while the vehicle is
in motion, as they may otherwise vibrate.
Folding the exterior mirrors in or out
automatically
When the "Automatic mirror folding" function
is activated in COMAND ( Y page 258):
R the exterior mirrors fold in automatically as
soon as you lock the vehicle from the
outside.
R the exterior mirrors fold out again
automatically as soon as you unlock the
vehicle and then open the driver's or front-
passenger door.
i The mirrors do not fold out if they have
been folded in manually.
Exterior mirror out of position
If an exterior mirror has been pushed out of
position, proceed as follows:
XPress the mirror-folding button
( Y page 110) repeatedly until you hear the
mirrors engage in position.
The mirror housing is engaged again and
you can adjust the exterior mirrors as usual
( Y page 109).
Automatic anti-glare mirrors
GWarning!
The auto dimming function does not react if
incoming light is not aimed directly at sensors
in the interior rear view mirror.
The interior rear view mirror and the exterior
rear view mirror on the driver's side do not
react, for example, if the rear window
sunshade is in raised position.
Light hitting the mirror(s) at certain angles
(incident light) could blind you. As a result,
you may not be able to observe traffic
conditions and could cause an accident.
The rear-view mirror and the exterior mirror
on the driver's side automatically go into anti-
glare mode if the ignition is switched on and
incident light from headlamps strikes the
sensor in the rear-view mirror.
110MirrorsSeats, steering wheel and mirrors
Page 151 of 524
COMAND calculates the route to the
destination without taking account of the
following:
R Traffic lights
R Stop and right-of-way-signs
R Lane merging
R Parking or stopping prohibited areas
R Other road and traffic rules and regulations
R Narrow bridgesGWarning
COMAND may give incorrect navigation
commands if the data in the digital map does
not correspond with the actual road/traffic
situation. Digital maps do not cover all areas
nor all routes within an area. For example, if
the traffic routing has been changed or the
direction of a one-way road has been
reversed.
For this reason, you must always observe
applicable road and traffic rules and
regulations during your journey. Road and
traffic rules and regulations always have
priority over the navigation commands
generated by the system.
GWarning
Navigation announcements are intended to
direct you while driving without diverting your
attention from the road and driving.
Please always use this feature instead of
consulting the map display for directions.
Looking at the icons or map display can
distract you from traffic conditions and
driving, and increase the risk of an accident.
General information
Operational readiness of the navigation
system
The navigation system must determine the
position of the vehicle before first use or
whenever operational status is restored.
Therefore, you may have to drive for a while
before precise route guidance is possible.
GPS reception
Among other things, correct functioning of
the navigation system depends on GPS
reception. In certain situations, GPS
reception may be impaired, there may be
interference or there may be no reception at
all, e.g. in tunnels or parking garages.
Input restriction
On vehicles for certain countries, there is a
restriction on entering data.
The restriction is active at vehicle speeds
above approximately 3 mph (5 km/h). The
restriction is deactivated as soon as the
speed falls below 2 mph (3 km/h).
When the restriction is active, certain entries
cannot be made. This will be indicated by the
fact that certain menu items are grayed out
and cannot be selected.
The following entries are not possible, for
example:
R entering the destination city and street
R entering a destination via the map
R entering in the vicinity of a city or via a
name search
R editing entries
R direct entry using the number keypad
Other entries are still possible, such as
entering points of interest in the vicinity of the
destination or current position.
Switching on navigation modeXPress the S function button once or
twice.
or
XSelect Navi in the main function bar by
sliding ZV and turning cVd the COMAND
controller and press W to confirm.
In both cases, you will see the map either
with or without the menu shown.Navigation149COMANDZ
Page 166 of 524
Route guidance
General information
GWarning
COMAND calculates the route to the
destination without taking into account the
following, for example:
RTraffic lights
RStop and right-of-way signs
RLane merging
RParking or stopping prohibited areas
ROther road and traffic rules and regulations
RNarrow bridges
COMAND may give incorrect navigation
commands if the data in the digital map does
not correspond with the actual road/ traffic
situation. For example, if the traffic routing
has been changed or the direction of a one-
way road has been reversed.
For this reason, you must always observe
applicable road and traffic rules and
regulations during your journey. Road and
traffic rules and regulations always have
priority over the navigation commands
generated by the system.
Route guidance begins once a route has been
calculated (Y page 154).
COMAND guides you to your destination by
means of navigation commands in the form
of audible navigation announcements and
route guidance displays.
The route guidance displays can only be seen
if the display is switched to navigation mode.
If you do not follow the navigation
announcements or if you leave the calculated
route, COMAND automatically calculates a
new route to the destination.
If the digital map contains the corresponding
information, the following applies:
Rwhen selecting a route, COMAND tries to
avoid roads that only have limited access,
e.g. roads closed to through traffic and non-
residents.
Rroads that have time restrictions (e.g.
closed on Sundays and public holidays) are
avoided for route guidance.
Changing direction
Introduction
Changes of direction have three phases:
RPreparation phase
RAnnouncement phase
RChange-of-direction phase
Preparation phase
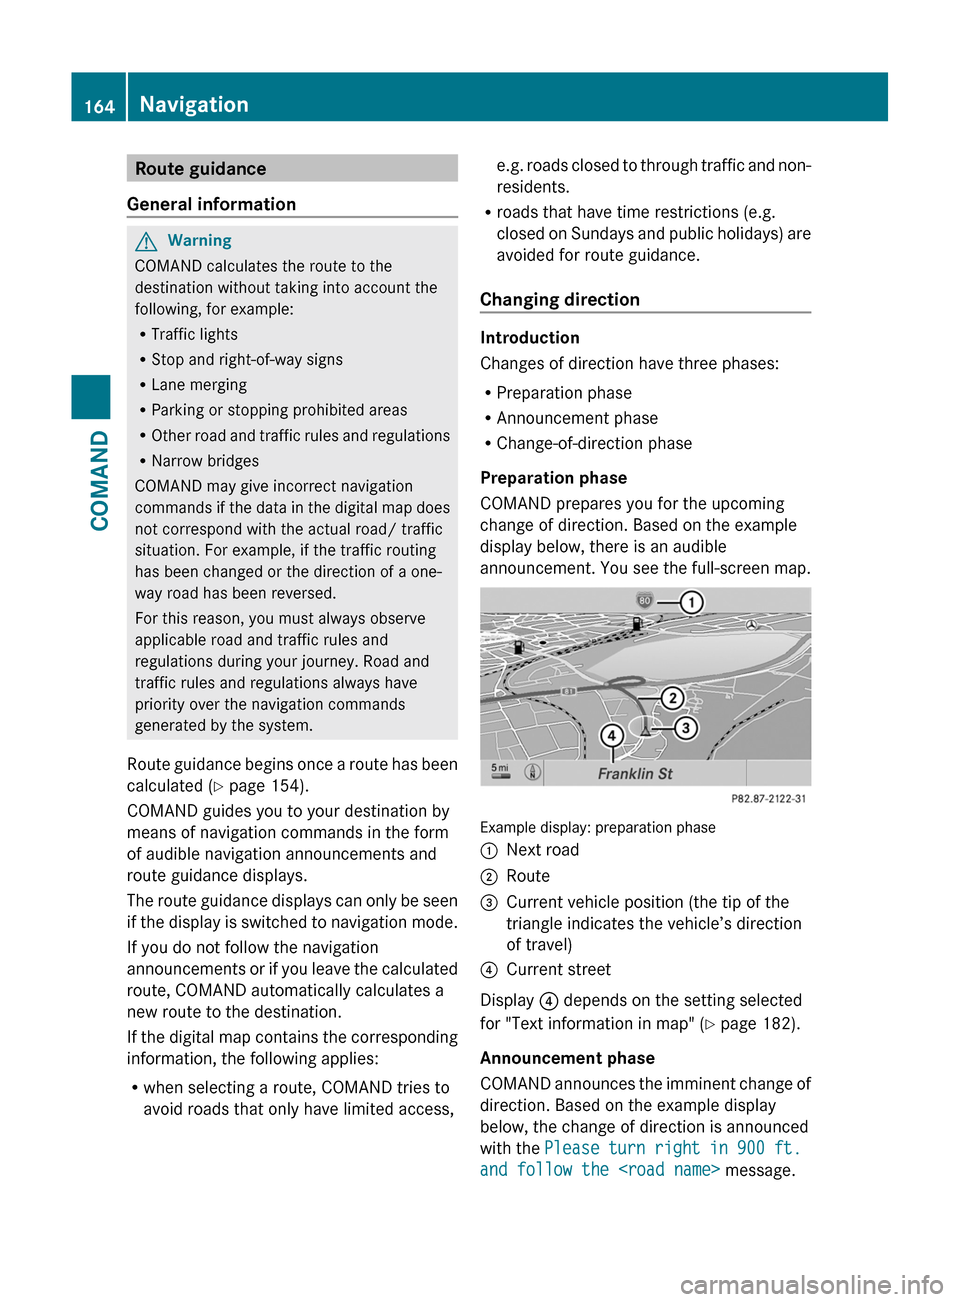
COMAND prepares you for the upcoming
change of direction. Based on the example
display below, there is an audible
announcement. You see the full-screen map.
Example display: preparation phase
:Next road;Route=Current vehicle position (the tip of the
triangle indicates the vehicle’s direction
of travel)
?Current street
Display ? depends on the setting selected
for "Text information in map" (Y page 182).
Announcement phase
COMAND announces the imminent change of
direction. Based on the example display
below, the change of direction is announced
with the Please turn right in 900 ft.
and follow the
164NavigationCOMAND
Page 188 of 524

You can view the current direction of travel,
the current height and the coordinates of the
current vehicle position in the compass view.XTo switch on navigation mode: press the
S function button once or twice.XTo show the menu: press the COMAND
controller W.XSelect Position in the navigation menu by
sliding VÆ and turning cVd the COMAND
controller and press W to confirm.XSelect Compass and press W to confirm.XTo exit the display: confirm Back by
pressing W or press the % button.
Installing new map software
The digital data generated by the map
software becomes outdated in the same way
as conventional road maps. Optimal route
guidance can only be provided by the
navigation system in conjunction with the
most up-to-date map software. Information
about new map software versions can be
obtained from an authorized Mercedes-Benz
Center.
You can install new map software yourself
using one or more DVDs, depending on the
size.
The installation process can take between 10
and 120 minutes depending on the size of the
map software. If radio mode is selected
before you start the installation process, you
can still adjust the volume. It is also still
possible to operate the automatic climate
control and cancel the process on COMAND.
Other functions are not operational. If
possible, carry out the installation process
when the vehicle is stationary. This takes less
time, since the DVD read speed is higher
when the vehicle is stationary than when it is
in motion. If the starter battery is not
sufficiently charged, COMAND may end the
process automatically in order to preserve
the battery. Therefore, keep the engine
running during the installation process.
GWarning
Never leave the engine running in enclosed
spaces. The exhaust gases contain toxic
carbon monoxide. Breathing in exhaust fumes
is a health hazard and can lead to
unconsciousness or death.
Displaying information about the
currently used map version
XTo switch on navigation mode: press the
S function button once or twice.XTo show the menu: press the COMAND
controller W.XSelect Navi in the main function bar by
sliding VÆ and turning cVd the COMAND
controller and press W to confirm.XSelect Map Version and press W to
confirm.
Notes on handling DVDs
R Only touch the edges of DVDs.
R Handle DVDs carefully to avoid read errors.
R Avoid scratching DVDs or getting
fingerprints or dust on them.
R Use a conventional cleaning cloth to clean
DVDs. Never wipe in a circle, but instead in
straight lines from the inside to the outside.
R Place DVDs back in their cases after use.
R Do not expose DVDs to heat or direct
sunlight.
Map software copy protection
Map software for COMAND is subject to a fee.
Map software can only be used on one vehicle
with an activation code and is not
transferable. The six-digit activation code is
available at your authorized Mercedes-Benz
Center. Contact your authorized Mercedes-
Benz Center if you lose the activation code or
if COMAND does not accept the code that you
received.
Your vehicle is delivered from the factory with
map software. Depending on the country,
map software for your region is either pre-
installed (Europe/USA) or the map software
186NavigationCOMAND
Page 249 of 524
Setting the picture brightnessXSelect Settings using the : button
and press the 9 button to confirm.
XSelect Brightness using the 9:
buttons and press the 9 button to confirm.
A scale appears.
XAdjust the brightness using the 9:
buttons and press the 9 button to confirm.
The brightness bar moves up or down. The
picture becomes lighter or darker in
accordance with the scale.
Showing/hiding the picture
XTo hide the picture: select Display off
in the system menu using the :;
buttons on the remote control and press
the 9 button to confirm.
The picture is hidden.
XTo display the picture: press the 9
button.
Audio CD/DVD and MP3 mode
Safety note
GWarning
The RSE CD/DVD player is a Class 1 laser
product. There is a danger of invisible laser
radiation when you open or damage the cover.
Do not remove the cover. The RSE CD/DVD
player does not contain any parts which can
be serviced by the user. For safety reasons,
have any necessary service work performed
by qualified personnel.
General notes
You will find information on the following
topics in the Audio section:
Rnotes on CDs/DVDs (Y page 225)
Rnotes on MP3 mode (Y page 224)
Rnotes on copyright (Y page 225)
Inserting a CD/DVD
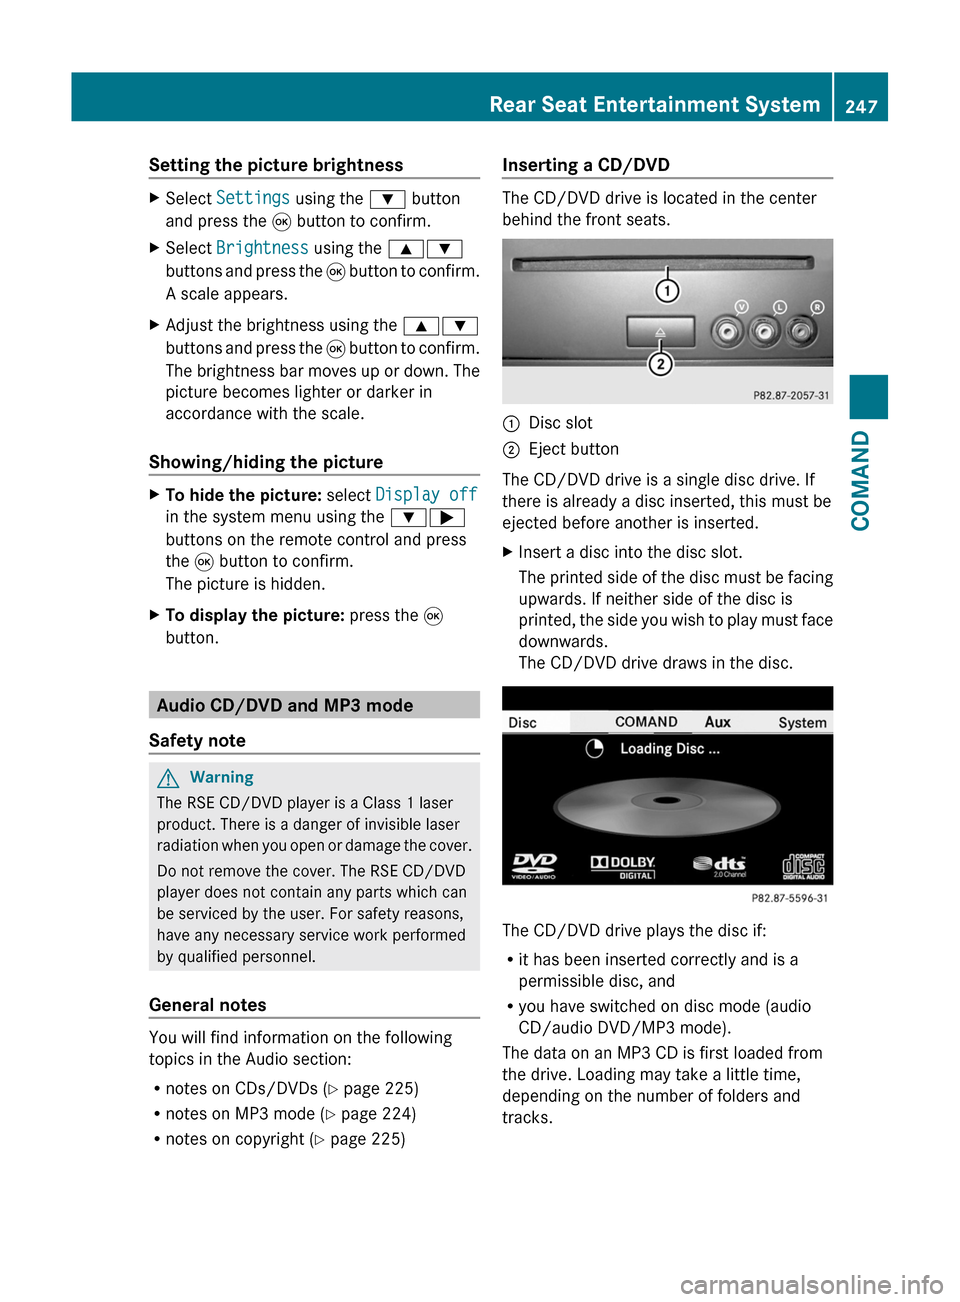
The CD/DVD drive is located in the center
behind the front seats.
:Disc slot;Eject button
The CD/DVD drive is a single disc drive. If
there is already a disc inserted, this must be
ejected before another is inserted.
XInsert a disc into the disc slot.
The printed side of the disc must be facing
upwards. If neither side of the disc is
printed, the side you wish to play must face
downwards.
The CD/DVD drive draws in the disc.
The CD/DVD drive plays the disc if:
Rit has been inserted correctly and is a
permissible disc, and
Ryou have switched on disc mode (audio
CD/audio DVD/MP3 mode).
The data on an MP3 CD is first loaded from
the drive. Loading may take a little time,
depending on the number of folders and
tracks.
Rear Seat Entertainment System247COMANDZ