2011 MERCEDES-BENZ S-Class Seats
[x] Cancel search: SeatsPage 120 of 524

Assigning the programmable button
(favorites):Programmable button
You can assign the following predefined
functions to the h programmable button:
RECO: you can activate or deactivate the ECO
start/stop function.
RMassage, driver's seat: you can switch
the massage function for the driver's seat
on and off.
RMassage, front-passenger's seat:
you can switch the massage function for
the front-passenger seat on and off.
RMassage, driver's and front
passenger seat: you can switch the
massage function for the driver's and front-
passenger seats on and off.
RDisplay off: you can switch the
COMAND display off or on.
RTow-away protection: you can arm or
deactivate tow-away protection.
RInterior motion sensor: you can arm or
deactivate the interior motion sensor.
RTow-away protection/interior
motion sensor: you can arm or deactivate
tow-away protection and the interior
motion sensor.
RRepeat navigation command: you can
have the most recent recommendation by
the navigation system repeated.
XTo assign the programmable button:
select Vehicle by sliding VÆ and turning
cVd the COMAND controller and press
W to confirm.
XSelect System and press W to confirm.XSelect Favorites Button and press W to
confirm.
The list of predefined functions appears.
The # dot in front of the list entry indicates
the current setting.
XTo change the setting: turn cVd the
COMAND controller and select the desired
function.
XTo store the setting and exit the menu:
press W the COMAND controller.
Telephone keypad
:Telephone keypad;Folding cover118At a glanceCOMAND
Page 137 of 524
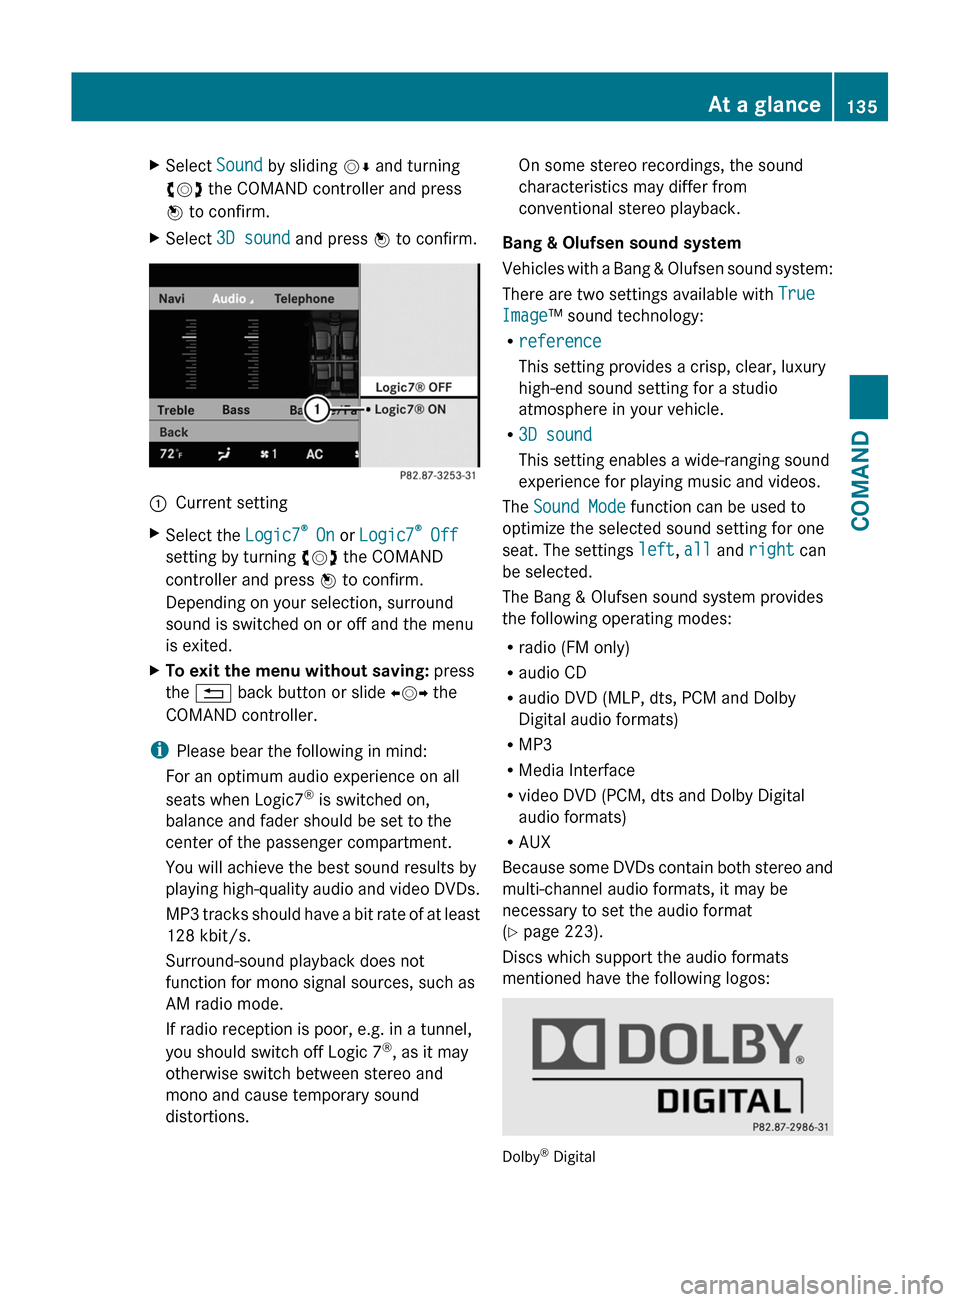
XSelect Sound by sliding VÆ and turning
cVd the COMAND controller and press
W to confirm.
XSelect 3D sound and press W to confirm.:Current settingXSelect the Logic7® On or Logic7® Off
setting by turning cVd the COMAND
controller and press W to confirm.
Depending on your selection, surround
sound is switched on or off and the menu
is exited.
XTo exit the menu without saving: press
the % back button or slide XVY the
COMAND controller.
iPlease bear the following in mind:
For an optimum audio experience on all
seats when Logic7® is switched on,
balance and fader should be set to the
center of the passenger compartment.
You will achieve the best sound results by
playing high-quality audio and video DVDs.
MP3 tracks should have a bit rate of at least
128 kbit/s.
Surround-sound playback does not
function for mono signal sources, such as
AM radio mode.
If radio reception is poor, e.g. in a tunnel,
you should switch off Logic 7®, as it may
otherwise switch between stereo and
mono and cause temporary sound
distortions.
On some stereo recordings, the sound
characteristics may differ from
conventional stereo playback.
Bang & Olufsen sound system
Vehicles with a Bang & Olufsen sound system:
There are two settings available with True
Image™ sound technology:
Rreference
This setting provides a crisp, clear, luxury
high-end sound setting for a studio
atmosphere in your vehicle.
R3D sound
This setting enables a wide-ranging sound
experience for playing music and videos.
The Sound Mode function can be used to
optimize the selected sound setting for one
seat. The settings left, all and right can
be selected.
The Bang & Olufsen sound system provides
the following operating modes:
Rradio (FM only)
Raudio CD
Raudio DVD (MLP, dts, PCM and Dolby
Digital audio formats)
RMP3
RMedia Interface
Rvideo DVD (PCM, dts and Dolby Digital
audio formats)
RAUX
Because some DVDs contain both stereo and
multi-channel audio formats, it may be
necessary to set the audio format
(Y page 223).
Discs which support the audio formats
mentioned have the following logos:
Dolby® Digital
At a glance135COMANDZ
Page 141 of 524
Selecting a menu/menu item and
confirming your selection
XSelect a menu/menu item using the
=;9: buttons and press
the 9 button to confirm.
CD/DVD drive and AUX jacks
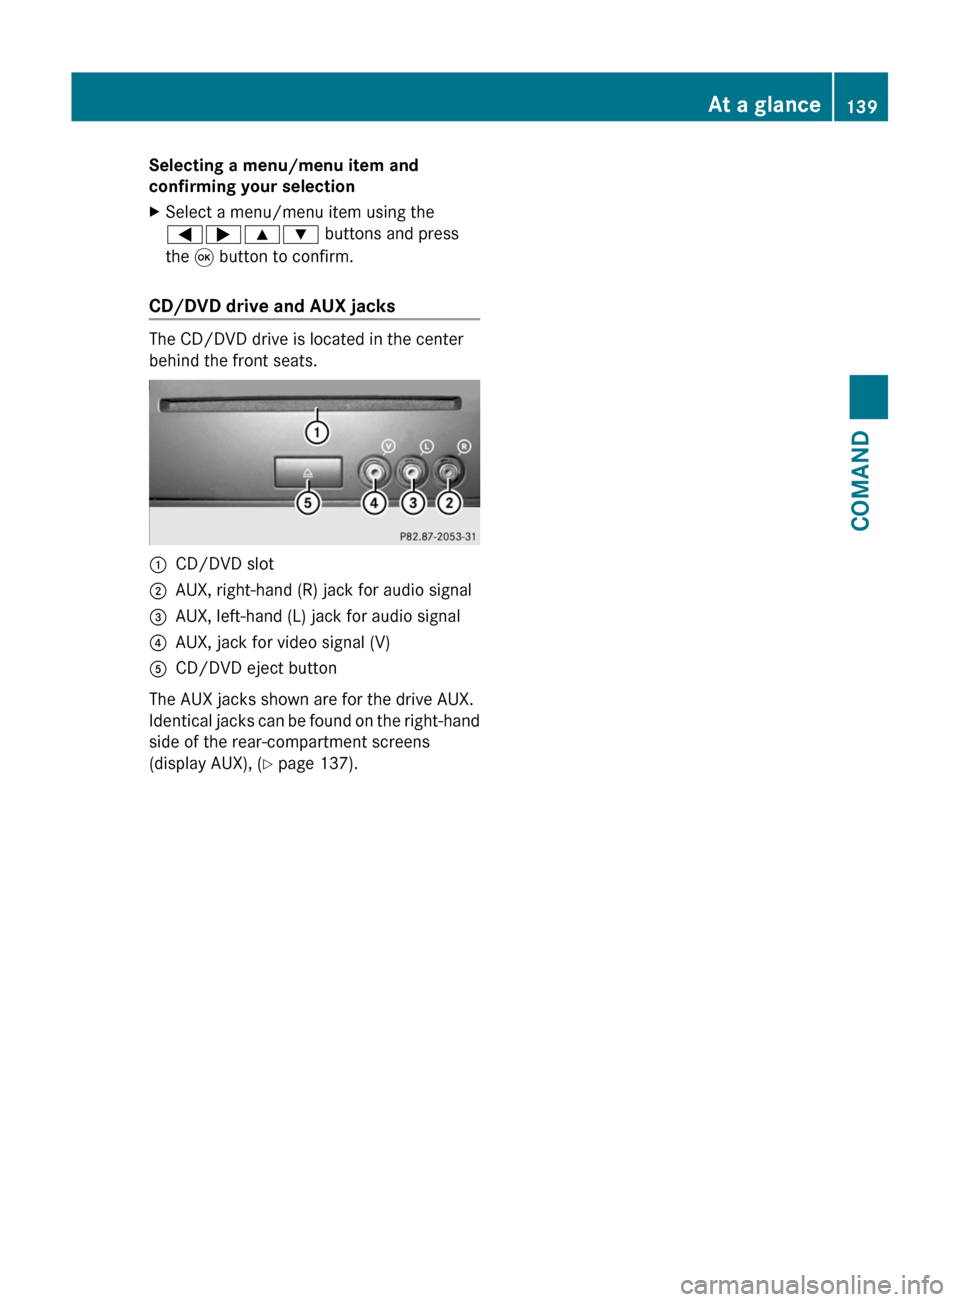
The CD/DVD drive is located in the center
behind the front seats.
:CD/DVD slot;AUX, right-hand (R) jack for audio signal=AUX, left-hand (L) jack for audio signal?AUX, jack for video signal (V)ACD/DVD eject button
The AUX jacks shown are for the drive AUX.
Identical jacks can be found on the right-hand
side of the rear-compartment screens
(display AUX), (Y page 137).
At a glance139COMANDZ
Page 249 of 524
Setting the picture brightnessXSelect Settings using the : button
and press the 9 button to confirm.
XSelect Brightness using the 9:
buttons and press the 9 button to confirm.
A scale appears.
XAdjust the brightness using the 9:
buttons and press the 9 button to confirm.
The brightness bar moves up or down. The
picture becomes lighter or darker in
accordance with the scale.
Showing/hiding the picture
XTo hide the picture: select Display off
in the system menu using the :;
buttons on the remote control and press
the 9 button to confirm.
The picture is hidden.
XTo display the picture: press the 9
button.
Audio CD/DVD and MP3 mode
Safety note
GWarning
The RSE CD/DVD player is a Class 1 laser
product. There is a danger of invisible laser
radiation when you open or damage the cover.
Do not remove the cover. The RSE CD/DVD
player does not contain any parts which can
be serviced by the user. For safety reasons,
have any necessary service work performed
by qualified personnel.
General notes
You will find information on the following
topics in the Audio section:
Rnotes on CDs/DVDs (Y page 225)
Rnotes on MP3 mode (Y page 224)
Rnotes on copyright (Y page 225)
Inserting a CD/DVD
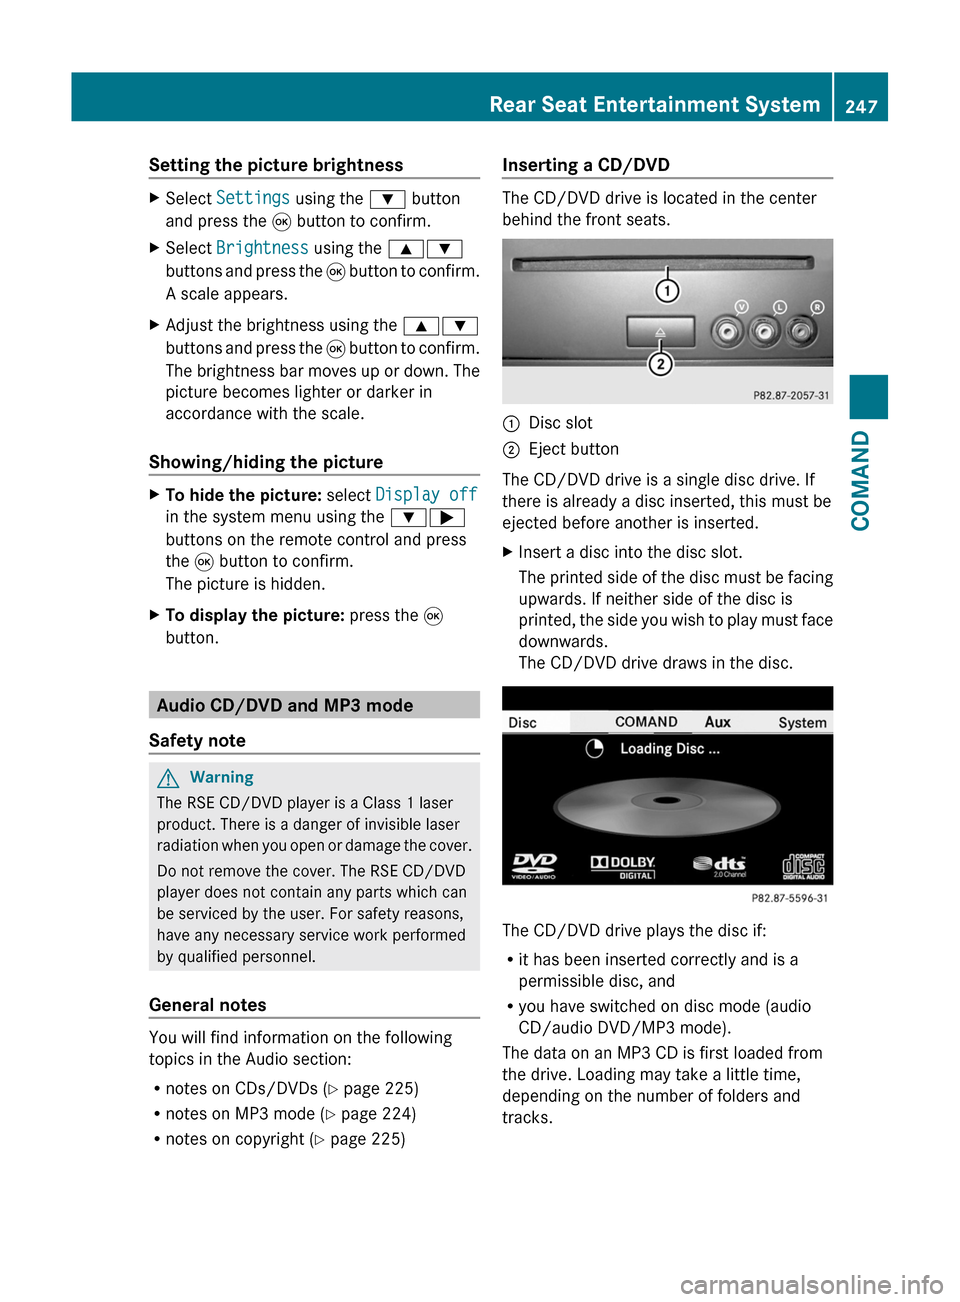
The CD/DVD drive is located in the center
behind the front seats.
:Disc slot;Eject button
The CD/DVD drive is a single disc drive. If
there is already a disc inserted, this must be
ejected before another is inserted.
XInsert a disc into the disc slot.
The printed side of the disc must be facing
upwards. If neither side of the disc is
printed, the side you wish to play must face
downwards.
The CD/DVD drive draws in the disc.
The CD/DVD drive plays the disc if:
Rit has been inserted correctly and is a
permissible disc, and
Ryou have switched on disc mode (audio
CD/audio DVD/MP3 mode).
The data on an MP3 CD is first loaded from
the drive. Loading may take a little time,
depending on the number of folders and
tracks.
Rear Seat Entertainment System247COMANDZ
Page 268 of 524

To switch back from operation of the rear-
compartment air-conditioning system from
the front:
XIn the climate control main menu, select
Front climate control and press W.
The air conditioning function bar shows the
climate control settings for the driver and
front passenger.
To switch off the rear-compartment air-
conditioning system:
XIn the climate control main menu, select
Rear climate control off and press
W.
To switch on automatic mode for the rear-
compartment air-conditioning system:
XIn the climate control main menu, select
Rear automatic and press W.
Automatic mode for the rear-compartment
air-conditioning system is switched on.
Seats
Lumbar supports
The lumbar support in the backrest of the
driver's and front-passenger seats can be
adjusted to provide optimum support for your
back.
XTo select the seat: press the T
function button.
The main area of the COMAND display is
active. A scale appears.
XTo move to the lower menu bar: select
by sliding ZVÆ the COMAND controller
and press W to confirm.
iWhen you press the T function button,
the previously adjusted seat is active.
XTo adjust the lumbar support: select by
sliding XVY or turning cVd the COMAND
controller and press W to confirm.
Multicontour seat
iInformation about the components and
operating principles of COMAND can be
found on (Y page 116).
The contour of the driver's seat and front-
passenger seat backrests can be individually
adjusted to provide optimum support for your
back. This is achieved by controlling the
pressure in the air chambers in the
multicontour seat.
The adjustments are made using the
COMAND display.
iWhen you adjust the multicontour seat,
you may hear the air being pumped in or
released.
You can adjust the following air cushions:
Rseat side bolsters
Rseat backrest side bolsters
Rbackrest curvature in the lumbar region
Rbackrest curvature in the upper back
region
XMake sure that the key is in position 2 in
the ignition lock.
XPress the T function button.
Selecting the seat
You must first select the seat for which you
wish to make adjustments.
XPress the T function button.
The main area is active.
XTo move to the lower menu bar: select
by sliding ZVÆ the COMAND controller
and press W to confirm.
266VehicleCOMAND
Page 424 of 524

Vehicle equipment
i This manual describes all the standard
and optional equipment of your vehicle
which was available at the time of
purchase. Country-specific differences are
possible. Bear in mind that your vehicle
may not feature all functions described
here. This also refers to safety-related
systems and functions.
Loading guidelines
GWarning!
Always fasten items being carried as securely
as possible. Use cargo tie-down rings and
fastening materials appropriate for the weight
and size of the load.
In an accident, during hard braking or sudden
maneuvers, loose items will be thrown around
inside the vehicle. This can cause injury to
vehicle occupants unless the items are
securely fastened in the vehicle.
To help avoid personal injury during a collision
or sudden maneuver, exercise care when
transporting cargo. Do not pile luggage or
cargo higher than the seat backrests.
The trunk is the preferred place to carry
objects.
Never drive a vehicle with the trunk open.
Deadly carbon monoxide (CO) gases may
enter vehicle interior resulting in
unconsciousness and death.
The handling characteristics of a laden
vehicle are dependent on the distribution of
the load within the vehicle. For this reason,
you should observe the following notes when
transporting a load:
R when transporting a load, never exceed the
maximum permissible gross vehicle weight
or the permissible axle loads for the vehicle
(including occupants). The values are
specified on the vehicle identification plate
on the B-pillar of the driver's door.
R position heavy loads as far forwards as
possible and as low down in the trunk as
possible.
R the load must not protrude above the upper
edge of the seat backrests.
R always place the load against the rear seat
backrests.
R always place the load behind unoccupied
seats if possible.
R secure the load with sufficiently strong and
wear-resistant lashing material. Pad sharp
edges for protection.
Stowage compartments
Important safety notes
GWarning!
To help avoid personal injury during a collision
or sudden maneuver, exercise care when
storing objects in the vehicle. Put luggage or
cargo in the trunk if possible.
Do not pile luggage or cargo higher than the
seat backrests.
Keep compartment lids closed. This will help
to prevent stored objects from being thrown
about and injuring vehicle occupants during
R braking
R vehicle maneuvers
R an accident
Stowage compartments in the front
Glove box
i Depending on the vehicle's equipment,
you will find the following installed in the
glove box: an audio and video AUX jack, a
USB socket or Media Interface, a universal
interface for portable audio equipment, e.g.
for an iPod or USB device, and a bracket for
a remote control (see the COMAND section
of this Operator's Manual.
422Stowage compartmentsLoading, stowing and features
Page 426 of 524
Coat hooks
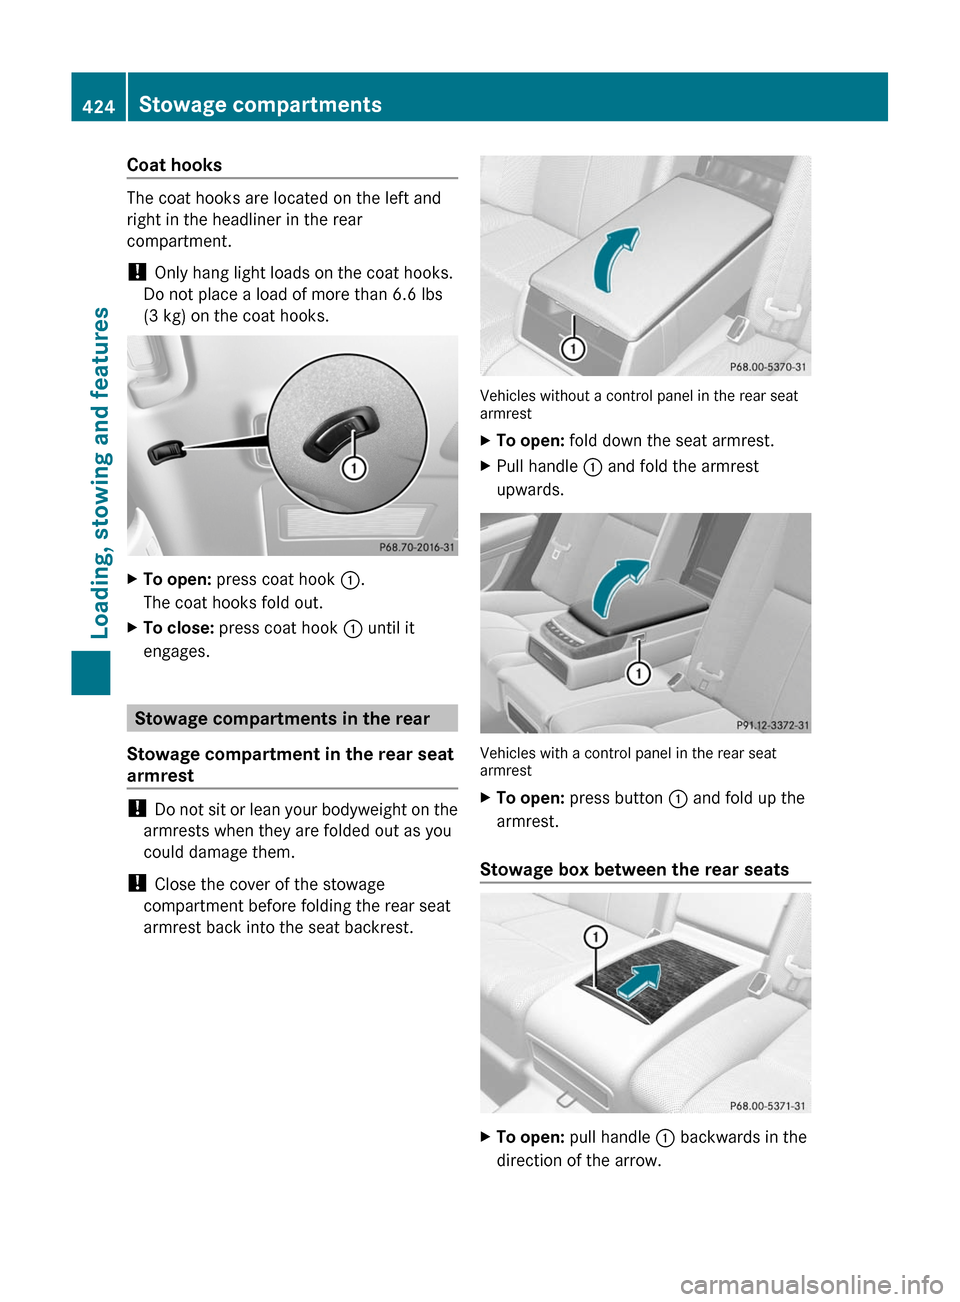
The coat hooks are located on the left and
right in the headliner in the rear
compartment.
! Only hang light loads on the coat hooks.
Do not place a load of more than 6.6 lbs
(3 kg) on the coat hooks.
XTo open: press coat hook :.
The coat hooks fold out.
XTo close: press coat hook : until it
engages.
Stowage compartments in the rear
Stowage compartment in the rear seat
armrest
! Do not sit or lean your bodyweight on the
armrests when they are folded out as you
could damage them.
! Close the cover of the stowage
compartment before folding the rear seat
armrest back into the seat backrest.
Vehicles without a control panel in the rear seatarmrest
XTo open: fold down the seat armrest.XPull handle : and fold the armrest
upwards.
Vehicles with a control panel in the rear seatarmrest
XTo open: press button : and fold up the
armrest.
Stowage box between the rear seats
XTo open: pull handle : backwards in the
direction of the arrow.
424Stowage compartmentsLoading, stowing and features
Page 427 of 524
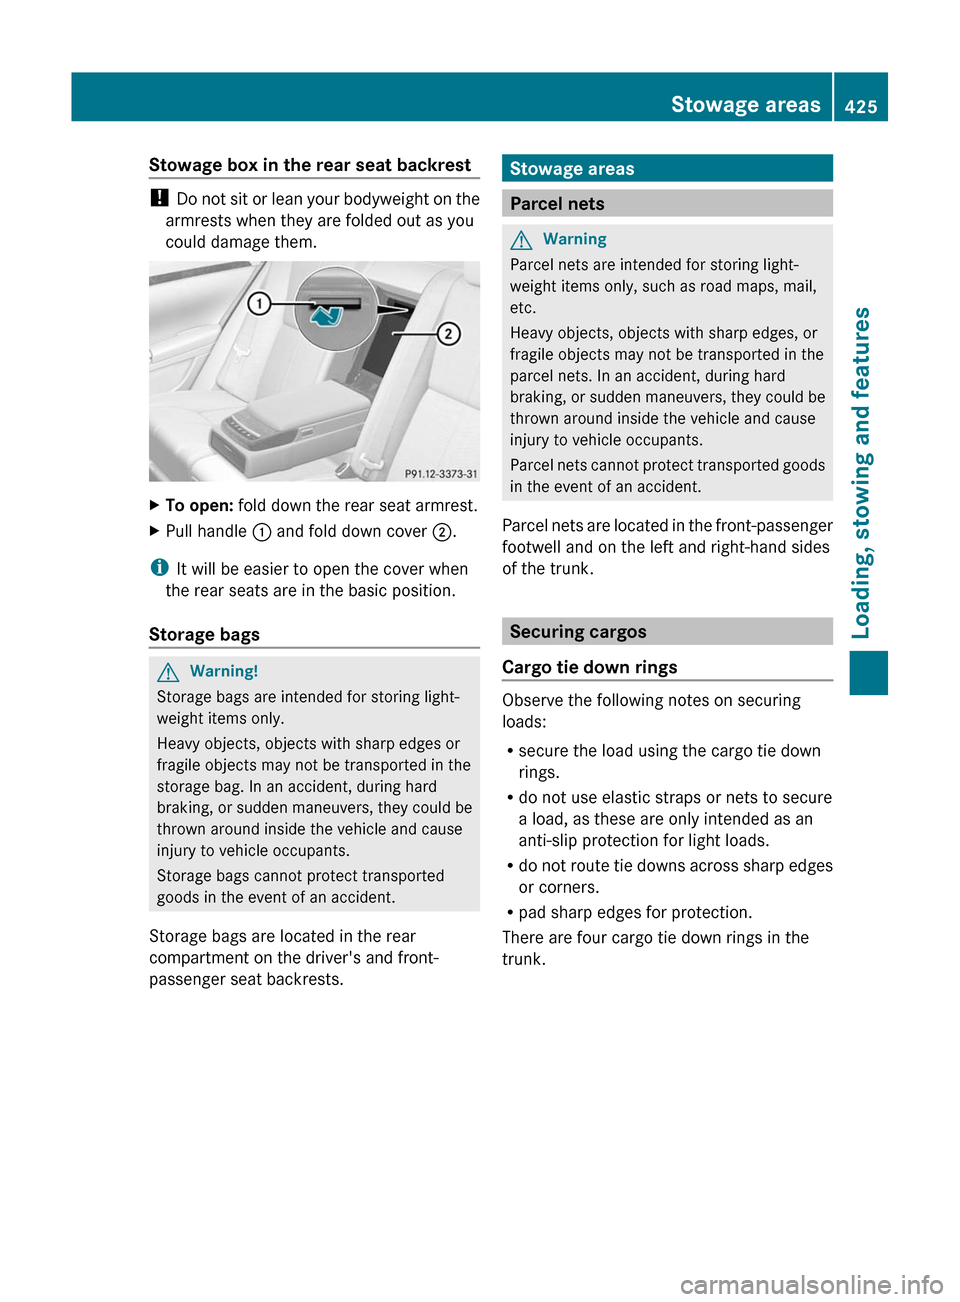
Stowage box in the rear seat backrest
! Do not sit or lean your bodyweight on the
armrests when they are folded out as you
could damage them.
XTo open: fold down the rear seat armrest.XPull handle : and fold down cover ;.
iIt will be easier to open the cover when
the rear seats are in the basic position.
Storage bags
GWarning!
Storage bags are intended for storing light-
weight items only.
Heavy objects, objects with sharp edges or
fragile objects may not be transported in the
storage bag. In an accident, during hard
braking, or sudden maneuvers, they could be
thrown around inside the vehicle and cause
injury to vehicle occupants.
Storage bags cannot protect transported
goods in the event of an accident.
Storage bags are located in the rear
compartment on the driver's and front-
passenger seat backrests.
Stowage areas
Parcel nets
GWarning
Parcel nets are intended for storing light-
weight items only, such as road maps, mail,
etc.
Heavy objects, objects with sharp edges, or
fragile objects may not be transported in the
parcel nets. In an accident, during hard
braking, or sudden maneuvers, they could be
thrown around inside the vehicle and cause
injury to vehicle occupants.
Parcel nets cannot protect transported goods
in the event of an accident.
Parcel nets are located in the front-passenger
footwell and on the left and right-hand sides
of the trunk.
Securing cargos
Cargo tie down rings
Observe the following notes on securing
loads:
Rsecure the load using the cargo tie down
rings.
Rdo not use elastic straps or nets to secure
a load, as these are only intended as an
anti-slip protection for light loads.
Rdo not route tie downs across sharp edges
or corners.
Rpad sharp edges for protection.
There are four cargo tie down rings in the
trunk.
Stowage areas425Loading, stowing and featuresZ