2011 MERCEDES-BENZ S-Class Button
[x] Cancel search: ButtonPage 94 of 524

XTouch sensor surface : on the door
handle until the side windows and the
sliding sunroof or the panorama roof with
power tilt/sliding panel are fully closed.
i Make sure you only touch sensor
surface :.
XMake sure that all the side windows and the
sliding sunroof or panorama roof with
power tilt/sliding panel are closed.XTo interrupt convenience closing:
release sensor surface : on the door
handle.
On vehicles with roller sunblinds:
XTouch the sensor surface on the door
handle again until the roller sunblinds
close.XTo interrupt the roller sunblind closing
procedure: pull the outside door handle
and hold firmly.
Resetting the side windows
You must reset each side window if:
R a side window cannot be closed
automatically.
R a side window opens again slightly after
being closed manually.
XClose all the doors.XTurn the SmartKey to position 1 in the
ignition lock.XPull the corresponding switch on the door
control panel until the side window is
completely closed. ( Y page 90)XHold the switch for an additional second.
If the side window opens again slightly:
XImmediately pull the corresponding switch
on the door control panel until the side
window is completely closed ( Y page 90).XHold the switch for an additional second.XIf the corresponding side window remains
closed after the button has been released,
the side window has been reset correctly.If this is not the case, repeat the steps
above again.
Problems with the side windows
Problem: a side window cannot be closed
because objects are trapped between the
side window and the door frame.
XRemove the objects.XClose the side window.
Problem: a side window cannot be closed
because objects in the guide rail are
preventing the window from being raised.
XRemove the objects.XClose the side window.
Problem: a side window cannot be closed,
and you cannot see the cause.
GWarning
Closing the side windows with increased force
or without the anti-entrapment feature could
lead to serious or even fatal injury. Make sure
that nobody can become trapped when
closing the side windows.
If a side window is obstructed during closing
and reopens again slightly:
XImmediately after the window blocks, pull
the corresponding switch again until the
side window has closed.
The side window is closed with increased
force.
If a side window is obstructed again during
closing and reopens again slightly:
XImmediately after the window blocks, pull
the corresponding switch again until the
side window has closed.
The side window is closed without the anti-
entrapment feature.GWarning!
Pulling and holding the switch to close the
door window immediately after it had been
blocked two times will cause the door window
92Side windowsOpening and closing
Page 98 of 524
XTurn the SmartKey to position 2 in the
ignition lock.
XPush or pull the 3 switch in the
corresponding direction.
iIf you press the 3 switch beyond the
point of resistance, an automatic opening/
closing process is started in the
corresponding direction. You can stop
automatic operation by pressing again.
Operating the rear roller sunblind
Operating from the front
GWarning
When opening or closing the rear roller
sunblind, make sure no one is in danger of
being injured by the opening or closing
procedure.
The rear roller sunblind is equipped with
automatic operation and the anti-entrapment
feature. If the movement of the rear roller
sunblind is blocked during the closing
procedure, the rear roller sunblind will stop
and retract slightly.
The opening and closing of the rear roller
sunblind can be immediately halted by
pressing the sunblind switch again.
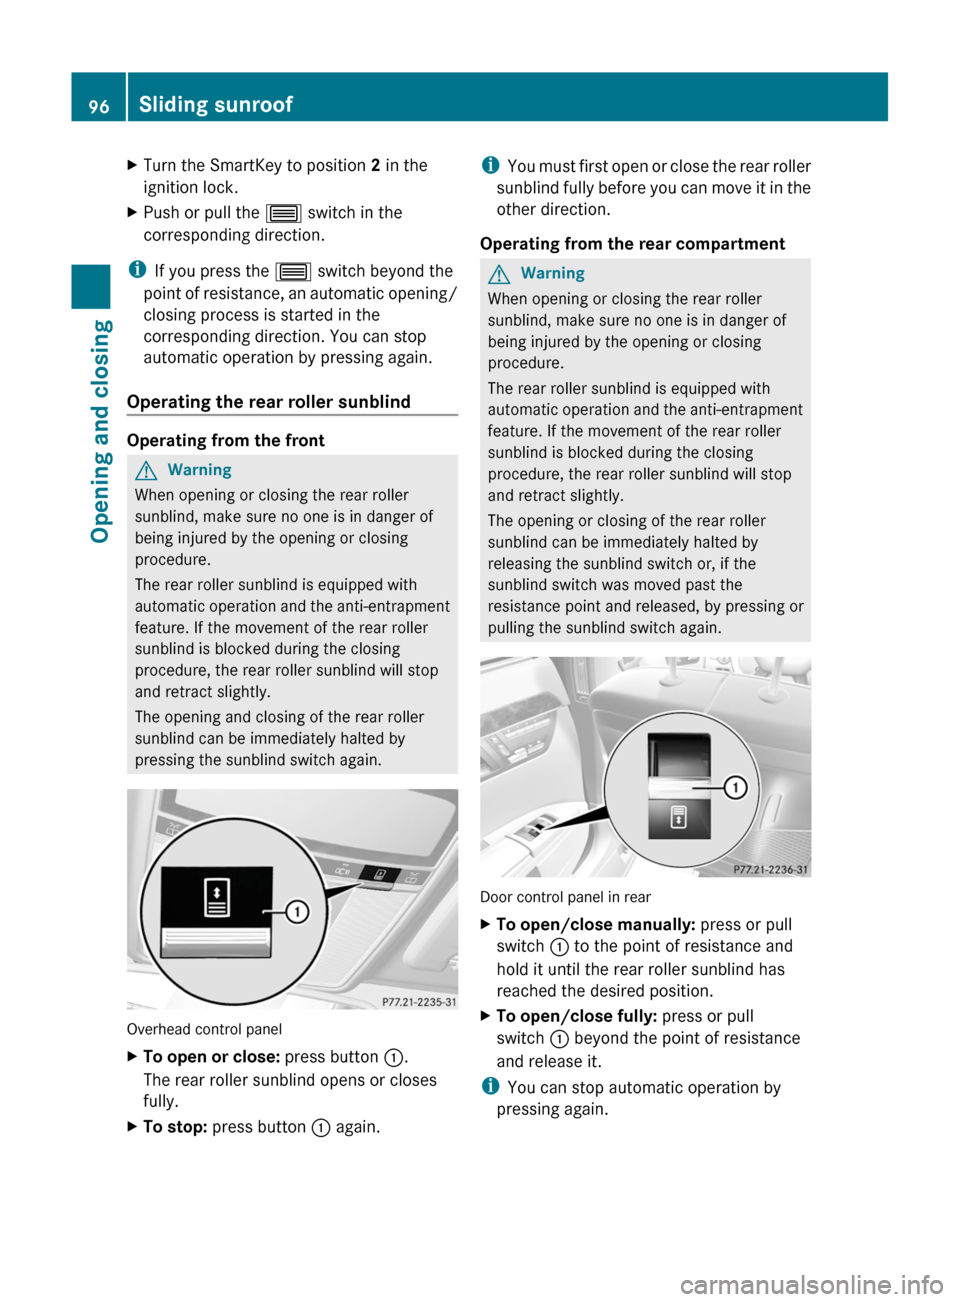
Overhead control panel
XTo open or close: press button :.
The rear roller sunblind opens or closes
fully.
XTo stop: press button : again.iYou must first open or close the rear roller
sunblind fully before you can move it in the
other direction.
Operating from the rear compartment
GWarning
When opening or closing the rear roller
sunblind, make sure no one is in danger of
being injured by the opening or closing
procedure.
The rear roller sunblind is equipped with
automatic operation and the anti-entrapment
feature. If the movement of the rear roller
sunblind is blocked during the closing
procedure, the rear roller sunblind will stop
and retract slightly.
The opening or closing of the rear roller
sunblind can be immediately halted by
releasing the sunblind switch or, if the
sunblind switch was moved past the
resistance point and released, by pressing or
pulling the sunblind switch again.
Door control panel in rear
XTo open/close manually: press or pull
switch : to the point of resistance and
hold it until the rear roller sunblind has
reached the desired position.
XTo open/close fully: press or pull
switch : beyond the point of resistance
and release it.
iYou can stop automatic operation by
pressing again.
96Sliding sunroofOpening and closing
Page 105 of 524

:Seat cushion angle;Backrest angle=To fold the head restraint up or back?Head restraint angleASeat fore-and-aft adjustment
Adjusting the front-passenger seat
from the driver’s seat
GWarning!
When adjusting the front passenger seat,
make sure the seat, if occupied, is as far from
the front passenger front air bag as possible.
Otherwise, the passenger could be seriously
or even fatally injured in the event of an
accident or braking maneuver.
Make sure no one is caught or injured while
the seat is being adjusted.
Even with the SmartKey or SmartKey with
KEYLESS-GO removed from the starter switch
or the SmartKey with KEYLESS-GO removed
from the vehicle, the power seats can be
operated. Therefore, do not leave children
unattended in the vehicle, or with access to
an unlocked vehicle. A child’s unsupervised
access to a vehicle could result in an accident
and/or serious personal injury.
! Do not move the front-passenger seat
fully forwards if there are objects in the
parcel net in the front-passenger footwell.
The objects could otherwise be damaged.
You can use the seat switches on the driver's
side to adjust the front-passenger seat.
XTo activate/deactivate: press button :.
If the indicator lamp in button : is lit, you
can access the following functions for the
front-passenger seat:
Rseat adjustment
Rseat heating/ventilation
Rmemory function
Adjusting the front-passenger seat
from the rear
GWarning!
When adjusting the front passenger seat,
make sure the seat, if occupied, is as far from
the front passenger front air bag as possible.
Otherwise, the passenger could be seriously
or even fatally injured in the event of an
accident or braking maneuver.
Make sure no one is caught or injured while
the seat is being adjusted.
Even with the SmartKey or SmartKey with
KEYLESS-GO removed from the starter switch
or the SmartKey with KEYLESS-GO removed
from the vehicle, the power seats can be
operated. Therefore, do not leave children
unattended in the vehicle, or with access to
an unlocked vehicle. A child’s unsupervised
access to a vehicle could result in an accident
and/or serious personal injury.
! Do not move the front-passenger seat
fully forwards if there are objects in the
parcel net in the front-passenger footwell.
The objects could otherwise be damaged.
Seats103Seats, steering wheel and mirrorsZ
Page 106 of 524
You can use the override button to disable
this function (Y page 65).
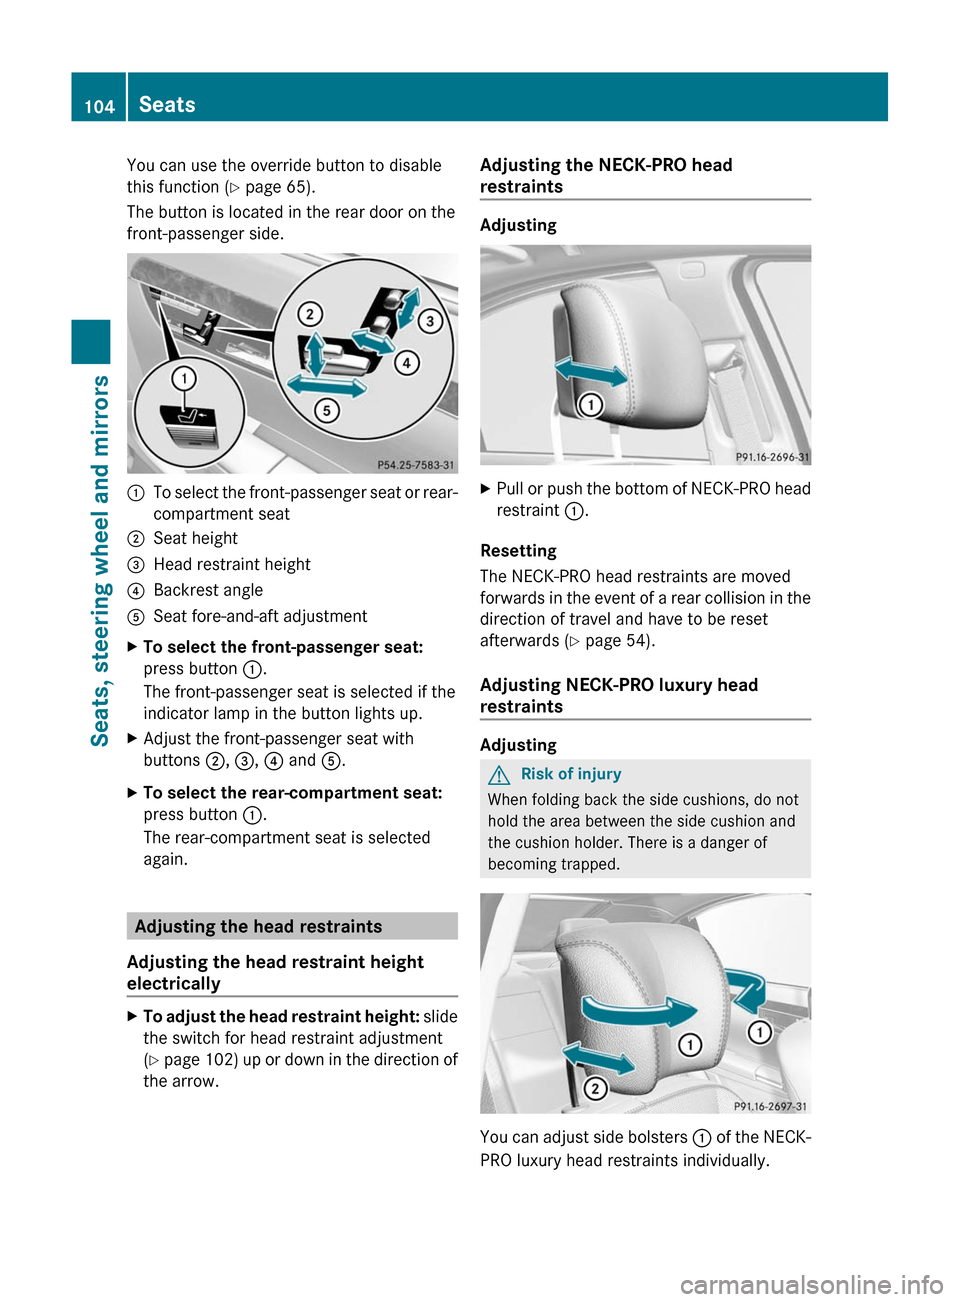
The button is located in the rear door on the
front-passenger side.
:To select the front-passenger seat or rear-
compartment seat
;Seat height=Head restraint height?Backrest angleASeat fore-and-aft adjustmentXTo select the front-passenger seat:
press button :.
The front-passenger seat is selected if the
indicator lamp in the button lights up.
XAdjust the front-passenger seat with
buttons ;, =, ? and A.
XTo select the rear-compartment seat:
press button :.
The rear-compartment seat is selected
again.
Adjusting the head restraints
Adjusting the head restraint height
electrically
XTo adjust the head restraint height: slide
the switch for head restraint adjustment
(Y page 102) up or down in the direction of
the arrow.
Adjusting the NECK-PRO head
restraints
Adjusting
XPull or push the bottom of NECK-PRO head
restraint :.
Resetting
The NECK-PRO head restraints are moved
forwards in the event of a rear collision in the
direction of travel and have to be reset
afterwards (Y page 54).
Adjusting NECK-PRO luxury head
restraints
Adjusting
GRisk of injury
When folding back the side cushions, do not
hold the area between the side cushion and
the cushion holder. There is a danger of
becoming trapped.
You can adjust side bolsters : of the NECK-
PRO luxury head restraints individually.
104SeatsSeats, steering wheel and mirrors
Page 107 of 524
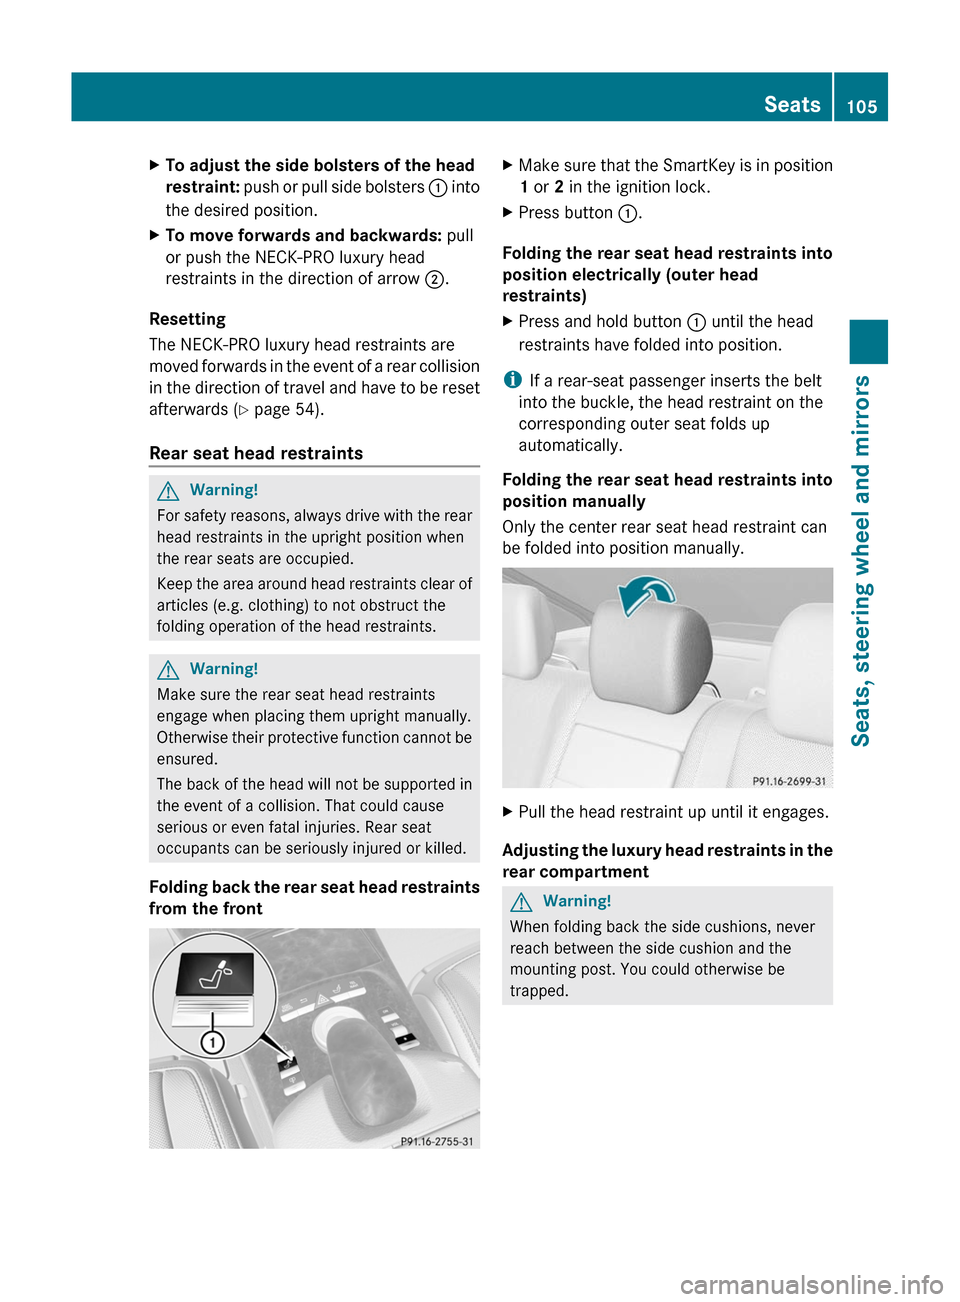
XTo adjust the side bolsters of the head
restraint: push or pull side bolsters : into
the desired position.
XTo move forwards and backwards: pull
or push the NECK-PRO luxury head
restraints in the direction of arrow ;.
Resetting
The NECK-PRO luxury head restraints are
moved forwards in the event of a rear collision
in the direction of travel and have to be reset
afterwards (Y page 54).
Rear seat head restraints
GWarning!
For safety reasons, always drive with the rear
head restraints in the upright position when
the rear seats are occupied.
Keep the area around head restraints clear of
articles (e.g. clothing) to not obstruct the
folding operation of the head restraints.
GWarning!
Make sure the rear seat head restraints
engage when placing them upright manually.
Otherwise their protective function cannot be
ensured.
The back of the head will not be supported in
the event of a collision. That could cause
serious or even fatal injuries. Rear seat
occupants can be seriously injured or killed.
Folding back the rear seat head restraints
from the front
XMake sure that the SmartKey is in position
1 or 2 in the ignition lock.
XPress button :.
Folding the rear seat head restraints into
position electrically (outer head
restraints)
XPress and hold button : until the head
restraints have folded into position.
iIf a rear-seat passenger inserts the belt
into the buckle, the head restraint on the
corresponding outer seat folds up
automatically.
Folding the rear seat head restraints into
position manually
Only the center rear seat head restraint can
be folded into position manually.
XPull the head restraint up until it engages.
Adjusting the luxury head restraints in the
rear compartment
GWarning!
When folding back the side cushions, never
reach between the side cushion and the
mounting post. You could otherwise be
trapped.
Seats105Seats, steering wheel and mirrorsZ
Page 108 of 524
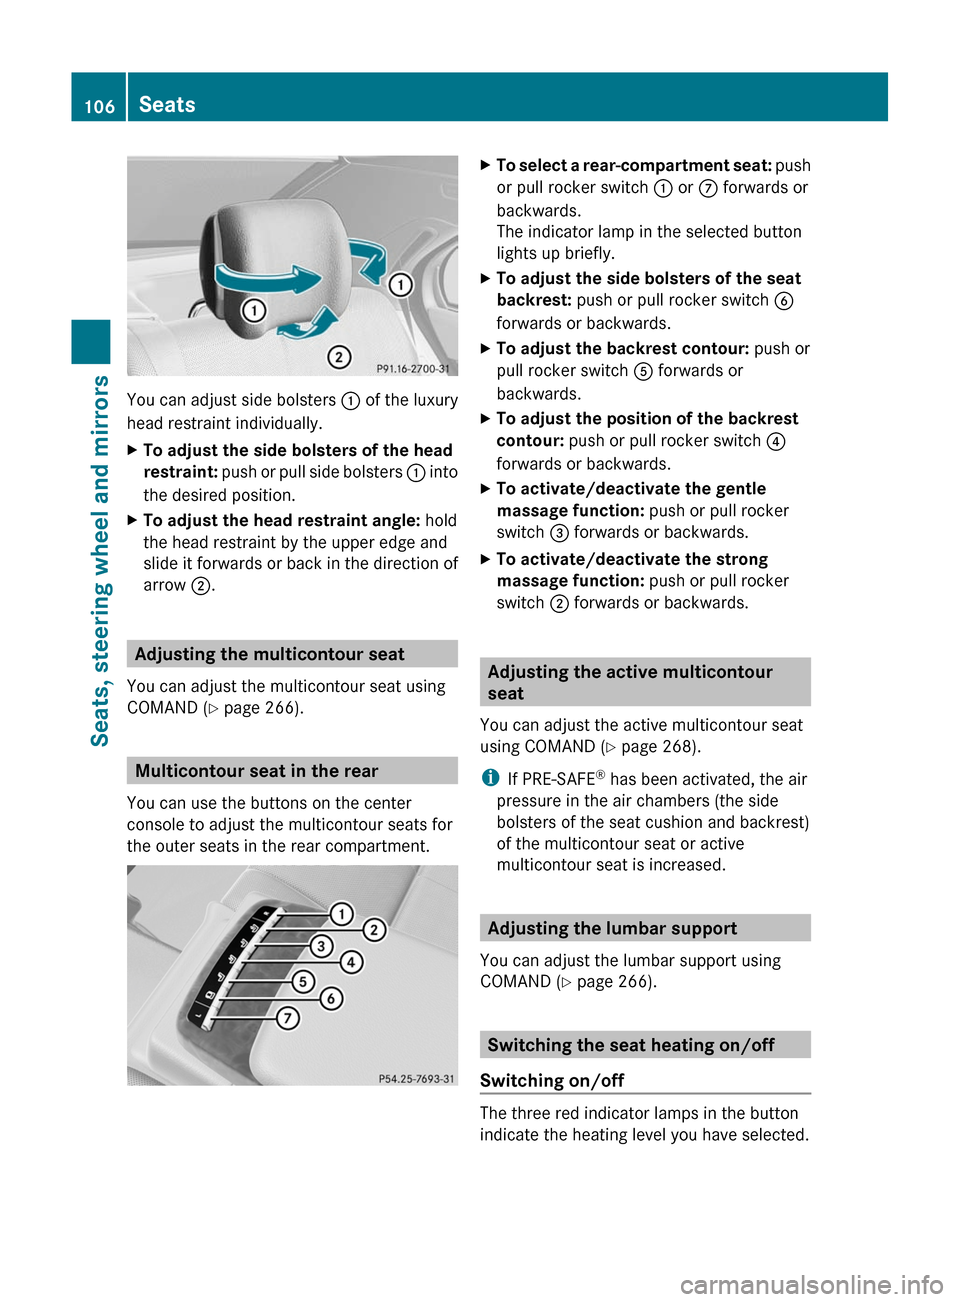
You can adjust side bolsters : of the luxury
head restraint individually.
XTo adjust the side bolsters of the head
restraint: push or pull side bolsters : into
the desired position.
XTo adjust the head restraint angle: hold
the head restraint by the upper edge and
slide it forwards or back in the direction of
arrow ;.
Adjusting the multicontour seat
You can adjust the multicontour seat using
COMAND (Y page 266).
Multicontour seat in the rear
You can use the buttons on the center
console to adjust the multicontour seats for
the outer seats in the rear compartment.
XTo select a rear-compartment seat: push
or pull rocker switch : or C forwards or
backwards.
The indicator lamp in the selected button
lights up briefly.
XTo adjust the side bolsters of the seat
backrest: push or pull rocker switch B
forwards or backwards.
XTo adjust the backrest contour: push or
pull rocker switch A forwards or
backwards.
XTo adjust the position of the backrest
contour: push or pull rocker switch ?
forwards or backwards.
XTo activate/deactivate the gentle
massage function: push or pull rocker
switch = forwards or backwards.
XTo activate/deactivate the strong
massage function: push or pull rocker
switch ; forwards or backwards.
Adjusting the active multicontour
seat
You can adjust the active multicontour seat
using COMAND (Y page 268).
iIf PRE-SAFE® has been activated, the air
pressure in the air chambers (the side
bolsters of the seat cushion and backrest)
of the multicontour seat or active
multicontour seat is increased.
Adjusting the lumbar support
You can adjust the lumbar support using
COMAND (Y page 266).
Switching the seat heating on/off
Switching on/off
The three red indicator lamps in the button
indicate the heating level you have selected.
106SeatsSeats, steering wheel and mirrors
Page 109 of 524
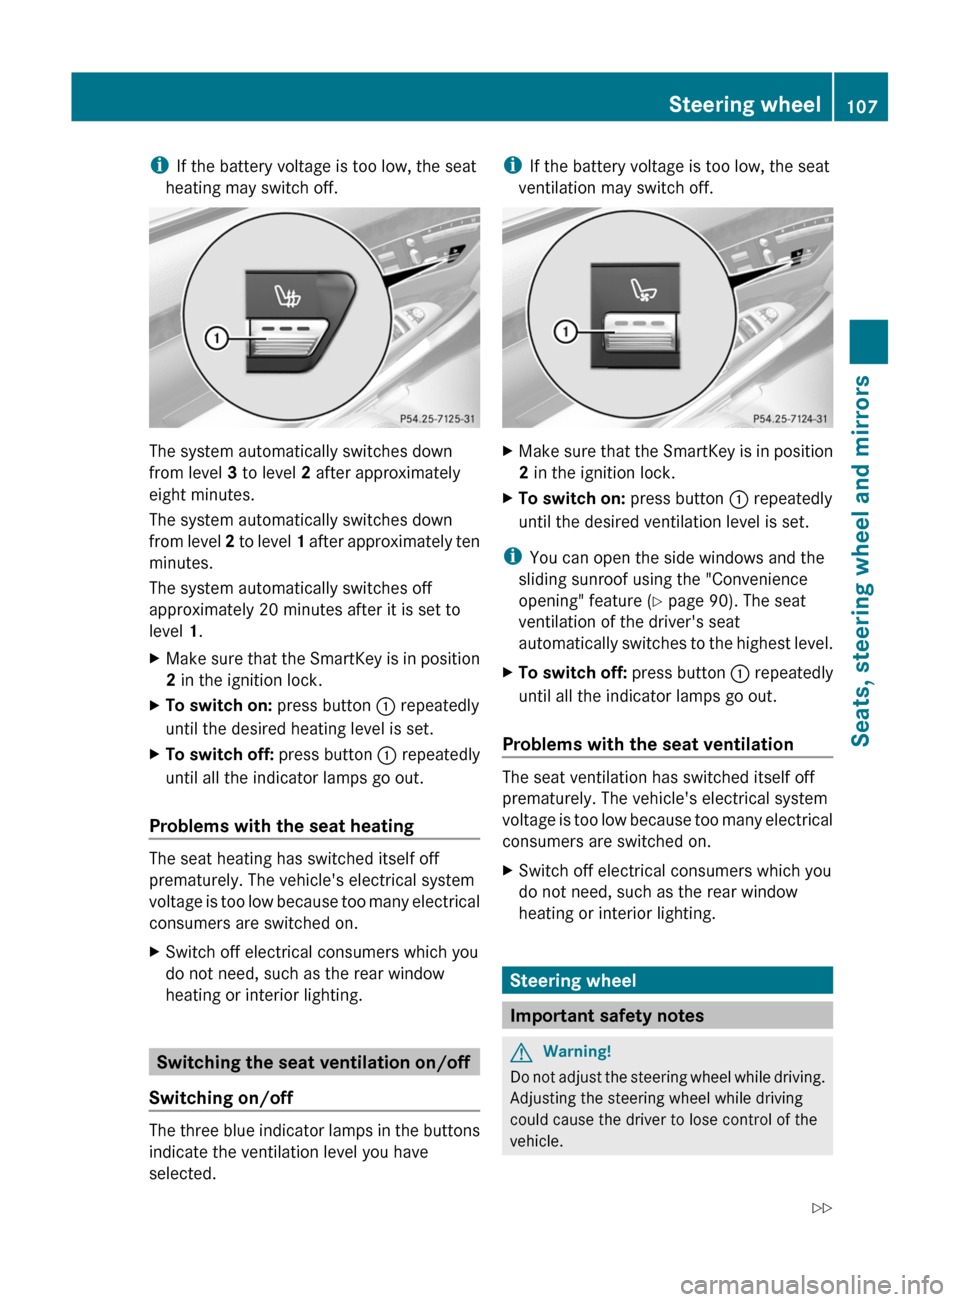
iIf the battery voltage is too low, the seat
heating may switch off.
The system automatically switches down
from level 3 to level 2 after approximately
eight minutes.
The system automatically switches down
from level 2 to level 1 after approximately ten
minutes.
The system automatically switches off
approximately 20 minutes after it is set to
level 1.
XMake sure that the SmartKey is in position
2 in the ignition lock.
XTo switch on: press button : repeatedly
until the desired heating level is set.
XTo switch off: press button : repeatedly
until all the indicator lamps go out.
Problems with the seat heating
The seat heating has switched itself off
prematurely. The vehicle's electrical system
voltage is too low because too many electrical
consumers are switched on.
XSwitch off electrical consumers which you
do not need, such as the rear window
heating or interior lighting.
Switching the seat ventilation on/off
Switching on/off
The three blue indicator lamps in the buttons
indicate the ventilation level you have
selected.
iIf the battery voltage is too low, the seat
ventilation may switch off.
XMake sure that the SmartKey is in position
2 in the ignition lock.
XTo switch on: press button : repeatedly
until the desired ventilation level is set.
iYou can open the side windows and the
sliding sunroof using the "Convenience
opening" feature (Y page 90). The seat
ventilation of the driver's seat
automatically switches to the highest level.
XTo switch off: press button : repeatedly
until all the indicator lamps go out.
Problems with the seat ventilation
The seat ventilation has switched itself off
prematurely. The vehicle's electrical system
voltage is too low because too many electrical
consumers are switched on.
XSwitch off electrical consumers which you
do not need, such as the rear window
heating or interior lighting.
Steering wheel
Important safety notes
GWarning!
Do not adjust the steering wheel while driving.
Adjusting the steering wheel while driving
could cause the driver to lose control of the
vehicle.
Steering wheel107Seats, steering wheel and mirrorsZ
Page 111 of 524
To stop steering wheel and seat movement,
do one of the following:
R move the seat adjustment switch.
R move the steering column adjustment
switch.
R press one of the memory function position
buttons or memory button M.
Do not leave children unattended in the
vehicle, or with access to an unlocked vehicle.
Children could open the driver's door and
unintentionally activate the EASY-ENTRY/
EXIT feature. This could result in an accident
and/or serious personal injury.GWarning
Let the system complete the adjustment
procedure before setting the vehicle in
motion. All steering wheel adjustment must
be completed before setting the vehicle in
motion. Driving off with the steering wheel
still adjusting could cause the driver to lose
control of the vehicle.
! Do not activate the EASY-ENTRY/EXIT
feature, if the seat backrest is reclined too
far backwards. This can damage the front
or rear seats. You must first move the
backrest to a vertical position.
Position of the steering wheel and the
driver's seat when the EASY-ENTRY/
EXIT feature is active
The steering wheel tilts upwards and the
driver's seat moves backwards when you:
R remove the SmartKey from the ignition lock
R open the driver's door when the SmartKey
is in the ignition lock or KEYLESS-GO is in
position 1
i The steering wheel only moves upwards if
it has not already reached the upper end
stop. The driver's seat only moves
backwards if it is not already in the
rearmost position.
Position of the steering wheel and the
driver's seat for driving
If you insert the SmartKey into the ignition
lock with the driver's door closed, depending
on the setting, the position of the steering
wheel and the driver's seat will be changed to
the previously set position.
The last position of the steering wheel or seat
is stored when:
R the ignition is switched off or
R the setting is stored with the memory
function.
Crash-responsive EASY-EXIT feature
If the crash-responsive EASY-EXIT feature is
triggered in an accident, the steering column
will move upwards when the driver's door is
opened. This occurs irrespective of the
position of the SmartKey in the ignition lock.
This makes it easier to exit the vehicle and
rescue the occupants.
The crash-responsive EASY-EXIT feature is
only operational if the EASY-EXIT/ENTRY
feature is activated in the on-board computer.
Mirrors
Exterior mirrors
Adjusting the exterior mirrors
GWarning
Exercise care when using the passenger-side
exterior rear view mirror. The mirror surface
is convex (outwardly curved surface for a
wider field of view). Objects in mirror are
closer than they appear. Check your interior
rear view mirror and glance over your
shoulder before changing lanes.
The exterior mirrors are automatically heated
if the rear window heating is switched on and
the outside temperature is low.
Mirrors109Seats, steering wheel and mirrorsZ