2011 MERCEDES-BENZ S-Class battery
[x] Cancel search: batteryPage 109 of 524
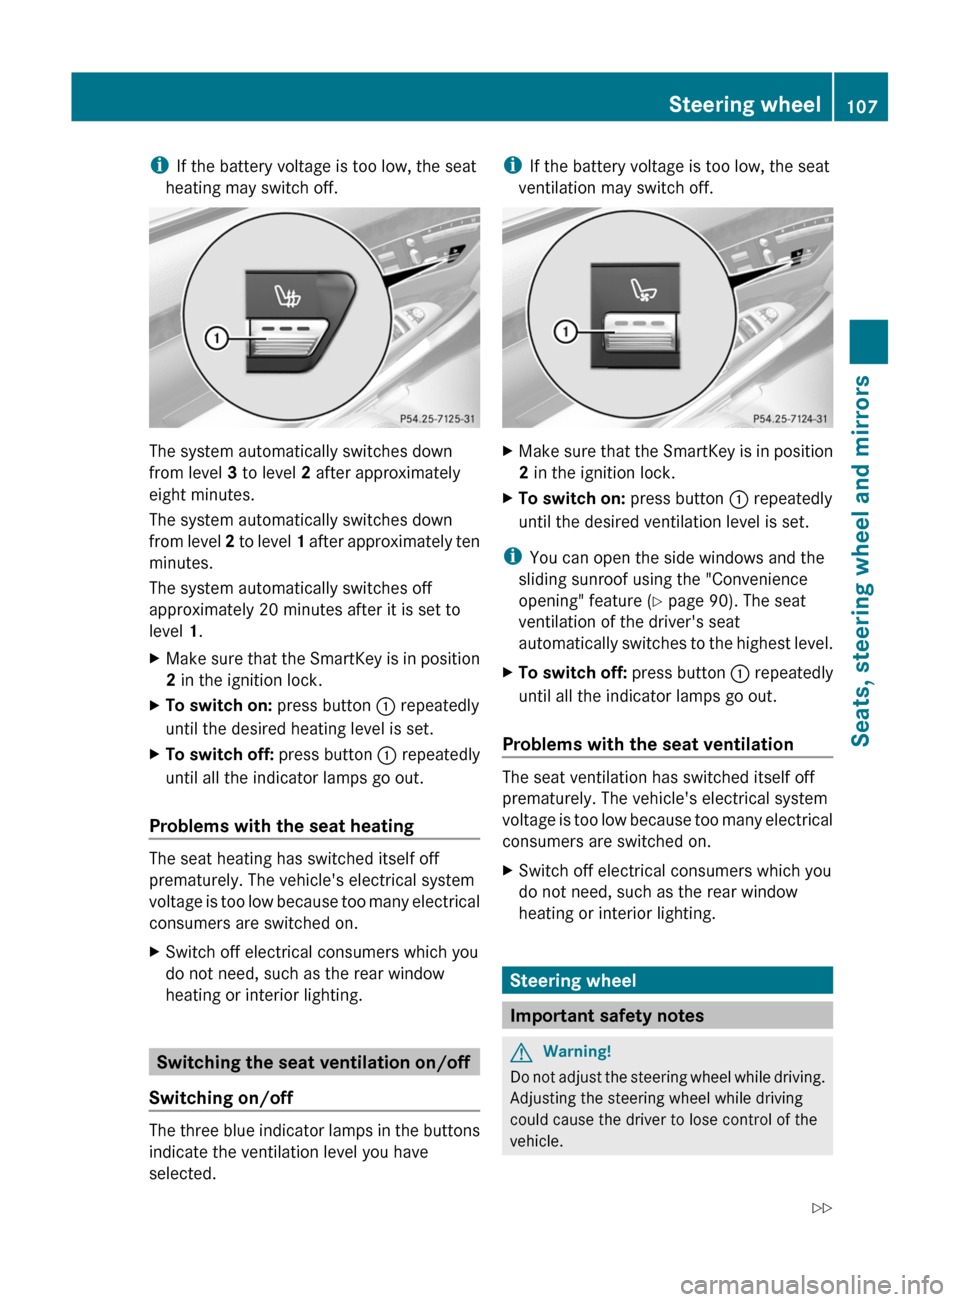
iIf the battery voltage is too low, the seat
heating may switch off.
The system automatically switches down
from level 3 to level 2 after approximately
eight minutes.
The system automatically switches down
from level 2 to level 1 after approximately ten
minutes.
The system automatically switches off
approximately 20 minutes after it is set to
level 1.
XMake sure that the SmartKey is in position
2 in the ignition lock.
XTo switch on: press button : repeatedly
until the desired heating level is set.
XTo switch off: press button : repeatedly
until all the indicator lamps go out.
Problems with the seat heating
The seat heating has switched itself off
prematurely. The vehicle's electrical system
voltage is too low because too many electrical
consumers are switched on.
XSwitch off electrical consumers which you
do not need, such as the rear window
heating or interior lighting.
Switching the seat ventilation on/off
Switching on/off
The three blue indicator lamps in the buttons
indicate the ventilation level you have
selected.
iIf the battery voltage is too low, the seat
ventilation may switch off.
XMake sure that the SmartKey is in position
2 in the ignition lock.
XTo switch on: press button : repeatedly
until the desired ventilation level is set.
iYou can open the side windows and the
sliding sunroof using the "Convenience
opening" feature (Y page 90). The seat
ventilation of the driver's seat
automatically switches to the highest level.
XTo switch off: press button : repeatedly
until all the indicator lamps go out.
Problems with the seat ventilation
The seat ventilation has switched itself off
prematurely. The vehicle's electrical system
voltage is too low because too many electrical
consumers are switched on.
XSwitch off electrical consumers which you
do not need, such as the rear window
heating or interior lighting.
Steering wheel
Important safety notes
GWarning!
Do not adjust the steering wheel while driving.
Adjusting the steering wheel while driving
could cause the driver to lose control of the
vehicle.
Steering wheel107Seats, steering wheel and mirrorsZ
Page 126 of 524

ECOMAND: e.g. to select a station from
presets, select a track, enter directly,
enter a phone number. Rear Seat
Entertainment System: to select a
track, enter directlyFTo leave the menu (back)XPoint the remote control at the
corresponding screen and execute the
functions by pressing the corresponding
button.
i The remote control's function may be
restricted depending on the angle at which
it is pointed at the respective screen.
Selecting the screen for the remote
control
XTurn thumbwheel = until the desired
display is highlighted in the window.
Switching the screen on/off (Rear Seat
Entertainment System only)
If the key is in position 0 or 1 in the ignition
lock (see vehicle Operator's Manual), or the
key is not inserted, the screens in the rear will
switch off after 30 minutes. Before the
screens switch off, they show a message to
this effect.
You can switch the screens back on,
However, this will discharge the starter
battery.
XPoint the remote control at the rear-
compartment screen which has been
selected for remote operation.XPress button : on the remote control.
The respective rear screen switches on or
off.
i You can only switch the screens on using
the remote control if the ignition is
switched on.
Switching button lighting on/offXPress button ; on the remote control.
Depending on the previous status, the
button lighting is switched on or off.
i If you do not use the remote control for
about 15 seconds, the button lighting
switches off automatically.
Mute
XPress button B on the remote control.
The sound is switched on/off.
Adjusting the volume
This function is available for COMAND and for
the Rear Seat Entertainment System in
conjunction with corded headphones.
XPress one of buttons C on the remote
control.
The volume of the currently selected audio
or video source changes.
For COMAND, you can also adjust the
volume for phone calls and navigation
announcements.
Selecting a menu/menu item and
confirming your selection
XSelect a menu/menu item using the
=;9: buttons and press
the 9 button to confirm.124At a glanceCOMAND
Page 140 of 524

Remote control
Overview
:To switch the screen on/off;To switch button lighting on/off=To select the screen for remote control
operation (COMAND, SPLITVIEW, L
REAR and REAR R can be selected)
?To select a menu or menu itemATo confirm a selection or settingBTo switch sound on/off (for corded
headphones)
CTo adjust the volume (for corded
headphones)
DTo skip, fast-forward/fast-rewindETo select a track, to enter directlyFTo leave the menu (back)Selecting the screen for the remote
control
You can use the remote control to operate
one of the two rear screens at a time. To do
so, you must switch the remote control to the
desired screen.
XTo select the left-hand screen: turn
thumbwheel = until "L REAR" is
highlighted in the window.
XTo select the right-hand screen: turn
thumbwheel = until "REAR R" is
highlighted in the window.
Switching the screen on/off
If the key in the ignition lock is in position 0
or 1 or if the key is not in the ignition lock, the
rear screens will switch off after 30 minutes.
Before the screens switch off, they show a
message to this effect.
You can switch the screens back on,
However, this will discharge the starter
battery.
XPoint the remote control at the rear-
compartment screen which has been
selected for remote operation.
XPress button : on the remote control.
The respective rear screen switches on or
off.
iYou can only switch the screens on using
the remote control if the ignition is
switched on.
Switching button lighting on/off
XPress button ; on the remote control.
Depending on the previous status, the
button lighting is switched on or off.
iIf you do not use the remote control for
about 15 seconds, the button lighting
switches off automatically.
Switching the sound on/off (corded
headphones only)
XPress button B on the remote control.
The sound is switched on/off.
138At a glanceCOMAND
Page 142 of 524
Cordless headphones
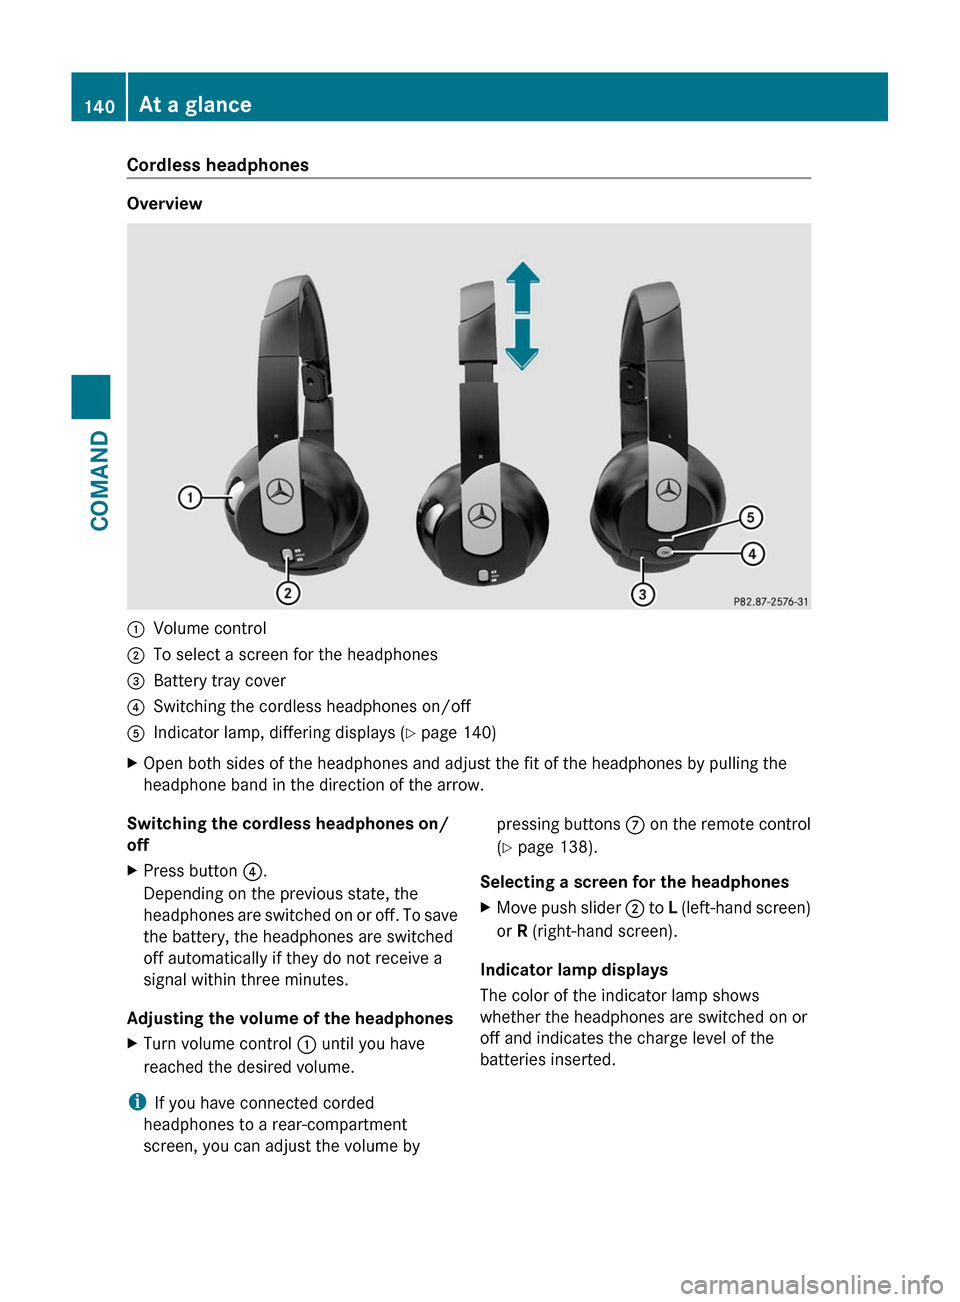
Overview
:Volume control;To select a screen for the headphones=Battery tray cover?Switching the cordless headphones on/offAIndicator lamp, differing displays (Y page 140)XOpen both sides of the headphones and adjust the fit of the headphones by pulling the
headphone band in the direction of the arrow.Switching the cordless headphones on/
offXPress button ?.
Depending on the previous state, the
headphones are switched on or off. To save
the battery, the headphones are switched
off automatically if they do not receive a
signal within three minutes.
Adjusting the volume of the headphones
XTurn volume control : until you have
reached the desired volume.
i If you have connected corded
headphones to a rear-compartment
screen, you can adjust the volume by
pressing buttons C on the remote control
( Y page 138).
Selecting a screen for the headphonesXMove push slider ; to L (left-hand screen)
or R (right-hand screen).
Indicator lamp displays
The color of the indicator lamp shows
whether the headphones are switched on or
off and indicates the charge level of the
batteries inserted.
140At a glanceCOMAND
Page 188 of 524

You can view the current direction of travel,
the current height and the coordinates of the
current vehicle position in the compass view.XTo switch on navigation mode: press the
S function button once or twice.XTo show the menu: press the COMAND
controller W.XSelect Position in the navigation menu by
sliding VÆ and turning cVd the COMAND
controller and press W to confirm.XSelect Compass and press W to confirm.XTo exit the display: confirm Back by
pressing W or press the % button.
Installing new map software
The digital data generated by the map
software becomes outdated in the same way
as conventional road maps. Optimal route
guidance can only be provided by the
navigation system in conjunction with the
most up-to-date map software. Information
about new map software versions can be
obtained from an authorized Mercedes-Benz
Center.
You can install new map software yourself
using one or more DVDs, depending on the
size.
The installation process can take between 10
and 120 minutes depending on the size of the
map software. If radio mode is selected
before you start the installation process, you
can still adjust the volume. It is also still
possible to operate the automatic climate
control and cancel the process on COMAND.
Other functions are not operational. If
possible, carry out the installation process
when the vehicle is stationary. This takes less
time, since the DVD read speed is higher
when the vehicle is stationary than when it is
in motion. If the starter battery is not
sufficiently charged, COMAND may end the
process automatically in order to preserve
the battery. Therefore, keep the engine
running during the installation process.
GWarning
Never leave the engine running in enclosed
spaces. The exhaust gases contain toxic
carbon monoxide. Breathing in exhaust fumes
is a health hazard and can lead to
unconsciousness or death.
Displaying information about the
currently used map version
XTo switch on navigation mode: press the
S function button once or twice.XTo show the menu: press the COMAND
controller W.XSelect Navi in the main function bar by
sliding VÆ and turning cVd the COMAND
controller and press W to confirm.XSelect Map Version and press W to
confirm.
Notes on handling DVDs
R Only touch the edges of DVDs.
R Handle DVDs carefully to avoid read errors.
R Avoid scratching DVDs or getting
fingerprints or dust on them.
R Use a conventional cleaning cloth to clean
DVDs. Never wipe in a circle, but instead in
straight lines from the inside to the outside.
R Place DVDs back in their cases after use.
R Do not expose DVDs to heat or direct
sunlight.
Map software copy protection
Map software for COMAND is subject to a fee.
Map software can only be used on one vehicle
with an activation code and is not
transferable. The six-digit activation code is
available at your authorized Mercedes-Benz
Center. Contact your authorized Mercedes-
Benz Center if you lose the activation code or
if COMAND does not accept the code that you
received.
Your vehicle is delivered from the factory with
map software. Depending on the country,
map software for your region is either pre-
installed (Europe/USA) or the map software
186NavigationCOMAND
Page 194 of 524

automatically attempts to log into a
network. If no network is available, you will
not be able to make a " 911" emergency
call. If you attempt to make an outgoing
call, the No Service message will appear
for a short while.
911 emergency callGWarning
The 911 emergency call system is a public
service. Using it without due cause is a
criminal offense.
The following conditions must be fulfilled in
order to make a 911 emergency call:
R the mobile phone must be switched on.
R a network must be available.
R a valid and operational SIM card must be
inserted in the mobile phone.
R the mobile phone must be connected to
COMAND via the Bluetooth ®
interface
If you cannot make an emergency call, you
must arrange rescue measures yourself.
XEnter the number using COMAND.XPress the 6 button.
The telephone makes the connection.XWait until the emergency call center
answers and describe the emergency
situation.
Telephony via the Bluetooth ®
interface
Conditions
On the mobile phone
For telephony via COMAND's Bluetooth ®
interface, a Bluetooth ®
-capable mobile
phone is required.
i Not all mobile phones available on the
market are equally suitable. For more
information on suitable mobile phones and
on connecting Bluetooth ®
-capable mobile
phones to COMAND, visit
http://www.mbusa-mobile.com or call
the Mercedes-Benz Customer Assistance
Center at 1-800-FOR-MERCedes
(1-800-367-6372) (US) or Customer
Relations at 1-800-387-0100 (Canada).
The battery of the mobile phone should
always be kept sufficiently charged in order
to prevent malfunctions.
In preparation for telephoning via the
Bluetooth ®
interface, you should check the
following items on your mobile phone (see the
mobile phone operating instructions):XHands-free profile
The mobile phone must support Hands-free
Profile 1.0 or above.
i Some displays (e.g. the signal strength)
depend on the supported version of the
Hands-free Profile.
XBluetooth ®
visibility
On certain mobile phones, the device itself
must be made "visible" for other devices,
as well as activating the Bluetooth ®
function (see the mobile phone operating
instructions).XBluetooth ®
device name
Every Bluetooth ®
device has its own
Bluetooth ®
device name. This name can be
freely chosen, but the default name may be
identical for all devices from a given
manufacturer. It is therefore
recommended that you change this name
so that you can easily recognize your
mobile phone (see the mobile phone
operating instructions).XSwitch on the mobile phone and enter the
PIN when prompted to do so (see the
mobile phone operating instructions).XActivate Bluetooth ®
functions and, where
necessary, Bluetooth ®
visibility on the
mobile phone (see the mobile phone
operating instructions).192TelephoneCOMAND
Page 245 of 524

accident. Objects moving within the
passenger compartment could cause serious
personal injury to vehicle occupants.
GWarning
Due to a potential choking hazard, wired
headset usage by children should only occur
with adult supervision.
Changing the batteries
Both the remote control and the two sets of
wireless headphones require batteries.
GWarning!
Keep the batteries out of the reach of
children. Consult a doctor immediately if a
child should swallow a battery.
Do not dismantle, short-circuit or burn a
battery.
HEnvironmental note
Dispose of discharged batteries in an
environmentally responsible manner.
In the remote control:Battery tray;Lug=Battery compartment cover?Retaining lugsABatteries
The remote control contains 2 type AAA
1.5 V batteries.
XTo open the battery compartment:
remove battery compartment cover = on
the back of the remote control.
XTo do so, press lug ; downwards and take
off battery compartment cover =.
XRemove discharged batteries A from the
compartment.
Rear Seat Entertainment System243COMANDZ
Page 246 of 524

XInsert new batteries. Observe the polarity
marking on the batteries and in the battery
compartment when doing so.
Left-hand battery: the positive pole (+)
must face upwards.
Right-hand battery: the positive pole (+)
must face downwards.
XTo close the battery compartment: first
place battery compartment cover = into
the battery compartment with retaining
lugs ? and allow lug ; to clip into place.
In the wireless headphones
The battery compartment cover is located on
the left headphone.
:Battery compartment cover
The wireless headphones contain 2 type AAA
1.5 V batteries.
XTo open the battery compartment: fold
the battery compartment cover :
upwards. When doing so, hold the left
headphone as shown to prevent the
inserted batteries from falling out.
XRemove the discharged batteries from the
compartment.
XInsert new batteries. Observe the polarity
marking on the batteries and in the battery
compartment when doing so.
Left-hand battery: the positive pole (+)
must face upwards.
Right-hand battery: the positive pole (+)
must face downwards.
XTo close the battery compartment:
press the battery compartment lid
downwards until it clips into place.
If the batteries have been inserted
correctly, the indicator lamp will light up
green when the headphones are switched
on.
Basic functions
Operating with headphones
iVehicles intended for sale in the USA are
equipped with cordless headphones.
Corded headphones are available for the
Canadian market and other markets.
You can use the cordless headphones
supplied and/or up to two sets of corded
headphones connected to the corresponding
jack of the rear-compartment screens
(Y page 137).
Information on:
Rswitching the cordless headphones on/off
Radjusting the volume of the headphones
Rselecting a screen for the headphones
can be found in the "cordless headphones"
section (Y page 140).
Using the main loudspeakers
This function is available in conjunction with
COMAND.
You can use the vehicle loudspeakers to
listen to a disc inserted in the rear-
compartment drive. To do so, at least one of
the rear-compartment screens must be set to
disc mode.
244Rear Seat Entertainment SystemCOMAND