2011 MERCEDES-BENZ S-Class Deactivate esp
[x] Cancel search: Deactivate espPage 72 of 524

! Vehicles with 4MATIC: switch off the
ignition when the electric parking brake is
being tested on a brake dynamometer.
Application of the brakes by ESP ®
may
otherwise destroy the brake system.
i Only use wheels with the recommended
tire sizes. Only then will ESP ®
function
properly.
ETS/4ETS (Electronic Traction System)GWarning
Observe "Important safety notes"
( Y page 66).
Traction control is part of ESP ®
.
Traction control brakes the drive wheels
individually if they spin. This enables you to
pull away and accelerate on slippery surfaces,
for example if the road surface is slippery on
one side. On vehicles with 4MATIC, more
drive torque is also transferred to the wheel
or wheels with traction.
Traction control remains active if you
deactivate ESP ®
.
Activating/deactivating ESP ®
GWarning!
The ESP should not be switched off during
normal driving other than in the
circumstances described below. Disabling
the system will reduce vehicle stability in
driving maneuvers.
Do not switch off the ESP when a spare wheel
is mounted.
GWarning
S 63 AMG: ESP ®
should not be deactivated
during normal driving.
Deactivating the system results in the
following:
R no restriction to the engine torque
R loss of system-supported traction control
"ESP OFF" is designed for driving on closed
tracks when the vehicle's own oversteering
and understeering characteristics are desired
and requires an extremely qualified and
experienced driver who is able to handle
these critical driving situations.
You could lose control of your vehicle and
cause an accident.
Beware of these limits if you deactivate
ESP ®
.
Do not deactivate ESP ®
when the emergency
or spare wheel is mounted.
ESP ®
is activated automatically when the
engine is running.
It may be best to deactivate ESP ®
in the
following situations:
R when using snow chains
R in deep snow
R on sand or gravelGWarning!
Switch on the ESP immediately if the
aforementioned circumstances do not apply
anymore. Otherwise the ESP will not stabilize
the vehicle when it is starting to skid or a
wheel is spinning.
When you deactivate ESP ®
:
R ESP ®
no longer improves driving stability.
R the engine's torque is no longer limited and
the drive wheels can spin. The spinning of
the wheels results in a cutting action, which
provides better grip.
R traction control is still activated.
R ESP ®
still provides support when you
brake.
If ESP ®
is deactivated and one or more wheels
start to spin, the ÷ warning lamp in the
instrument cluster flashes. In such situations,
ESP ®
will not stabilize the vehicle.
XTo deactivate: (Y page 375).
The å warning lamp in the instrument
cluster lights up.70Driving safety systemsSafety
Page 73 of 524

GWarning
When the å ESP®
OFF warning lamp is lit,
ESP ®
is deactivated.
If the ÷ ESP®
warning lamp and the
å ESP®
OFF warning lamp remain lit,
ESP ®
is not available due to a malfunction.
When ESP ®
is deactivated or not operational,
vehicle stability in standard driving
maneuvers is reduced.
Adapt your speed and driving to the prevailing
road conditions and to the non-operating
status of the ESP ®
.
! Avoid spinning a drive wheel for an
extended period with ESP ®
switched off.
This could cause serious damage to the
drive train.
XTo activate: (Y page 375).
The å warning lamp in the instrument
cluster goes out.
EBD (Electronic Brake-force
Distribution)
GWarning
Observe "Important safety notes"
( Y page 66).
EBD monitors and controls the brake
pressure on the rear wheels to improve
driving stability while braking.
GWarning
If the EBD malfunctions, the brake system will
still function with full brake boost. However,
the rear wheels could lock up during
emergency braking situations, for example.
You could lose control of the vehicle and
cause an accident.
Adapt your driving style to the changed
driving characteristics.
Adaptive Brake
ADAPTIVE BRAKE enhances braking safety
and offers increased braking comfort. In
addition to the braking function, ADAPTIVE
BRAKE also has the HOLD function
( Y page 335) and hill start assist
( Y page 302). For further information, see
Driving tips ( Y page 320).
PRE-SAFE ®
Brake (vehicles with
DISTRONIC PLUS)
PRE-SAFE ®
Brake can help you to minimize
the risk of a frontal collision with a vehicle
ahead or reduce the effects of such a
collision.
At speeds above approximately
20 mph (30 km/h), this function warns you
when you are rapidly approaching the vehicle
in front. An intermittent warning tone sounds
and the · distance warning lamp lights up
in the instrument cluster.
Due to the nature of the system, particularly
complicated driving conditions may cause the
system to display an unnecessary warning.
If the driver and front-passenger have
fastened their seat belts, PRE-SAFE ®
Brake
can also can also perform the following at
speeds of above approximately
20 mph (30 km/h):
R brake the vehicle automatically at speeds
up to approximately 124 mph (200 km/h)
R trigger preventative passenger protection
measures (PRE-SAFE ®
) ( Y page 53)
GWarning!
An intermittent warning sounds and the
distance warning lamp · in the instrument
cluster is illuminated if the PRE-SAFE ®
Brake
calculates that the distance to the vehicle
ahead and your vehicle's current speed
indicate that the PRE-SAFE ®
Brake will not be
capable of slowing the vehicle sufficiently to
maintain the preset following distance, which
creates a danger of a collision.
Driving safety systems71SafetyZ
Page 123 of 524

DVD function can be viewed from the front
passenger side.
Use the SPLITVIEW remote control to operate
COMAND from the front passenger side.
Points to remember:
RYour vehicle may be equipped with
SPLITVIEW. The use of SPLITVIEW is
currently not permitted in the following
states: AL, CO, IL, LA, MA, MD, NH, PA, VA,
VT, WA, WI, and WV as well as in the
Canadian provinces Manitoba,
Newfoundland, New Brunswick, and Prince
Edward Island. The driver is responsible for
complying with ALL regional laws. If your
vehicle is registered in a state or province
where SPLITVIEW is not permitted, this
function must be deactivated. Please
consult an authorized Mercedes-Benz
center to verify if the use of SPLITVIEW is
permitted in your state/province.
RThe SPLITVIEW remote control can be used
to adjust the volume of the front-passenger
side headphones. Before putting on the
headphones, make certain that the volume
has not been set too high.
RYou can only use media from the driver's
and front-passenger sides separately if the
media are from different sources. Example:
on the driver's side, an audio CD is being
played on the DVD changer. This means
that on the front-passenger side, the DVD
changer cannot be used to play a different
medium, for instance a video DVD.
However, other media can be used at the
same time on the front-passenger side,
including radio, memory card, MUSIC
REGISTER, Media Interface, USB or AUX.
RIf you use the same medium on both sides,
you can both carry out the respective
settings.
RThere must be clear line of sight between
the headphones and the display so that
COMAND can optimally transmit music and
speech via the infrared signal on the front-
passenger's headphones. For this reason,
please also observe that the headphones
have left and right sides, and use them
correctly.
RUsing SPLITVIEW you can only use
entertainment functions separately, such
as audio and video functions.
RThe multifunction steering wheel can only
used for functions which relate to the
driver's side.
Switching SPLITVIEW on/off
XTo switch on SPLITVIEW: select
Vehicle from the main function bar by
turning cVd the COMAND controller and
press W to confirm.
The "Vehicle" menu appears.
XSelect SPLITVIEW on.
SPLITVIEW symbol : appears in the
display, and display ; switches to
SPLITVIEW off.
XTo switch off SPLITVIEW: select
Vehicle from the main function bar by
turning cVd the COMAND controller and
press W to confirm.
The "Vehicle" menu appears.
XSelect SPLITVIEW off.
Display ; switches to SPLITVIEW on.
iIf COMAND has already been switched
on, you can also use the remote control to
switch SPLITVIEW on and off
(Y page 123).
The SPLITVIEW screen remains on for
approximately 30 minutes after the key has
been turned to position 0 in the ignition lock.
After this time or after the key has been
At a glance121COMANDZ
Page 151 of 524

COMAND calculates the route to the
destination without taking account of the
following:
R Traffic lights
R Stop and right-of-way-signs
R Lane merging
R Parking or stopping prohibited areas
R Other road and traffic rules and regulations
R Narrow bridgesGWarning
COMAND may give incorrect navigation
commands if the data in the digital map does
not correspond with the actual road/traffic
situation. Digital maps do not cover all areas
nor all routes within an area. For example, if
the traffic routing has been changed or the
direction of a one-way road has been
reversed.
For this reason, you must always observe
applicable road and traffic rules and
regulations during your journey. Road and
traffic rules and regulations always have
priority over the navigation commands
generated by the system.
GWarning
Navigation announcements are intended to
direct you while driving without diverting your
attention from the road and driving.
Please always use this feature instead of
consulting the map display for directions.
Looking at the icons or map display can
distract you from traffic conditions and
driving, and increase the risk of an accident.
General information
Operational readiness of the navigation
system
The navigation system must determine the
position of the vehicle before first use or
whenever operational status is restored.
Therefore, you may have to drive for a while
before precise route guidance is possible.
GPS reception
Among other things, correct functioning of
the navigation system depends on GPS
reception. In certain situations, GPS
reception may be impaired, there may be
interference or there may be no reception at
all, e.g. in tunnels or parking garages.
Input restriction
On vehicles for certain countries, there is a
restriction on entering data.
The restriction is active at vehicle speeds
above approximately 3 mph (5 km/h). The
restriction is deactivated as soon as the
speed falls below 2 mph (3 km/h).
When the restriction is active, certain entries
cannot be made. This will be indicated by the
fact that certain menu items are grayed out
and cannot be selected.
The following entries are not possible, for
example:
R entering the destination city and street
R entering a destination via the map
R entering in the vicinity of a city or via a
name search
R editing entries
R direct entry using the number keypad
Other entries are still possible, such as
entering points of interest in the vicinity of the
destination or current position.
Switching on navigation modeXPress the S function button once or
twice.
or
XSelect Navi in the main function bar by
sliding ZV and turning cVd the COMAND
controller and press W to confirm.
In both cases, you will see the map either
with or without the menu shown.Navigation149COMANDZ
Page 214 of 524

HD Radio
Important notes
The "HD Radio" section provides detailed
information on the following:
R special functions available exclusively for
HD Radio when compared with analog AM
and FM radio
R selecting an HD Radio station
R displaying program information
i Optional HD Radio equipment is required
to make use of the HD Radio functions
described here. Registration is not
required.
i HD Radio functions offer:
R digital broadcasting in the same
wavebands as analog AM/FM. The
analog AM/FM stations remain available
on the same frequencies when selecting
a station.
R multiple program streams via a single
AM/FM frequency (e.g. HD1, HD2 etc.)
R interference-free, clear reception
R FM: sound reproduction in CD quality;
AM: sound reproduction as for analog FM
stations
R numerous data services, text-based
information display: artist's name, track
name etc.
Further information on HD Radio can be
found at http://www.hdradio.com .
i Please note that sub-programs and
program information shown in the
illustrations are dependent on the program
broadcast by the respective radio station.
The program contents may vary. The sub-
programs and programs shown in the
illustrations in this manual may therefore
differ from the sub-programs and programs
broadcast by radio stations.
Switching on HD Radio
i As HD Radio stations are broadcast in the
AM/FM wavebands, operating HD Radio is
similar to operating analog AM/FM radio.
This chapter describes only those functions
that differ from standard FM radio
functions.
Operating analog FM/AM radio is described
in the "Radio" chapter ( Y page 208).
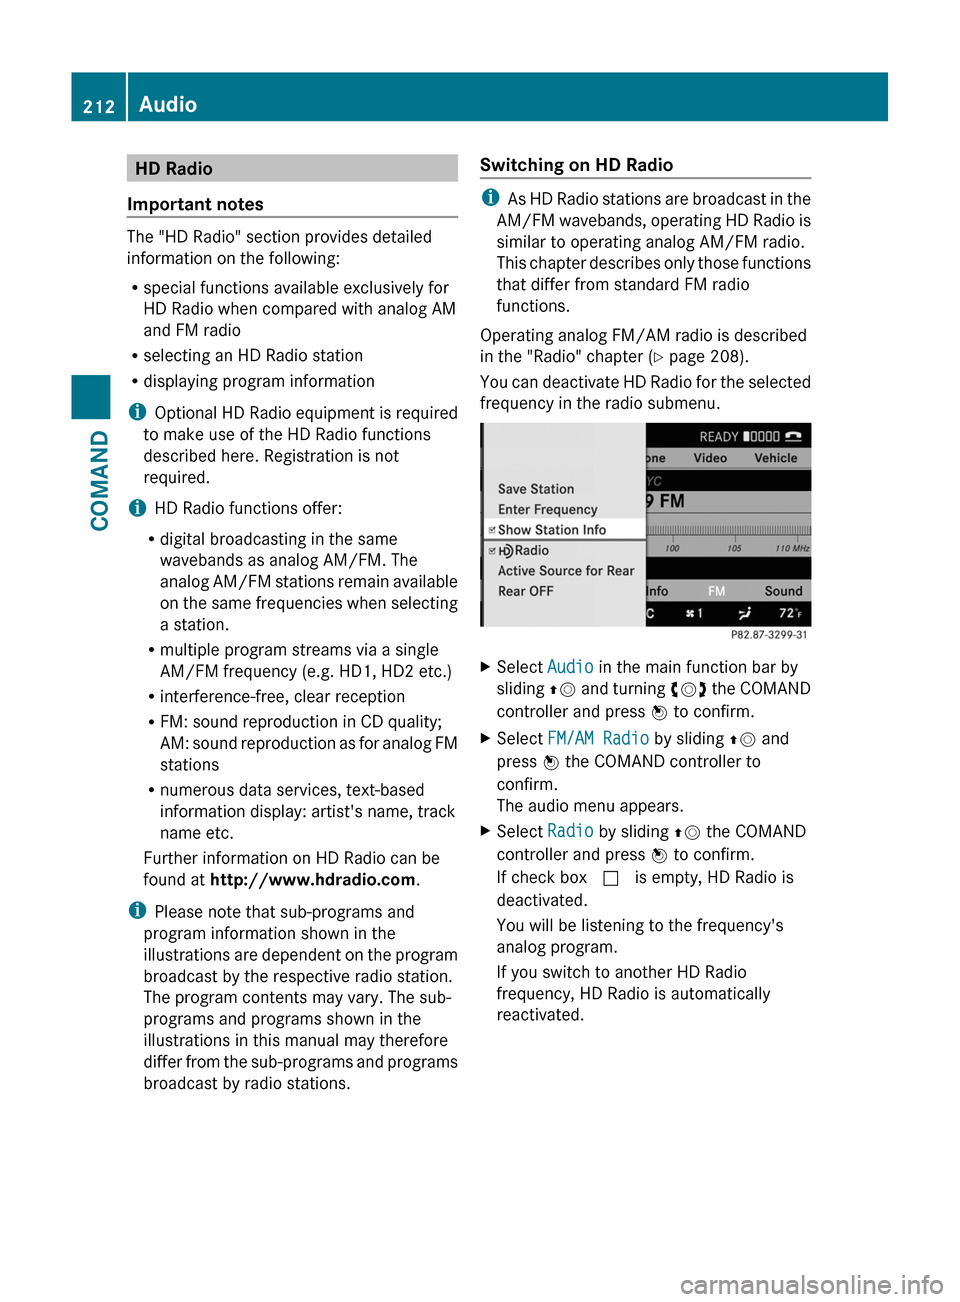
You can deactivate HD Radio for the selected
frequency in the radio submenu.
XSelect Audio in the main function bar by
sliding ZV and turning cVd the COMAND
controller and press W to confirm.XSelect FM/AM Radio by sliding ZV and
press W the COMAND controller to
confirm.
The audio menu appears.XSelect Radio by sliding ZV the COMAND
controller and press W to confirm.
If check box c is empty, HD Radio is
deactivated.
You will be listening to the frequency's
analog program.
If you switch to another HD Radio
frequency, HD Radio is automatically
reactivated.212AudioCOMAND
Page 237 of 524

If COMAND is equipped with a Media
Interface, external audio sources are
connected using the associated cable set.
The audio cable set then replaces the audio
AUX socket.
iYou can find more information on the
Internet at http://www.mercedes-
benz.com/connect and in the "Media
Interface mode" section (Y page 229).
Activating audio AUX mode
When you connect an external audio source,
audio AUX is not selected automatically.
XSelect Audio in the main function bar by
sliding ZV and turning cVd the COMAND
controller and press W to confirm.
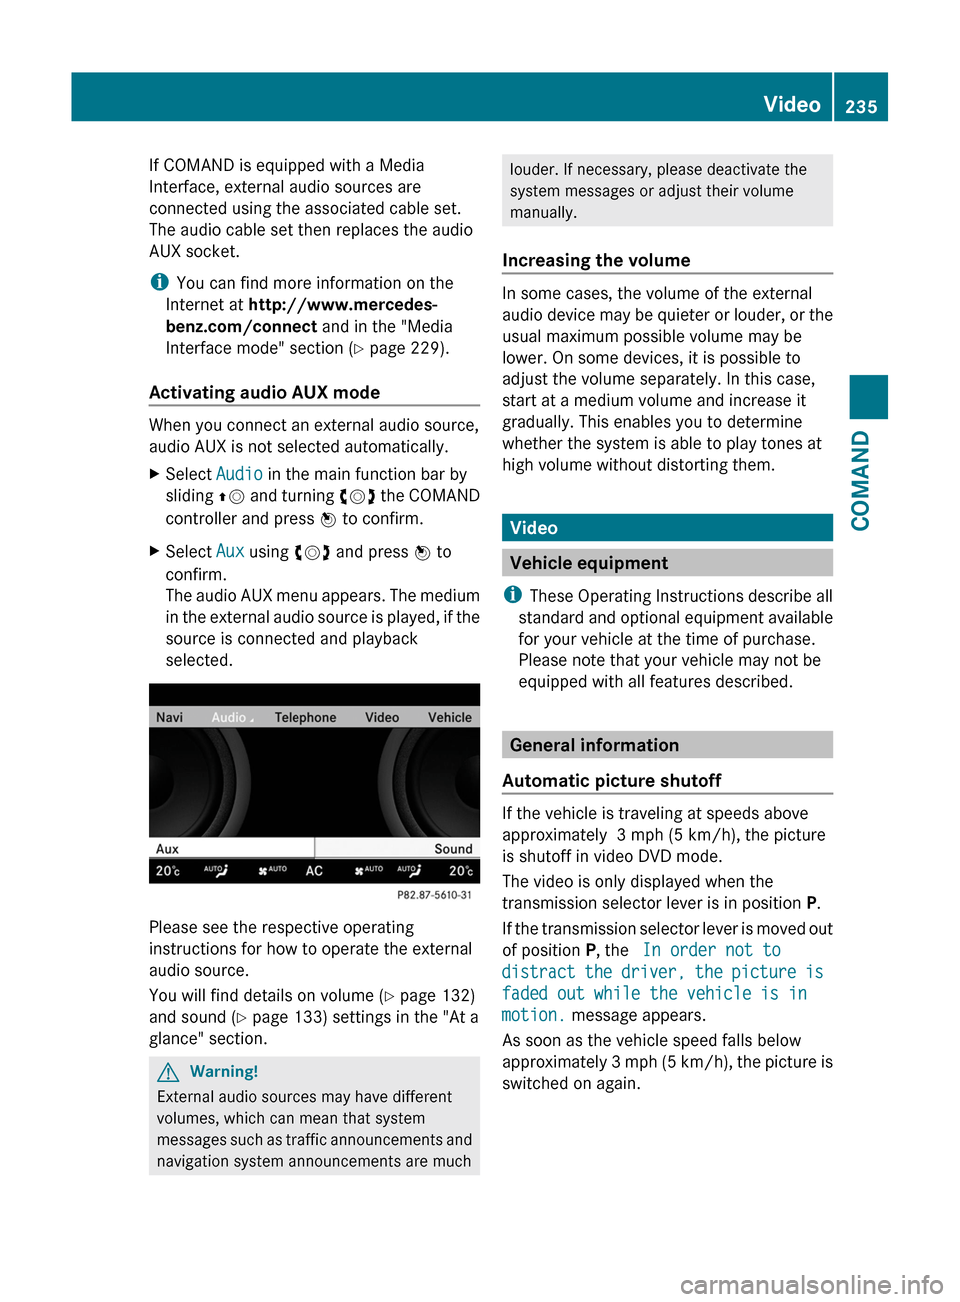
XSelect Aux using cVd and press W to
confirm.
The audio AUX menu appears. The medium
in the external audio source is played, if the
source is connected and playback
selected.
Please see the respective operating
instructions for how to operate the external
audio source.
You will find details on volume (Y page 132)
and sound (Y page 133) settings in the "At a
glance" section.
GWarning!
External audio sources may have different
volumes, which can mean that system
messages such as traffic announcements and
navigation system announcements are much
louder. If necessary, please deactivate the
system messages or adjust their volume
manually.
Increasing the volume
In some cases, the volume of the external
audio device may be quieter or louder, or the
usual maximum possible volume may be
lower. On some devices, it is possible to
adjust the volume separately. In this case,
start at a medium volume and increase it
gradually. This enables you to determine
whether the system is able to play tones at
high volume without distorting them.
Video
Vehicle equipment
iThese Operating Instructions describe all
standard and optional equipment available
for your vehicle at the time of purchase.
Please note that your vehicle may not be
equipped with all features described.
General information
Automatic picture shutoff
If the vehicle is traveling at speeds above
approximately 3 mph (5 km/h), the picture
is shutoff in video DVD mode.
The video is only displayed when the
transmission selector lever is in position P.
If the transmission selector lever is moved out
of position P, the In order not to
distract the driver, the picture is
faded out while the vehicle is in
motion. message appears.
As soon as the vehicle speed falls below
approximately 3 mph (5 km/h), the picture is
switched on again.
Video235COMANDZ
Page 244 of 524

Switching on video AUX modeXSelect Video in the main function bar by
sliding ZV and turning cVd the COMAND
controller and press W to confirm.
If video AUX mode was the last mode
selected, it will now be active.
If another video source is switched on, you
can now switch to video AUX mode in the
video menu.XSelect Video and press W to confirm.XSelect Aux and press W to confirm.
The video AUX menu appears. You will hear
and see the content of the external video
source if it is connected and switched to
playback.
For details on how to operate the external
video source, see the respective device's
operating instructions.
Showing/hiding the menu
XTo show: press W the COMAND
controller.XTo hide: slide ZV the COMAND controller
and confirm Full screen by pressing W.
Volume and sound settings
You will find details on volume ( Y page 132)
and sound ( Y page 133) settings in the "At a
glance" section.
GWarning!
External video sources may have different
volumes, which can mean that system
messages such as traffic announcements and
navigation system announcements are much
louder. If necessary, please deactivate the
system messages or adjust their volume
manually.
i It may be the case that a device which is
connected as an external video source
seems quieter or louder in the vehicle, or
that the usual maximum volume cannot be
reached. On some devices, it is possible to
adjust the volume separately. In this case,
start at a medium volume and increase it
gradually. This enables you to determine
whether the system is able to play the
music at high volume without distorting it.
Rear Seat Entertainment System
Vehicle equipment
i These Operating Instructions describe all
standard and optional equipment available
for your vehicle at the time of purchase.
Please note that your vehicle may not be
equipped with all features described.
General information
Important safety notes
GWarning
The RSE CD/DVD player is a Class 1 laser
product. There is a danger of invisible laser
radiation when you open or damage the cover.
Do not remove the cover. The RSE CD/DVD
player does not contain any parts which can
be serviced by the user. For safety reasons,
have any necessary service work performed
by qualified personnel.
GWarning
The driver should not wear a Rear Seat
Entertainment headset while operating the
vehicle under any circumstances. The use of
a headset while driving the vehicle could
drastically impair the ability to react to audible
traffic conditions (e.g. emergency sirens from
police/fire/ambulance, another car’s horn,
etc.).
GWarning
When not in use, headsets or external video
sources should be stored in a safe location
(e.g. one of the vehicle’s storage
compartments) so that they are not loose
within the passenger compartment during
braking, vehicle maneuvers or a traffic
242Rear Seat Entertainment SystemCOMAND
Page 275 of 524

Low-beam headlampsXTo switch on the low-beam headlamps:
turn the key in the ignition lock to position
2 or start the engine.XTurn the light switch to L.
The T indicator lamp on the light switch
lights up.
Daytime running lamps
Daytime running lamps in Canada
The "daytime running lamps" function is
required by law in Canada. It cannot therefore
be deactivated.
XTurn the light switch to $ or c .
When the engine is on: depending on the
ambient light, the daytime running lamps or
the low-beam headlamps are switched on.
When the low-beam headlamps are
activated, the T indicator lamp on the
light switch lights up.
When the engine is running and the vehicle is
stationary or if the electronic parking brake is
applied: if you move the selector lever from a
driving position to P, the daytime running
lamps/low-beam headlamps go out after
three minutes.
When the engine is running, the vehicle is
stationary and in high ambient light
brightness: if you turn the light switch
to T , you turn on the daytime running
lamps and low-beam headlamps.
If the engine is running and you turn the light
switch to L, the manual settings take
precedence over the daytime running lamps.
Daytime running lamps in the USA
In the USA, the daytime running lamps are
deactivated upon delivery from the factory.
XTo activate: activate the daytime running
lamps function in the on-board computer
( Y page 377).XTurn the light switch to $ or c .
When the engine is on: depending on the
ambient light, the daytime running lamps or
the low-beam headlamps are switched on.
When the low-beam headlamps are
activated, the T indicator lamp on the
light switch lights up.
If the engine is running and you turn the light
switch to T or L , the manual settings
take precedence over the daytime running
lamps.
Automatic headlamps
GRisk of accident
If the light switch is set to c, the low-beam
headlamps will not come on automatically if
it is foggy. This could endanger you and
others. Therefore, turn the light switch to
L in fog.
The automatic headlamp feature is only an
aid. The driver is responsible for the vehicle's
lighting at all times.
GRisk of accident
When it is dark or foggy, turn the light switch
quickly from c to L . Otherwise, the
headlamps could switch off temporarily and
you could cause an accident.
XTo switch on automatic headlamp
mode: turn the light switch to c.
Key in position 1 in the ignition lock: the
side lamps are switched on or off
automatically depending on the brightness
of the ambient light.
With the engine running: depending on the
brightness of the ambient light, the daytime
running lamps 15
or the side lamps and low-
beam headlamps are switched on or off
automatically.15 Only if daytime running lamps have been activated via the on-board computer.Exterior lighting273Lights and windshield wipersZ