2011 MERCEDES-BENZ R-Class phone
[x] Cancel search: phonePage 17 of 214

Funct
ion Pag
e E
Nu
mb erkey pad To
sele ctstatio nsvia the
st atio npresets 119
To
store stations manually 119
Pass
code entry 42
Tele
phone number entry 100
DTMF
tonetransmissi on 101
U
To
set the map scale
(zooms in) 81
T
To
set the map scale
(zooms out) 81
F
2
Press
briefly:
Deletes individual
chara cters 24
Press
andhold:
Deletes anentire entry 24
G
k
Press
briefly:
Exits menus andswitches
to the next menu levelup 16
Press
andhold:
Switches tothe basic
disp layforthe currently
sele cted opera tingmode 16
H
9
Press
briefly:
Confirms selection orentry 21
Stores
settings 28
Shows/hi
desthemenu
system 47
Press
andhold:
Adopts alis te ntry 24 Fu
nctio n Pag
e I
9/:
/;/= Sel
ects asta tion 119
Sel
ects atrac k 134
Sel
ects amenu itemo rlist
ent ry 21
Ex
its amen uor list 30
Moves
themap 56
J
Adj
usts thevolume 27
K
Swit
ches COMA NDon/ off 27
L
F/E
Selec
tsast ation using the
st ation scan 119
Selec
tsthe next/prev ious
tr ack 134
Fast
rewin d/fast forward 135
M
6
Ac
cept sa call 100
Redials 100
N
~
Rejec
tsacall 100
En
ds an act ive call 101
O
8
Mute 27
To
switc hoff navig ation
ann ounc emen ts 27
P
Ø
To
switc hon navig ation
mode 47COMAND
operating syst em
15Ataglance
Page 19 of 214

COMAN
Ddis pla y
Disp layover view The
COMA NDdispl aysho wsthefun ction curren tlyselec teda nd itsassoci atedmenu s.The
CO MAND displ ayisdivid ed into severalar ea s.
The radio displ ayissho wninthe exampl e. :
Statu sba r
; Tocallup the audio menu
= Mainfunctio nbar
? Display/s electionw indow
A Radio menubar
St atus bar:shows thetimeand thecurr entsettings for radio andtelep honeoperat ion.
The main functionsnavig ation,audio, telephoneand video feature additio nalmen us.This is
indic ated bytriangle ;.Thefollowing tableliststheavaila blemenu items.
Main functionbar =allow syou tocall upthe desired mainfunction.
In the example, themain functionaudi ois set toradio mode anddispla y/selection
window ?isactive.
Radi omenu barAallow syou tooperate theradio functions.
Menu overview The
table liststhemenus availableafter calling upthe main functionnavigation, audio,
telephone orvideo inthe main functionbar. COMAND
operatingsystem
17Ataglance
Page 27 of 214

i
You willfindfurt her informat ioninthe
"Dest inationentry" sect ion(Ypage 48). Enter
ingchar acters inthead dress
and theph one book
Intr oduct ion The
followin gsect iondesc ribes howtoent er
char acters inthe phon ebook (Ypage 102)
and theaddress book(Ypage 110)when
cre atin ganew entry.
Creat inganew entr yint he phone book X
Ca llup the inpu tmenu with data fields
(Y page 105). Phone
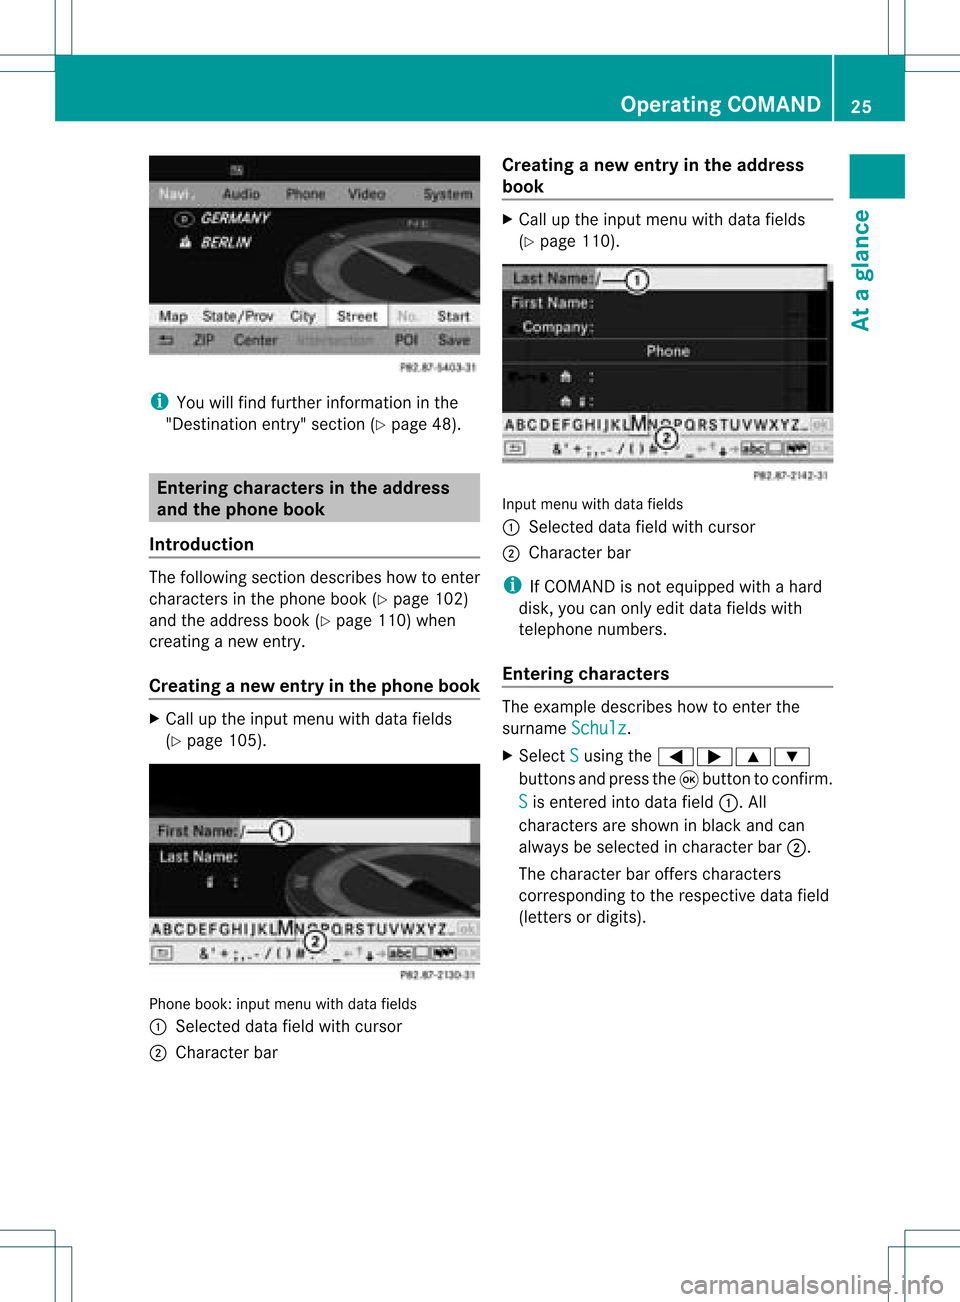
book:inputmenu withdata fields
: Select eddata fieldwithcursor
; Character bar Creat
inganew entry inthe address
book X
Call upthe input menu withdata fields
(Y page 110). Input
menu withdata fields
: Select eddata fieldwithcursor
; Character bar
i IfCOMAND isnot equipped withahard
disk, youcan only editdata fields with
telephon enumbers.
Entering character s The
example describes howtoent erthe
surname Schulz .
X Select S using
the=;9:
button sand press the9button tocon firm.
S is
ent ered intodata field:.All
charact ersare shown inblack andcan
alway sbe select edincharact erbar ;.
The charact erbar offer scharact ers
corr espondin gto the respect ivedata field
(lett ersordigits). Opera
tingCOMAND
25Ataglance Z
Page 28 of 214

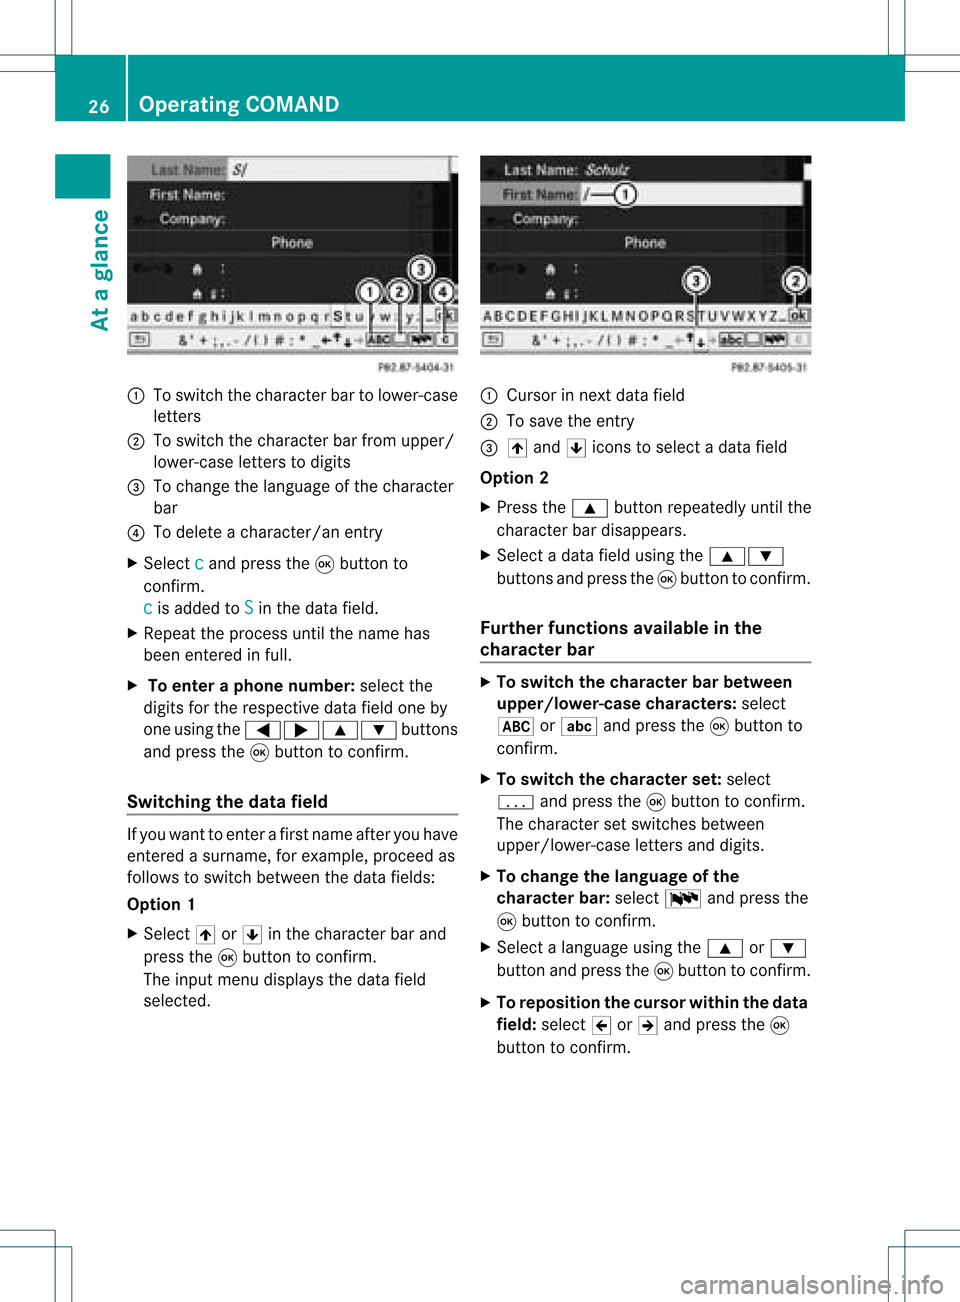
:
Toswitch thecharact erbar tolower-case
letter s
; Toswitch thecharact erbar from upper/
lower-case lettersto digits
= Tochange thelanguage ofthe charact er
bar
? Todelete acharact er/anentry
X Select c and
press the9button to
conf irm.
c is
added toS in
the data field.
X Repeat theprocess untilthename has
been entered infull.
X To enter aphone number :select the
digits forthe respect ivedata fieldoneby
one using the=;9: buttons
and press the9button toconf irm.
Switching thedatafield If
you want toent erafirst name afteryouhave
ent ered asurname, forexample, proceedas
follows toswitch between thedata fields:
Option 1
X Select 4or5 inthe charact erbar and
press the9button toconf irm.
The input menu display sthe data field
selected. :
Cursor innext data field
; Tosave theentry
= 4 and 5icons toselect adata field
Option 2
X Press the9 button repeatedly untilthe
charact erbar disappears.
X Select adata fieldusing the9:
button sand press the9button toconf irm.
Furt herfunctions availableinthe
chara cterbar X
To switch thechara cterbarbetween
upp er/lower-case characters: select
* orE andpress the9button to
conf irm.
X To switch thechara cterset:select
p andpress the9button toconf irm.
The charact erset switches between
upper/lower-case lettersand digits.
X To change thelanguage ofthe
chara cterbar:select Bandpress the
9 button toconf irm.
X Select alanguage usingthe9 or:
button andpress the9button toconf irm.
X To reposition thecursor withinthedata
field: select 2or3 and press the9
button toconf irm. 26
Opera
tingCOMANDAtaglance
Page 30 of 214

Adj
usting thev olum efor traf fic rep orts
and navigat ionannou ncemen ts i
You cansetthevolum eof traff icand
nav igat ionann ounc emen tsrelat ivetothe
volum eof theaudio orvideo source.
Dur ing traff icor nav igat ionann ounc emen ts:
X Turn orpres sth eq con trol kn ob.
or
X Pres sth eW orX buttononthe
mult ifunction steerin gwheel.
Adj usting thevolum efor telep hone
calls You
canadjus tthe volume forhands-free
mode during atelephone call.
X Turn orpress theqcont rolknob.
or
X Press theW orX button onthe
multifunction steeringwheel. Adjust
ingthe sound settings
Calling upthe sound menu You
canmake various soundsettingsfor the
different audioand video sources. Thismeans
that itis possible toset more bassforradio
mode thanforCD mode, forexample. Youcan
call upthe respective soundmenufromthe
menu ofthe desired mode.
The example describes howtocall upthe
sound menuinradio mode.
X Press the$ functionbutton.
The radio displa yappea rs.You willhear the
last station playedon the last waveba nd.
X Select Sound using
the:=;
buttons andpress the9button toconfirm .
You cannow setthe treble andbass orthe
bala nce and fader forradio mode. Adjust
ingtreble andbass X
Select Treble or
Bass in
the sound menu
using the:=; buttonsonthe
remote controland press the9button to
confirm .
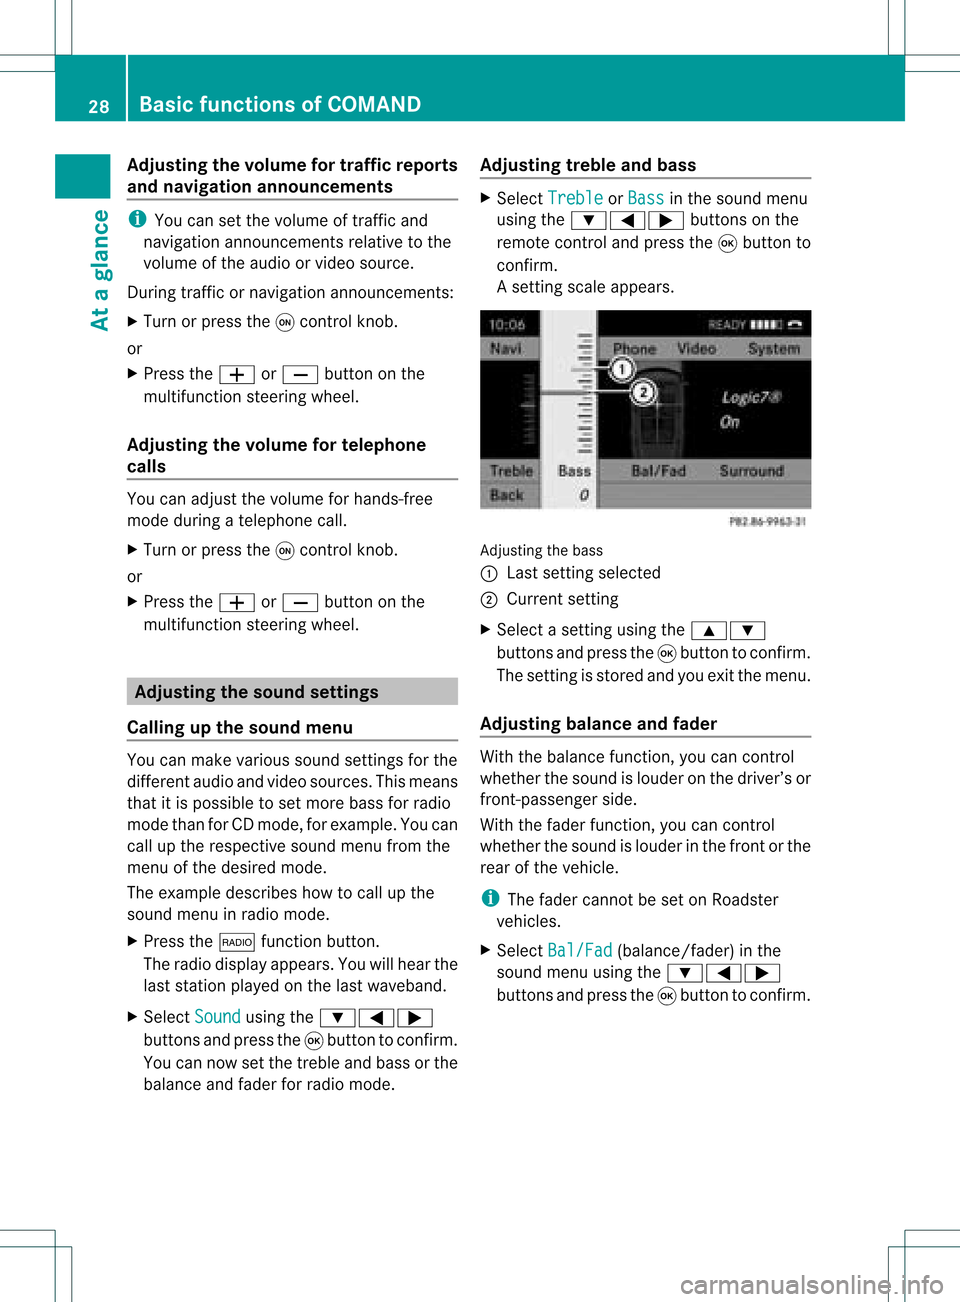
As etting scale appears. Adj
usting thebass
: Last settingselect ed
; Current setting
X Select asett ingusing the9:
button sand press the9button tocon firm.
The settingisstor edand youexit themenu.
Adju sting balance andfader With
thebalance function,you can control
whether thesound islouder onthe driver’s or
fron t-passenger side.
With thefader function,you can control
whether thesound islouder inthe fron torthe
rear ofthe vehicle.
i The fader cannot beset onRoadster
vehicles.
X Select Bal/Fad (bala
nce/ fader) inthe
sound menuusingthe:=;
buttons andpress the9button toconfirm . 28
Basic
functions ofCOMANDAt aglance
Page 32 of 214

Switching
surround sound on/off Example:
switching onsurround soundfor
radio mode
X Press the$ functionbutton.
The radio display appears. Youwillhear the
last station playedon the last waveband.
X Select Sound using
the:=;
buttons andpress the9button toconf irm.
X Select Surround and
press the9button
to conf irm. X
Select Logic7 ®
On or
Logic7 ®
Off using
the 9: buttonsandpress the9
button toconf irm.
Depending onyour selection, surround
sound isswitched onoroff and themenu
is exited.
X To exit themenu without storing:press
the % backbutton orthe = button.
i Please bearthefollowing inmind:
For anoptimum audioexperience onall
seats when Logic7 ®
is switched on,
bala nce and fader should beset tothe
cent erofthe passenger compartmen t.
You willachieve thebest sound results by
play inghigh-quali tyaudi oand video DVDs.
MP3 track sshould haveabitrat eof at least
128 kbit/s.
If radio receptio nispoor, e.g.inatunnel,
you should switchoffLogic 7®
,as itmay
otherwise switchbetween stereoand
mono andcause temporary sound
distortions. On
some stereo recordings, thesound
characteristics maydiffer from
conven tionalstereo playback. Rear
SeatEntertainment Components
Overview The
Rear SeatEntertainment System
comprises:
R two screens behindthefront -seat head
restraints
R the remote control
R aCD/DVD drive
R AUX jacks onboth screens (AUXdispla y)
and onthe CD/DVD drive(AUX drive)
R two sets ofwireless headphones Rear-comp
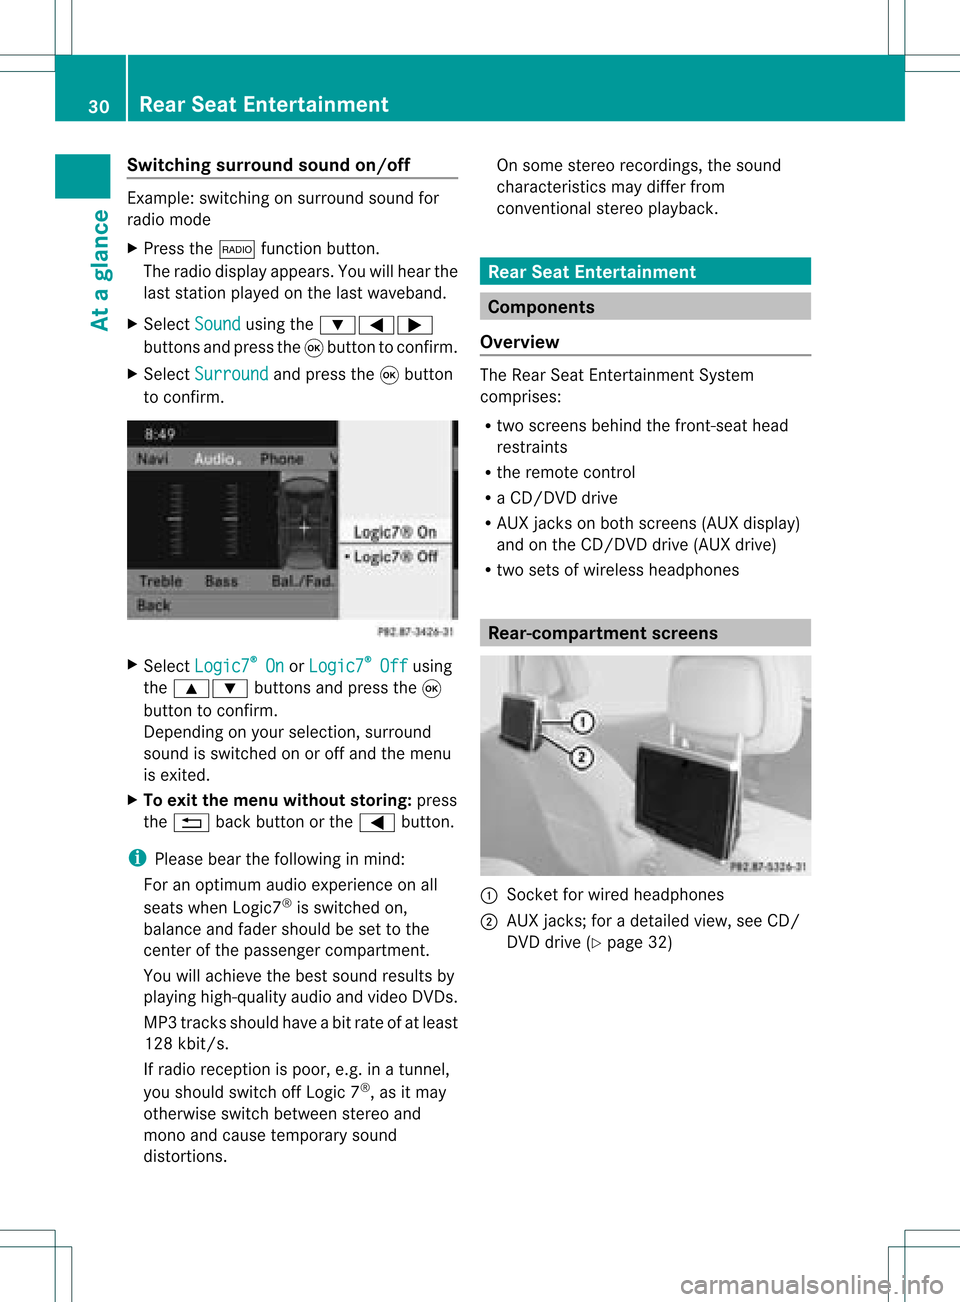
artment screens :
Sock etfor wired headphones
; AUX jacks; foradetailed view,seeCD/
DVD drive (Ypage 32) 30
Rear
SeatEntertainmentAtaglanc e
Page 35 of 214

Wirel
essheadphone s
Ove rview :
Volu mecontrol
; Tosele ctascreen forthe headpho nes
= Battery traycover
? Toswi tch the wire less headpho neson/off
A Indica torlamp, various displays (Y pag e33)
X Open bothsidesof the headpho nesand adjustthe fitofthe headpho nesbypul ling the
hea dpho neband inthe direction ofthe arrow .
Swi tchin gthe wirele ssheadphone son/
off X
Press button ?.
Dependi ngon the previ ousstate, the
hea dpho nesareswitched onoroff. To
prese rvethe batteri es,the headpho nes
au tomatica llyswi tch offifthey have not
receive dan IRsigna lfor abo utthree
minutes .
Adjusting thevolume ofthe
headphone s X
Turn volumecontrol :until thedesi red
volu mehas been set. i
Ifyou have connected wiredhea dpho nes
to arear-comp artmentscreen,youcan
adju stthe volu mebypress ingbuttons C
on the remote control(Ypag e31).
Sel ecting ascree nfor thehea dphones X
Mov epush slider; toL(lef t-han dsc ree n)
or R(rig ht-hand scree n).
Ind icat orlam p,dis pla ys The
color oftheind icat orlamp shows
whet hertheheadp honesare swit ched on or
off and indicat esthech arge levelof the
bat teries inserted. Rea
rSea tEnt ertain men t
33Ataglan ce Z
Page 36 of 214

Disp
lay St
ate Gree
n The
head phonesare swit ched
on and thebat terie sare fully
ch arg ed. Red The
head phonesare swit ched
on and thebat terie sare
almo stdisc harged. No
disp lay
(dar k) The
head phonesare swit ched
of for thebat terie sare
disc harged, inser ted
in co rrec tly or notin ser ted. Connect
ingadditiona lhea dphon es You
canconn ecta na ddition alset ofwired
headphones toeach rear-compart ment
scre en(Ypage 30).Theconnection sock etis
for headphones with1/8inch stereojack
plugs andanimpedanc eof 32 ohms. Changing
batteries
Bot hthe remot econ troland thetwo sets of
wireless headphones requirebatteries.
Changing thebatt eries (Ypage 162) Rear
view camer a
The rear view camera isonly available forthe
M-Class andtheR-Class. G
War
ning!
The rear view camera ismerely anaid.
Please observe thecorr espondin gnotes in
your vehicle's Operator's Manual.
If your vehicle isequipped witharear view
camera, itsimage isautomatically relayedto
the COMAND displayifthe funct ionis
activated andyouengage reverse gear.
If the funct ionisactivated, theCOMAND
display willautomatically switchbacktothe
previously selecteddisplayassoon asyou
shift outofreverse gear. X
Press theW functionbutton .
The system menuappears.
X Select Settings and
press the9button
to conf irm.
X Select RearViewCamera and
press the
9 button toconf irm.
X Select Activation byRgear and
press
the 9button toconf irm.
The funct ionisswitched onO oroff ª,
depending onthe previous status. 34
Rear
view cameraAtaglance