2011 MERCEDES-BENZ M-CLASS SUV roof
[x] Cancel search: roofPage 195 of 389

vehicle. Yo
ucould dam aget he vehicle or
the objects.
The sensor smay not detect snow and
objects which absorb ultrasonic sources.
Ultrasonic sources, such as an automatic
car wash, alorry's compressed-air brakes
or ap neumatic drill, coul dcause PARK-
TRONI Ctom alfunction.
PARKTRONIC may not fun ctioncorrectly on
uneven terrain.
Minimum distance Centre approxima
tely 20 cm Corners approximately 15 cm
If there is an obstacle within this range, the
relevan twarning displays light up and awarn-
ing ton esounds. If th edistanc efalls below
the minimum, the distanc emay no longer be
shown.
Warning displays The warning displays show the distan
ce
between th esensor sand the obstacle. The
warning display for the fron tarea is located
on th edashboard above the centre air vents.
The warning display for the rear area is in the
roof lamp in the rear compartment. Warning display for the front area
: Segments on the left-hand side of the
vehicle
; Segments on the right-hand side of the
vehicle
= Segments sho wingoperational readiness The warning display for each side of the vehi-
cle is divided into fiv
eyellow and two red seg-
ments. PARKTRONI Cisoperational if yellow
segment sshowing oper ational readiness =
light up.
The selected transmission position and the
direction in which the vehicle is rolling deter-
mine which warning display is activ ewhen the
engin eisrunning. Transmission
position Warning display
D
Front area activated
R,
Nor the vehicle
is rolling back-
wards Rea
rand front areas
activated P
No area
sactivated One or more segment
slight up as the vehicle
approaches an obstacle, depending on the
vehicle's distance from the obstacle.
From the:
R sixth segment onwards, you wil lhear an
intermitten twarnin gtonef or approx-
imately two seconds.
R seven thsegment onwards, you will hear a
warnin gtonef or approximately two sec-
onds. This indicates that you have now
reached the minimu mdistance.
Deactivating/activating PARKTRONIC :
Indicator lamp
; To deactivate/activate PARKTRONIC 192
Drivin
gsystemsDrivin gand parking
Page 309 of 389
X
To close: detach hook =from the luggage
compartment's uppe rseal ?.
X Fasten hook =to the brac ketont he
underside of the luggage compar tment
floor.
X Fold the luggage compartmen tfloor down.
X Press the luggage compar tment floor
down ;until it engages. Roof car
rier
Important safet ynotes G
WARNING
An incorrectly secured roof carrier, ski rack or
load could become detached from the vehi-
cle. These objects might then be thrown
around and could injur eyou or other sor
caus eana ccident.F ollow the roof carrier /ski
rack manufacturer's installation instructions
and special instructions for use.
The roof load raises the vehicle's centre of
gravity, thereb yaffecting vehicl ehandling.
You must alway sobserv ethe maximum roof
load of 10 0kg. Always adapt your driving style
to the prevailin groad, traffic and weather
condition sand drive with particula rcare if the
roof is laden.
! Mercedes -Benz recommends that you
only use roof carrier sthat hav ebeen tested
and approved for Mercedes-Benz vehicles.
This helps to preven tdamage to the vehi-
cle.
Position the load on the roof carrier in such
aw ay that the vehicle will not sustain dam-
age even when it is in motion.
Depending on the vehicle equipment,
ensure that when the roof carrier is fitted
you can:
R raise the sliding sunroof fully
R open the panorama sliding sunroof fully
R open the tailgate fully Attaching the roof carrier
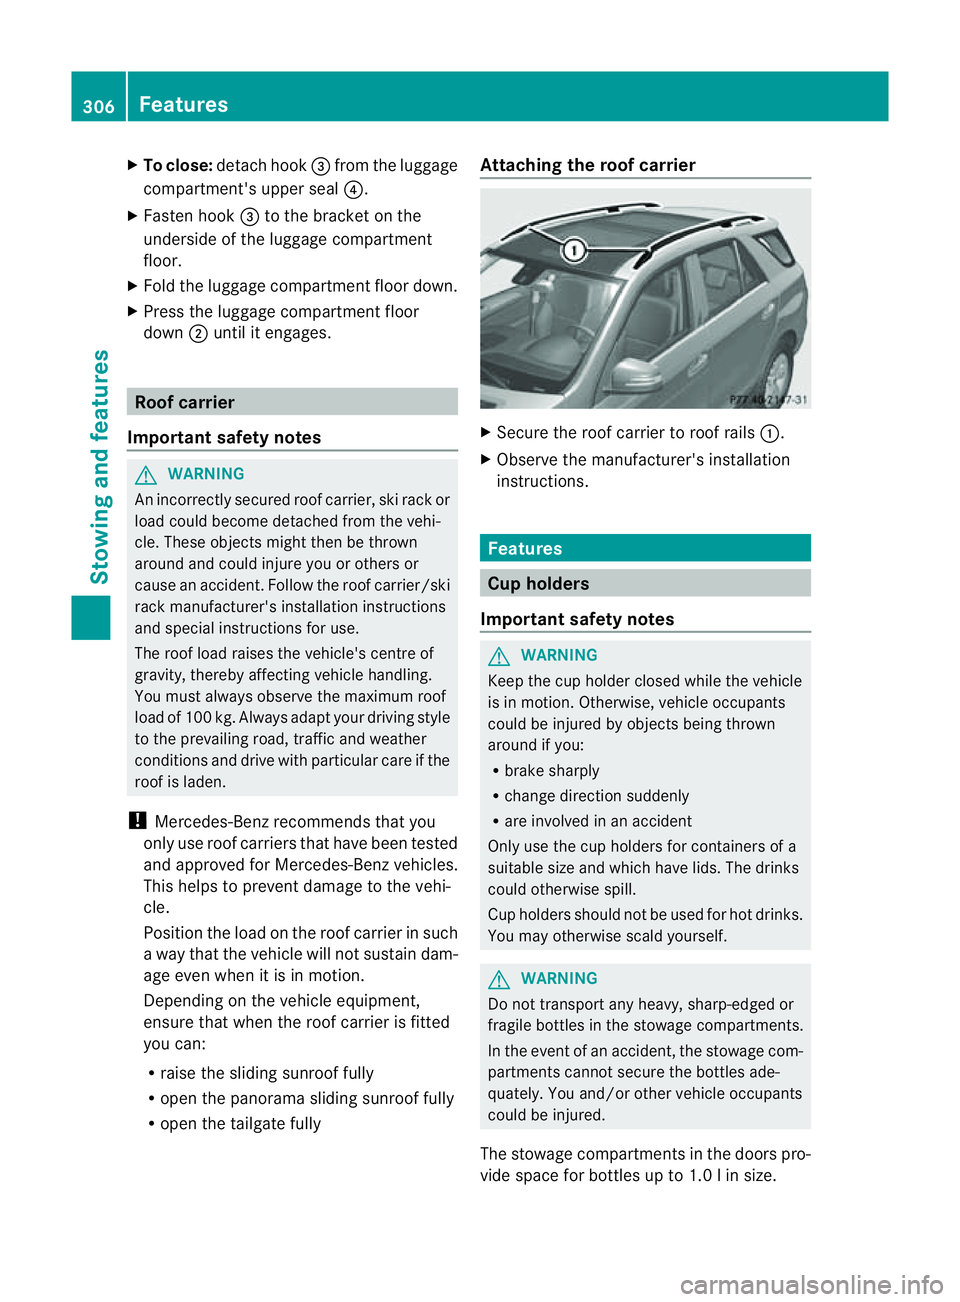
X
Secure the roof carrier to roof rails :.
X Observe the manufacturer' sinstallation
instructions. Features
Cup holders
Important safety notes G
WARNING
Keep the cup holder closed whil ethe vehicle
is in motion. Otherwise, vehicle occupants
coul dbei njured by object sbeing thrown
around if you:
R brak esharply
R change direction suddenly
R arei nvolved in an accident
Only use the cup holders for container sofa
suitable size and whic hhave lids. The drinks
could otherwise spill.
Cup holders shoul dnot be used for hot drin ks.
You may otherwise scald yourself. G
WARNING
Do not transport any heavy, sharp-edged or
fragile bottles in the stowage compar tments.
In the event of an accident, the stowage com-
partments can notsecur ethe bottles ade-
quately. You and/or other vehicle occupan ts
coul dbei njured.
The stowage compartments in the doors pro-
vide space for bottles up to 1.0 linsize. 306
FeaturesStowin
gand features
Page 328 of 389
X
Release the electric parking brake.
X Switc hoff the ig nition and leav ethe key in
th ei gnition lock.
! Mak esuret hat:
R the side windows and slidin gsunroo fare
close dcompl etely.
R the blower for the ventilation/heating is
switched off (OFF button is depressed).
R the windscreen wiper switch is at posi-
tion 0.
The vehic lecoul dotherwise be damaged.
After using an automatic car wash, wip eoff
wa xfrom th ewindscreen and the wiper
blades. This wil lprevent smears and red uce
wiping noises cause dbyresidue on the wind-
screen.
Washing by hand In some countries, washing by hand is only
allowed at speciall
yequipped washing bays.
Observe the lega lrequirements for each indi-
vidual country.
X Do not use hot water and do not wash the
vehic lein direct sunlight.
X Use asoft sponge to clean.
X Use amild cleaning agent, such as acar
shampoo approved by Mercedes-Benz.
X Thoroughly hos edown the vehicle with a
gentle jet of water.
X Do not point the water jet directly towards
the air inlet.
X Use plenty of water and rinse out the
sponge frequently.
X Rinse the vehicle with clean water and dry
thoroughly with achamois.
X Do not let the cleanin gagent dry on the
paintwork.
When using the vehicle in winter, remove all
traces of roa dsalt deposits carefully and as
soon as possible. High-pressure cleanin
gequipment G
WARNING
Do not use high-pressure cleaners with circu-
lar-jet nozzles (dirt grinders) to clean your
vehicle, in particular the tyres. You could oth-
erwis edamage the tyres and cause an acci-
dent.
! Always maintain adistance of at least
30 cm between the vehicle and the high-
pressure cleaner nozzle. Information about
the correct distance is available from the
equipment manufacturer.
Move the high-pressure cleaner nozzle
around when cleaning your vehicle.
Do not aim directly at any of the following:
R tyres
R door gaps, roof gaps, joint setc.
R electrical components
R battery
R connectors
R lights
R seals
R trim elements
R ventilatio nslots
Damaged seals or electrical components
can lead to leaks or failures.
Cleanin gthe whee ls !
Do not use acidic whee lcleaning products
to remov ebrake dust .This could damage
wheel bolts and brake components.
! Do not par kupthe vehicle for an extended
period straight after cleanin git, particularly
after having cleaned the wheels with wheel
cleaner. Wheel cleaners could cause
increased corrosio nofthe brake discs and
brake pads/linings. For this reason, you
should drive for afew minutes after clean-
ing. Brakin gheats the brak ediscs and the
brake pads/linings, thus drying them. The
vehicle can then be parked up. Care
325Maintenance andcare Z
Page 333 of 389
res
ultsd epend on the type of dirt and
how long it has been there.
R clean Alcantara® covers with adamp
cloth. Make sure you wipe entire seat
sections to avoid leavin gvisible lines.
i Notethat regular car eisessentia lto
ensure that the appearance and comfor tof
the covers is retaine dovertime.
Cleaning th eseat belts X
Use clean ,lukewarm water and soap solu-
tion.
! Do not clean the seat belts using chemical
cleaning agents. Do not dry the seatbelts
at temperatures above 80 †orbyexposing
them to direc tsunlight.
Cleaning th erooflining and carpets X
Roof lining: useasoft brush or acleaning
agent recommended and approve dby
Mercedes-Ben ztoremov eheavy soiling.
X Carpets: use the carpet and textile clean-
ing agents recommended and approved by
Mercedes-Benz. 330
CareMaintenance and care
Page 360 of 389
Tyre tread
G
WARNING
Bea rinm ind that:
R tyre gri pdecrease srapidly on wetroads
when the tread depth is less than 3mm.
Thus ,you should repl acet yres that have
insufficient tread.
R winter tyres sho uld bereplaced when the
trea ddepth is 4mmorl ess as they no lon-
ger provide adequat egrip.
R thet rea donat yre may not wear evenly.
Thus ,you should regularly chec kthe tread
depth and the condition of the tread across
the entire widt hofall tyres. If necessary,
turn the fron twheels to full lock in order to
inspec tthe tyr etrea dm ore easily.
Otherwise, you coul dlose control of the vehi-
cle and cause an accident due to the reduced
grip of the tyres on the road. Note
sons electing, fitting and replac-
ing tyres
R Only fit tyres and wheels of the same type
and make.
R Only fit tyres of the correct size onto the
wheels.
R After fittin gnew tyres, run them in at mod-
erat espeeds for the first 10 0km, as they
onl yreach their ful lperformanc eafter this
distance.
R Do not drive wit htyres which have too little
tread depth ,asthis significantly reduces
the traction on wet roads (aquaplaning).
R Replace the tyres after six year satthe lat-
est, regardless of wear .This also applies to
the emergency spar ewheel/spar ewheel. MOExtended ty
res( tyres with run-flat
characteristics)
MOExtended tyres (tyres with run-flat char-
acteristics) allo wyou to continue drivin gthe vehicle even when one or mor
etyres los eall
air pressure.
MOExtended tyres may only be used in con-
junction with the tyre pressure loss warning
system or with the tyre pressure monitor and
on wheels specifically tested by Mercedes-
Benz.
i Vehicles with MOExtended tyres are not
equipped with aTIREFIT kit at th efactory.
It is therefore recommended that you addi-
tionally equip your vehicle with the TIREFIT
kit if you fit tyres that do not feature run-
flat properties, e.g. winter tyres. ATIREFIT
kit can be obtaine dfrom aMercedes-Benz
Ser vice Centre.
Notes on driving with MOExtended tyres in
the event of aflat tyre can be found in the
"Breakdown assistance" section
(Y page 342). Winter operation
Points to remember
At the onset of winter ,have your vehicle win-
terproofed at aqualified specialist workshop,
e.g. at aMercedes-Ben zService Cent re.
Observe the notes in the "Changin gawheel"
section (Y page 363). Drivin
gwith summer ty res
At temperatures below +7 †, summer tyres
los ee lasticit yand therefore traction and
braking power; chang ethe tyres on your vehi-
cle to M+S tyres .Using summer tyres at very
cold temperatures could cause tears to form,
thereby damagin gthe tyres permanently.
Mercedes-Ben zcannot accept responsibility
for this type of damage. Winter operation
357Wheels andtyres Z
Page 364 of 389

R
you are drivin gonsandorg ravel.
R yo ua dopt averys porty driv ings tyle (cor-
nering at hig hspeeds or driv ingw ith high
rates of acceleration).
R you are towing avery heavy or lar getrailer.
R you are driving with aheavy load (in the
vehic le oron the roof).
Restarting th etyre pressure lo sswarn-
ing system Restart the tyre press
urel oss warnin gsystem
if you have:
R changed the tyre press ure
R changed the whe elso rtyres
R fitted new wheels or tyres
X Before restarting, consult the table of tyre
press ures on the inside of the fuel filler flap
to ensur ethat the tyr epressure in all four
tyre siss et correctly for the respective
operating conditions.
X Observ ethe notes in the section on tyre
pressures (Y page 359). G
WARNING
The tyr epressure loss warn ings ystem can
only give reliabl ewarnings if you have set the
correct tyre pressure.
If an incorrect tyre pressure is set, these
incorrect values wil lbemonitored.
At yre with insufficient pressure results in
vehicle instability when driving, thu sincreas-
ing the risk of an accident.
X Make sure that the key is in pos i-
tion 2(Ypage139) in the igniti onlock.
X Press =or; on the steering wheel
to select the Serv. menu.
X Press 9or: to select Tyre pres‐ sure .
X Press the abutton.
The RunF lat Indicato ractive Restart with OK message ap
pears in the
multifunction display. If you wis
htoconfirm the restart:
X Press the abutton.
The Tyre press. no wOK? message
ap pe ars in the multifunction display.
X Press the 9or: button to select
Yes .
X Press the abutton.
The RunF lat Indicato rrestarted message ap
pears in the multifunction dis-
play.
After ateach-in period, the tyr epressure
loss warn ings ystem wil lmonitor the set
tyr ep ressures of all fou rtyres.
If you wis htocancel the restart:
X Press the %button.
or
X If the Tyre press. now OK? message
appears ,press 9 or: to select
Cancel .
X Press the abutton.
Th et yre press urev alues stored at the last
restart wil lcontinue to be monitored. Tyre pressur
emonitor
Important safety notes If
at yre press urem onitor system is fitted, the
vehicle's wheels have sensor sfitted that
monitor the tyre pressures in all four tyres.
The tyre pressure monitor warns you when
the pressure drops in one or more of the
tyres. The tyre pressure monitor only func-
tions if the correct sensors are fitted to all
wheels. G
WARNING
The tyre pressure monitor does not warn you
of an incorrectly set tyre pressure. The table
on the inside of the fuel filler flap wil lhelp you
decide whether the tyre pressures should be
correc ted.
The tyr epressure monitor is not abl etow arn
you of asudden loss of pressure, e.g. if the Tyr
epressure
361Wheels and tyres
Z
Page 375 of 389

:
Rear roof area
; Rear wing 31 G
WAR
NING
Incorrec tretrofitting of RF transmitters can
cause the vehicle electronics to malfunction.
The vehicle's operating safet yand thus your
own safety are impaired.
Have aftermarket radio frequenc ytransmit-
tin ge quipmen tinstalled at aqualified spe-
cialist workshop .Mercedes-Benz recom-
mends that you use aMercedes-Benz Ser vice
Centre for thi spurpose. G
WARNING
Incorrec tretrofitting of RF tra nsmitters can
lead to increase delectromagnetic radiation in
the vehicle interior. Using an exterior aerial
takes into account curren tscientific discus-
sions relating to the possible health hazards
that may result from electromagnetic fields.
Have aftermarket radio frequenc ytransmit-
tin ge quipmen tinstalled at aqualified spe-
cialist workshop .Mercedes-Benz recom-
mends that you use aMercedes-Benz Ser vice
Centre for thi spurpose.
Deviations with respect to aerial locations,
output and frequencies must be approved by
Mercedes-Benz.
There is no restriction for aerial positions in
the outer area of the vehicle for thes ewave-
bands: trunked radio/Tetra, 70 cm wave-
band, GSM 900/AMPS, GSM 180 0and
UMTS. Legal provisions for fittings must be
observed.
RF transmitters with amaximum transmis-
sion output of 100 mW (PEAK )may be used
in the vehicle without restrictions.
! The operating permit may be invalidated
if the instructions for installation and use of
RF transmitters are not observed, e.g.
approved wavebands, maximum output
and aerial positions on the vehicle. Vehicle identification plates
Vehicle identification plat
ewith vehi-
cle identification number (VIN) and
paint code number X
Open the fron tright-han ddoor.
You will see vehicle identifi cation plate :. Vehicle identification plate (example)
:
Vehicle identification plate
; Vehicle manufacturer
= EU type approval number
31 Recommended installation position: on the side which face sthe centr eofthe road. 372
Vehicle identification platesTechnical data
Page 381 of 389
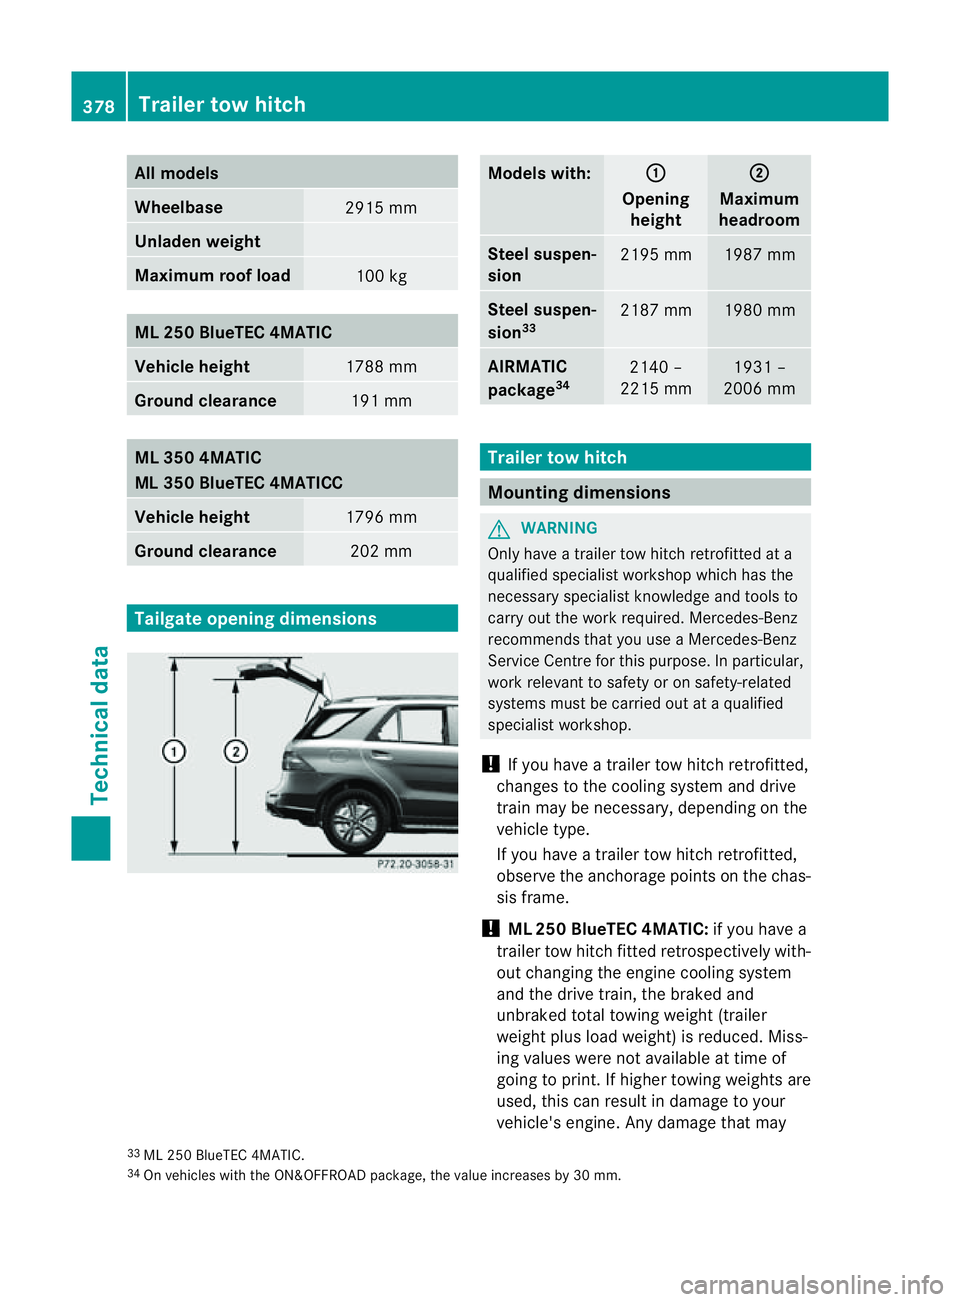
All models
Wheelbase
2915 mm
Unladen weight
Maximu
mroofload 10
0kg Vehicle height
178
8mm Ground clearance
191 mm
1796 mm
Ground clearance
202 mm
Tailg
ateo pening dimensions Models with: :
Opening
height ;
Maximum
headroom Stee
lsuspen-
sion 2195 mm 1987 mm
Steel suspen-
sion
33 2187 mm 1980 mm
AIRMATIC
package
34 2140 –
2215 mm 1931 –
2006 mm Traile
rtow hitch Mounting dimensions
G
WARNING
Only have atrailer tow hitch retrofit tedata
qualified specialist workshop which has the
necessary specialist knowledge and tools to
carry out the work required. Mercedes-Benz
recommends that you use aMercedes-Benz
Ser vice Centre for thi spurpose. In particular,
work relevant to safety or on safety-related
systems must be carried out at aqualified
specialist workshop.
! If you have atrailer to whitchr etrofit ted,
changes to the cooling system and drive
train may be necessary, depending on the
vehicle type.
observe the anchorage points on th echas-
sis frame.
! trailer tow hitc hfitted retrospectively with-
out changing the engine cooling system
and the drive train ,the braked and
unbraked tota ltowing weight (trailer
weight plus load weight) is reduced. Miss-
ing values wer enot available at tim eof
going to print. If higher towin gweight sare
used ,this can result in damage to your
vehi cle's engine. An ydamage that may
33
34 On vehicles with the ON&OFFROAD package, the value increases by 30 mm. 378
Trailer tow hitchTechnica
ldata
ML 250 BlueTEC 4MATIC
ML 350 4MATIC
Vehicle height
ML
350 BlueTEC 4MATICC
ML 250 BlueTEC 4MATIC:if you have a
If you have
atrailer to whitchr etrofit ted,
ML 25 0BlueTE C4MATIC.