2011 MERCEDES-BENZ M-CLASS SUV tyre pressure
[x] Cancel search: tyre pressurePage 282 of 389

Displa
ymessages Possible causes/consequences and
M Solutions
Wh
eels ensor(s) missing There is no signal from the tyre pressu
resensor of on eorseveral
wheels. The pressur eofthe affected tyre is notdispla yed in the
multifunction display.
X Have the faulty tyre pressure sensor replaced at aqualified spe-
cialist workshop. Tyre press. monitor
currentl
yunavail‐ able Due to
asour ceofrad io interference, no signals can be received
from the wheel sensors. The tyr epressure monito rist emporarily
malfunctioning.
X Drive on.
The tyr epressure monito rrestarts automatically as soon as the
problem has been solved. h
Tyre pressure Cau‐
tion
,tyre malf. G
Ris
kofa ccident
The tyre pressure in one or more tyres has dropped suddenly.
Aw arning ton ealso sounds.
X Stop th evehicle without making any sudde nsteering or braking
mano euvres.P ay attention to the traffic conditions as you do
so.
X If necessary ,change awheel (Y page 363). h
Tyre pressure
Chec
ktyre(s) G
Ris
kofa ccident
The tyre pressure in one or more tyres has dropped significantly.
X Stop the vehicle without making any sudde nsteering or braking
manoeuvres. Pay attention to the traffic conditions as you do
so.
X If necessary, change awheel (Y page 363).
X Chec kthe tyr epressure. If necessary, corre ct thetyre pressure
(Y page 361). h
Please correct
tyr
epressure Th
et yre pressure is too low in at leas tone of the tyres, or the tyre
pressure difference between the wheels is too great.
X Check the tyre pressures at the next opportunity. If necessary,
correct the tyre pressure (Y page361). Display messages
279On-boardcomputer anddisplays Z
Page 296 of 389

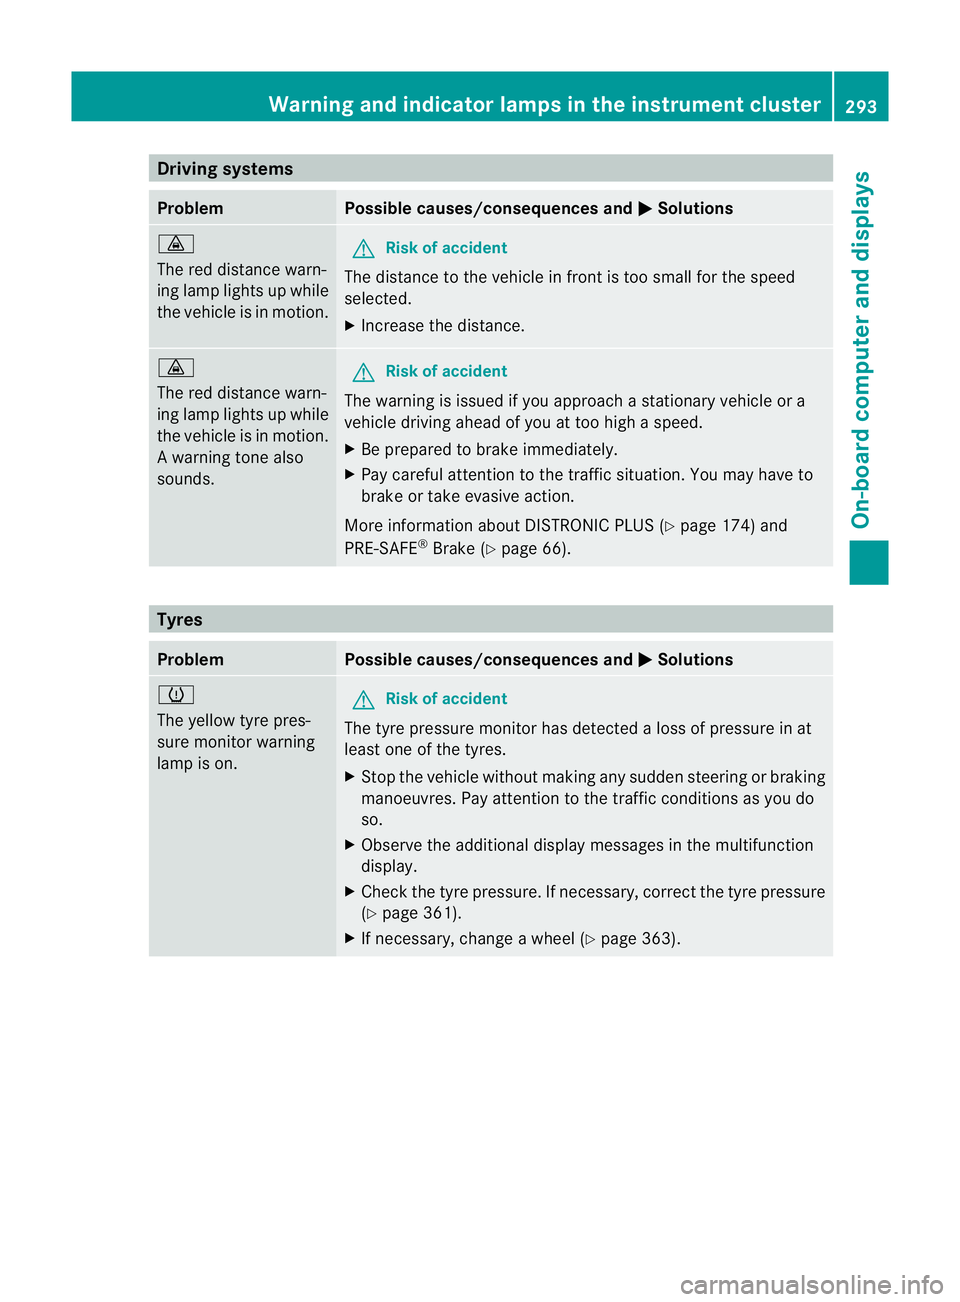
Driving systems
Problem Possible causes/consequences and
M Solutions
·
The red distanc
ewarn-
in gl amp lights up while
th ev ehicle is in motion. G
Risk of acc
ident
The distanc etothe vehicle in frontistoo smal lfor the speed
selected.
X Increase the distance. ·
The red distance warn-
ing lam
plights up while
the vehicle is in motion.
Aw arning ton ealso
sounds. G
Ris
kofa ccident
The warning is issued if you approach astationar yvehicle or a
vehicle driving ahead of you at to ohigh aspeed.
X Be prepared to brak eimmediately.
X Pa yc areful attention to the traffic situation. You may have to
brak eort akee vasive action.
Mo reinformatio nabout DISTRONI CPLUS(Ypage 174) and
PRE-SAFE ®
Brake (Y page 66). Tyres
Problem Possible causes/consequences and
M Solutions
h
The yellow tyr
epres-
sure monitor warning
lamp is on. G
Risk of accident
Th et yrep ressure monitor has detected aloss of pressure in at
least on eofthe tyres.
X Stop the vehicl ewithout making any sudden steering or braki ng
manoeuvres .Pay attention to the traffic conditions as you do
so.
X Observ ethe additiona ldisplay messages in the multifunction
display.
X Check the tyre pressure. If necessary, correc tthe tyr epressure
(Y page 361).
X If necessary, change awheel (Y page 363). Wa
rning and indicator lamp sinthe instrument cluster
293On-boardcomputerand disp lays Z
Page 328 of 389

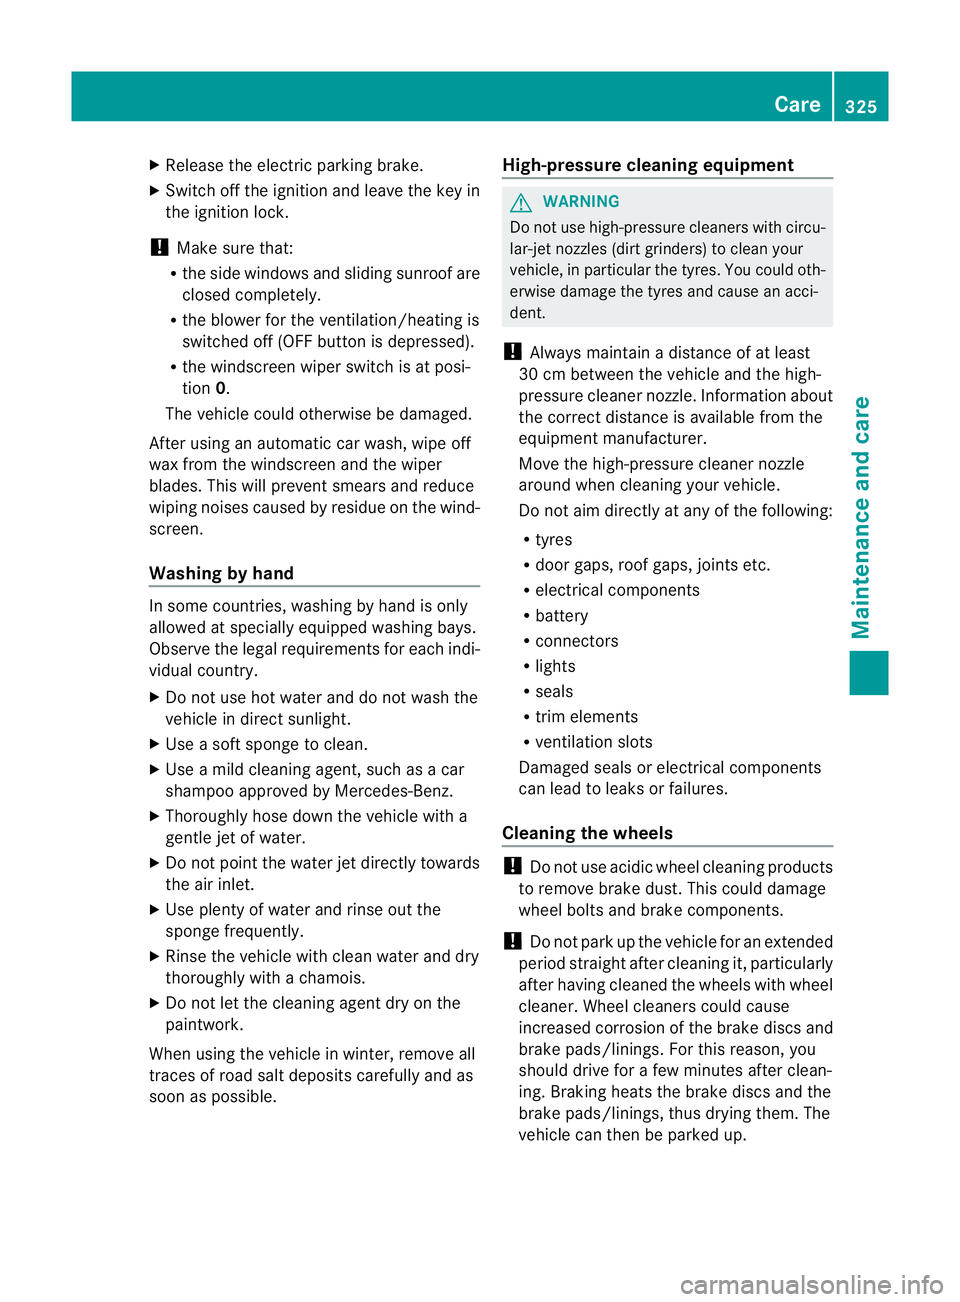
X
Release the electric parking brake.
X Switc hoff the ig nition and leav ethe key in
th ei gnition lock.
! Mak esuret hat:
R the side windows and slidin gsunroo fare
close dcompl etely.
R the blower for the ventilation/heating is
switched off (OFF button is depressed).
R the windscreen wiper switch is at posi-
tion 0.
The vehic lecoul dotherwise be damaged.
After using an automatic car wash, wip eoff
wa xfrom th ewindscreen and the wiper
blades. This wil lprevent smears and red uce
wiping noises cause dbyresidue on the wind-
screen.
Washing by hand In some countries, washing by hand is only
allowed at speciall
yequipped washing bays.
Observe the lega lrequirements for each indi-
vidual country.
X Do not use hot water and do not wash the
vehic lein direct sunlight.
X Use asoft sponge to clean.
X Use amild cleaning agent, such as acar
shampoo approved by Mercedes-Benz.
X Thoroughly hos edown the vehicle with a
gentle jet of water.
X Do not point the water jet directly towards
the air inlet.
X Use plenty of water and rinse out the
sponge frequently.
X Rinse the vehicle with clean water and dry
thoroughly with achamois.
X Do not let the cleanin gagent dry on the
paintwork.
When using the vehicle in winter, remove all
traces of roa dsalt deposits carefully and as
soon as possible. High-pressure cleanin
gequipment G
WARNING
Do not use high-pressure cleaners with circu-
lar-jet nozzles (dirt grinders) to clean your
vehicle, in particular the tyres. You could oth-
erwis edamage the tyres and cause an acci-
dent.
! Always maintain adistance of at least
30 cm between the vehicle and the high-
pressure cleaner nozzle. Information about
the correct distance is available from the
equipment manufacturer.
Move the high-pressure cleaner nozzle
around when cleaning your vehicle.
Do not aim directly at any of the following:
R tyres
R door gaps, roof gaps, joint setc.
R electrical components
R battery
R connectors
R lights
R seals
R trim elements
R ventilatio nslots
Damaged seals or electrical components
can lead to leaks or failures.
Cleanin gthe whee ls !
Do not use acidic whee lcleaning products
to remov ebrake dust .This could damage
wheel bolts and brake components.
! Do not par kupthe vehicle for an extended
period straight after cleanin git, particularly
after having cleaned the wheels with wheel
cleaner. Wheel cleaners could cause
increased corrosio nofthe brake discs and
brake pads/linings. For this reason, you
should drive for afew minutes after clean-
ing. Brakin gheats the brak ediscs and the
brake pads/linings, thus drying them. The
vehicle can then be parked up. Care
325Maintenance andcare Z
Page 338 of 389

X
Place the warnin gtriangl e(Ypage 332) a
suitable distanc eaway. Observe legal
requirements.
X Unload heavy luggage.
i Only operate the tyre inflation compres-
sor using a12Vsocket (Y page 309), even
if the ignition is turned off.
An emergenc ycut-off ensures that the on-
board voltage does not drop too low. If the
on-board voltage is too low, the power to
the sockets is automatically cut. This
ensures that there is sufficient power to
start the engine. TIREFIT kit
Usin gthe TIREFIT kit Yo
uc an use the TIREFI Tkit to seal small
punctures, particularly those in the tyre tread.
You can use TIREFIT at outside temperatures
down to Ò20†. G
WARNING
In the followin gsituations, your safety is at
particular risk as tyre sealant is unable to pro-
vide sufficient breakdown assistance:
R there are cuts or punctures in the tyre
greater than 4mm.
R thew heel rim is damaged.
R you hav edrive natv ery low tyr epressures
or on aflat tyre.
Do not drive any further. Consult aqualified
specialist workshop which has the necessary
specialist knowledg eand tool stocarry out
the work required.
Mercedes-Benz recommends that you use a
Mercedes-Benz Servic eCentr efor this pur-
pose. In particular ,work relevant to safet yor
on safety-related system smust be carried out
at aq ualified specialist workshop. X
Do not remove any foreign objects which
have penetrated the tyre, e.g. screws or
nails.
X Remove the tyre sealant bottle, the accom-
panying "max. 80 km/h" sticker and the
tyre inflation compresso rfrom th estowage
well underneath the luggage compartment
floor (Y page 333). X
Affix part :of the sticker withi nthe driv-
er' sfield of vision.
X Affix part ;of the sticker near the valve
on the wheel with the defectiv etyre. G
WARNING
TIREFIT must not come into contact with your
skin, eyes or clothing.
R If TIREFIT comes into contact with your
eyes or skin, immediately rinse thoroughly
with clean water.
R Change out of clothing which has come into
contact with TIREFIT immediately.
R If an allergic reaction occurs, consult adoc-
tor immediately.
Keep TIREFI Taway from children.
R If TIREFI Tiss wallowed, immediately rinse
your mouth out thoroughly and drink plenty
of water.
R Do not induce vomiting. Consult adoctor
immediately.
R Do not inhal eTIREFIT fumes.
i If TIREFIT leaks out, allo wittod ry. It can
then be removed like alayer of film. Flat tyre
335Breakdown assistanc e Z
Page 339 of 389

If yo
uget TIREFI Tonyour clothing, have it
cleaned as soo naspossible with perchloro-
ethylene. X
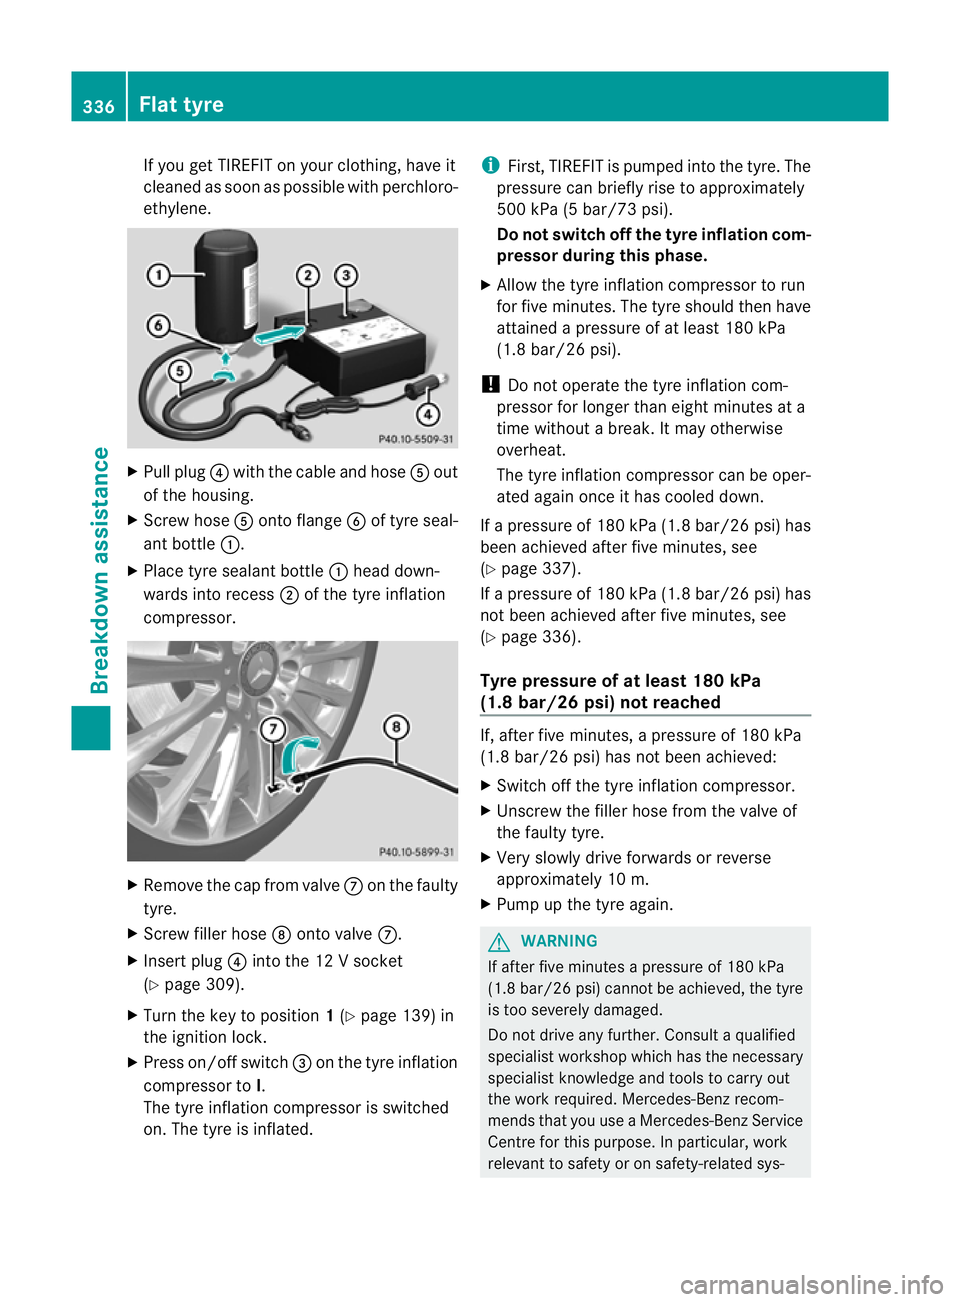
Pull plug ?with the cabl eand hose Aout
of the housing.
X Screw hose Aontoflange Bof tyre seal-
ant bottle :.
X Place tyre sealant bottle :head down-
wards int orecess ;of the tyr einflation
compressor. X
Remove the cap fro mvalve Con the faulty
tyre.
X Screw filler hose Dontovalve C.
X Insert plug ?into the 12 Vsocket
(Y page 309).
X Tur nthe key to position 1(Y page 139) in
the ignition lock.
X Press on/of fswitch =on the tyr einflation
compressor to I.
The tyr einflation compressor is switched
on. The tyre is inflated. i
First ,TIREFIT is pumpe dinto the tyre. The
pressure can briefly rise to approximately
500 kPa (5 bar/73 psi).
Do not switch off the tyr einflation com-
pressor du ring this phase.
X Allow the tyr einflation compresso rtor un
for five minutes. The tyre should then have
attained apressure of at leas t180 kPa
(1.8 bar/26 psi).
! Do not operat ethe tyr einflation com-
presso rfor longer than eight minutes at a
tim ew ithout abreak. It may otherwise
overheat.
Th et yre inflation compressor can be oper-
ated again once it has coole ddown.
If ap ressure of 180 kPa (1.8 bar/26 psi) has
been achieved afte rfive minutes, see
(Y page 337).
If ap ressure of 180 kPa (1.8 bar/26 psi) has
not been achieved afte rfive minutes, see
(Y page 336).
Tyr epressure of at least 180 kPa
(1.8 bar/26 psi) not reached If, after five minutes,
apressure of 180 kPa
(1.8 bar/26 psi) ha snot been achieved:
X Switch off the tyr einflation compresso r.
X Un screw the filler hose from the valv eof
the faulty tyre.
X Very slowly drive forwards or reverse
approximately 10 m.
X Pump up the tyre again. G
WARNING
If after five minutes apressure of 180 kPa
(1.8 bar/26 psi) cannot be achieved ,the tyre
is too severel ydamaged.
Do not drive any further. Consult aqualified
specialist workshop which has the necessary
specialist knowledge and tools to carry out
the work required. Mercedes-Benz recom-
mends that you use aMercedes-Ben zService
Centr efor this pur pose.Inp articular, work
relevant to safety or on safety-related sys- 336
Flat tyreBreakdown assistance
Page 340 of 389

tems mus
tbec arrie dout at aquali fieds pe-
cialist workshop.
Ty re pressure of 180 kPa (1.8 bar/
26 psi) is reached X
Switch off the tyre inflation compressor.
X Unscrew the fille rhose from the valve of
the faulty tyre.
! Afteru se, excess TIREFIT ma yrun out of
the filler hose. This may cause stains.
Therefore, place the filler hos einthe plastic
bag whic hcontained the TIREFIT kit.
X Stow the tyr esealan tbottle, the tyr einfla-
tion compresso rand the warning triangle.
X Pull away immediately. G
WARNING
Do not exceed the maximum speed of
80 km/h.
The "max. 80 km/h" labe lmust be affixed in
the driver's field of vision.
The vehicle's handling characteristic smay be
affected.
X Stop after driving for approximately ten
minutes and check the tyre pressure with
the tyre inflation compressor. G
WARNING
If the tyre pressure is less than 130 kPa
(1.3 bar/2 0psi), the tyr eistoo severely dam-
aged. Do not driv eany further. Consult a
qualified specialis tworkshop which has the
necessary specialist knowledge and tools to
carry out the work required .Mercedes-Benz
recommends that you use aMercedes-Benz
Ser vice Centre for thi spurpose. In particular,
work relevant to safety or on safety-related
systems must be carried out at aqualified
specialist workshop.
X Correct the tyre pressure if it is still at least
130 kPa (1.3 bar/20 psi) (for the values,
see the fuel filler flap). X
To increase the tyr epressure: switchon
the tyre inflation compressor. E
Pressure releas ebutton
F Pressure gauge
X To reduce the tyr epressur e:press pres-
sure release button Eon the filler hose.
X Stow the tyr esealan tbottle, the tyr einfla-
tion compresso rand the warning triangle.
X Drive to the neares tworkshop and have the
tyr ec hange dthere.
X Hav ethe tyr esealan tbottle replaced as
soon as possible at aqualified specialist
workshop, e.g. at aMercedes-Benz Ser vice
Centre. H
Environmental note
Have the use dtyre sealant bottle dispose dof
professionally, e.g. at aMercedes-Benz
Ser vice Centre.
X Have the tyre sealant bottle replaced every
four years at aqualified specialist work-
shop, e.g. aMercedes-Benz Ser vice
Centre. Changing
awhee land fitting th espare
wheel
Preparing the vehicle G
WARNING
The wheel and tyre size of the emergency
spare wheel/s pare wh eelm ay differ to tha tof
the damaged wheel. Whe nusing an emer- Flat ty
re
337Breakd ownassistance
Z
Page 345 of 389

and transpor
tthe wheel in the luggage
compartment.
or
X Depending on the size of the wheel, you
ma yalso be able to secure the faulty wheel
in the emergenc yspare wheel well. In this
case, you must remove the stowage tray
from the emergency spare wheel well and
store it securely in the luggage compart-
ment.
i When you are driving with the collapsible
emergency spare wheel fitted, the tyre
pressur eloss warnin gsystem or the tyre
pressure monitor cannot function reliably.
Only restart the tyre pressure los swarning
system/tyre pressure monitor when the
defective wheel has been replaced with a
new wheel.
Vehicles with tyre pressure monitor: all fit-
ted wheels must be equipped with func-
tioning sensors. The defective wheel
should no longer be in the vehicle. MOExtended tyres (tyres with run-flat
characteristics)
MOExtended tyres (tyres with run-flat char-
acteristics) allow you to continue driving the
vehicle even when one or more tyres lose all
air pressure.
MOExtended tyres may only be used in con-
junction with the activated tyre pressure loss
warning system or with the tyre pressure
monitor.
The maximum permissible distance which
can be driven in run-flat mode depends on the
load in the vehicle. It is 80 km if the vehicle
is partially laden and 30 km if fully laden.
The maximum permissible distance which
can be driven in run-flat mode is counted from
the moment the tyre pressure loss warning
appears in the multifunction displ ay.
Yo um ust not exceed amaximum spee dof
80 km/h. G
WARNING
Th eh andling characteristics of your vehicle
deteriorate in run-flat mode, for example:
R when cornering
R when braking
R when accelerating rapidly
Adapt your driving style accordingly and avoid
sudden changes in direction and sudden
acceleration, as well as driving over obstacles
(i.e. kerbs, potholes), and driving off-road.
This is particularly the case when the vehicle
is heavily laden.
The maximum permissible distance that can
be driven in run-flat mode depends to alarge
exten tonthe loads placed on the vehicle. It
can be shorter due to high speeds, aheavy
load, sudden changes in direction, the road
surface condition, outside temperature, etc.,
or further if you driv ecarefully and conserva-
tively.
Do not continue to drive in run-flat mode if:
R you hear banging noises.
R the vehicle starts to shake.
R you see smoke and smell rubber.
R ESP ®
is intervening constantly.
R there are tears in the sidewalls of the tyre.
After driving in run-flat mode, you must have
the wheel(s) checked for damage at aquali-
fied specialist workshop which has the nec-
essary specialist knowledg eand tool stocarry
out the work required. The faulty tyre must be
replaced in every case.
Mercedes-Benz recommends that you use a
Mercedes-Benz Service Centr efor this pur-
pose. In particular ,work relevant to safet yor
on safety-related system smust be carried out
at aq ualified specialist workshop.
i Whe nreplacing one or all tyres, make
sure that you only use tyres marked
MOExtended and of the specified size for
the vehicle.
i Vehicles with MOExtended tyres are not
equipped with aTIREFIT kit at th efactory. 342
Flat tyreBreakdown assistance
Page 358 of 389

Usefu
linfor mation ............................ 356
Important safet ynotes .................... 356
Operation ........................................... 356
Winter oper ation ............................... 357
Ty re pressure .................................... 359
Changing awheel ............................. 363
Wheel and ty recombinations ..........364 355Wheels and
tyres