2011 MERCEDES-BENZ GLK-Class seats
[x] Cancel search: seatsPage 102 of 304

Memory functions
Storing settings
With the memory function, you can store up
to three different settings, e.g. for three
different people.
The following settings are stored as a single
memory preset:
Rposition of the seat, backrest and head
restraint
Rdriver's side: steering wheel position
Rdriver's side: position of the exterior
mirrors on the driver's and front-passenger
sides
GWarning!
The memory function can still be used when
the key has been removed. For this reason,
children should never be left unsupervised in
the vehicle. They could otherwise become
trapped when adjusting the seat or the
steering wheel.
GWarning!
Only use the memory function on the driver's
side when the vehicle is stationary. You could
otherwise be distracted from the traffic
conditions by the steering wheel and seat
moving of their own accord, and as a result
cause an accident.
XAdjust the seat (Y page 92).XOn the driver's side, adjust the steering
wheel (Y page 96) and the exterior mirrors
(Y page 97).
XPress memory button M and one of the
storage position buttons 1, 2 or 3 within
three seconds.
The settings are stored in the selected
preset position. A tone sounds when the
settings have been completed.
Calling up a stored setting
! If you want to move the seat from the fully
reclined position to a stored seat position,
first raise the backrest. The seat could
otherwise be damaged.
XPress and hold the relevant storage
position button 1, 2 or 3, until the seat,
steering wheel and exterior mirrors are in
the stored position.
iThe setting procedure is interrupted as
soon as you release the storage position
button.
100Memory functionsSeats, steering wheel and mirrors
BA 204.9 USA, CA Edition A 2011; 1; 6, en-USd2mwentsVersion: 3.0.3.62010-06-15T08:58:39+02:00 - Seite 100
Page 208 of 304

Vehicle equipment
i This manual describes all the standard
and optional equipment of your vehicle
which was available at the time of
purchase. Country-specific differences are
possible. Bear in mind that your vehicle
may not feature all functions described
here. This also refers to safety-related
systems and functions.
Loading guidelines
GWarning!
Always fasten items being carried as securely
as possible using cargo tie-down rings and
fastening materials appropriate for the weight
and size of the load.
In an accident, during hard braking or sudden
maneuvers, loose items will be thrown around
inside the vehicle. This can cause injury to
vehicle occupants unless the items are
securely fastened in the vehicle.
To help avoid personal injury during a collision
or sudden maneuver, exercise care when
transporting cargo. Do not pile luggage or
cargo higher than the seat backrests.
Never drive a vehicle with the tailgate open.
Deadly carbon monoxide (CO) gases may
enter vehicle interior resulting in
unconsciousness and death.
The gross vehicle weight (GVW) is the weight
of the vehicle including fuel, the vehicle tool
kit, spare tire, any installed accessories,
vehicle occupants and luggage/cargo.
The load limit and the gross vehicle weight
rating (GVWR) of your vehicle must never be
exceeded. The load limit and the GVWR are
stated on the vehicle identification plate on
the B-pillar on the driver's side
( Y page 274).
Additionally, the cargo must be distributed so
that the weight on each axle never exceeds
the maximum gross axle weight rating
(GAWR) for the front and rear axles. The data
on GVWR and GAWR is stated on the vehicle
identification plate on the B-pillar on the
driver's side ( Y page 274).
Further information can be found in the
"Loading the vehicle" section ( Y page 274).
The handling characteristics of a laden
vehicle are dependent on the distribution of
the load within the vehicle. For this reason,
you should observe the following notes when
transporting a load:
R Position heavy loads as far forwards as
possible and as low down in the cargo
compartment as possible.
R The load must not protrude above the
upper edge of the seat backrests.
R always place the load against the rear or
front seat backrests. Make sure that the
seat backrests are securely locked into
place.
R Hook in the cargo net when loading.
R Always place the load behind unoccupied
seats if possible.
R Secure the load with sufficiently strong and
wear-resistant tie down. Pad sharp edges
for protection.
Stowage compartments
Important safety notes
GWarning!
To help avoid personal injury during a collision
or sudden maneuver, exercise care when
storing objects in the vehicle. Put luggage or
cargo in the cargo compartment if possible.
Do not pile luggage or cargo higher than the
seat backrests.
Keep compartment lids closed. This will help
to prevent stored objects from being thrown
about and injuring vehicle occupants during
R braking
R vehicle maneuvers
R an accident
206Stowage compartmentsLoading, stowing and features
BA 204.9 USA, CA Edition A 2011; 1; 6, en-USd2mwentsVersion: 3.0.3.62010-06-15T08:58:39+02:00 - Seite 206
Page 213 of 304

XTo install: attach cargo compartment
cover : to the opening on the left-hand
side.
XPress handle ; to the right.XAllow cargo compartment cover : to
engage in the appropriate recess.
Cargo net
Important safety notes
GWarning!
Make sure the cargo net is properly engaged
at top and bottom position and the tightening
belts are securely fastened.
Never use a damaged cargo net.
Always use cargo net when transporting
cargo. This helps to avoid personal injury from
smaller objects being thrown around in the
occupant compartment during a collision or
sudden maneuver.
The cargo net cannot prevent the movement
of large, heavier objects into the passenger
compartment in an accident. Such items must
be properly secured using the cargo tie-down
rings in the cargo compartment floor.
Passenger use of seats behind installed cargo
net is restricted because of the footwell being
taken up by the net.
When the vehicle is loaded with objects that
extend beyond the seat backrests, using a
cargo net is particularly important. For
reasons of safety, a cargo net should always
be used when transporting cargo.
Preparing the cargo net
The cargo net can be used in two different
positions (behind the B-pillar or the C-pillar).
RThe brackets behind B-pillar : are
required for the cargo compartment
enlargement (Y page 208).
The corresponding cargo tie down rings to
tighten the net are located in the footwell
of the rear bench seat (Y page 209).
RThe brackets behind C-pillar ; are
required for the cargo compartment behind
the rear bench seat.
The corresponding cargo tie down rings to
tension the net are located in the cargo
compartment (Y page 209).
The cargo net is located in the loading tray in
the stowage well under the trunk floor
(Y page 212).
XOpen both Velcro fasteners and remove the
cargo net.
XUnroll and unfold the cargo net.
The upper and lower guide rods must
engage audibly.
Attaching the cargo net
Cargo net attached behind the C-pillar
Stowage areas211Loading, stowing and featuresBA 204.9 USA, CA Edition A 2011; 1; 6, en-USd2mwentsVersion: 3.0.3.62010-06-15T08:58:39+02:00 - Seite 211Z
Page 214 of 304

XInsert guide rod ; into retainer : in the
direction of the arrow.
XSlide guide rod ; forwards into
retainer : in the direction of the arrow.
Tightening the cargo net
Seat belt reel holder behind the front seats
XInsert belt hook : into cargo tie-down
ring ; in the direction of the arrow.
XPull tensioning strap = by the loose end in
the direction of the arrow until the cargo
net is tight.
XAfter driving a short distance, check the
tension of the cargo net and retighten it if
necessary.
Releasing the cargo net
Seat belt reel holder behind the front seats
XPull belt adjuster : upwards in the
direction of the arrow to reduce the tension
on the tensioning strap.
XUnhook belt hook ; from cargo tie-down
ring =.
Detaching and storing the cargo net
XDetach guide rod ; from bracket :
(Y page 211).
XPress the red button on the upper and lower
guide rods.
XFold the cargo net and roll it up.XClose the two Velcro fasteners on the cargo
net holder.
Coat hooks on the tailgate
GWarning!
The tailgate may close if too great a load is
placed on the coat hooks.
You and/or others could be trapped and
injured.
Only use the coat hooks for light clothing.
:Coat hooks
Stowage well under the cargo
compartment floor
GWarning!
If items are stored in the compartment, make
sure compartment is securely closed.
212Stowage areasLoading, stowing and features
BA 204.9 USA, CA Edition A 2011; 1; 6, en-USd2mwentsVersion: 3.0.3.62010-06-15T08:58:39+02:00 - Seite 212
Page 220 of 304

115 V socketGWarning!
The 115V AC socket operates at high voltage.
Use the 115V AC socket in the vehicle with
the same caution and prudence that you
exercise when using power outlets at home.
Keep any fluids away from the 115V AC
socket. Do not clean the socket with fluids or
tapered objects. Keep the 115V AC socket
cover in the closed position, when not in use.
Otherwise, you could suffer an electric shock
and be seriously or even fatally injured.
GWarning!
A device that you connect must have a
suitable plug that complies with U.S.
standards. Never pull on the cable to unplug
a plug from the 115V AC socket. Do not use
a damaged connection cable. The 115V AC
socket may not be connected to another
115V AC power source. Do not use converters
to a grounding plug with the 115V AC socket.
This could cause serious personal injury to
you and/or others.
GWarning!
If the 115V AC socket is damaged or torn out
of the trim, do not use or touch the 115V AC
socket. Using a 115V AC socket that is
damaged or torn out of the trim could cause
serious personal injury to you and/or others.
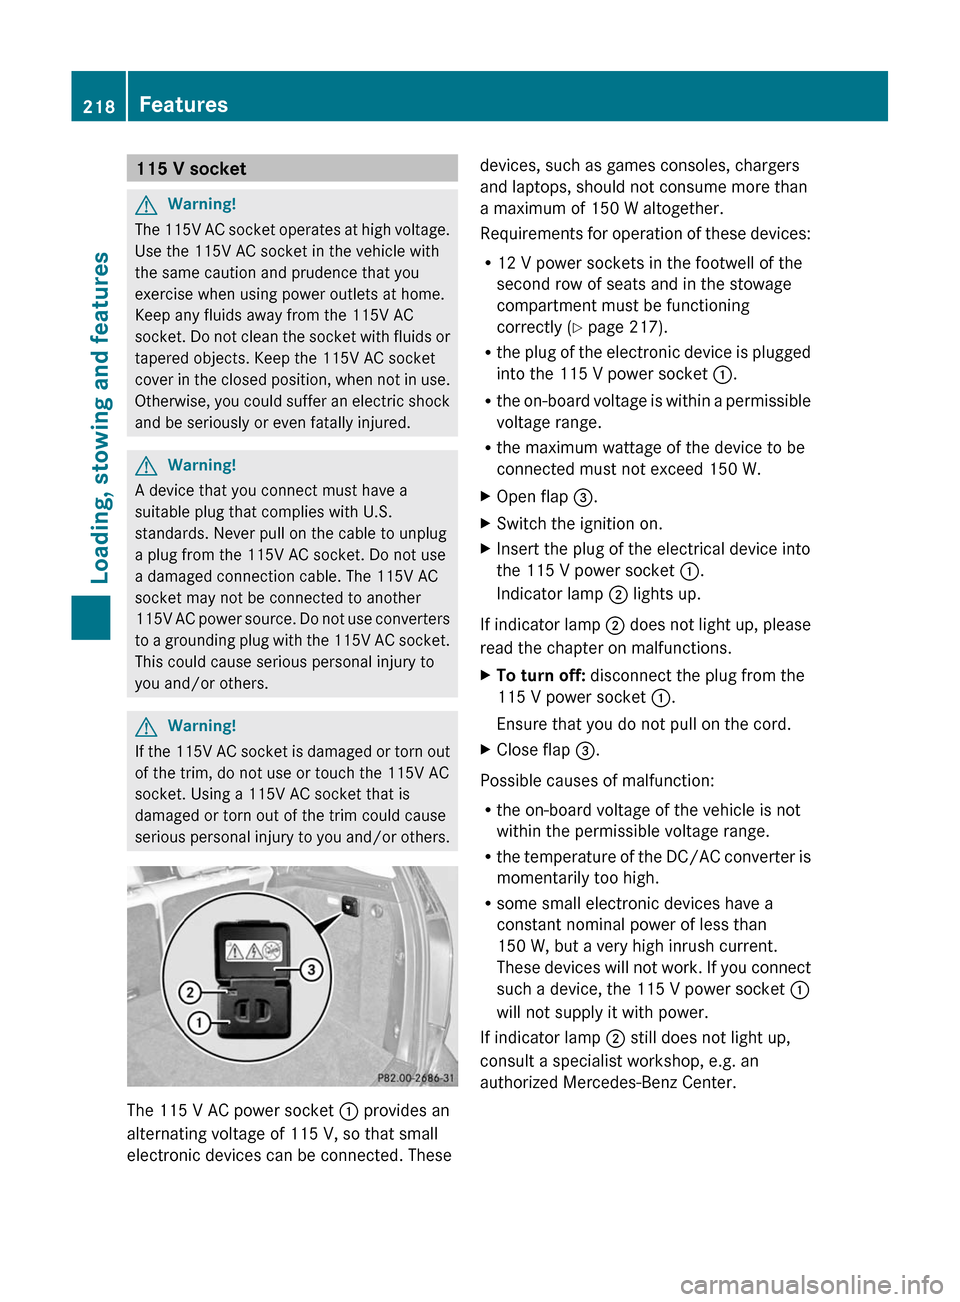
The 115 V AC power socket : provides an
alternating voltage of 115 V, so that small
electronic devices can be connected. These
devices, such as games consoles, chargers
and laptops, should not consume more than
a maximum of 150 W altogether.
Requirements for operation of these devices:
R12 V power sockets in the footwell of the
second row of seats and in the stowage
compartment must be functioning
correctly (Y page 217).
Rthe plug of the electronic device is plugged
into the 115 V power socket :.
Rthe on-board voltage is within a permissible
voltage range.
Rthe maximum wattage of the device to be
connected must not exceed 150 W.
XOpen flap =.XSwitch the ignition on.XInsert the plug of the electrical device into
the 115 V power socket :.
Indicator lamp ; lights up.
If indicator lamp ; does not light up, please
read the chapter on malfunctions.
XTo turn off: disconnect the plug from the
115 V power socket :.
Ensure that you do not pull on the cord.
XClose flap =.
Possible causes of malfunction:
Rthe on-board voltage of the vehicle is not
within the permissible voltage range.
Rthe temperature of the DC/AC converter is
momentarily too high.
Rsome small electronic devices have a
constant nominal power of less than
150 W, but a very high inrush current.
These devices will not work. If you connect
such a device, the 115 V power socket :
will not supply it with power.
If indicator lamp ; still does not light up,
consult a specialist workshop, e.g. an
authorized Mercedes-Benz Center.
218FeaturesLoading, stowing and features
BA 204.9 USA, CA Edition A 2011; 1; 6, en-USd2mwentsVersion: 3.0.3.62010-06-15T08:58:39+02:00 - Seite 218
Page 247 of 304

After an accidentProblemPossible causes/consequences and M SolutionsFuel is leaking from the
vehicle.
GRisk of explosion or fire
The fuel line or the fuel tank is faulty.
XImmediately turn the key to position 0(Y page 129)in the ignition
lock and remove it.
XDo not restart the engine under any circumstances.XConsult a qualified specialist workshop.You are unable to
determine the extent of
the damage.
XConsult a qualified specialist workshop.You cannot detect any
damage.
XStart the engine as normal.The NECK-PRO head
restraints on the
driver's and front-
passenger seats have
been triggered.
Your vehicle has been involved in a rear-end collision.XReset the triggered NECK-PRO head restraints (Y page 50).Where will I find...?
First-aid kit
XOpen the tailgate.XRemove first-aid kit : from the parcel net.
iCheck the expiration date on the first-aid
kit at least once a year. Replace the
contents if necessary, and replace missing
contents.
Vehicle tool kit
The vehicle tool kit can be found in the
stowage well under the cargo compartment
floor.
iVehicles without a spare wheel are not
equipped with the tools needed to change
a wheel when they leave the factory, e.g.
jack or lug wrench. Some tools for changing
a wheel are specific to the vehicle. To
obtain tools approved for your vehicle, visit
a qualified specialist workshop, e.g. an
authorized Mercedes-Benz Center.
XTo remove the cargo compartment
stowage trays: lift up the floor of the cargo
compartment (Y page 212).
Where will I find...?245Roadside AssistanceBA 204.9 USA, CA Edition A 2011; 1; 6, en-USd2mwentsVersion: 3.0.3.62010-06-15T08:58:39+02:00 - Seite 245Z
Page 270 of 304

Make sure that the tire pressure for normal
speeds is adopted again.
Additional specifications of tire pressure
values for loads can also be found on the tire
pressure table on the inside of the fuel filler
flap.
The tire pressure for emergency spare wheels
can be found:
R on the yellow label on the wheel rim of the
emergency spare wheel
R in the "Wheel and tire combinations"
section ( Y page 287) of this Operator's
Manual
R on the Tire and Loading Information placard
on the B-pillar on the driver's side
i The specifications shown in the examples
in the tire pressure tables are only
examples. Tire pressure specifications are
vehicle-specific and may deviate from the
data shown here. The tire pressure
specifications that are valid for your vehicle
can be found on your vehicle's tire pressure
table.
The tire pressures in the tire pressure table
on the inside of the fuel filler flap are valid for
all approved tires installed at the factory,
unless stated otherwise.
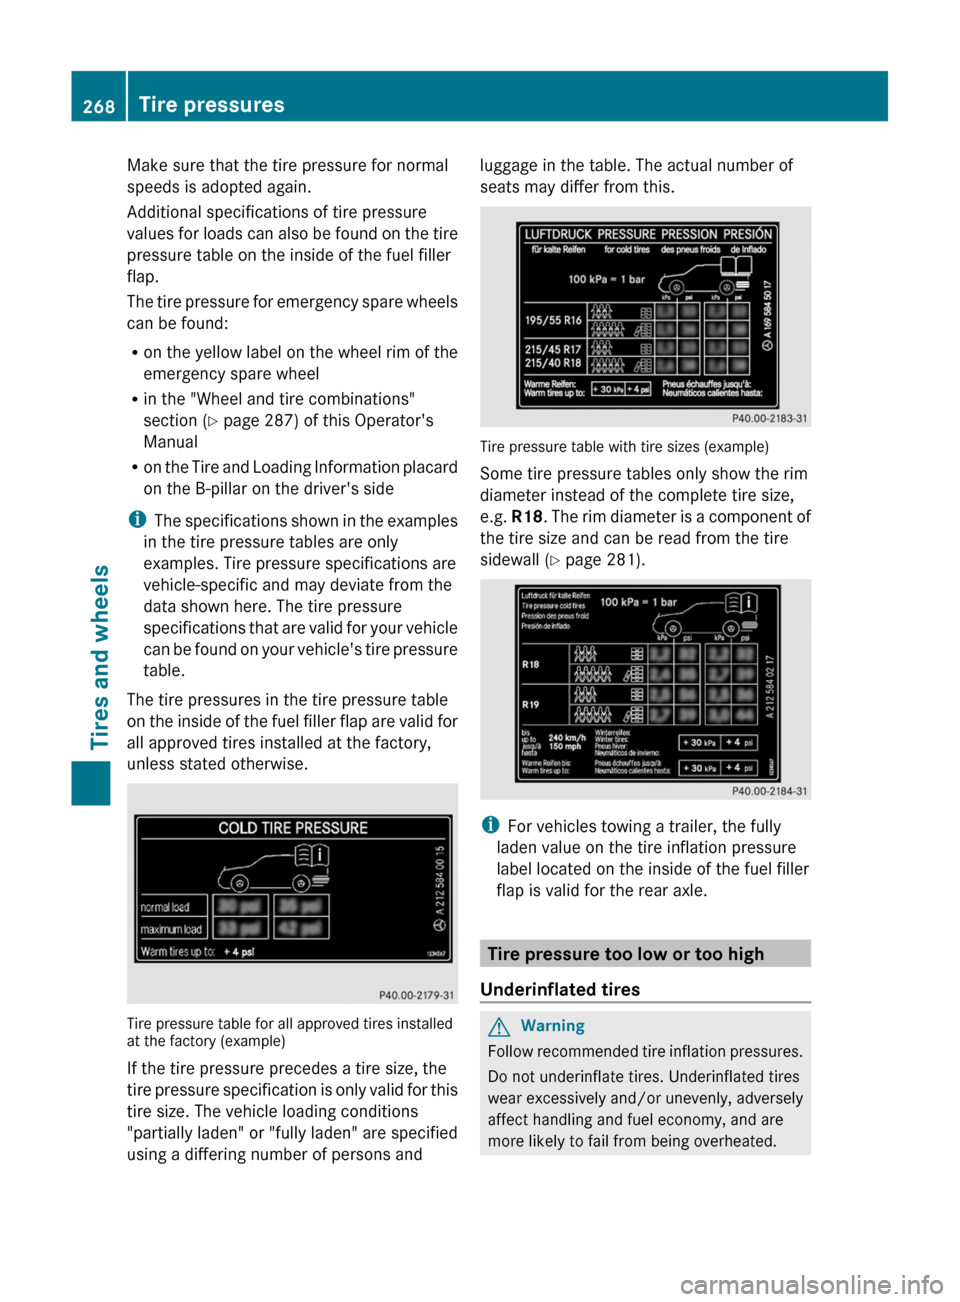
Tire pressure table for all approved tires installed
at the factory (example)
If the tire pressure precedes a tire size, the
tire pressure specification is only valid for this
tire size. The vehicle loading conditions
"partially laden" or "fully laden" are specified
using a differing number of persons and
luggage in the table. The actual number of
seats may differ from this.
Tire pressure table with tire sizes (example)
Some tire pressure tables only show the rim
diameter instead of the complete tire size,
e.g. R18 . The rim diameter is a component of
the tire size and can be read from the tire
sidewall ( Y page 281).
i
For vehicles towing a trailer, the fully
laden value on the tire inflation pressure
label located on the inside of the fuel filler
flap is valid for the rear axle.
Tire pressure too low or too high
Underinflated tires
GWarning
Follow recommended tire inflation pressures.
Do not underinflate tires. Underinflated tires
wear excessively and/or unevenly, adversely
affect handling and fuel economy, and are
more likely to fail from being overheated.
268Tire pressuresTires and wheels
BA 204.9 USA, CA Edition A 2011; 1; 6, en-USd2mwentsVersion: 3.0.3.62010-06-15T08:58:39+02:00 - Seite 268
Page 277 of 304

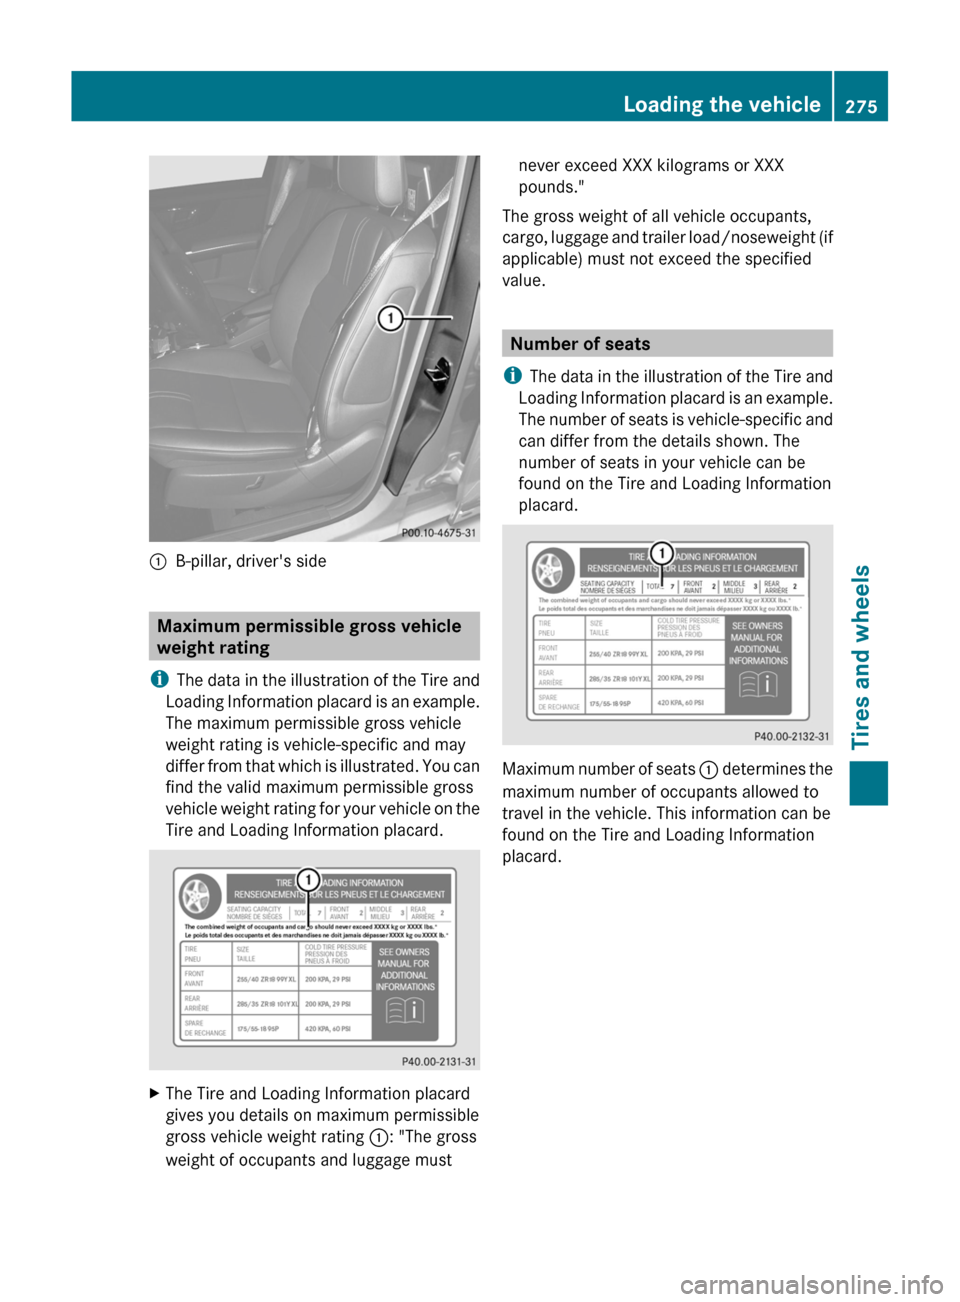
:B-pillar, driver's side
Maximum permissible gross vehicle
weight rating
i The data in the illustration of the Tire and
Loading Information placard is an example.
The maximum permissible gross vehicle
weight rating is vehicle-specific and may
differ from that which is illustrated. You can
find the valid maximum permissible gross
vehicle weight rating for your vehicle on the
Tire and Loading Information placard.
XThe Tire and Loading Information placard
gives you details on maximum permissible
gross vehicle weight rating :: "The gross
weight of occupants and luggage mustnever exceed XXX kilograms or XXX
pounds."
The gross weight of all vehicle occupants,
cargo, luggage and trailer load/noseweight (if
applicable) must not exceed the specified
value.
Number of seats
i The data in the illustration of the Tire and
Loading Information placard is an example.
The number of seats is vehicle-specific and
can differ from the details shown. The
number of seats in your vehicle can be
found on the Tire and Loading Information
placard.
Maximum number of seats : determines the
maximum number of occupants allowed to
travel in the vehicle. This information can be
found on the Tire and Loading Information
placard.
Loading the vehicle275Tires and wheelsBA 204.9 USA, CA Edition A 2011; 1; 6, en-USd2mwentsVersion: 3.0.3.62010-06-15T08:58:39+02:00 - Seite 275Z