2011 MERCEDES-BENZ GL350 BlueTEC trailer
[x] Cancel search: trailerPage 147 of 376
Vehicle equipment ............................146
Notes on breaking-in a new vehicle 146
Driving ............................................... 146
Automatic transmission ...................152
Refueling ............................................ 159
Parking ............................................... 165
Driving tips ........................................ 167
Driving systems ................................ 179
Off-road driving systems ..................202
Towing a trailer ................................. 209145Driving and parkingBA 164.8 USA, CA Edition B 2011; 1; 2, en-USd2sboikeVersion: 3.0.3.52010-04-21T15:08:44+02:00 - Seite 145
Page 157 of 376
Driving tips
Kickdown
Use kickdown for maximum acceleration.
XVehicles for USA: fully depress the
accelerator pedal.
The transmission shifts to a lower gear
depending on the engine speed.XVehicles for Canada: depress the
accelerator pedal beyond the pressure
point.
The transmission shifts to a lower gear
depending on the engine speed.
Rocking the vehicle free
Rocking the vehicle free by repeatedly
shifting back and forth between transmission
positions D and R can help to free a vehicle
that has become stuck in mud or snow. The
engine management system of the vehicle
limits shifting back and forth between
transmission positions D and R to a maximum
speed of 5 mph (9 km/h). To shift back and
forth between transmission positions D and
R , move the selector lever up and down
beyond the pressure point.
Working on the vehicle
GWarning
When working on the vehicle, engage the
parking brake and shift the automatic
transmission into park position P. Otherwise
the vehicle could roll away which could result
in an accident and/or serious personal injury.
Trailer towing
XWhen towing a trailer and driving downhill,
shift to a lower gear if the automatic
transmission constantly shifts between
two gears.XEngaging a lower gear and reducing the
speed reduces the risk of the engine
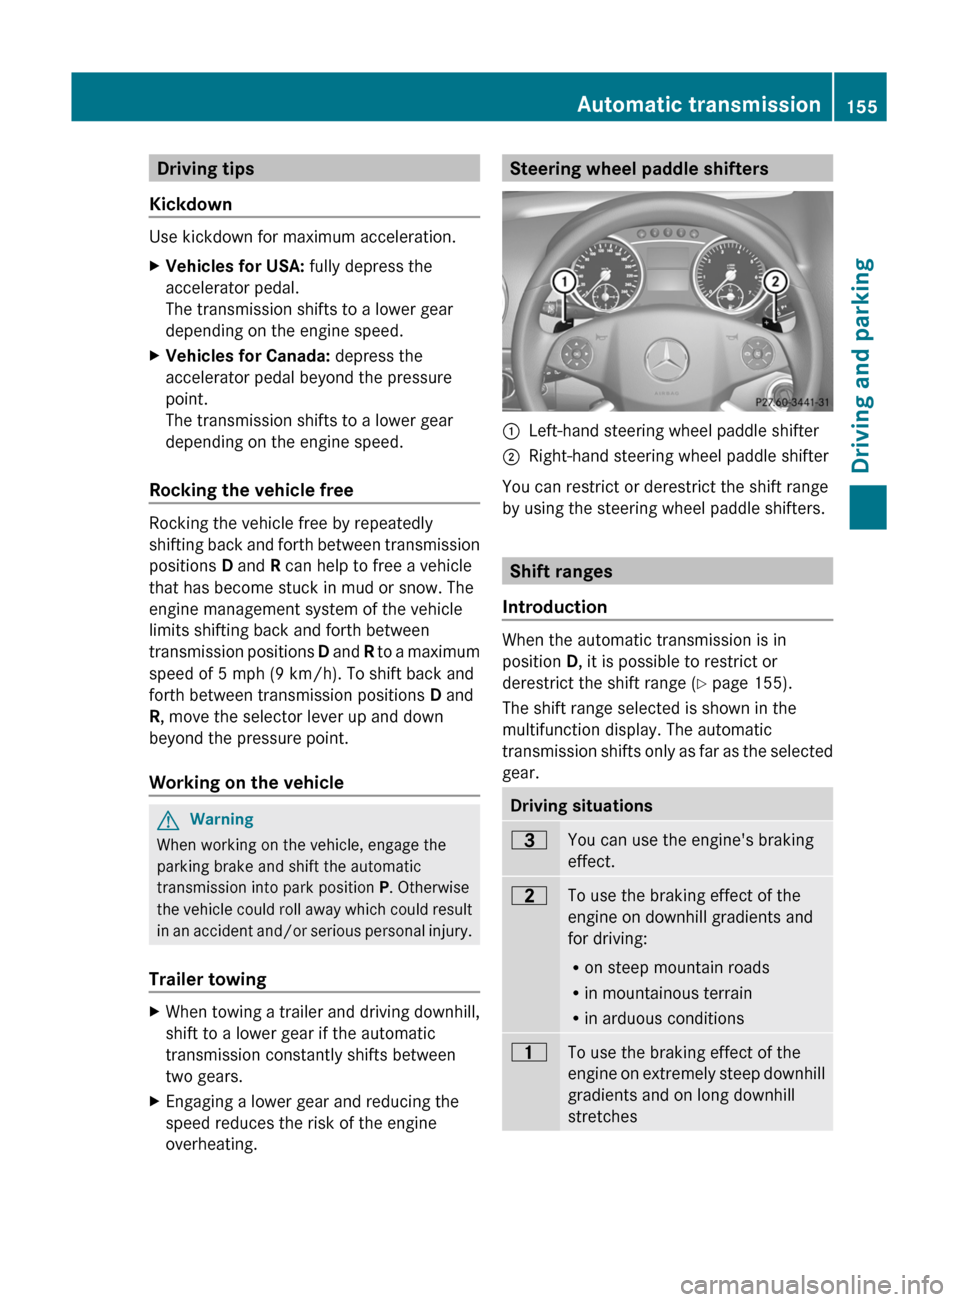
overheating.Steering wheel paddle shifters:Left-hand steering wheel paddle shifter;Right-hand steering wheel paddle shifter
You can restrict or derestrict the shift range
by using the steering wheel paddle shifters.
Shift ranges
Introduction
When the automatic transmission is in
position D, it is possible to restrict or
derestrict the shift range ( Y page 155).
The shift range selected is shown in the
multifunction display. The automatic
transmission shifts only as far as the selected
gear.
Driving situations=You can use the engine's braking
effect.5To use the braking effect of the
engine on downhill gradients and
for driving:
R on steep mountain roads
R in mountainous terrain
R in arduous conditions4To use the braking effect of the
engine on extremely steep downhill
gradients and on long downhill
stretchesAutomatic transmission155Driving and parkingBA 164.8 USA, CA Edition B 2011; 1; 2, en-USd2sboikeVersion: 3.0.3.52010-04-21T15:08:44+02:00 - Seite 155Z
Page 181 of 376
Driving systems
Cruise control
Important safety notes
Cruise control maintains a constant road
speed for you. It brakes automatically in order
to avoid exceeding the set speed. On long and
steep downhill gradients, especially if the
vehicle is laden or towing a trailer, you must
select shift range 1, 2 or 3 in good time. By
doing so, you will make use of the braking
effect of the engine, which relieves the load
on the brake system and prevents the brakes
from overheating and wearing too quickly.
Use cruise control only if road and traffic
conditions make it appropriate to maintain a
steady speed for a prolonged period. You can
store any road speed above 20 mph
(30 km/h).
GWarning
The cruise control is a convenience system
designed to assist the driver during vehicle
operation. The driver is and must always
remain responsible for the vehicle's speed
and for safe brake operation.
Only use the cruise control if the road, traffic,
and weather conditions make it advisable to
travel at a constant speed.
R The use of the cruise control can be
dangerous on winding roads or in heavy
traffic because conditions do not allow safe
driving at a constant speed.
R The use of the cruise control can be
dangerous on slippery roads. Rapid
changes in tire traction can result in wheel
spin and loss of control.
R Deactivate the cruise control when driving
in fog.
The "Resume" function should only be
operated if the driver is fully aware of the
previously set speed and wishes to resume
this particular preset speed.
GWarning
When cruise control brakes, the brake pedal
is pulled back (i.e. operated automatically).
The area around the pedal must not be
blocked by obstacles:
R Do not place any objects in the footwell.
R Ensure that floormats and carpets are fixed
securely. In particular, do not place several
floormats on top of one another.
R Do not place your foot under the brake
pedal, as it could become trapped.
Non-compliance could lead you to cause an
accident in which you and/or others could be
seriously injured.
i Cruise control should not be activated
during off-road driving.
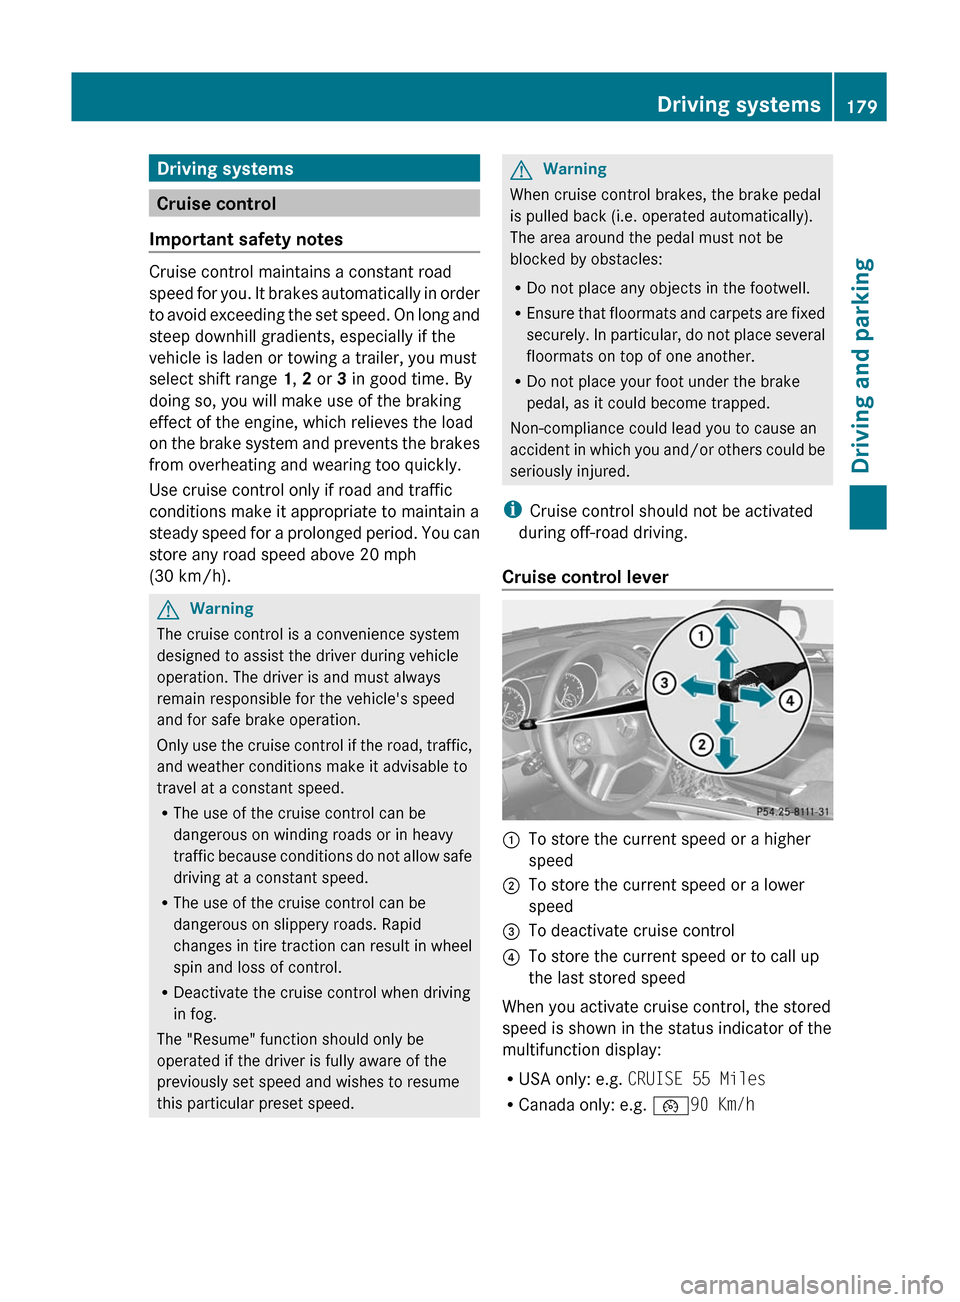
Cruise control lever
:To store the current speed or a higher
speed;To store the current speed or a lower
speed=To deactivate cruise control?To store the current speed or to call up
the last stored speed
When you activate cruise control, the stored
speed is shown in the status indicator of the
multifunction display:
R USA only: e.g. CRUISE 55 Miles
R Canada only: e.g. ¯90 Km/h
Driving systems179Driving and parkingBA 164.8 USA, CA Edition B 2011; 1; 2, en-USd2sboikeVersion: 3.0.3.52010-04-21T15:08:44+02:00 - Seite 179Z
Page 183 of 376
Deactivating cruise control
There are several ways to deactivate cruise
control:
XBriefly press the cruise control lever
forwards =.
or
XBrake.
Cruise control is automatically deactivated if:
R you depress the parking brake.
R you are driving below 20 mph (30 km/h).
R ESP ®
intervenes or you deactivate ESP ®
.
R you shift the transmission to position N
while driving.
If cruise control is deactivated, you will hear
a warning tone. You will see the Cruise
control Off message in the multifunction
display for approximately five seconds.
i The last speed stored is cleared when you
switch off the engine.
DISTRONIC
Important safety notes
DISTRONIC regulates the speed and
automatically helps you maintain the
distance to the vehicle detected in front. It
brakes automatically in order to avoid
exceeding the set speed.
On long and steep downhill gradients,
especially if the vehicle is laden or towing a
trailer, you must select shift range 1, 2 or 3
in good time. By doing so, you will make use
of the braking effect of the engine, which
relieves the load on the brake system and
prevents the brakes from overheating and
wearing too quickly.
If a slower-moving vehicle is detected in front,
DISTRONIC causes your vehicle to brake and
maintain the preset distance to the vehicle in
front.
GWarning!
The Distronic requires familiarity with its
operational characteristics. We strongly
recommend that you review the following
information carefully before operating the
system.
GWarning
When DISTRONIC brakes, the brake pedal is
pulled back (i.e. operated automatically). The
area around the pedal must not be blocked by
obstacles:
R do not place any objects in the footwell.
R ensure that floormats and carpets are fixed
securely. In particular, do not place several
floormats on top of one another.
R do not place your foot under the brake
pedal, as it could become trapped.
Non-compliance could lead you to cause an
accident in which you and/or others could be
seriously injured.
GWarning!
The Distronic is a convenience system. Its
speed adjustment reduction capability is
intended to make cruise control more
effective and usable when traffic speeds vary.
It is not however, intended to, nor does it,
replace the need for extreme care.
The responsibility for the vehicle’s speed,
distance to the preceding vehicle and, most
importantly, brake operation to ensure a safe
stopping distance, always remains with the
driver.
The Distronic cannot take street and traffic
conditions into account. Complex driving
situations are not always fully recognized by
the Distronic. This could result in wrong or
missing distance warnings.
If there is no vehicle in front, DISTRONIC
operates in the same way as cruise control in
the speed range between 20 mph
( 30 km/h) and 120 mph (200 km/h). If there
is a vehicle in front, DISTRONIC operates in
Driving systems181Driving and parkingBA 164.8 USA, CA Edition B 2011; 1; 2, en-USd2sboikeVersion: 3.0.3.52010-04-21T15:08:44+02:00 - Seite 181Z
Page 193 of 376
If you press the V, U , & or *
button on the multifunction steering wheel,
the message will disappear.
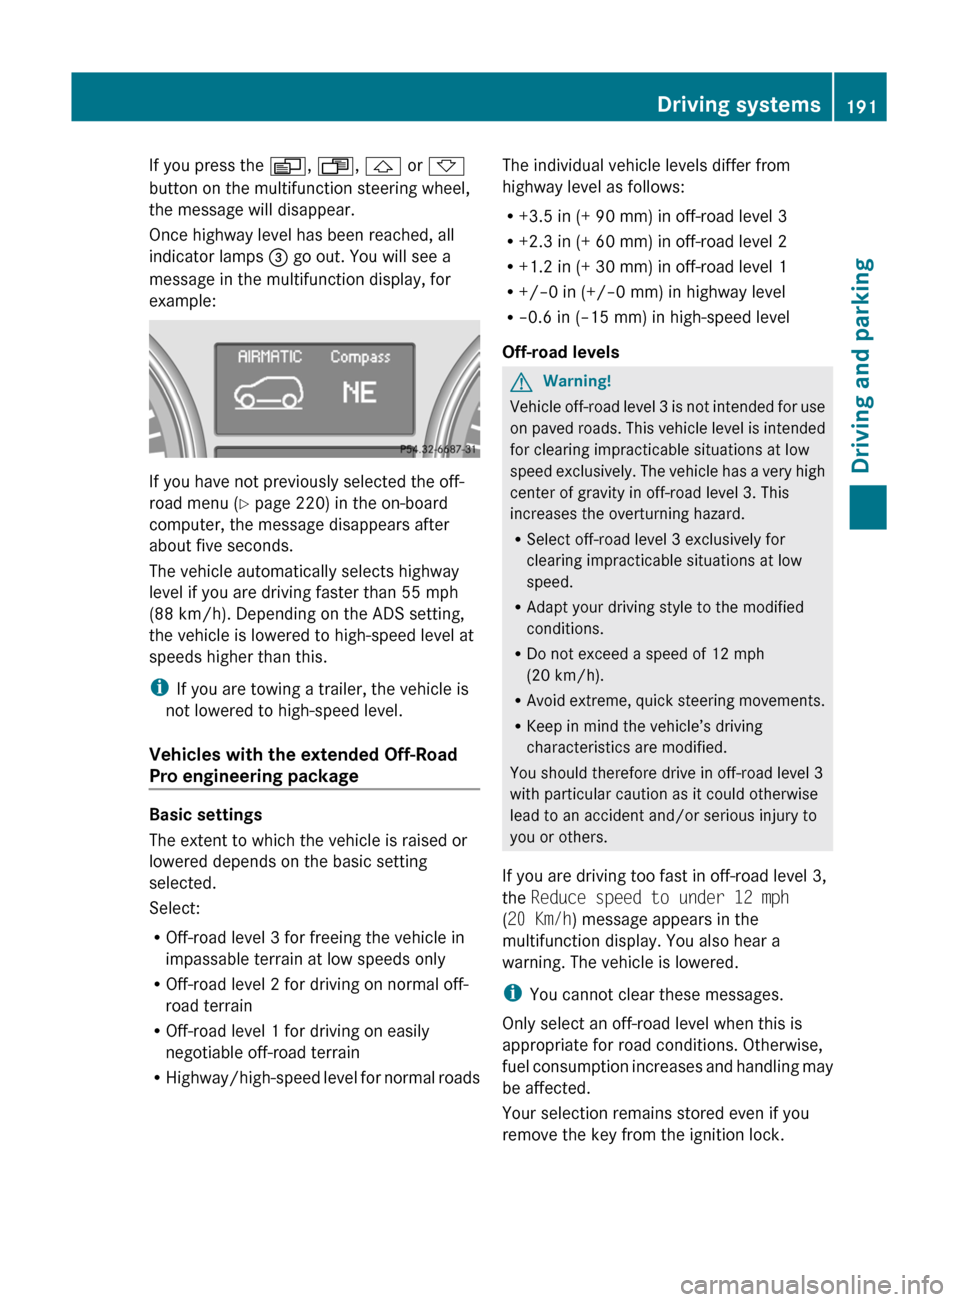
Once highway level has been reached, all
indicator lamps = go out. You will see a
message in the multifunction display, for
example:
If you have not previously selected the off-
road menu ( Y page 220) in the on-board
computer, the message disappears after
about five seconds.
The vehicle automatically selects highway
level if you are driving faster than 55 mph
(88 km/h). Depending on the ADS setting,
the vehicle is lowered to high-speed level at
speeds higher than this.
i If you are towing a trailer, the vehicle is
not lowered to high-speed level.
Vehicles with the extended Off-Road
Pro engineering package
Basic settings
The extent to which the vehicle is raised or
lowered depends on the basic setting
selected.
Select:
R Off-road level 3 for freeing the vehicle in
impassable terrain at low speeds only
R Off-road level 2 for driving on normal off-
road terrain
R Off-road level 1 for driving on easily
negotiable off-road terrain
R Highway/high-speed level for normal roads
The individual vehicle levels differ from
highway level as follows:
R +3.5 in (+ 90 mm) in off-road level 3
R +2.3 in (+ 60 mm) in off-road level 2
R +1.2 in (+ 30 mm) in off-road level 1
R +/–0 in (+/–0 mm) in highway level
R –0.6 in (–15 mm) in high-speed level
Off-road levelsGWarning!
Vehicle off-road level 3 is not intended for use
on paved roads. This vehicle level is intended
for clearing impracticable situations at low
speed exclusively. The vehicle has a very high
center of gravity in off-road level 3. This
increases the overturning hazard.
R Select off-road level 3 exclusively for
clearing impracticable situations at low
speed.
R Adapt your driving style to the modified
conditions.
R Do not exceed a speed of 12 mph
(20 km/h).
R Avoid extreme, quick steering movements.
R Keep in mind the vehicle’s driving
characteristics are modified.
You should therefore drive in off-road level 3
with particular caution as it could otherwise
lead to an accident and/or serious injury to
you or others.
If you are driving too fast in off-road level 3,
the Reduce speed to under 12 mph
( 20 Km/h ) message appears in the
multifunction display. You also hear a
warning. The vehicle is lowered.
i You cannot clear these messages.
Only select an off-road level when this is
appropriate for road conditions. Otherwise,
fuel consumption increases and handling may
be affected.
Your selection remains stored even if you
remove the key from the ignition lock.
Driving systems191Driving and parkingBA 164.8 USA, CA Edition B 2011; 1; 2, en-USd2sboikeVersion: 3.0.3.52010-04-21T15:08:44+02:00 - Seite 191Z
Page 196 of 376

:To raise the level;To lower the level=Indicator lampsXStart the engine.
If one or more indicator lamps = are on:
XTurn the selector wheel
counterclockwise ; until all indicator
lamps = that are lit start to flash.
The vehicle is lowered to highway level. As
soon as the next lowest level is reached,
the indicator lamp stops flashing and goes
out.
While the adjustment is taking place, a
message appears in the multifunction
display, e.g.:
If you press the V, U , & or *
button on the multifunction steering wheel,
the message will disappear.
Once highway level has been reached, all
indicator lamps = go out. You will see a
message in the multifunction display, for
example:
If you have not previously selected the off-
road menu ( Y page 220) in the on-board
computer, the message disappears after
about five seconds.
The vehicle automatically selects highway
level if you are driving faster than 60 mph
(115 km/h). Depending on the ADS setting
( Y page 194), the vehicle is lowered to high-
speed level at higher speeds.
i If you are towing a trailer, the vehicle is
not lowered to high-speed level.
ADS (Adaptive Damping System)
General notes
ADS is continuously electronically controlled.
It adapts the damping characteristics to the
current operating and driving situation.
Damping is controlled separately for each
wheel. This increases driving safety and tire
comfort.
This depends on:
R your driving style
R the road surface conditions
R the ADS setting
R the vehicle level setting
Your selection remains stored even if you
remove the key from the ignition lock.
194Driving systemsDriving and parking
BA 164.8 USA, CA Edition B 2011; 1; 2, en-USd2sboikeVersion: 3.0.3.52010-04-21T15:08:44+02:00 - Seite 194
Page 198 of 376
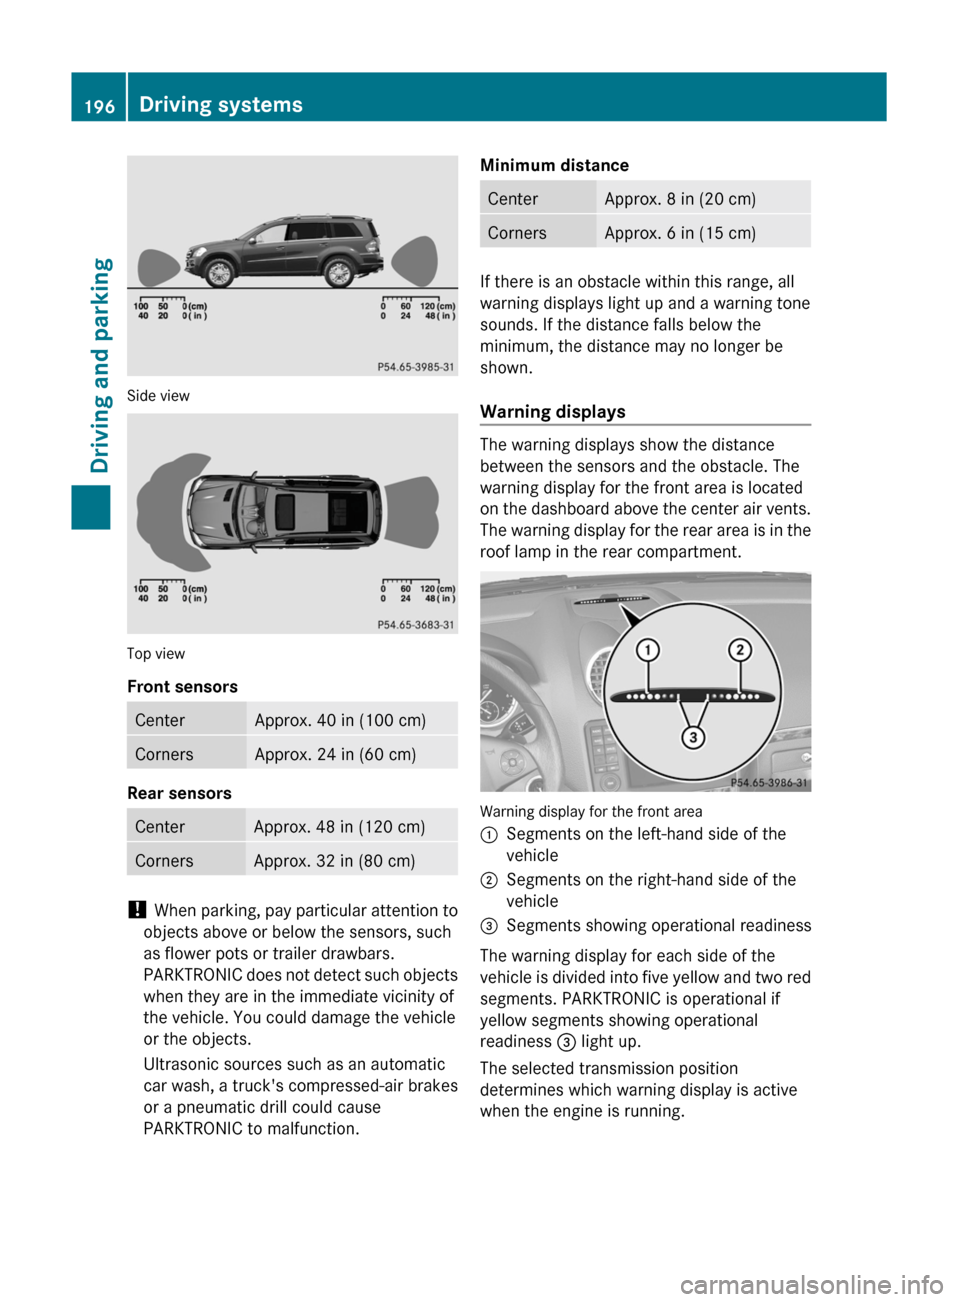
Side view
Top view
Front sensors
CenterApprox. 40 in (100 cm)CornersApprox. 24 in (60 cm)
Rear sensors
CenterApprox. 48 in (120 cm)CornersApprox. 32 in (80 cm)
! When parking, pay particular attention to
objects above or below the sensors, such
as flower pots or trailer drawbars.
PARKTRONIC does not detect such objects
when they are in the immediate vicinity of
the vehicle. You could damage the vehicle
or the objects.
Ultrasonic sources such as an automatic
car wash, a truck's compressed-air brakes
or a pneumatic drill could cause
PARKTRONIC to malfunction.
Minimum distanceCenterApprox. 8 in (20 cm)CornersApprox. 6 in (15 cm)
If there is an obstacle within this range, all
warning displays light up and a warning tone
sounds. If the distance falls below the
minimum, the distance may no longer be
shown.
Warning displays
The warning displays show the distance
between the sensors and the obstacle. The
warning display for the front area is located
on the dashboard above the center air vents.
The warning display for the rear area is in the
roof lamp in the rear compartment.
Warning display for the front area
:Segments on the left-hand side of the
vehicle;Segments on the right-hand side of the
vehicle=Segments showing operational readiness
The warning display for each side of the
vehicle is divided into five yellow and two red
segments. PARKTRONIC is operational if
yellow segments showing operational
readiness = light up.
The selected transmission position
determines which warning display is active
when the engine is running.
196Driving systemsDriving and parking
BA 164.8 USA, CA Edition B 2011; 1; 2, en-USd2sboikeVersion: 3.0.3.52010-04-21T15:08:44+02:00 - Seite 196
Page 199 of 376
Transmission
positionWarning displayDFront area activatedR or NRear and front areas
activatedPNo areas activated
One or more segments light up as the vehicle
approaches an obstacle, depending on the
vehicle's distance from the obstacle.
From the:
R sixth segment onwards, you will hear an
intermittent warning tone for
approximately two seconds.
R seventh segment onwards, you will hear a
warning tone for approximately two
seconds. This indicates that you have now
reached the minimum distance.
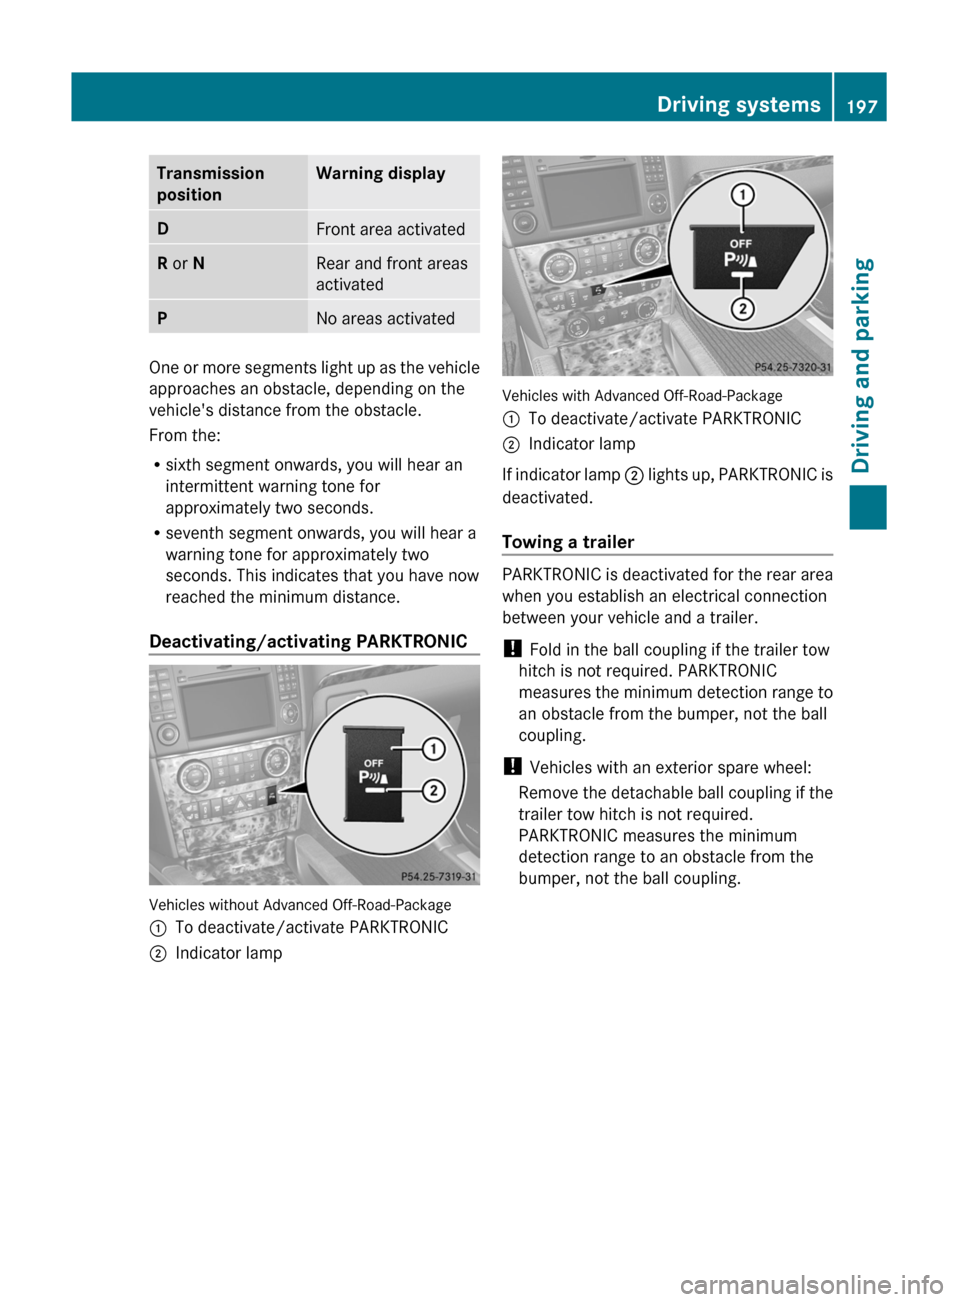
Deactivating/activating PARKTRONIC
Vehicles without Advanced Off-Road-Package
:To deactivate/activate PARKTRONIC;Indicator lamp
Vehicles with Advanced Off-Road-Package
:To deactivate/activate PARKTRONIC;Indicator lamp
If indicator lamp ; lights up, PARKTRONIC is
deactivated.
Towing a trailer
PARKTRONIC is deactivated for the rear area
when you establish an electrical connection
between your vehicle and a trailer.
! Fold in the ball coupling if the trailer tow
hitch is not required. PARKTRONIC
measures the minimum detection range to
an obstacle from the bumper, not the ball
coupling.
! Vehicles with an exterior spare wheel:
Remove the detachable ball coupling if the
trailer tow hitch is not required.
PARKTRONIC measures the minimum
detection range to an obstacle from the
bumper, not the ball coupling.
Driving systems197Driving and parkingBA 164.8 USA, CA Edition B 2011; 1; 2, en-USd2sboikeVersion: 3.0.3.52010-04-21T15:08:44+02:00 - Seite 197Z