2011 MERCEDES-BENZ GL350 BlueTEC roof
[x] Cancel search: roofPage 44 of 376
bag on the front-passenger side will not
deploy. The side impact air bag on the front-
passenger side will deploy if the front
passenger seat belt is fastened, regardless of
whether the front-passenger seat is occupied
or not.
! Vehicles with BabySmart™ (Canada only):
do not place objects heavier than 20 lb
(9 kg) on the front-passenger seat, as this
could be interpreted as the seat being
occupied. In the event of an accident, the
restraint systems on the front-passenger
side are deployed. Have restraint systems
replaced that have been deployed.
Window curtain air bagsGWarning
Observe "Important safety instructions"
( Y page 38).
The window curtain air bags enhance the level
of protection for the head (but not chest or
arms) of the vehicle occupants on the side of
the vehicle on which the impact occurs.
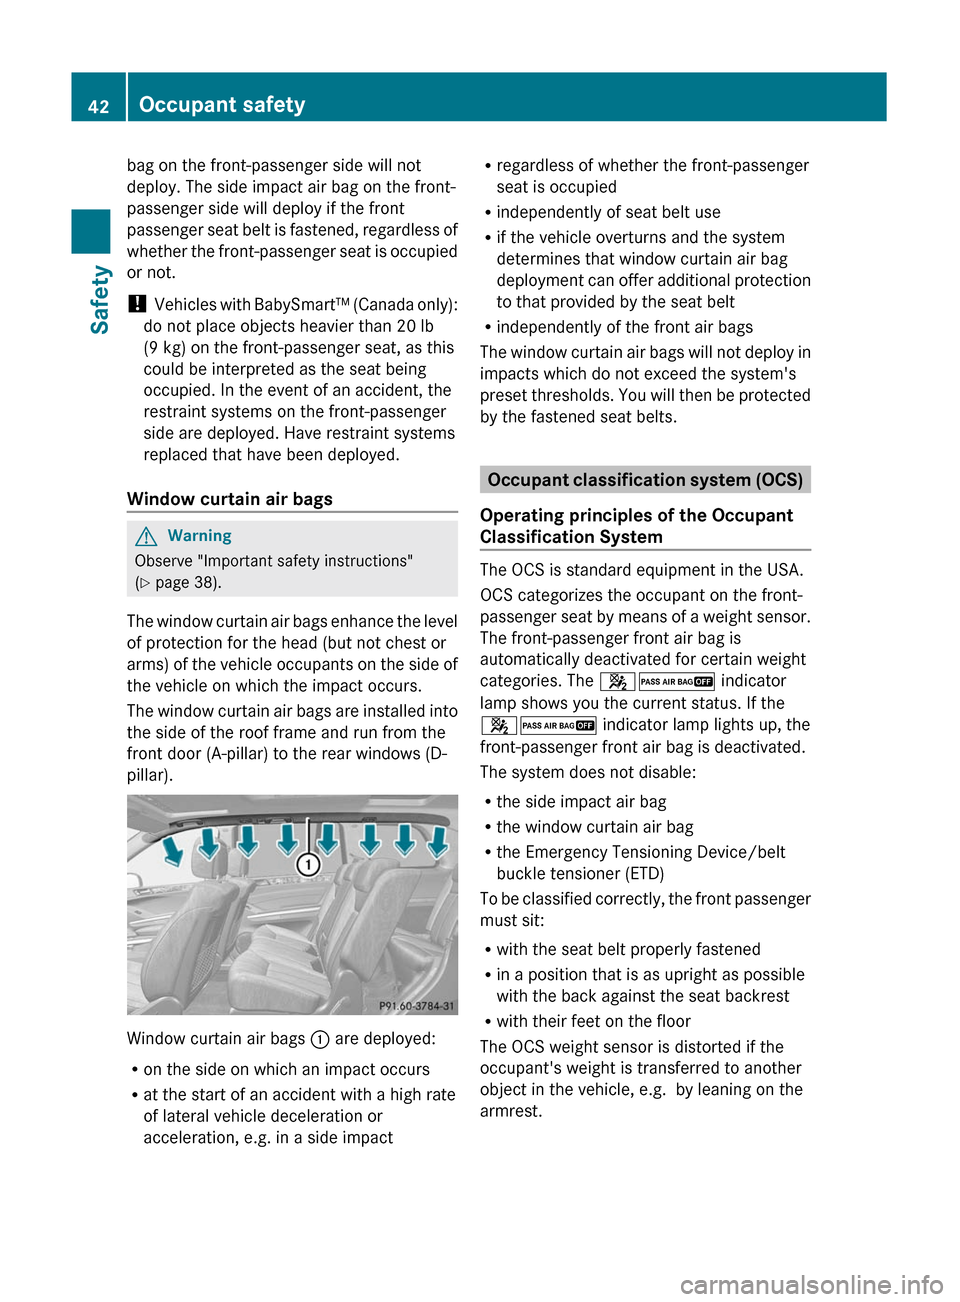
The window curtain air bags are installed into
the side of the roof frame and run from the
front door (A-pillar) to the rear windows (D-
pillar).
Window curtain air bags : are deployed:
R on the side on which an impact occurs
R at the start of an accident with a high rate
of lateral vehicle deceleration or
acceleration, e.g. in a side impact
R regardless of whether the front-passenger
seat is occupied
R independently of seat belt use
R if the vehicle overturns and the system
determines that window curtain air bag
deployment can offer additional protection
to that provided by the seat belt
R independently of the front air bags
The window curtain air bags will not deploy in
impacts which do not exceed the system's
preset thresholds. You will then be protected
by the fastened seat belts.
Occupant classification system (OCS)
Operating principles of the Occupant
Classification System
The OCS is standard equipment in the USA.
OCS categorizes the occupant on the front-
passenger seat by means of a weight sensor.
The front-passenger front air bag is
automatically deactivated for certain weight
categories. The 42 indicator
lamp shows you the current status. If the
42 indicator lamp lights up, the
front-passenger front air bag is deactivated.
The system does not disable:
R the side impact air bag
R the window curtain air bag
R the Emergency Tensioning Device/belt
buckle tensioner (ETD)
To be classified correctly, the front passenger
must sit:
R with the seat belt properly fastened
R in a position that is as upright as possible
with the back against the seat backrest
R with their feet on the floor
The OCS weight sensor is distorted if the
occupant's weight is transferred to another
object in the vehicle, e.g. by leaning on the
armrest.
42Occupant safetySafety
BA 164.8 USA, CA Edition B 2011; 1; 2, en-USd2sboikeVersion: 3.0.3.52010-04-21T15:08:44+02:00 - Seite 42
Page 49 of 376
Problems with the occupant classification systemProblemPossible causes/consequences and M SolutionsUSA only: The
42
indicator lamp
illuminates and
remains illuminated
when the weight of a
typical adult or an
individual that is the
size of a typical adult
has been detected on
the passenger seat; the
system then
determines the
occupant cannot be a
child.The OCS is malfunctioning.XHave the OCS checked as soon as possible at an authorized
Mercedes-Benz Center.XRead and observe the additional display messages in the
multifunction display ( Y page 231).GWarning
If the 42 indicator lamp illuminates and remains illuminated when the weight of a
typical adult or someone larger than a small individual has been detected on the passenger seat,
the system then determines the occupant cannot be a child. Do not allow any occupant to use
the passenger seat until the system has been repaired.
ProblemPossible causes/consequences and M SolutionsThe 42
indicator lamp does not
illuminate and/or does
not remain illuminated
when the weight of a
typical 12-month-old
child in a standard child
restraint or less/
unoccupied child
restraint has been
detected on the front-
passenger seat.The OCS is malfunctioning.XMake sure there is nothing between the seat cushion and the
child seat.XCheck the installation of the child restraint system.XMake sure there are no objects applying additional weight onto
the seat.XMake sure there are no objects applying additional weight onto
the seat. Head restraints that press against the roof or books
that are behind or trapped between the seat, for example, apply
force to the seat. OCS senses such forces as additional weight.XIf the 42 indicator lamp does not illuminate, have
the OCS checked as soon as possible at an authorized
Mercedes-Benz Center. Do not transport a child on the front-
passenger seat until the OCS has been repaired.XRead and observe the additional display messages in the
multifunction display ( Y page 231).Occupant safety47SafetyBA 164.8 USA, CA Edition B 2011; 1; 2, en-USd2sboikeVersion: 3.0.3.52010-04-21T15:08:44+02:00 - Seite 47Z
Page 54 of 376
of having to swerve to avoid an obstacle at
a speed above 85 mph (140 km/h).
PRE-SAFE ®
takes the following measures
depending on the hazardous situation
detected:
R the front seat belts are pre-tensioned.
R on vehicles with memory functions: the
front-passenger seat is adjusted if it is in an
unfavorable position under accident
conditions.
R if the vehicle skids, the side windows are
closed so that only a small gap remains.
R on vehicles with sliding sunroof: if the
vehicle skids, the sliding sunroof closes so
that only a small gap remains.
If the hazardous situation passes without
resulting in an accident, PRE-SAFE ®
slackens
the belt pretensioning. All settings made by
PRE-SAFE ®
can then be reversed.
If the seat belts are not released:XMove the backrest or the seat back slightly
until the belt pretensioning is reduced.
The locking mechanism releases.GWarning
Make sure that nobody can become trapped
as you adjust the seat.
! Make sure that there are no objects in the
footwell or behind the seats when resetting
the seats. There is a risk that the seats
and/or the objects could be damaged.
More information about belt adjustment, a
convenience function integrated into PRE-
SAFE ®
, can be found in the "Belt adjustment"
section ( Y page 56).
NECK-PRO head restraints
The NECK-PRO head restraints increase
protection to the driver's and front-
passenger's head and neck. To this end, the
head restraints on the driver's and front-
passenger seats are moved forwards and
upwards in the event of a rear-end collision of
a certain severity. This provides better head
support.GWarning
Do not secure any objects (e.g. coat hangers)
on the NECK-PRO head restraints. Otherwise,
the NECK-PRO head restraints may not
function properly, or in the event of a rear-end
collision may not be able offer the level of
protection they are designed to provide.
If the NECK-PRO head restraints have been
triggered in an accident, you must reset the
NECK-PRO head restraints on the driver’s and
front-passenger seat ( Y page 52).
Otherwise, the additional protection will not
be available in the event of another rear-end
collision. You can recognize when NECK-PRO
head restraints have been triggered by the
fact that they have moved forwards and can
no longer be adjusted.
Resetting triggered NECK-PRO head
restraints
Important safety information
GWarning
For reasons of safety, have the NECK-PRO
head restraints/NECK-PRO luxury head
restraints checked at a Mercedes-Benz
Service Center after a rear-end collision.
GWarning
If you press the NECK-PRO head restraint
cushion backwards, make sure that your
fingers are not trapped between the cushion
and the cover. Failure to observe could result
in injuries.
NECK-PRO head restraints
i Resetting the NECK-PRO head restraints
requires a certain amount of strength. If
you have difficulty resetting the NECK-PRO
head restraints, have this work carried out
at a qualified specialist workshop, e.g. an
authorized Mercedes-Benz Center.
52Occupant safetySafety
BA 164.8 USA, CA Edition B 2011; 1; 2, en-USd2sboikeVersion: 3.0.3.52010-04-21T15:08:44+02:00 - Seite 52
Page 66 of 376
Child-proof locks
Child-proof locks for the rear doorsGWarning
Observe "Important safety instructions"
( Y page 59).
GWarning
Children could open a rear door from inside
the vehicle. This could result in serious
injuries or an accident. Therefore, when
children ride in the rear always secure the rear
doors with the child-proof locks.
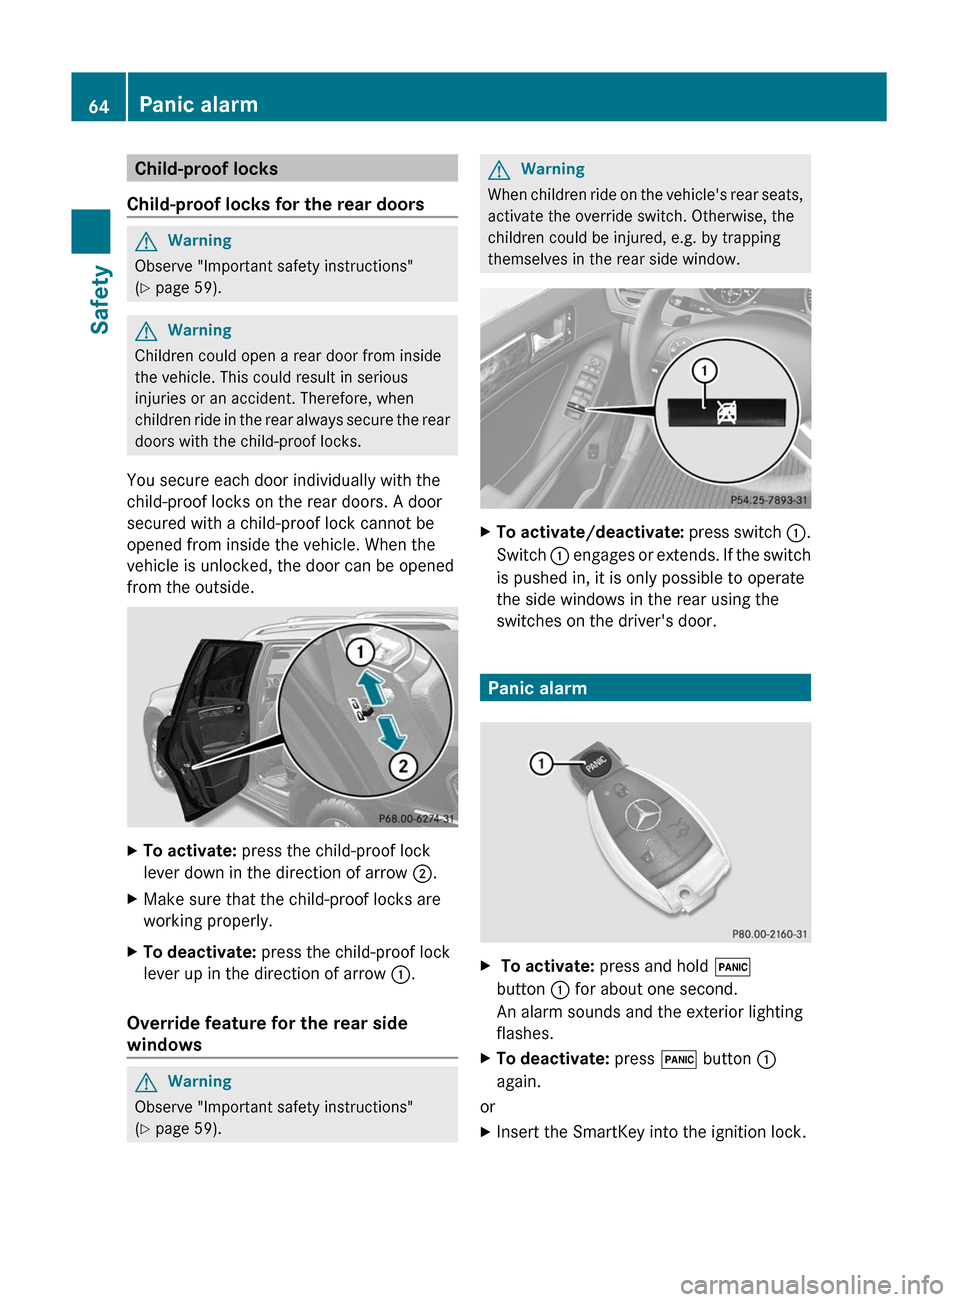
You secure each door individually with the
child-proof locks on the rear doors. A door
secured with a child-proof lock cannot be
opened from inside the vehicle. When the
vehicle is unlocked, the door can be opened
from the outside.
XTo activate: press the child-proof lock
lever down in the direction of arrow ;.XMake sure that the child-proof locks are
working properly.XTo deactivate: press the child-proof lock
lever up in the direction of arrow :.
Override feature for the rear side
windows
GWarning
Observe "Important safety instructions"
( Y page 59).
GWarning
When children ride on the vehicle's rear seats,
activate the override switch. Otherwise, the
children could be injured, e.g. by trapping
themselves in the rear side window.
XTo activate/deactivate: press switch :.
Switch : engages or extends. If the switch
is pushed in, it is only possible to operate
the side windows in the rear using the
switches on the driver's door.
Panic alarm
X To activate: press and hold !
button : for about one second.
An alarm sounds and the exterior lighting
flashes.XTo deactivate: press ! button :
again.
or
XInsert the SmartKey into the ignition lock.64Panic alarmSafety
BA 164.8 USA, CA Edition B 2011; 1; 2, en-USd2sboikeVersion: 3.0.3.52010-04-21T15:08:44+02:00 - Seite 64
Page 73 of 376
Vehicle equipment ..............................72
SmartKey ............................................. 72
Doors .................................................... 78
Cargo compartment ............................80
Side windows ...................................... 84
Sliding sunroof .................................... 8871Opening and closingBA 164.8 USA, CA Edition B 2011; 1; 2, en-USd2sboikeVersion: 3.0.3.52010-04-21T15:08:44+02:00 - Seite 71
Page 81 of 376
Unlocking and opening doors from
the inside
You can open a door from inside the vehicle
even if it has been locked, unless the child-
proof locks have been activated (Y page 64).
Open the door only when the traffic
conditions permit.
If the vehicle has been opened with the
SmartKey or KEYLESS-GO key, opening from
inside triggers the anti-theft alarm system.
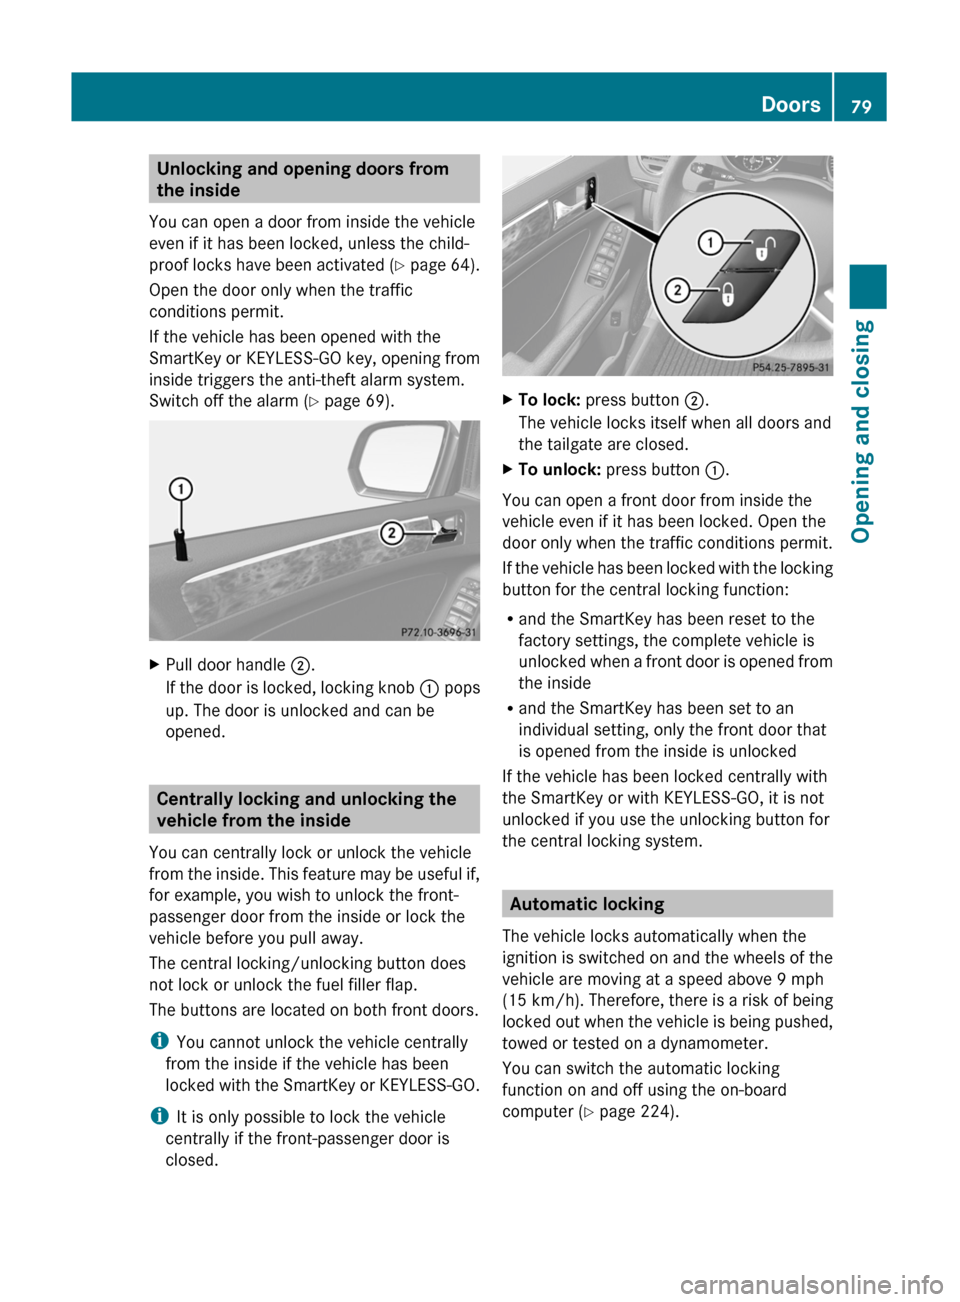
Switch off the alarm ( Y page 69).XPull door handle ;.
If the door is locked, locking knob : pops
up. The door is unlocked and can be
opened.
Centrally locking and unlocking the
vehicle from the inside
You can centrally lock or unlock the vehicle
from the inside. This feature may be useful if,
for example, you wish to unlock the front-
passenger door from the inside or lock the
vehicle before you pull away.
The central locking/unlocking button does
not lock or unlock the fuel filler flap.
The buttons are located on both front doors.
i You cannot unlock the vehicle centrally
from the inside if the vehicle has been
locked with the SmartKey or KEYLESS-GO.
i It is only possible to lock the vehicle
centrally if the front-passenger door is
closed.
XTo lock: press button ;.
The vehicle locks itself when all doors and
the tailgate are closed.XTo unlock: press button :.
You can open a front door from inside the
vehicle even if it has been locked. Open the
door only when the traffic conditions permit.
If the vehicle has been locked with the locking
button for the central locking function:
R and the SmartKey has been reset to the
factory settings, the complete vehicle is
unlocked when a front door is opened from
the inside
R and the SmartKey has been set to an
individual setting, only the front door that
is opened from the inside is unlocked
If the vehicle has been locked centrally with
the SmartKey or with KEYLESS-GO, it is not
unlocked if you use the unlocking button for
the central locking system.
Automatic locking
The vehicle locks automatically when the
ignition is switched on and the wheels of the
vehicle are moving at a speed above 9 mph
(15 km/h) . Therefore, there is a risk of being
locked out when the vehicle is being pushed,
towed or tested on a dynamometer.
You can switch the automatic locking
function on and off using the on-board
computer ( Y page 224).
Doors79Opening and closingBA 164.8 USA, CA Edition B 2011; 1; 2, en-USd2sboikeVersion: 3.0.3.52010-04-21T15:08:44+02:00 - Seite 79Z
Page 88 of 376
iIf you press the switch beyond the point
of resistance, an automatic opening/
closing process is started in the
corresponding direction. You can stop
automatic operation by pressing again.
i You can continue to operate the side
windows after you switch off the engine.
This function remains active for five
minutes or until one of the front doors is
opened.
Opening and closing the hinged side
windows
You can operate the hinged side windows
electrically.
The hinged side windows can only be
operated from the driver's seat.
GWarning!
Make sure that nobody can become trapped
as you close the hinged side windows. If there
is a risk of somebody becoming trapped,
release the switch or push the switch again to
reopen the side window.
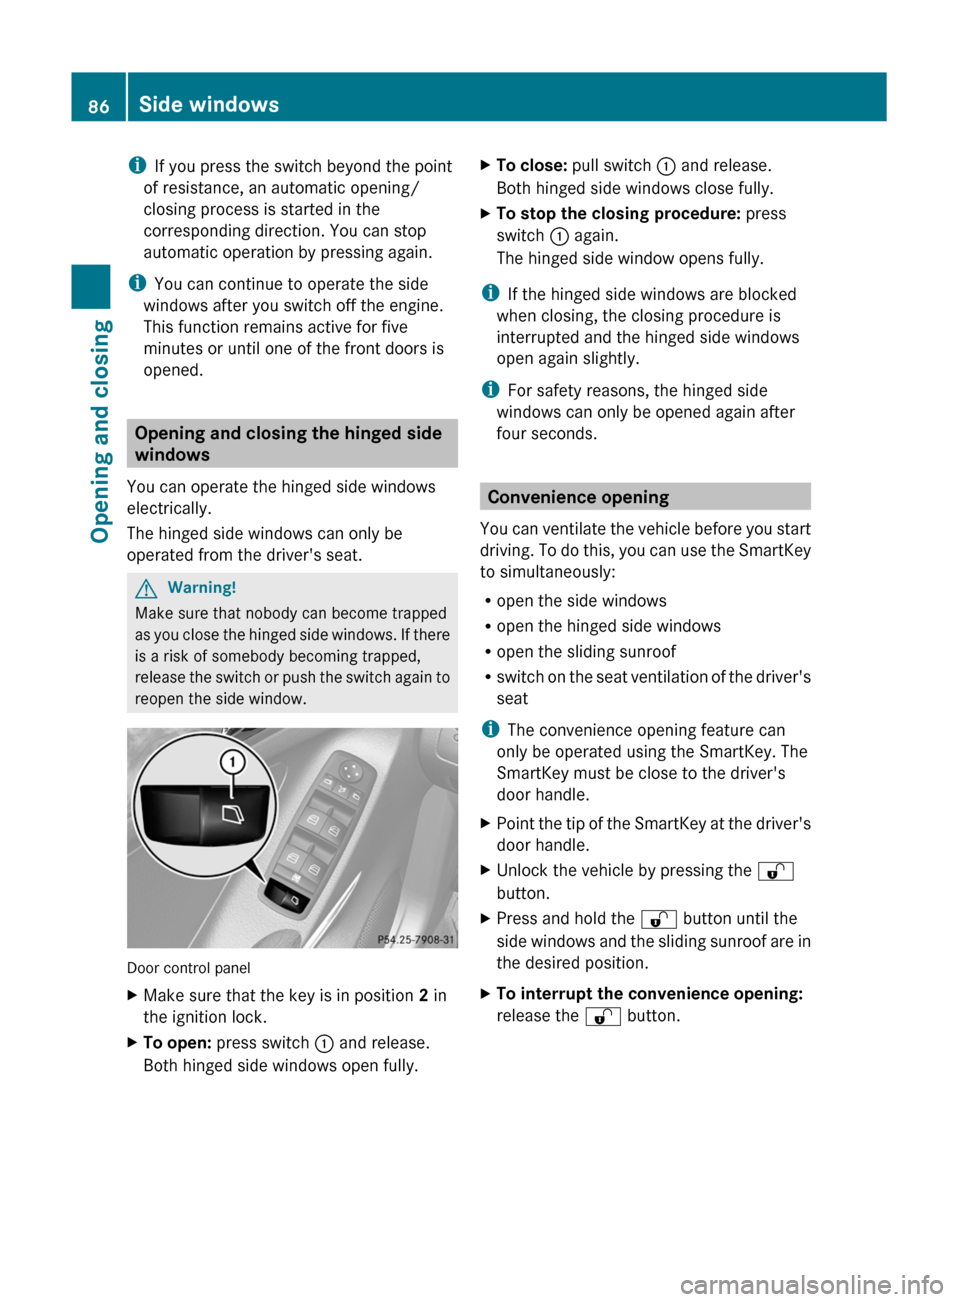
Door control panel
XMake sure that the key is in position 2 in
the ignition lock.XTo open: press switch : and release.
Both hinged side windows open fully.XTo close: pull switch : and release.
Both hinged side windows close fully.XTo stop the closing procedure: press
switch : again.
The hinged side window opens fully.
i If the hinged side windows are blocked
when closing, the closing procedure is
interrupted and the hinged side windows
open again slightly.
i For safety reasons, the hinged side
windows can only be opened again after
four seconds.
Convenience opening
You can ventilate the vehicle before you start
driving. To do this, you can use the SmartKey
to simultaneously:
R open the side windows
R open the hinged side windows
R open the sliding sunroof
R switch on the seat ventilation of the driver's
seat
i The convenience opening feature can
only be operated using the SmartKey. The
SmartKey must be close to the driver's
door handle.
XPoint the tip of the SmartKey at the driver's
door handle.XUnlock the vehicle by pressing the %
button.XPress and hold the % button until the
side windows and the sliding sunroof are in
the desired position.XTo interrupt the convenience opening:
release the % button.86Side windowsOpening and closing
BA 164.8 USA, CA Edition B 2011; 1; 2, en-USd2sboikeVersion: 3.0.3.52010-04-21T15:08:44+02:00 - Seite 86
Page 89 of 376
Convenience closing
General information
When you lock the vehicle, you can
simultaneously:
R close the side windows
R close the hinged side windows
R close the sliding sunroof
GWarning
When closing the door windows and the
sliding sunroof, make sure that there is no
danger of anyone being harmed by the closing
procedure.
If potential danger exists, proceed as follows:
R Release the & button to stop the closing
procedure. To open, press and hold the
% button. To continue the closing
procedure after making sure that there is
no danger of anyone being harmed by the
closing procedure, press and hold the
& button.
Vehicles with KEYLESS-GO:
R Release the lock button on the outside door
handle to stop the closing procedure.
R Immediately pull on the same outside door
handle and hold firmly. The door windows
and the sliding sunroof will open for as long
as the door handle is held but the door is
not opened.
Using the SmartKey
i The SmartKey must be close to the
driver's door handle.
XPoint the tip of the SmartKey at the driver's
door handle.XLock the vehicle by pressing the &
button.XPress and hold the & button until the
side windows and the sliding sunroof are
fully closed.XMake sure that all the side windows and the
sliding sunroof are closed.XTo interrupt the convenience closing:
release the & button.
Using KEYLESS-GO
The KEYLESS-GO key must be outside the
vehicle but must not be further than 3 ft (1 m)
from a door.
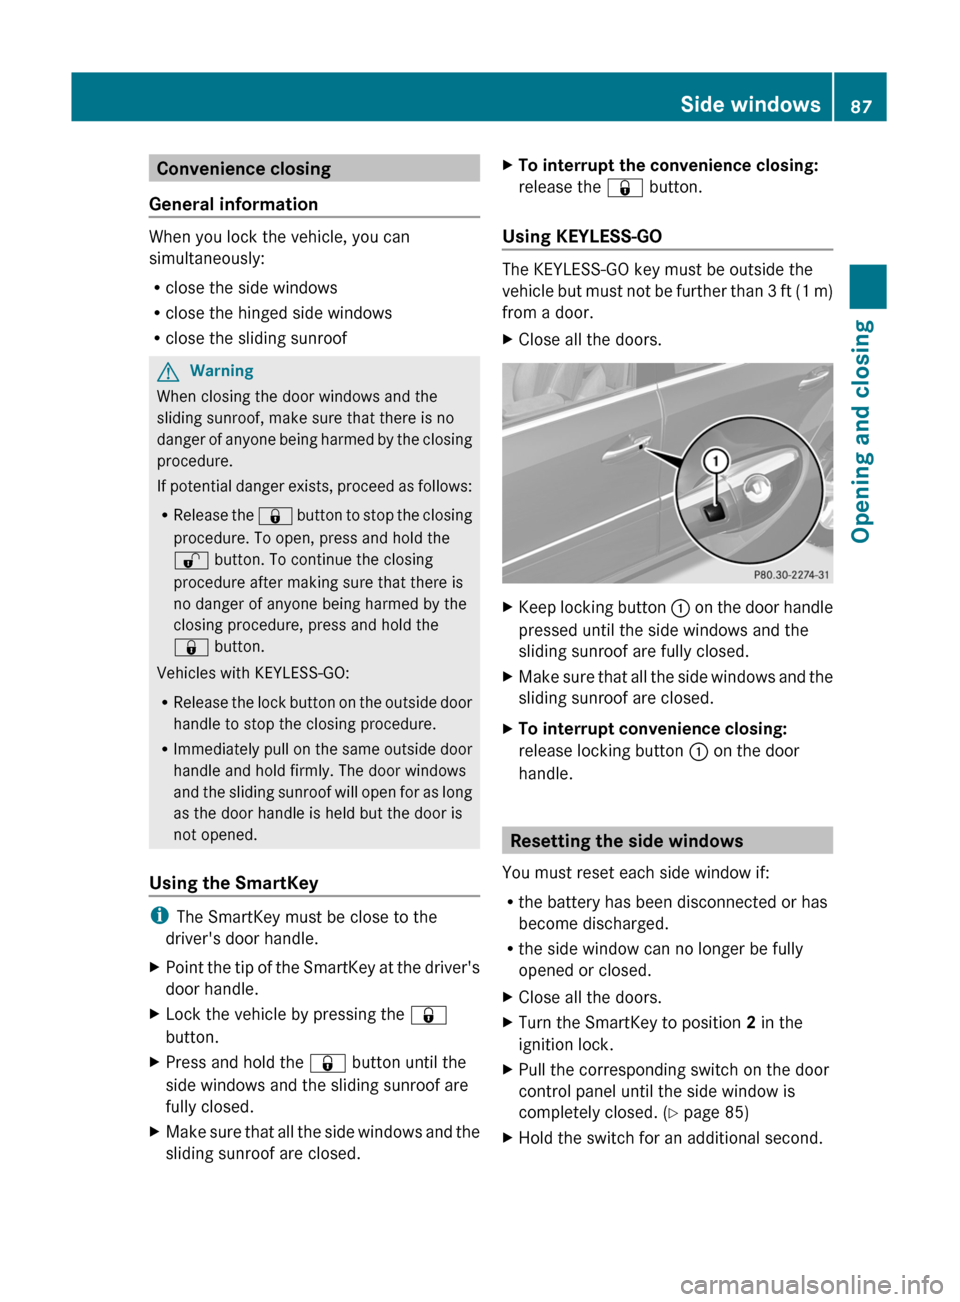
XClose all the doors.XKeep locking button : on the door handle
pressed until the side windows and the
sliding sunroof are fully closed.XMake sure that all the side windows and the
sliding sunroof are closed.XTo interrupt convenience closing:
release locking button : on the door
handle.
Resetting the side windows
You must reset each side window if:
R the battery has been disconnected or has
become discharged.
R the side window can no longer be fully
opened or closed.
XClose all the doors.XTurn the SmartKey to position 2 in the
ignition lock.XPull the corresponding switch on the door
control panel until the side window is
completely closed. ( Y page 85)XHold the switch for an additional second.Side windows87Opening and closingBA 164.8 USA, CA Edition B 2011; 1; 2, en-USd2sboikeVersion: 3.0.3.52010-04-21T15:08:44+02:00 - Seite 87Z