2011 MERCEDES-BENZ GL four wheel drive
[x] Cancel search: four wheel drivePage 6 of 376

1, 2, 3 ...
115 V socket ...................................... 282
12 V socket ........................................ 281
4ETS (Electronic Traction System) Function/notes ................................ 67
4MATIC (permanent four-wheel
drive) .................................................. 202
A
ABS (Anti-lock Braking System) Display message ............................ 235
Function/notes ................................ 65
Warning lamp ................................. 256
Accident (notes) ................................ 309
Active light function (display
message) ............................................ 240
Active service system see Service interval display
Adaptive Damping System (ADS) ..... 194
AdBlue ®
Adding ........................................... 163
Display message ............................ 243
Additional functions (on-board
computer) .......................................... 226
ADS (Adaptive Damping System) ..... 194
Air bags Display message ............................ 232
Front air bag (driver, front
passenger) ....................................... 39
Important safety information ...........38
Knee bag .......................................... 40
PASSENGER AIRBAG OFF
indicator lamp (only Canada) ...........48
PASSENGER AIRBAG OFF
indicator lamp (only USA) ................42
Safety guidelines ............................. 37
Side impact air bag ..........................41
Window curtain air bag ....................42
Air-conditioning system
see Climate control
Air dehumidification
Activating/deactivating with
cooling ........................................... 137
Air distribution
Setting ........................................... 140
Air filter (display message) .............. 243
Airflow
Setting ........................................... 140
Air nozzles
see Air vents .................................. 143
Air pressure
see Tire pressure
Air-recirculation mode
Activating/deactivating .................141
Air vents ............................................. 143
Important safety information .........142
Rear ............................................... 143
Setting the center air vents ...........143
Setting the side air vents ...............143
Alarm system
see ATA
Ambient lighting (on-board
computer) .......................................... 223
Anti-lock Braking System see ABS
Anti-Theft Alarm system
see ATA
Anti-theft system
ATA (Anti-Theft Alarm system) .........69
Approach/departure angle .............. 177
Ashtray ............................................... 279
ATA (Anti-Theft Alarm system) Activating/deactivating ...................69
Function ........................................... 69
Switching off the alarm ....................69
Audio menu (on-board computer) .... 219
AUTO lights see Light sensor
Automatic car wash .......................... 300
Automatic transmission DIRECT SELECT lever .....................152
Display message ............................ 250
Driving tips .................................... 155
Emergency running mode ..............157
Kickdown ....................................... 155
Malfunction .................................... 157
Pulling away ................................... 149
Starting .......................................... 148
Trailer towing ................................. 1554IndexBA 164.8 USA, CA Edition B 2011; 1; 2, en-USd2sboikeVersion: 3.0.3.52010-04-21T15:08:44+02:00 - Seite 4
Page 14 of 376

OCSFaults ............................................... 47
Operation ......................................... 42
System self-test ............................... 46
Octane number (fuel) ........................ 366
Odometer ........................................... 218
Off-road 4MATIC .......................................... 202
Differential locks ............................ 207
DSR ............................................... 203
LOW RANGE off-road gear .....158, 205
Off-road 4ETS .................................. 67
Off-road ABS .................................... 66
Off-road drive program ..................204
Off-road drive program ..................... 204
Off-road driving ................................. 174
Important safety instructions ......... 173
Off-road fording ................................. 171
Off-road terrain Off-road ESP .................................... 68
Oil
see Engine oil
On-board computer
Additional functions menu .............226
Audio menu ................................... 219
Convenience submenu ..................225
Displaying a service message ........299
Displaying the coolant
temperature ................................... 218
Displaying the outside
temperature ................................... 218
Display messages ..........................229
DISTRONIC menu .......................... 186
Factory settings ............................. 221
Important safety notes ..................214
Instrument cluster submenu ..........221
Lighting submenu .......................... 223
Message memory menu ................. 229
Navigation menu ............................ 220
Off-road menu ............................... 220
Operating video DVD .....................220
Operation ....................................... 215
Overview of menus ........................217
Selecting the language ..................222
Settings menu ............................... 221
Standard display menu ..................218
Telephone menu ............................ 227
Time/Date submenu .....................222Trip computer menu ......................227
Vehicle submenu ........................... 224
Opening and closing the side trim
panels ................................................. 123
Operating system see On-board computer
Outside temperature
Calling up (on-board computer) .....218
Display ........................................... 214
Overhead control panel
Overview .......................................... 33
Override feature
Rear side windows ...........................64
P
Paint code number ............................ 363
Paintwork (cleaning instructions) ... 301
Panel Removing (third row of seats) ........101
Panic alarm .......................................... 64
Parking ............................................... 165
Parking aid PARKTRONIC ................................. 195
Rear view camera .......................... 198
Parking brake .................................... 166
Parking lamp (display message) ...... 239
Parking position Exterior mirror on the front-
passenger side ............................... 109
PARKTRONIC ...................................... 195
Activating/deactivating .................197
Malfunction .................................... 198
Problem ......................................... 198
Range of the sensors .....................195
Trailer towing ................................. 197
Warning display ............................. 196
PASSENGER AIRBAG OFF indicator
lamp (only Canada) ............................. 48
PASSENGER AIRBAG OFF indicator
lamp (only USA) ................................... 42
Pedals ................................................. 167
Permanent four-wheel drive see 4MATIC
Plastic trim (cleaning instructions) . 304
Power supply (trailer) ....................... 212
Power washers .................................. 301
12IndexBA 164.8 USA, CA Edition B 2011; 1; 2, en-USd2sboikeVersion: 3.0.3.52010-04-21T15:08:44+02:00 - Seite 12
Page 106 of 376
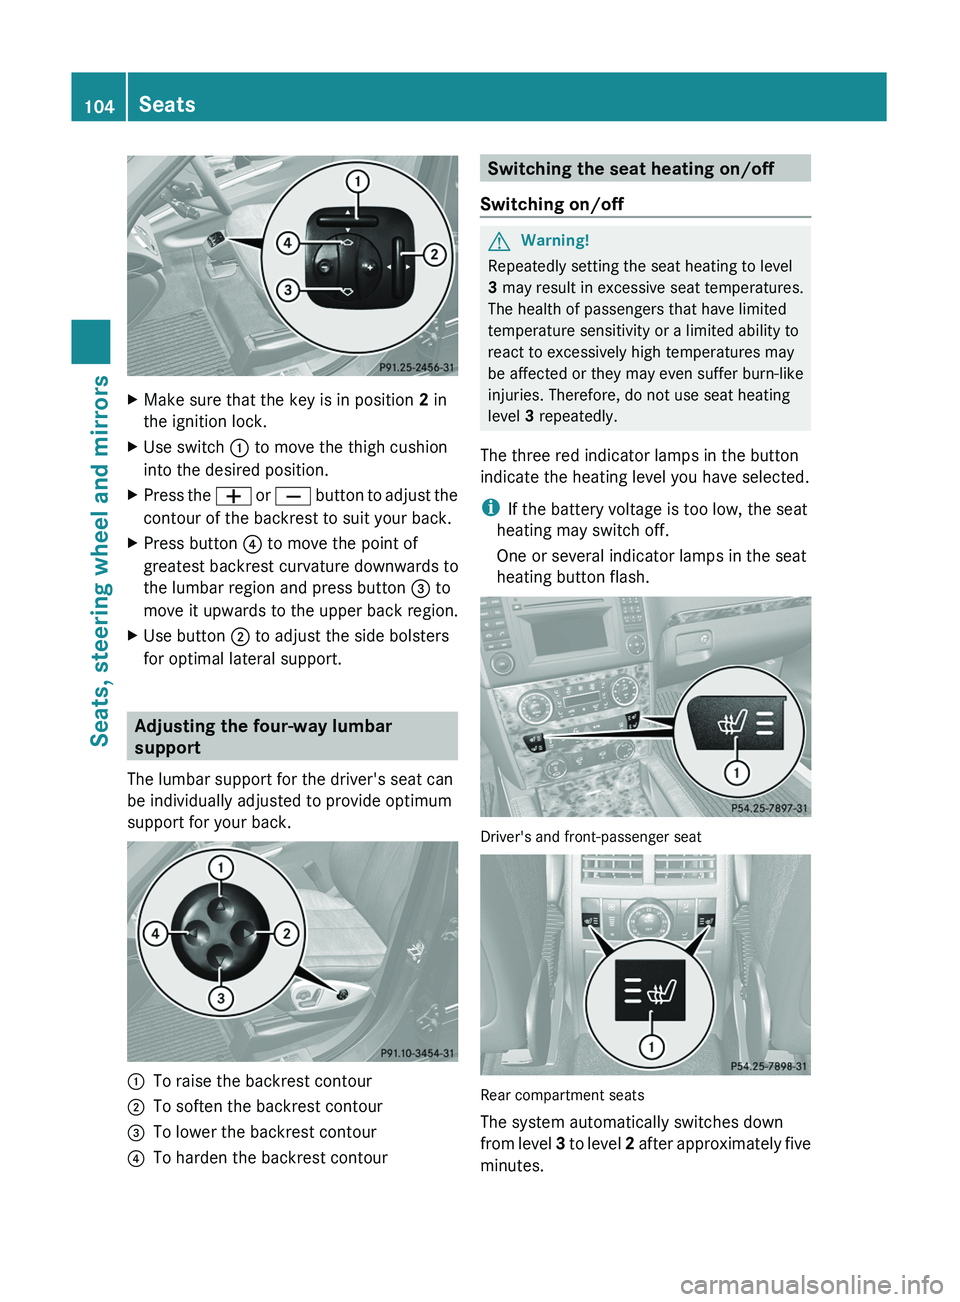
XMake sure that the key is in position 2 in
the ignition lock.XUse switch : to move the thigh cushion
into the desired position.XPress the W or X button to adjust the
contour of the backrest to suit your back.XPress button ? to move the point of
greatest backrest curvature downwards to
the lumbar region and press button = to
move it upwards to the upper back region.XUse button ; to adjust the side bolsters
for optimal lateral support.
Adjusting the four-way lumbar
support
The lumbar support for the driver's seat can
be individually adjusted to provide optimum
support for your back.
:To raise the backrest contour;To soften the backrest contour=To lower the backrest contour?To harden the backrest contourSwitching the seat heating on/off
Switching on/offGWarning!
Repeatedly setting the seat heating to level
3 may result in excessive seat temperatures.
The health of passengers that have limited
temperature sensitivity or a limited ability to
react to excessively high temperatures may
be affected or they may even suffer burn-like
injuries. Therefore, do not use seat heating
level 3 repeatedly.
The three red indicator lamps in the button
indicate the heating level you have selected.
i If the battery voltage is too low, the seat
heating may switch off.
One or several indicator lamps in the seat
heating button flash.
Driver's and front-passenger seat
Rear compartment seats
The system automatically switches down
from level 3 to level 2 after approximately five
minutes.
104SeatsSeats, steering wheel and mirrors
BA 164.8 USA, CA Edition B 2011; 1; 2, en-USd2sboikeVersion: 3.0.3.52010-04-21T15:08:44+02:00 - Seite 104
Page 168 of 376
Using KEYLESS-GOXPress the Start/Stop button (Y page 147).
When the driver's door is closed, the Start/
Stop button is in position 1. When the
driver's door is opened, the Start/Stop
button moves to position 0. This
corresponds to removing the SmartKey.XApply the parking brake firmly.
i If you turn off the engine with the Start/
Stop button and open a front door, the
automatic transmission switches to P
automatically.
i The engine can be turned off while the
vehicle is in motion by pressing and holding
the Start/Stop button for three seconds.
If you have started the engine with the Start/
Stop button and it cannot be switched off as
described:
Xremove the Start/Stop button from the
ignition lock.Xinsert the SmartKey into the ignition lock.
The engine stops. The ignition lock is in
position 0.
Parking brake
GWarning
Engaging the parking brake while the vehicle
is in motion can cause the rear wheels to lock
up. You could lose control of the vehicle and
cause an accident. In addition, the vehicle's
brake lights do not light up when the parking
brake is engaged.
GWarning!
When leaving the vehicle, always remove the
SmartKey from the starter switch, take it with
you, and lock the vehicle. Do not leave
children unattended in the vehicle, or with
access to an unlocked vehicle. Children could
release the parking brake and/or shift the
automatic transmission out of park position
P , either of which could result in an accident
and/or serious personal injury.
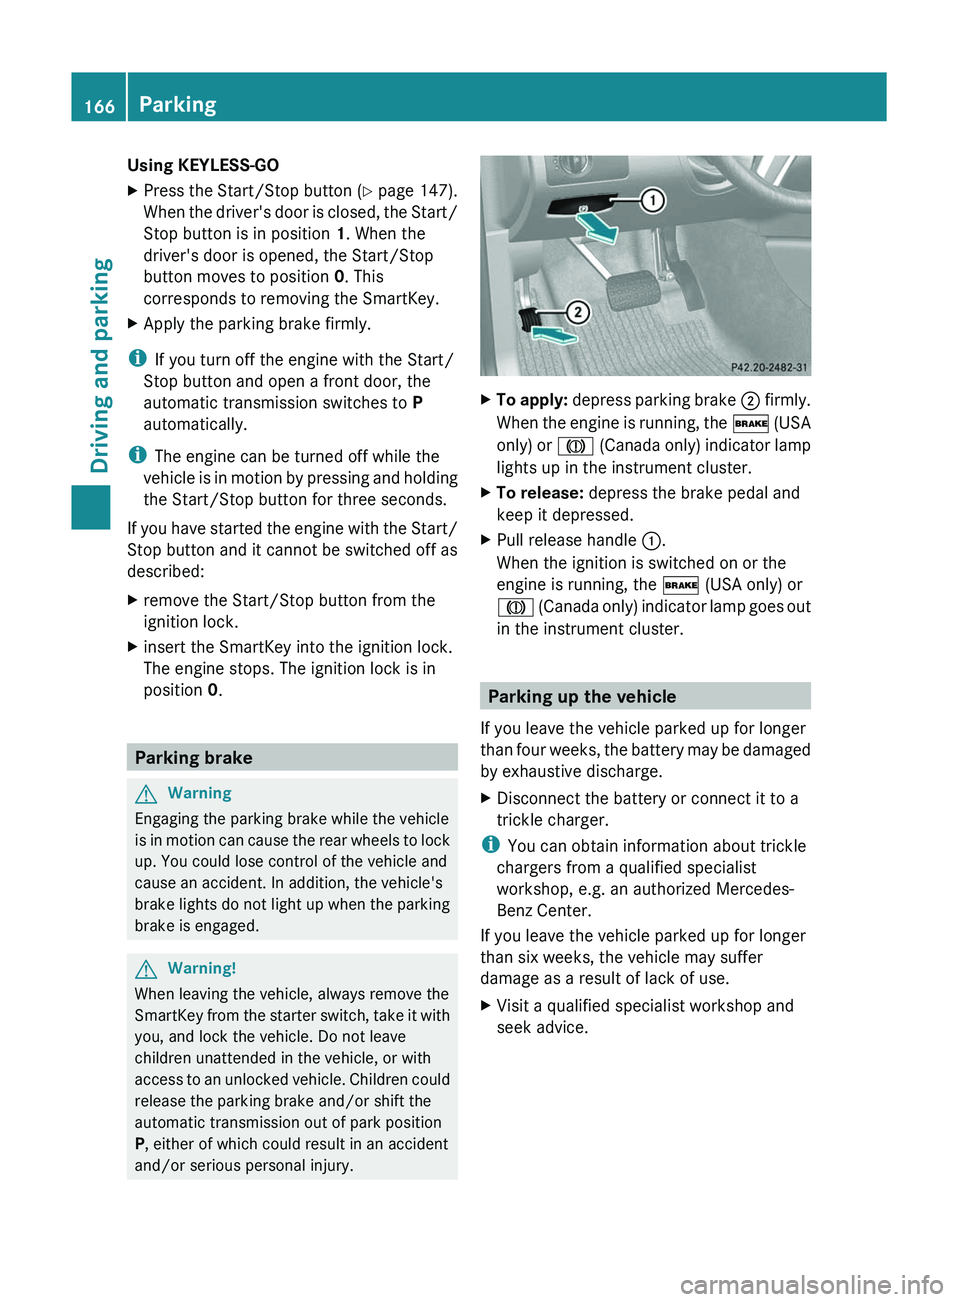
XTo apply: depress parking brake ; firmly.
When the engine is running, the $ (USA
only) or J (Canada only) indicator lamp
lights up in the instrument cluster.XTo release: depress the brake pedal and
keep it depressed.XPull release handle :.
When the ignition is switched on or the
engine is running, the $ (USA only) or
J (Canada only) indicator lamp goes out
in the instrument cluster.
Parking up the vehicle
If you leave the vehicle parked up for longer
than four weeks, the battery may be damaged
by exhaustive discharge.
XDisconnect the battery or connect it to a
trickle charger.
i You can obtain information about trickle
chargers from a qualified specialist
workshop, e.g. an authorized Mercedes-
Benz Center.
If you leave the vehicle parked up for longer
than six weeks, the vehicle may suffer
damage as a result of lack of use.
XVisit a qualified specialist workshop and
seek advice.166ParkingDriving and parking
BA 164.8 USA, CA Edition B 2011; 1; 2, en-USd2sboikeVersion: 3.0.3.52010-04-21T15:08:44+02:00 - Seite 166
Page 204 of 376
recognize dangers in time, cause an accident
and injure yourself and others.
Collision warning
If a vehicle is detected in the monitoring range
of Blind Spot Assist and you switch on the turn
signal, a double warning tone sounds. Red
warning lamp : flashes. If the turn signal
remains on, detected vehicles are indicated
by the flashing of red warning lamp :. There
are no further warning tones.
Switching on Blind Spot Assist
XMake sure that the radar sensor system
( Y page 224) and Blind Spot Assist
( Y page 226) are activated in the on-board
computer.XTurn the key to position 2 in the ignition
lock.
Warning lamps : light up red in the
exterior mirrors for approximately 1.5
seconds and then turn yellow.
Towing a trailer
When you attach a trailer, make sure you have
correctly established the electrical
connection. This can be accomplished by
checking the trailer lighting. In this event,
Blind Spot Assist is deactivated. The indicator
lamp lights up yellow in the exterior mirrors
and the message: Blind Spot Assist
Currently Unavailable See
Operator's Manual appears in the
multifunction display.
i The indicator lamps in the exterior mirrors
can be switched off.
To do this, you must deactivate Blind Spot
Assist when:
R the key is in position 2 in the ignition
lock.
R the engine is not running.
R the electrical connection to the trailer
has been established.
Off-road driving systems
4MATIC (permanent four-wheel drive)
4MATIC ensures that all four wheels are
permanently driven. Together with ESP ®
and
4ETS , it improves the traction of your vehicle
whenever a drive wheel spins due to
insufficient grip.
GWarning!
If a drive wheel is spinning due to insufficient
traction:
R While driving off, apply as little throttle as
possible.
R While driving, ease up on the accelerator
pedal.
R Adapt your speed and driving style to the
prevailing road conditions.
Failure to observe these guidelines could
cause the vehicle to skid.
The 4MATIC cannot prevent accidents
resulting from excessive speed.
! Never tow the vehicle with one axle
raised. This may damage the transfer case.
Damage of this sort is not covered by the
Mercedes-Benz Limited Warranty. All
wheels must remain either on the ground
or be fully raised. Observe the instructions
for towing the vehicle with all wheels in full
contact with the ground.
i In wintry driving conditions, the maximum
effect of 4MATIC can only be achieved if
you use winter tires ( M+S tires), with snow
chains if necessary.
! When testing the parking brake, operate
the vehicle only briefly (for a maximum of
ten seconds) on a brake test dynamometer.
When doing this, turn the key to position
0 or 1 in the ignition. Failure to do this can
cause damage to the drive train or the
brake system.
! Function or performance tests may only
be performed on a 2-axle dynamometer. If
you wish to operate the vehicle on such a
202Off-road driving systemsDriving and parking
BA 164.8 USA, CA Edition B 2011; 1; 2, en-USd2sboikeVersion: 3.0.3.52010-04-21T15:08:44+02:00 - Seite 202
Page 250 of 376
Currently Unavailable See Operator’s Manual message will be displayed in the
multifunction display and DISTRONIC will be turned off.
Tires
GWarning
Do not drive with a flat tire. A flat tire affects the ability to steer or brake the vehicle. You may
lose control of the vehicle. Continued driving with a flat tire will cause excessive heat build-up
and possibly a fire.
GWarning
Follow recommended tire inflation pressures.
Do not underinflate tires. Underinflated tires wear excessively and/or unevenly, adversely affect
handling and fuel economy, and are more likely to fail from being overheated.
Do not overinflate tires. Overinflated tires can adversely affect handling and ride comfort, wear
unevenly, increase stopping distance, and result in sudden deflation (blowout) because they are
more likely to become punctured or damaged by road debris, potholes etc.
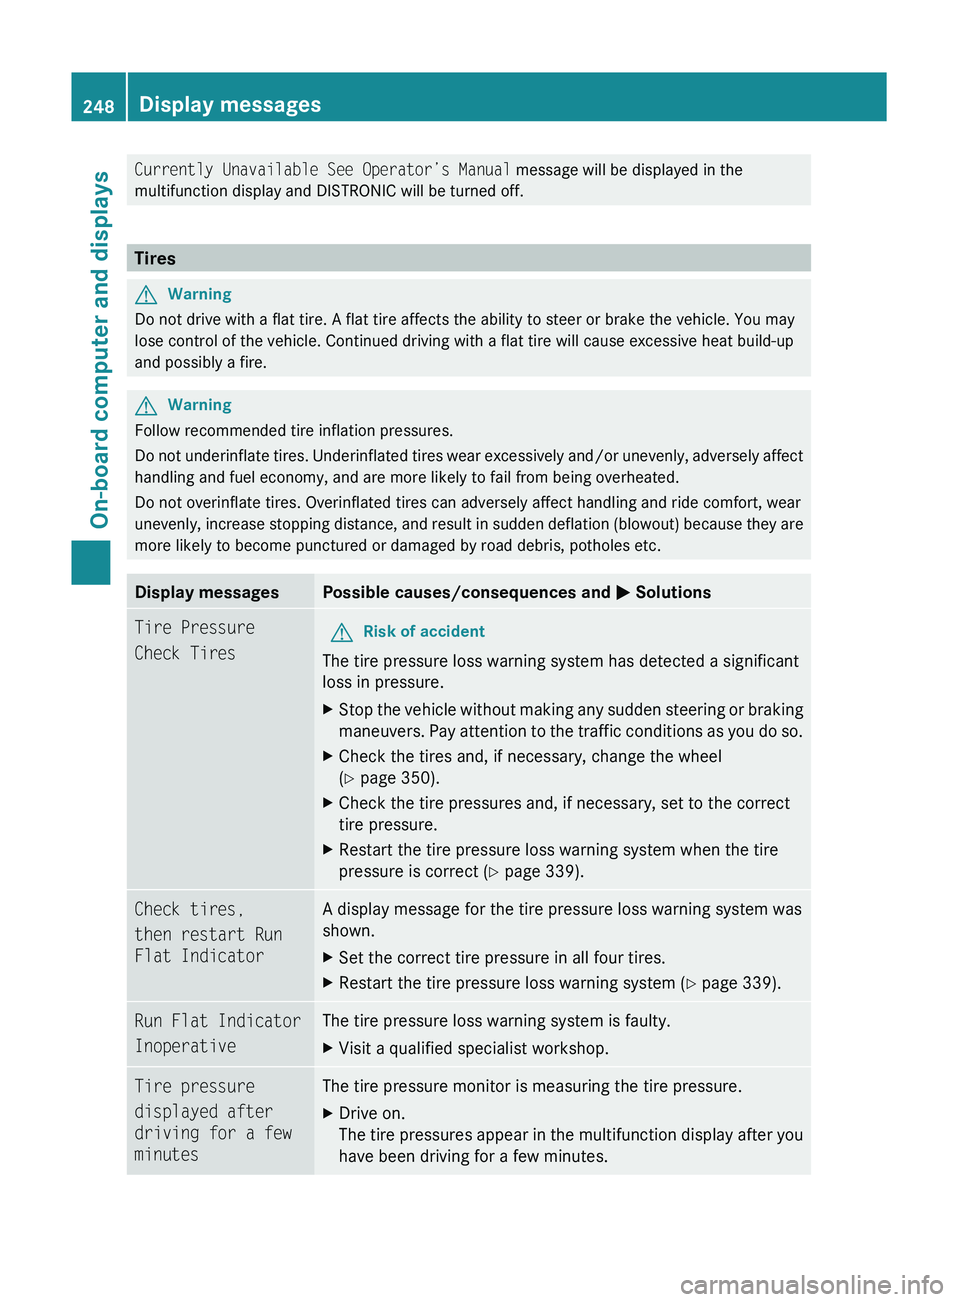
Display messagesPossible causes/consequences and M SolutionsTire Pressure
Check TiresGRisk of accident
The tire pressure loss warning system has detected a significant
loss in pressure.
XStop the vehicle without making any sudden steering or braking
maneuvers. Pay attention to the traffic conditions as you do so.XCheck the tires and, if necessary, change the wheel
( Y page 350).XCheck the tire pressures and, if necessary, set to the correct
tire pressure.XRestart the tire pressure loss warning system when the tire
pressure is correct ( Y page 339).Check tires,
then restart Run
Flat IndicatorA display message for the tire pressure loss warning system was
shown.XSet the correct tire pressure in all four tires.XRestart the tire pressure loss warning system ( Y page 339).Run Flat Indicator
InoperativeThe tire pressure loss warning system is faulty.XVisit a qualified specialist workshop.Tire pressure
displayed after
driving for a few
minutesThe tire pressure monitor is measuring the tire pressure.XDrive on.
The tire pressures appear in the multifunction display after you
have been driving for a few minutes.248Display messagesOn-board computer and displays
BA 164.8 USA, CA Edition B 2011; 1; 2, en-USd2sboikeVersion: 3.0.3.52010-04-21T15:08:44+02:00 - Seite 248
Page 318 of 376
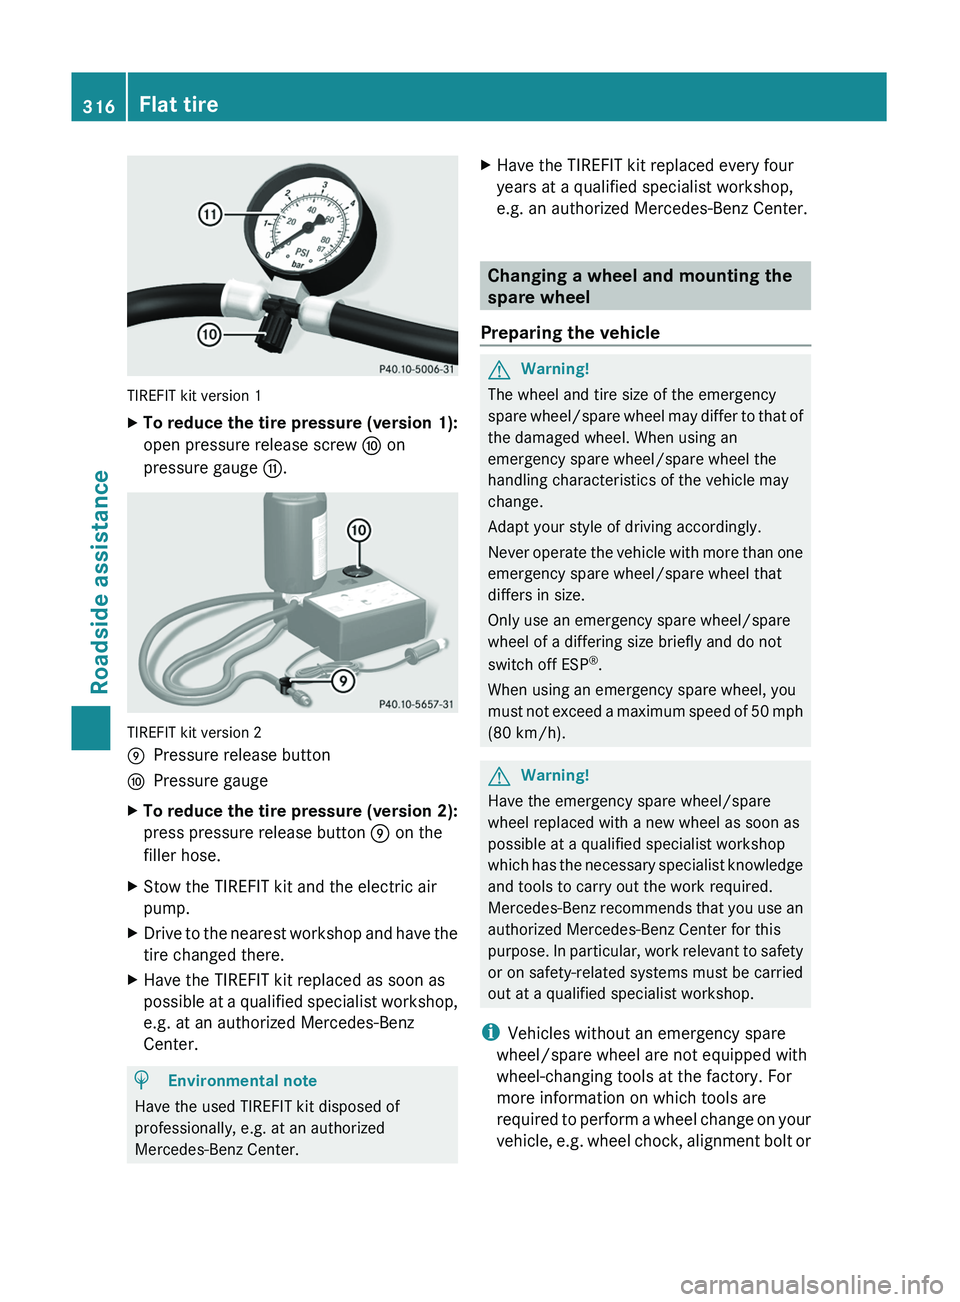
TIREFIT kit version 1
XTo reduce the tire pressure (version 1):
open pressure release screw F on
pressure gauge G.
TIREFIT kit version 2
EPressure release buttonFPressure gaugeXTo reduce the tire pressure (version 2):
press pressure release button E on the
filler hose.
XStow the TIREFIT kit and the electric air
pump.
XDrive to the nearest workshop and have the
tire changed there.
XHave the TIREFIT kit replaced as soon as
possible at a qualified specialist workshop,
e.g. at an authorized Mercedes-Benz
Center.
HEnvironmental note
Have the used TIREFIT kit disposed of
professionally, e.g. at an authorized
Mercedes-Benz Center.
XHave the TIREFIT kit replaced every four
years at a qualified specialist workshop,
e.g. an authorized Mercedes-Benz Center.
Changing a wheel and mounting the
spare wheel
Preparing the vehicle
GWarning!
The wheel and tire size of the emergency
spare wheel/spare wheel may differ to that of
the damaged wheel. When using an
emergency spare wheel/spare wheel the
handling characteristics of the vehicle may
change.
Adapt your style of driving accordingly.
Never operate the vehicle with more than one
emergency spare wheel/spare wheel that
differs in size.
Only use an emergency spare wheel/spare
wheel of a differing size briefly and do not
switch off ESP®.
When using an emergency spare wheel, you
must not exceed a maximum speed of 50 mph
(80 km/h).
GWarning!
Have the emergency spare wheel/spare
wheel replaced with a new wheel as soon as
possible at a qualified specialist workshop
which has the necessary specialist knowledge
and tools to carry out the work required.
Mercedes-Benz recommends that you use an
authorized Mercedes-Benz Center for this
purpose. In particular, work relevant to safety
or on safety-related systems must be carried
out at a qualified specialist workshop.
iVehicles without an emergency spare
wheel/spare wheel are not equipped with
wheel-changing tools at the factory. For
more information on which tools are
required to perform a wheel change on your
vehicle, e.g. wheel chock, alignment bolt or
316Flat tireRoadside assistance
BA 164.8 USA, CA Edition B 2011; 1; 2, en-USd2sboikeVersion: 3.0.3.52010-04-21T15:08:44+02:00 - Seite 316
Page 342 of 376
message will appear in the multifunction
display.GWarning!
When the multifunction display shows the
message Tire Pressure Check Tires , one
or more of your tires are significantly
underinflated. You should stop and check
your tires as soon as possible, and inflate
them to the proper tire inflation pressure as
indicated on the vehicle’s Tire and Loading
Information placard or on the tire inflation
pressure label.
Driving on a significantly underinflated tire
causes the tire to overheat and can lead to
tire failure. Underinflation also reduces fuel
efficiency and tire tread life, and may affect
the vehicle’s handling and stopping ability.
Each tire, including the spare, should be
checked at least once a month when cold.
Inflate the tires to the recommended tire
inflation pressure as specified on
R the Tire and Loading Information placard on
the driver’s door B-pillar
or
R the tire inflation pressure label located on
the inside of the fuel filler flap
GWarning!
The tire pressure loss warning system does
not provide a warning for wrongly selected tire
inflation pressures. Always adjust tire
inflation pressure according to the Tire and
Loading Information placard on the driver's
door B-pillar or on the tire inflation pressure
label located on the inside of the fuel filler flap.
The tire pressure loss warning system does
not replace regular checks of the tire inflation
pressures since a gradual pressure loss in
more than one tire cannot be detected by the
tire pressure loss warning system.
The tire pressure loss warning system is not
able to issue a warning due to a sudden
dramatic loss of tire inflation pressure (e.g.
tire blowout caused by a foreign object). In
this case bring the vehicle to a halt by carefully
applying the brakes and avoiding abrupt
steering maneuvers.
The function of the tire pressure loss warning
system is limited or delayed if:
R snow chains are mounted on your vehicle's
tires.
R road conditions are wintry.
R you are driving on sand or gravel.
R you adopt a very sporty driving style
(cornering at high speeds or driving with
high rates of acceleration).
R you are towing a very heavy or large trailer.
R you are driving with a heavy load or a load
on the roof.
Restarting the tire pressure loss
warning system
Restart the tire pressure loss warning system
if you have:
R changed the tire pressure
R changed the wheels or tires
R mounted new wheels or tires
XBefore restarting, make sure that the tire
pressures are set properly on all four tires
for the respective operating conditions,
using the Tire and Loading Information
placard on the B-pillar on the driver's side
or the tire pressure table on the fuel filler
flap.XObserve the notes in the section on tire
pressures ( Y page 336).GWarning!
The tire pressure loss warning system can
only give reliable warnings if you have set the
correct tire pressure.
If an incorrect tire pressure is set, these
incorrect values will be monitored.
A tire with insufficient pressure results in
vehicle instability when driving, thus
increasing the risk of an accident.
340Tire pressuresTires and wheels
BA 164.8 USA, CA Edition B 2011; 1; 2, en-USd2sboikeVersion: 3.0.3.52010-04-21T15:08:44+02:00 - Seite 340