2011 MERCEDES-BENZ E-CLASS ESTATE seat adjustment
[x] Cancel search: seat adjustmentPage 118 of 409
X
Push release lever :down completely.
The steering column is unlocked.
X Adjust the steering wheel to the desired
position.
X Push release lever :up completely.
The steering column is locked.
X Check if the steering column is locked.
When doing so, try to push the steering
wheel up or down or try to move it in the
fore-and-aft direction. Adjusting the steering wheel electri-
cally
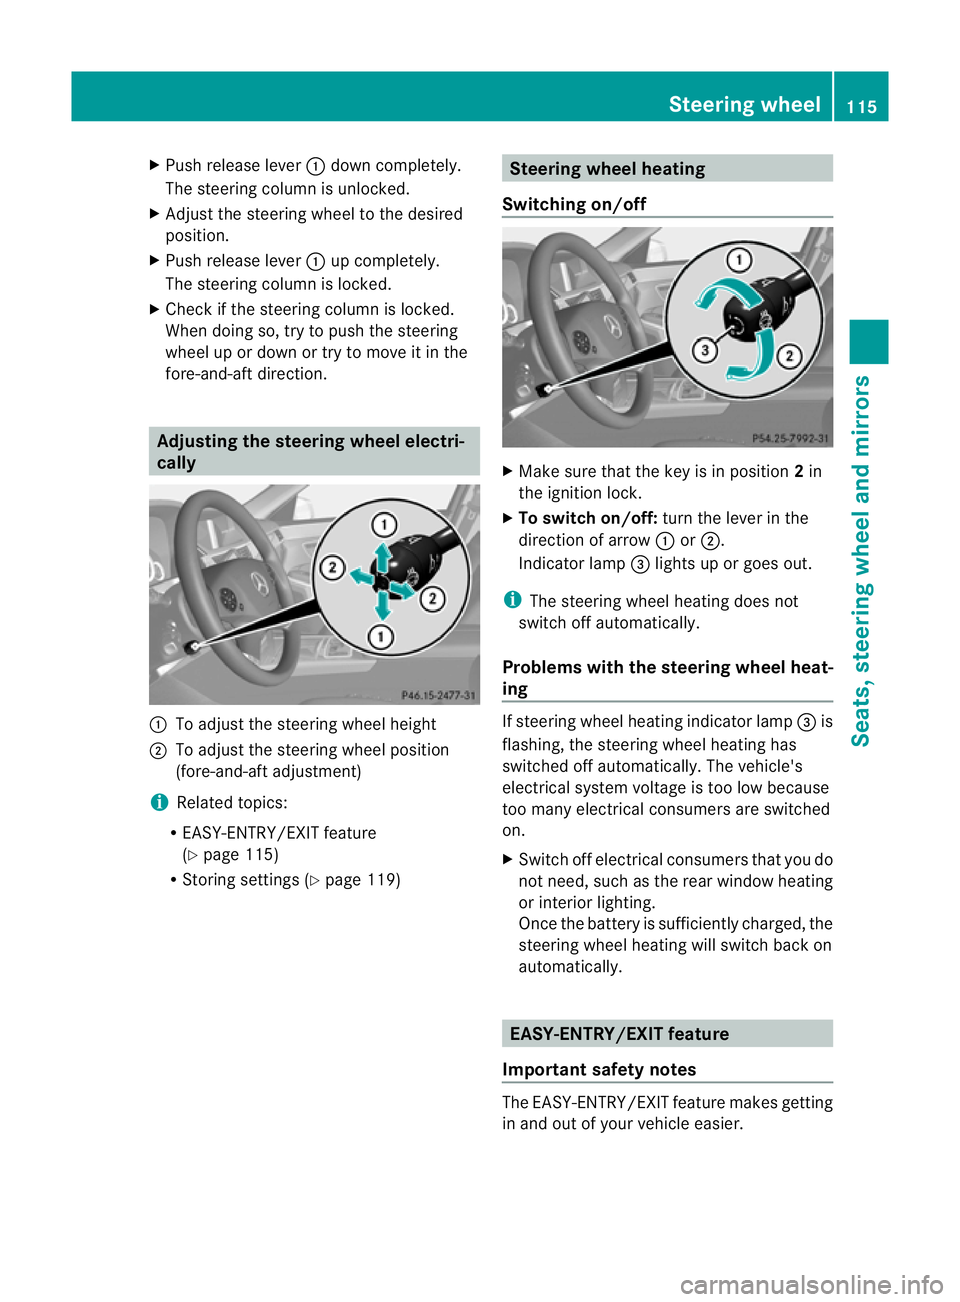
:
To adjust the steering wheel height
; To adjust the steering wheel position
(fore-and-aft adjustment)
i Related topics:
R EASY-ENTRY/EXIT feature
(Y page 115)
R Storing settings (Y page 119) Steering wheel heating
Switching on/off X
Make sure that the key is in position 2in
the ignition lock.
X To switch on/off: turn the lever in the
direction of arrow :or;.
Indicator lamp =lights up or goes out.
i The steering wheel heating does not
switch off automatically.
Problems with the steering wheel heat-
ing If steering wheel heating indicator lamp
=is
flashing, the steering wheel heating has
switched off automatically. The vehicle's
electrical system voltage is too low because
too many electrical consumers are switched
on.
X Switch off electrical consumers that you do
not need, such as the rear window heating
or interior lighting.
Once the battery is sufficiently charged, the
steering wheel heating will switch back on
automatically. EASY-ENTRY/EXIT feature
Important safety notes The EASY-ENTRY/EXIT feature makes getting
in and out of your vehicle easier. Steering wheel
115Seats, steering wheel and mirrors Z
Page 120 of 409
Exterior mirrors
Adjusting the exterior mirrors G
WARNING
The exterior mirrors reduce the size of the
image .Objects are actually closer than they
appear. You could misjudge the distance from
vehicles driving behind and cause an acci-
dent, e.g. when changing lane. For this rea-
son, make sure of the actual distance from the
vehicle driving behind by glancing over your
shoulder.
The convex exterior mirrors provide a larger
field of vision.
The exterior mirrors are automatically heated
if the rear window heating is switched on and
the outside temperature is low. X
Make sure that the key is in position 1or
2 in the ignition lock.
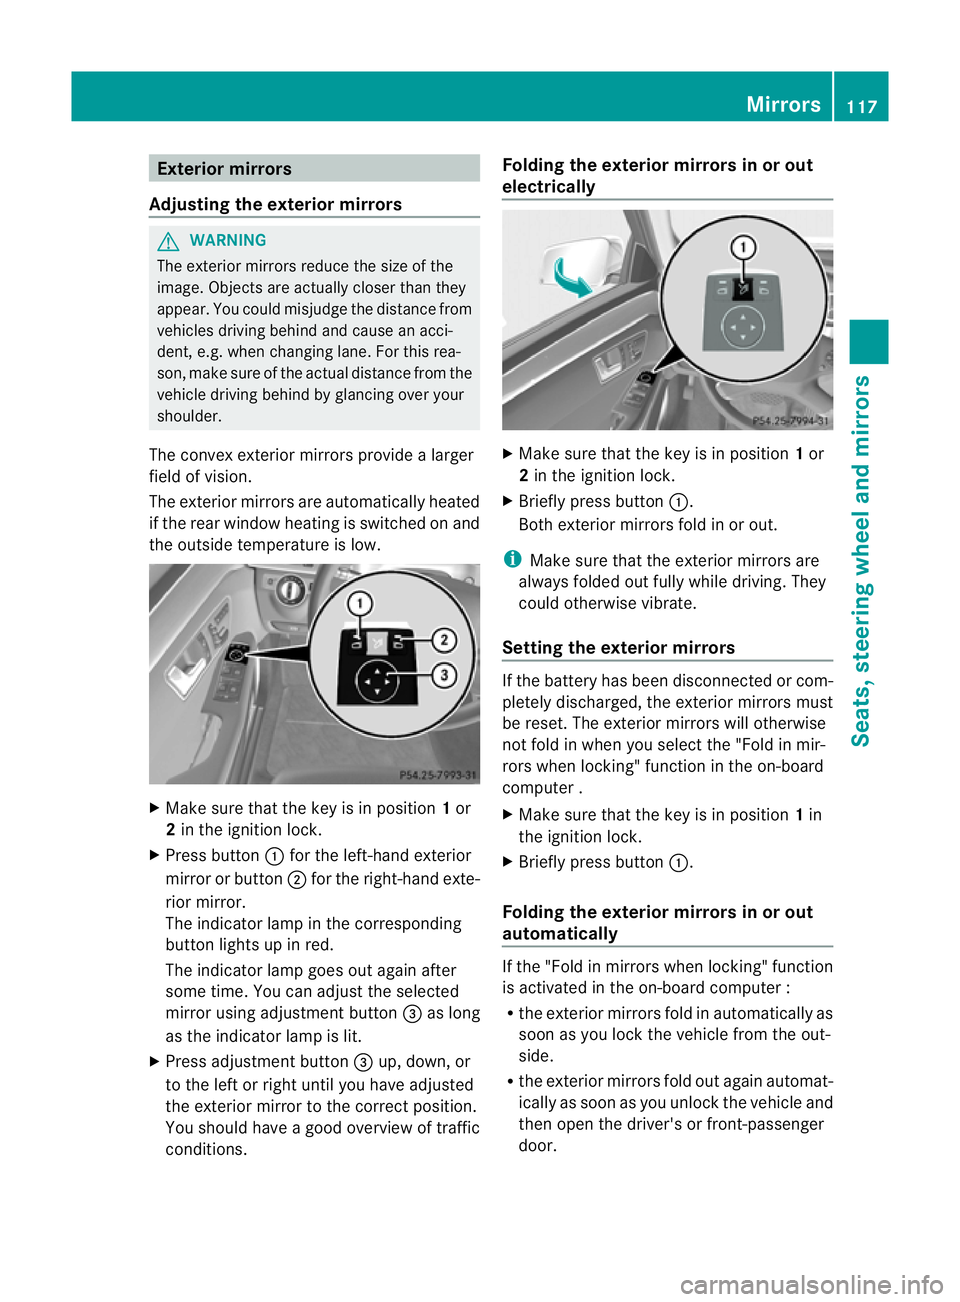
X Press button :for the left-hand exterior
mirror or button ;for the right-hand exte-
rior mirror.
The indicator lamp in the corresponding
butto nlights up in red.
The indicator lamp goes out again after
some time. You can adjust the selected
mirror using adjustment button =as long
as the indicator lamp is lit.
X Press adjustmen tbutton =up, down, or
to the left or right until you have adjusted
the exterior mirror to the correct position.
You should have a good overview of traffic
conditions. Folding the exterior mirrors in or out
electrically
X
Make sure that the key is in position 1or
2 in the ignition lock.
X Briefly press button :.
Both exterior mirrors fold in or out.
i Make sure that the exterior mirrors are
always folded out fully while driving .They
could otherwise vibrate.
Setting the exterior mirrors If the battery has been disconnected or com-
pletely discharged, the exterior mirrors must
be reset. The exterior mirrors will otherwise
not fold in when you select the "Fold in mir-
rors when locking" function in the on-board
computer .
X
Make sure that the key is in position 1in
the ignition lock.
X Briefly press button :.
Folding the exterior mirrors in or out
automatically If the "Fold in mirrors when locking" function
is activated in the on-board computer :
R
the exterior mirrors fold in automatically as
soon as you lock the vehicle from the out-
side.
R the exterior mirrors fold out again automat-
ically as soon as you unlock the vehicle and
then open the driver's or front-passenger
door. Mirrors
117Seats, steering wheel and mirrors Z
Page 121 of 409
i
If the exterior mirrors have been folded in
manually, they do not fold out.
Exterior mirror out of position If an exterior mirror has been pushed out of
position, proceed as follows:
X
Vehicles without electricall yfolding
exterior mirrors: move the exterior mirror
into the correc tposition manually.
X Vehicles with electrically folding exte-
rior mirrors: press the mirror-folding but-
ton (Y page 117) repeatedly until you hear
the mirror engage in position.
The mirror housing is engaged again and
you can adjust the exterior mirrors as usual
(Y page 117). Automatic anti-dazzle mirrors
G
WARNING
If incident light from headlamps is prevented
from striking the sensor in the rear-view mir-
ror, for instance, by luggage piled too high in
the vehicle, the mirror's automatic anti-dazzle
function will not operate.
Incident light could then blind you. This may
distract you from the traffic conditions and,
as a result, you may cause an accident.
The rear-view mirror and the exterior mirror
on the driver's side automatically go into anti-
dazzle mode if the ignition is switched on and
incident light from headlamps strikes the sen-
sor in the rear-view mirror.
The mirrors do not go into anti-dazzle mode if
reverse gear is engaged or the interior lighting
is switched on. Parking position for the exterior mir-
ror on the front-passenger side
Setting and storing the parking position You can position the front-passenger side
exterior mirror in such a way that you can see the rear wheel on that side as soon as you
engage reverse gear. You can store this posi-
tion.
X
Make sure that the vehicle is stationary and
that the key is in position 2in the ignition
lock.
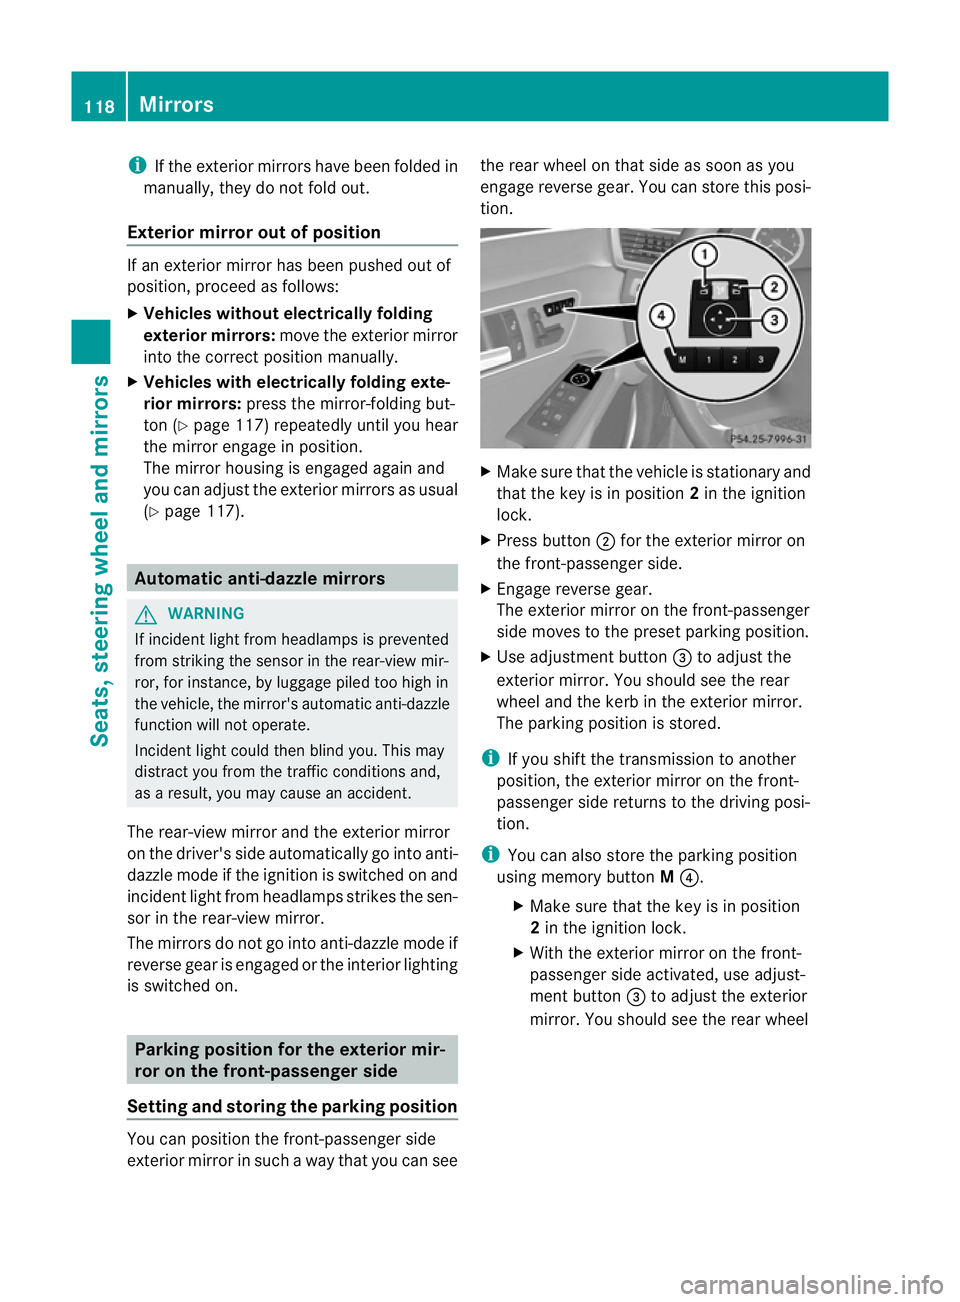
X Press button ;for the exterior mirror on
the front-passenger side.
X Engage reverse gear.
The exterior mirror on the front-passenger
side moves to the preset parking position.
X Use adjustment button =to adjust the
exterior mirror. You should see the rear
wheel and the kerb in the exterior mirror.
The parking position is stored.
i If you shift the transmission to another
position, the exterior mirror on the front-
passenger side returns to the driving posi-
tion.
i You can also store the parking position
using memory button M?.
X Make sure that the key is in position
2 in the ignition lock.
X With the exterior mirror on the front-
passenger side activated, use adjust-
ment button =to adjust the exterior
mirror. You should see the rear wheel 118
MirrorsSeats, steering wheel and mirrors
Page 122 of 409
and the kerb in the exterior mirror on
the front-passenger side.
X Press memory button M? and one of
the arrows on adjustment button =
within three seconds.
The parking positio nis stored if the
exterior mirror does not move.
If the mirror moves out of position, repeat
the steps.
Calling up astore dparking position set-
ting X
Tur nthe key to position 2in the ignition
lock.
X Adjust the exterior mirror on the front-
passenger side with the corresponding but-
ton (Y page 117).
X Engage reverse gear.
The exterior mirror on the front-passenger
side moves to the stored parking position.
The exterior mirror on the front-passenger
side moves back to its original position:
R as soon as you exceed a speed of
10 km/h
R about ten seconds after you have disen-
gaged reverse gear
R if you press button :for the exterior mir-
ror on the driver's side Memory function
Storing settings
G
WARNING
The memory function can still be used when
the key has been removed. For this reason,
children should never be left unsupervised in
the vehicle. They could otherwise become
trapped when adjusting the seat or the steer-
ing wheel. G
WARNING
Only use the memory function on the driver's
side when the vehicle is stationary. You could otherwise be distracted from the traffic con-
ditions by the steering wheel and seat moving
of their own accord, and as a result, cause an
accident.
With the memory function, you can store up
to three different settings, e.g. for three dif-
ferent people.
The following settings are stored as a single
memory preset:
R position of the seat, backrest and head
restraint
R active multicontour seat: dynamic function
level
R driver's side: steering wheel position
R driver's side: position of the exterior mir-
rors on the driver's and front-passenger
sides X
Adjust the seat (Y page 106).
X On the driver's side, adjust the steering
wheel (Y page 115) and the exterior mirrors
(Y page 117).
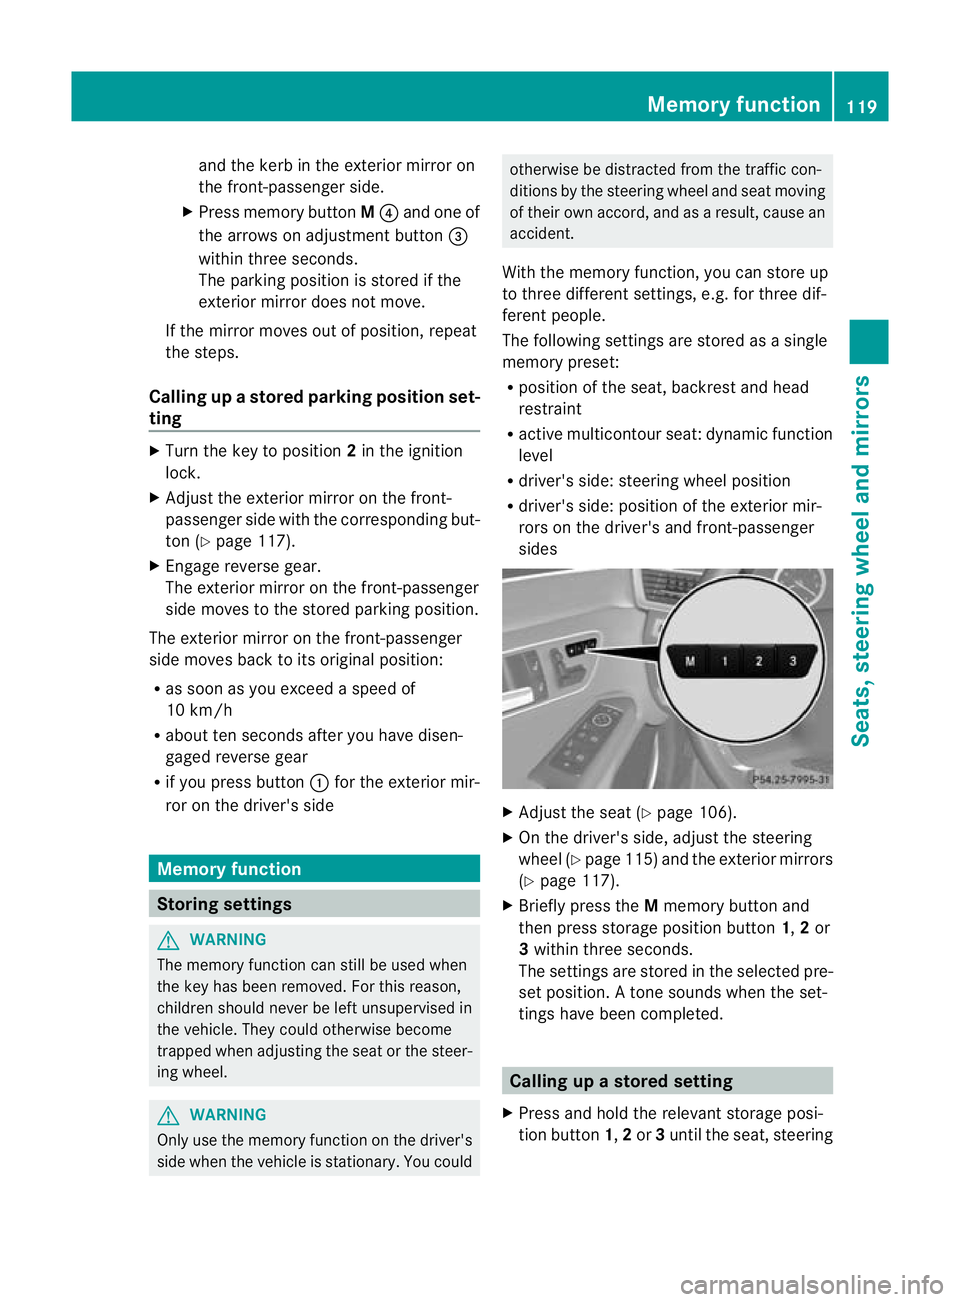
X Briefly press the Mmemory button and
then press storage position button 1,2or
3 within three seconds.
The settings are stored in the selected pre-
set position. Atone sounds when the set-
tings have been completed. Calling up
astore dsetting
X Press and hold the relevant storage posi-
tio nb utton 1,2or 3until the seat, steering Memory function
119Seats, steering wheel and mirrors Z
Page 252 of 409
X
Press the abutton to confirm.
X Press the :or9 button to select the
Easy Entry/Exit function.
If the Easy Entry/Exit function is activa-
ted, the vehicle steering wheel is displayed
in red in the multifunction display.
X Press the abutton to save the setting.
Switching the belt adjustment on/off
For further information on belt adjustment,
see (Y page 51).
X Press the =or; button on the steer-
ing wheel to select the Settings menu.
X Press the :or9 button to select the
Convenience submenu.
X Press the abutton to confirm.
X Press the :or9 button to select the
Belt adjustment function.
When the Belt adjustment function is
activated, the vehicle seat belt is displayed
in red in the multifunction display.
X Press the abutton to save the setting.
Switching the fold in mirrors when lock-
ing function on/off
If you switch on the Auto. fold in function,
the exterior mirrors fold in when you lock the
vehicle. When you unlock the vehicle and then
open the driver's or front-passenger door, the
exterior mirrors fold out again.
If you have switched the function on and you
fold the exterior mirrors in using the button
on the door (Y page 117), they will not fold
out automatically. The exterior mirrors can
then only be folded out using the button on
the door.
X Press the =or; button on the steer-
ing wheel to select the Settings menu.
X Press the :or9 button to select the
Convenience submenu.
X Press the abutton to confirm. X
Press the :or9 button to select the
Auto. fold in function.
If the Auto. fold in function is activated,
the vehicle's exterior mirror is displayed in
red in the multifunction display.
X Press the abutton to save the setting.
Resetting to factor ysettings For safety reasons, no
tall functions are reset:
the Limit speed (winter tyres) function
in permanent SPEEDTRONIC can only be set
in the Vehicle submenu. If you want to reset
the Day lights function in the
Light sub-
menu, you must tur nthe key in the ignition
lock to position 1.
X Press the =or; button on the steer-
ing wheel to select the Settings menu.
X Press the :or9 button to select the
Factory setting submenu.
X Press the abutton to confirm.
The Reset all settings? message
appears.
X Press the :or9 button to select
No or
Yes .
X Press the abutton to confirm the selec-
tion.
If you have selected Yes , the multifunction
display shows a confirmation message. AMG menu in AMG vehicles
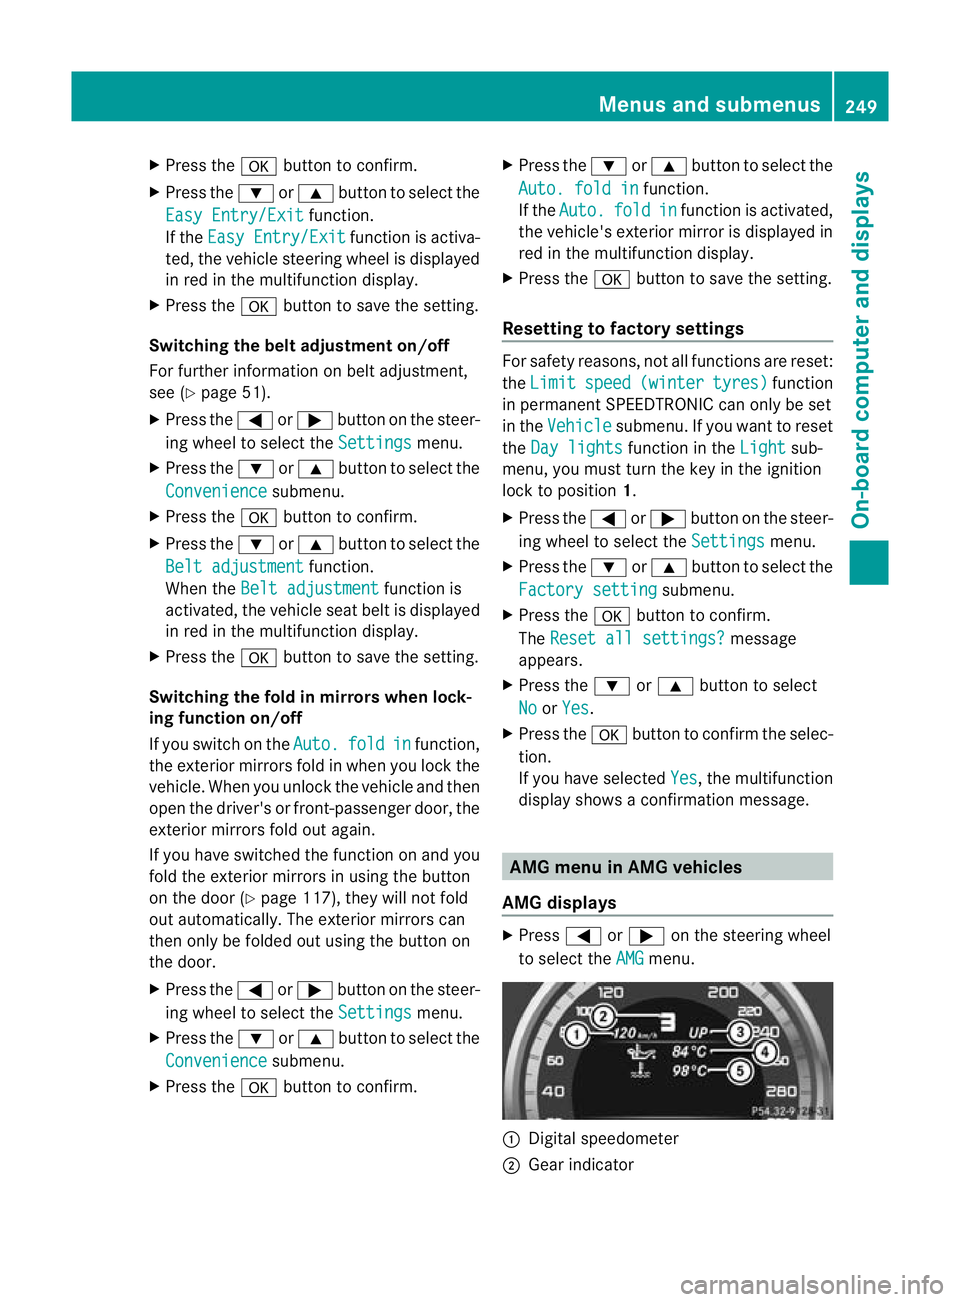
AMG displays X
Press =or; on the steering wheel
to select the AMG menu.
:
Digital speedometer
; Gear indicator Menus and submenus
249On-board computer and displays Z