2011 MERCEDES-BENZ E-Class COUPE dashboard
[x] Cancel search: dashboardPage 189 of 344

the vehicle. You could damage the vehicle
or the objects.
Ultrasonic sources such as an automatic
car wash, a truck's compressed-air brakes
or a pneumatic drill could cause
PARKTRONIC to malfunction.
Minimum distanceCenterApprox. 8 in (20 cm)CornersApprox. 6 in (15 cm)
If there is an obstacle within this range, all
warning displays light up and a warning tone
sounds. If the distance falls below the
minimum, the distance may no longer be
shown.
Warning displays
The warning displays show the distance
between the sensors and the obstacle. The
warning display for the front area is located
on the dashboard above the center air vents.
The warning display for the rear area in the
Coupe is located on the headliner in the rear
compartment; in the Cabriolet, it is between
the rear seats.
Warning display for the front area
:Segments on the left-hand side of the
vehicle;Segments on the right-hand side of the
vehicle=Segments showing operational readiness
The warning display for each side of the
vehicle is divided into five yellow and two red
segments. PARKTRONIC is operational if
yellow segments showing operational
readiness = light up.
The selected transmission position
determines which warning display is active
when the engine is running.Transmission
positionWarning displayDFront area activatedR or NRear and front areas
activatedPNo areas activated
One or more segments light up as the vehicle
approaches an obstacle, depending on the
vehicle's distance from the obstacle.
From the:
R sixth segment onwards, you will hear an
intermittent warning tone for
approximately two seconds.
R seventh segment onwards, you will hear a
warning tone for approximately two
seconds. This indicates that you have now
reached the minimum distance.
Deactivating/activating PARKTRONIC
:To deactivate/activate PARKTRONIC;Indicator lamp
If indicator lamp ; lights up, PARKTRONIC is
deactivated.
Driving systems187Driving and parkingBA 207 USA, CA Edition B 2011; 1; 3, en-USd2sboikeVersion: 3.0.3.62010-05-20T10:38:09+02:00 - Seite 187Z
Page 261 of 344

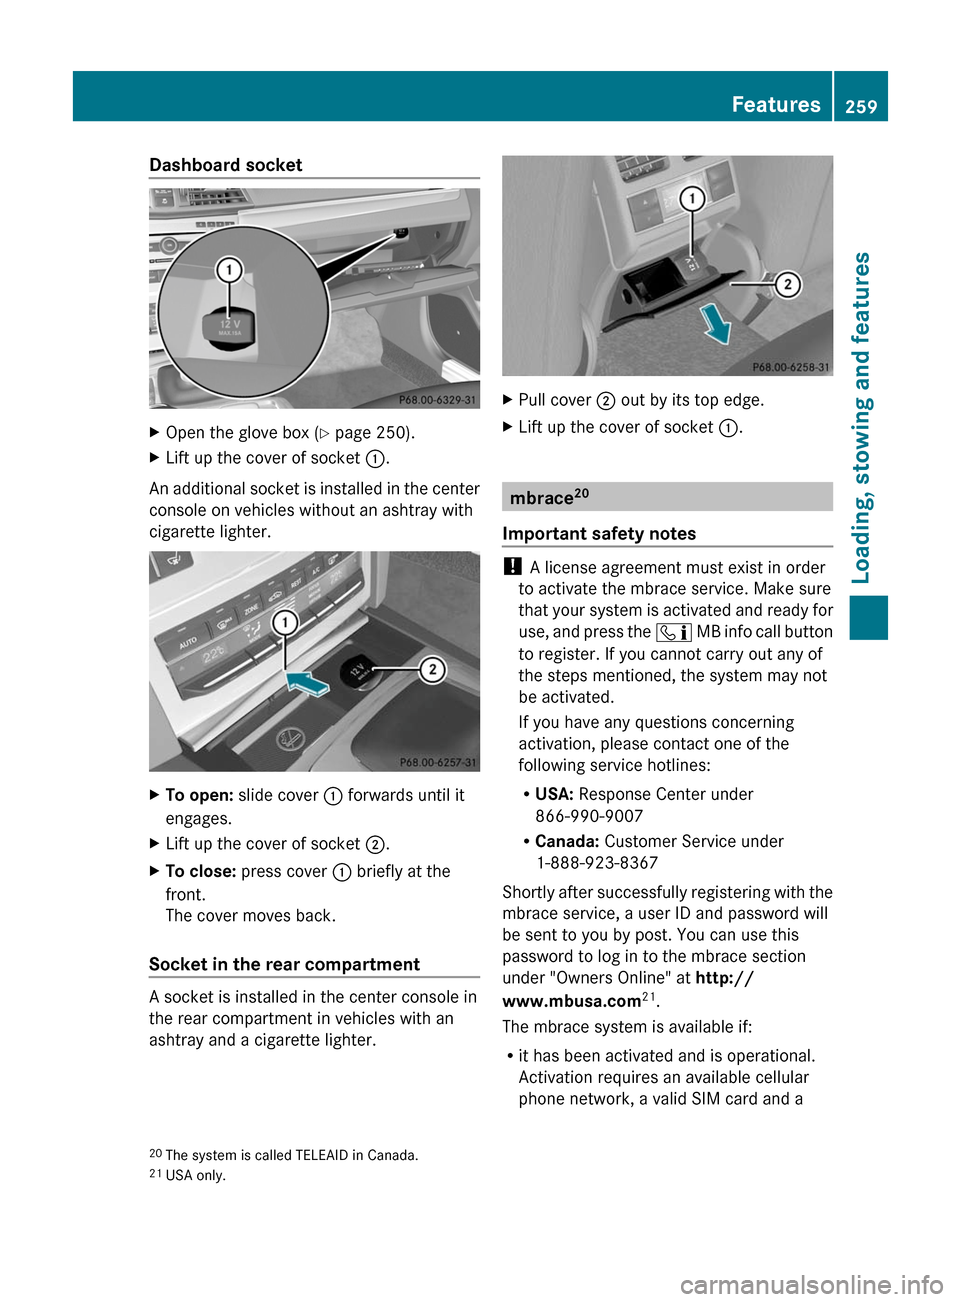
Dashboard socketXOpen the glove box (Y page 250).XLift up the cover of socket :.
An additional socket is installed in the center
console on vehicles without an ashtray with
cigarette lighter.
XTo open: slide cover : forwards until it
engages.
XLift up the cover of socket ;.XTo close: press cover : briefly at the
front.
The cover moves back.
Socket in the rear compartment
A socket is installed in the center console in
the rear compartment in vehicles with an
ashtray and a cigarette lighter.
XPull cover ; out by its top edge.XLift up the cover of socket :.
mbrace20
Important safety notes
! A license agreement must exist in order
to activate the mbrace service. Make sure
that your system is activated and ready for
use, and press the ï MB info call button
to register. If you cannot carry out any of
the steps mentioned, the system may not
be activated.
If you have any questions concerning
activation, please contact one of the
following service hotlines:
RUSA: Response Center under
866-990-9007
RCanada: Customer Service under
1-888-923-8367
Shortly after successfully registering with the
mbrace service, a user ID and password will
be sent to you by post. You can use this
password to log in to the mbrace section
under "Owners Online" at http://
www.mbusa.com21.
The mbrace system is available if:
Rit has been activated and is operational.
Activation requires an available cellular
phone network, a valid SIM card and a
20The system is called TELEAID in Canada.21USA only.
Features259Loading, stowing and featuresBA 207 USA, CA Edition B 2011; 1; 3, en-USd2sboikeVersion: 3.0.3.62010-05-20T10:38:09+02:00 - Seite 259Z
Page 285 of 344

! For cleaning, do not use any of the
following:
R alcohol-based thinner or gasoline
R abrasive cleaning agents
R commercially-available household
cleaning agents
These may damage the display surface. Do
not put pressure on the display surface
when cleaning. This could lead to
irreparable damage to the display.
Cleaning the plastic trimGWarning!
When cleaning the steering wheel boss and
dashboard, do not use cockpit sprays or
cleaning agents containing solvents. Cleaning
agents containing solvents cause the surface
to become porous, and as a result, plastic
parts may break away and be thrown around
the interior when an air bag is deployed, which
may result in severe injuries.
! Do not affix the following to plastic
surfaces:
R stickers
R films
R scented oil bottles or similar items
You can otherwise damage the plastic.
! Do not allow cosmetics, insect repellent
or sunscreen to come into contact with the
plastic trim. This maintains the high-quality
look of the surfaces.
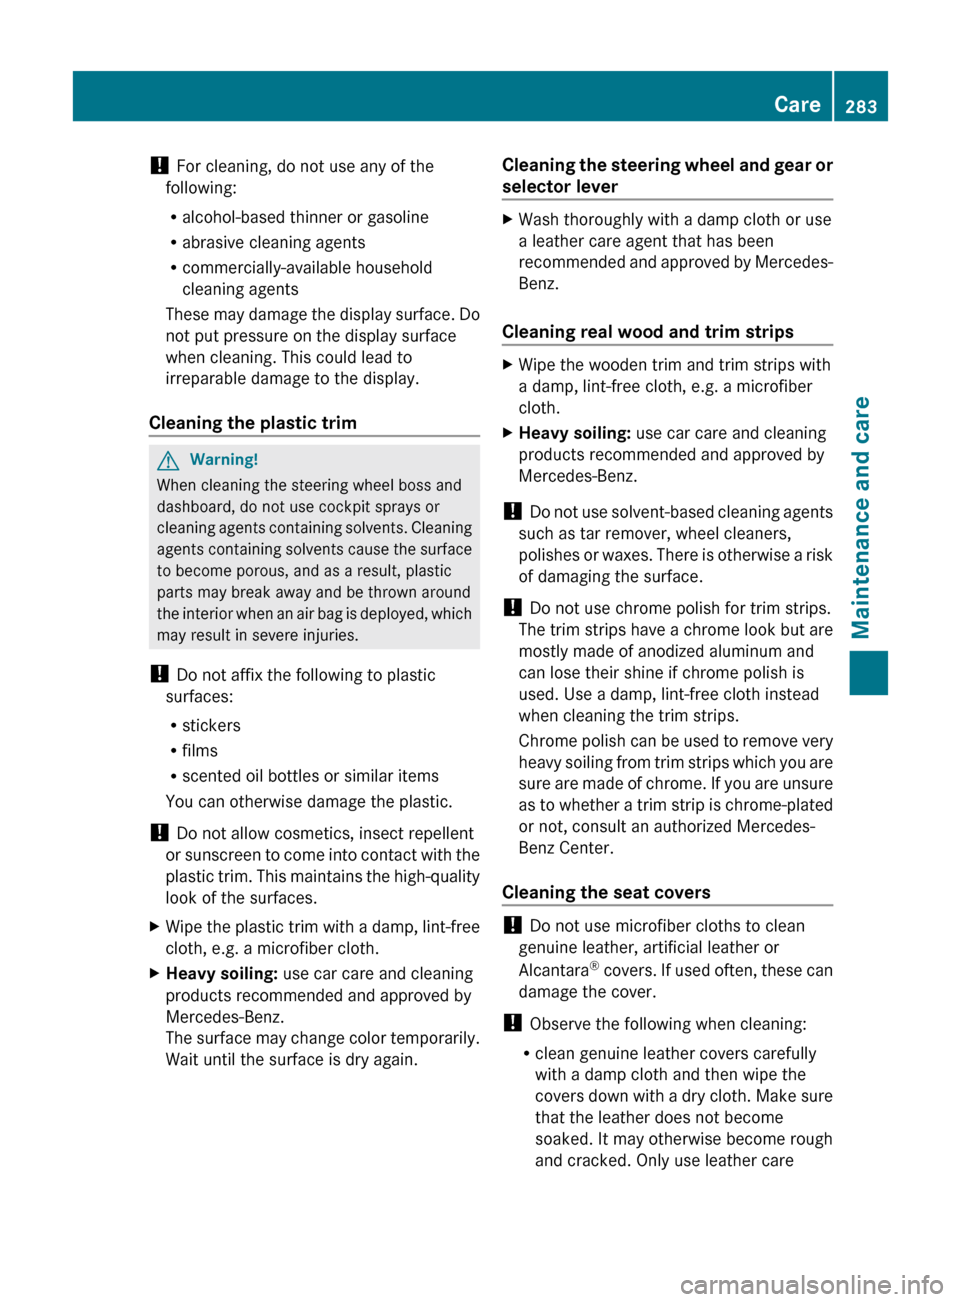
XWipe the plastic trim with a damp, lint-free
cloth, e.g. a microfiber cloth.XHeavy soiling: use car care and cleaning
products recommended and approved by
Mercedes-Benz.
The surface may change color temporarily.
Wait until the surface is dry again.Cleaning the steering wheel and gear or
selector leverXWash thoroughly with a damp cloth or use
a leather care agent that has been
recommended and approved by Mercedes-
Benz.
Cleaning real wood and trim strips
XWipe the wooden trim and trim strips with
a damp, lint-free cloth, e.g. a microfiber
cloth.XHeavy soiling: use car care and cleaning
products recommended and approved by
Mercedes-Benz.
! Do not use solvent-based cleaning agents
such as tar remover, wheel cleaners,
polishes or waxes. There is otherwise a risk
of damaging the surface.
! Do not use chrome polish for trim strips.
The trim strips have a chrome look but are
mostly made of anodized aluminum and
can lose their shine if chrome polish is
used. Use a damp, lint-free cloth instead
when cleaning the trim strips.
Chrome polish can be used to remove very
heavy soiling from trim strips which you are
sure are made of chrome. If you are unsure
as to whether a trim strip is chrome-plated
or not, consult an authorized Mercedes-
Benz Center.
Cleaning the seat covers
! Do not use microfiber cloths to clean
genuine leather, artificial leather or
Alcantara ®
covers. If used often, these can
damage the cover.
! Observe the following when cleaning:
R clean genuine leather covers carefully
with a damp cloth and then wipe the
covers down with a dry cloth. Make sure
that the leather does not become
soaked. It may otherwise become rough
and cracked. Only use leather care
Care283Maintenance and careBA 207 USA, CA Edition B 2011; 1; 3, en-USd2sboikeVersion: 3.0.3.62010-05-20T10:38:09+02:00 - Seite 283Z
Page 302 of 344

XTurn the SmartKey to position 2 in the
ignition lock.
XShift the selector lever to N.
As soon as the vehicle has been loaded:
XPrevent the vehicle from rolling away by
applying the parking brake.
XMove the selector lever to P.XTurn the SmartKey to position 0 in the
ignition lock and remove the SmartKey.
XSecure the vehicle.
! Only lash the vehicle down by the wheels
or wheel rims, not by parts of the vehicle
such as axle or steering components.
Otherwise, the vehicle could be damaged.
Fuses
Important safety notes
The fuses in your vehicle serve to close down
faulty circuits. If a fuse blows, all the
components on the circuit and their functions
will fail.
GWarning
Only use fuses approved by Mercedes-Benz
with the specified amperage for the system in
question and do not attempt to repair or
bridge a blown fuse. Using other than
approved fuses or using repaired or bridged
fuses may cause an overload leading to a fire,
and/or cause damage to electrical
components and/or systems. Have the cause
determined and remedied by an authorized
Mercedes-Benz Center.
Blown fuses must be replaced with fuses of
the same rating, which you can recognize by
the color and value. The fuse ratings are listed
in the fuse allocation chart. An authorized
Mercedes-Benz Center will be happy to
advise you.
iIf a fuse has blown, visit a breakdown
service or an authorized Mercedes-Benz
Center.
If the newly inserted fuse also blows, have the
cause traced and rectified at a qualified
specialist workshop, e.g. an authorized
Mercedes-Benz Center.
! Only use fuses that have been approved
for Mercedes-Benz vehicles and which
have the correct fuse rating for the system
concerned. Otherwise, components or
systems could be damaged.
Before changing a fuse
XPark the vehicle and apply the parking
brake.
XSwitch off all electrical consumers.XRemove the key from the ignition lock.
The fuses are located in various fuse boxes:
Rfuse box on the driver's side of the
dashboard
Rfuse box in the engine compartment on the
left-hand side of the vehicle, when viewed
in the direction of travel
Rfuse box in the trunk on the right when
viewed in the direction of travel
The fuse allocation chart is located in the
vehicle tool kit (Y page 287) in the stowage
compartment under the trunk floor.
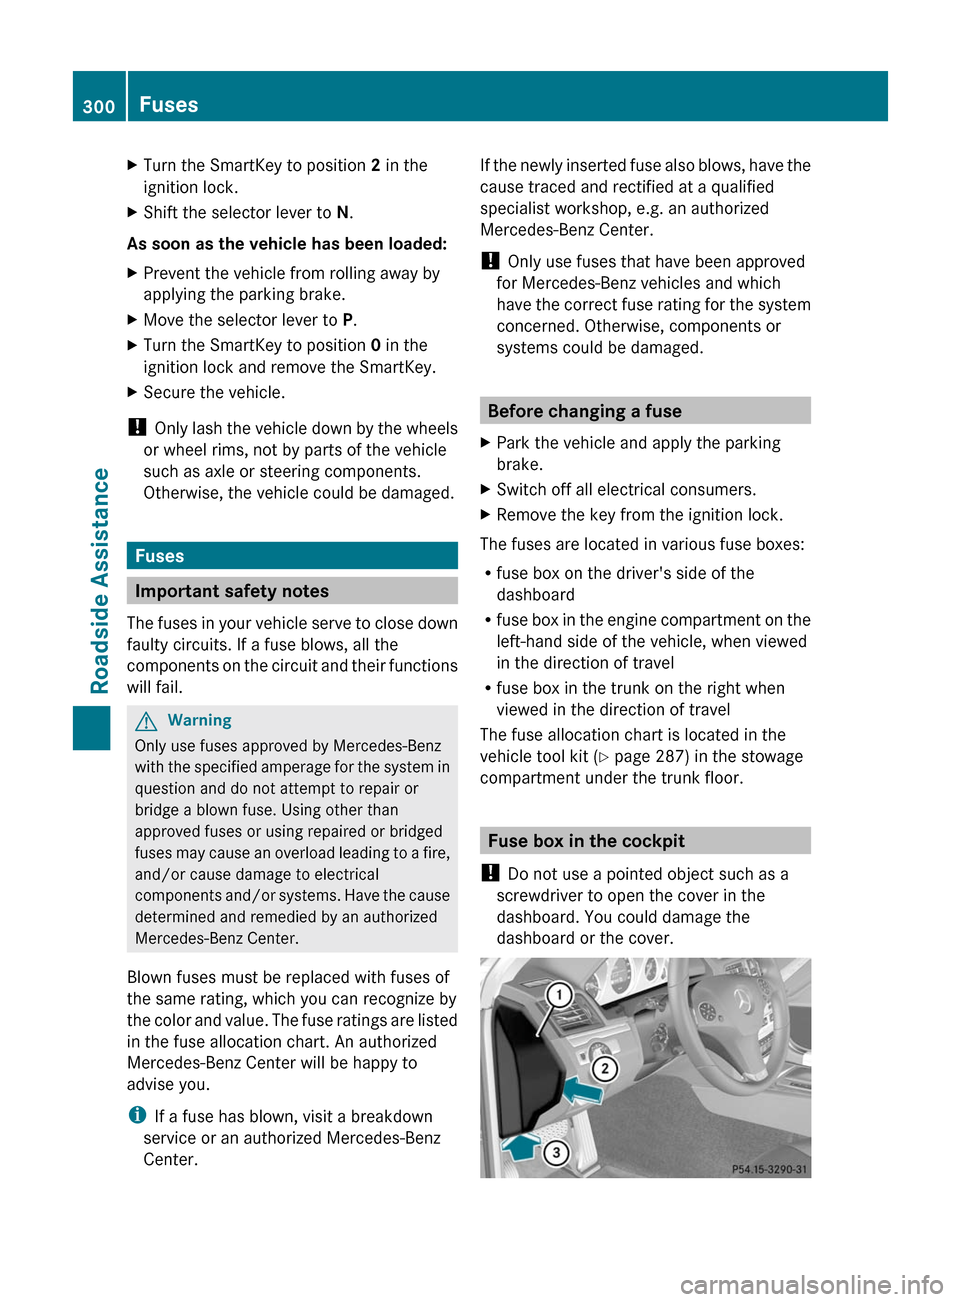
Fuse box in the cockpit
! Do not use a pointed object such as a
screwdriver to open the cover in the
dashboard. You could damage the
dashboard or the cover.
300FusesRoadside Assistance
BA 207 USA, CA Edition B 2011; 1; 3, en-USd2sboikeVersion: 3.0.3.62010-05-20T10:38:09+02:00 - Seite 300
Page 303 of 344

XTo open: pull out cover : slightly at the
bottom in the direction of arrow =.
XPull cover : outwards in the direction of
arrow ; and remove it.
XTo close: clip in cover : on the front of
the dashboard.
XFold cover : inwards until it engages.
Fuse box in the engine compartment
XMake sure that the windshield wipers are
turned off.
GRisk of injury
Make sure that the windshield wipers are
turned off and the key is pulled out of the
ignition lock before you open the cover of the
fuse box. Otherwise, the windshield wipers
and the wiper rods above the cover could be
set in motion. This could lead to you or others
being injured by the wiper rods.
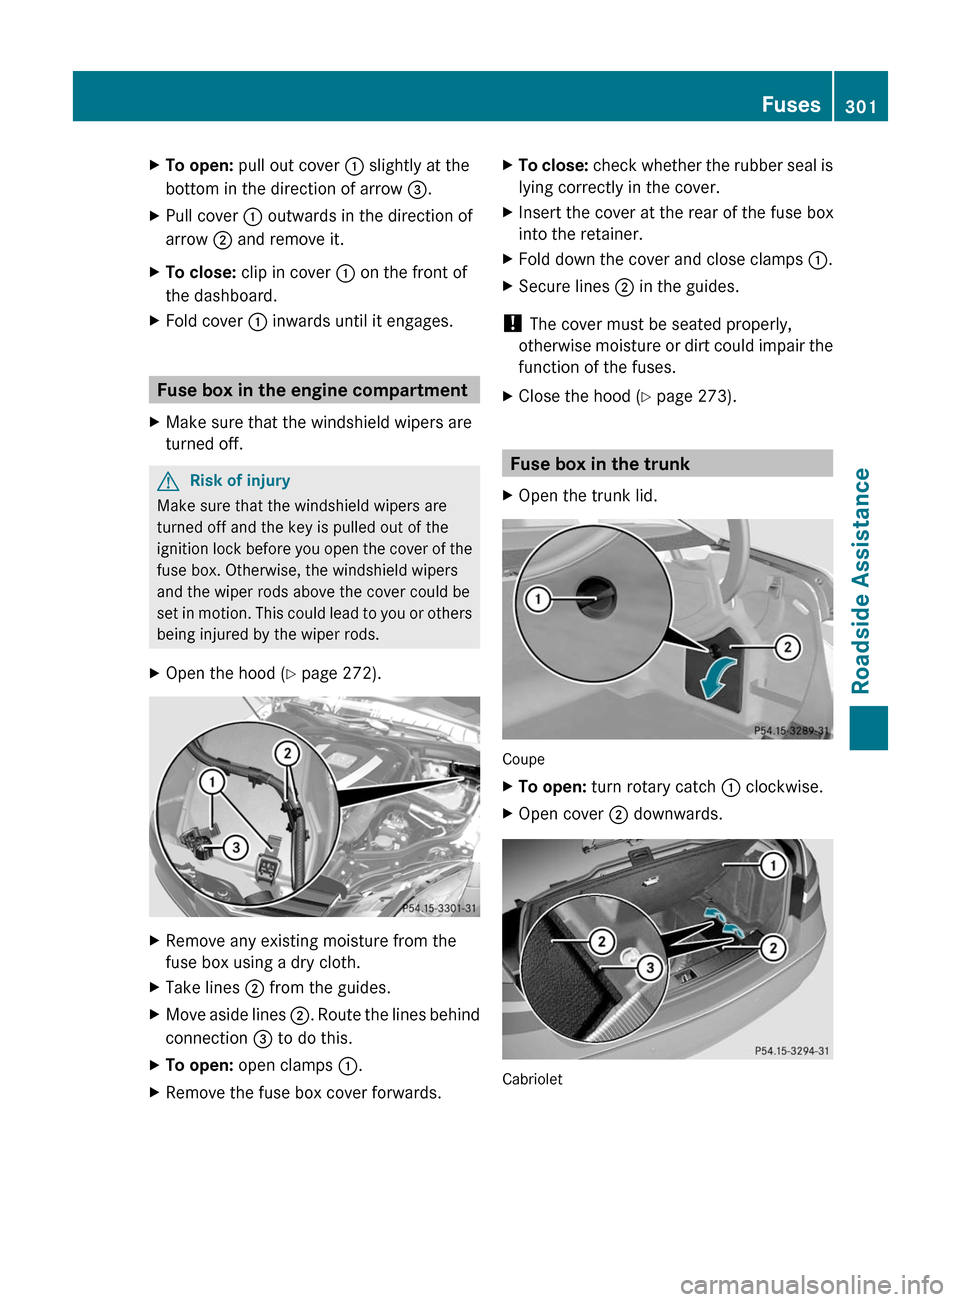
XOpen the hood (Y page 272).XRemove any existing moisture from the
fuse box using a dry cloth.
XTake lines ; from the guides.XMove aside lines ;. Route the lines behind
connection = to do this.
XTo open: open clamps :.XRemove the fuse box cover forwards.XTo close: check whether the rubber seal is
lying correctly in the cover.
XInsert the cover at the rear of the fuse box
into the retainer.
XFold down the cover and close clamps :.XSecure lines ; in the guides.
! The cover must be seated properly,
otherwise moisture or dirt could impair the
function of the fuses.
XClose the hood (Y page 273).
Fuse box in the trunk
XOpen the trunk lid.
Coupe
XTo open: turn rotary catch : clockwise.XOpen cover ; downwards.
Cabriolet
Fuses301Roadside AssistanceBA 207 USA, CA Edition B 2011; 1; 3, en-USd2sboikeVersion: 3.0.3.62010-05-20T10:38:09+02:00 - Seite 301Z