2011 MERCEDES-BENZ E-CLASS CABRIOLET wipers
[x] Cancel search: wipersPage 138 of 353
X
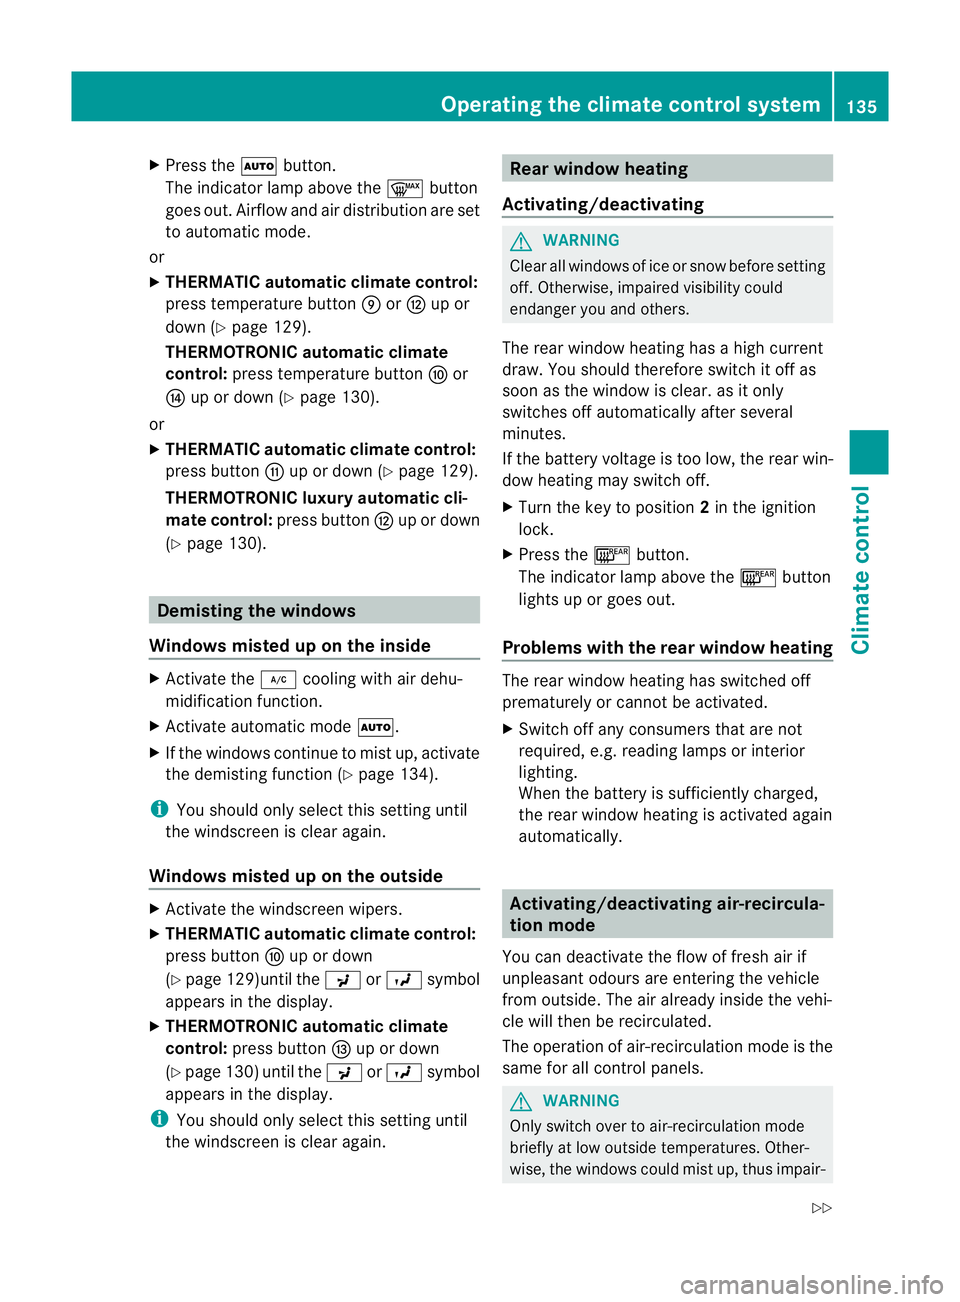
Press the Ãbutton.
The indicator lamp above the ¬button
goes out. Airflow and air distribution are set
to automatic mode.
or
X THERMATIC automatic climate control:
press temperature button EorH up or
down (Y page 129).
THERMOTRONIC automatic climate
control: press temperature button For
J up or down (Y page 130).
or
X THERMATIC automatic climate control:
press button Gup or down (Y page 129).
THERMOTRONIC luxur yautomatic cli-
matec ontrol: press button Hup or down
(Y page 130). Demisting the windows
Windows misted up on the inside X
Activate the ¿cooling with air dehu-
midification function.
X Activate automatic mode Ã.
X If the windows continue to mist up, activate
the demisting function (Y page 134).
i You should only select this setting until
the windscreen is clear again.
Windows misted up on the outside X
Activate the windscreen wipers.
X THERMATIC automatic climate control:
press button Fup or down
(Y page 129)until the PorO symbol
appears in the display.
X THERMOTRONIC automatic climate
control: press button Iup or down
(Y page 130) until the PorO symbol
appears in the display.
i You should only select this setting until
the windscreen is clear again. Rear window heating
Activating/deactivating G
WARNING
Clear all windows of ice or snow before setting
off. Otherwise, impaired visibility could
endanger you and others.
The rear window heating has ahigh current
draw. You should therefore switc hitoff as
soon as the window is clear .asitonly
switches off automaticallya fter several
minutes.
If the battery voltage is too low, the rear win-
dow heating may switch off.
X Turn the key to position 2in the ignition
lock.
X Press the ¤button.
The indicator lamp above the ¤button
lights up or goes out.
Problems with the rear window heating The rear window heating has switched off
prematurely or cannot be activated.
X
Switch off any consumers that are not
required, e.g. reading lamps or interior
lighting.
When the battery is sufficiently charged,
the rear window heating is activated again
automatically. Activating/deactivating air-recircula-
tion mode
You can deactivate the flow of fresh air if
unpleasant odours are entering the vehicle
from outside. The air already inside the vehi-
cle will then be recirculated.
The operation of air-recirculation mode is the
same for all control panels. G
WARNING
Only switch over to air-recirculation mode
briefly at low outside temperatures. Other-
wise, the windows could mist up, thus impair- Operating the climatec
ontrol system
135Climatecontrol
Z
Page 150 of 353
Where possible, avoid spinning the drive
wheels when pulling away on slippery
roads. Otherwise, you could damage the
drive train. Key positions
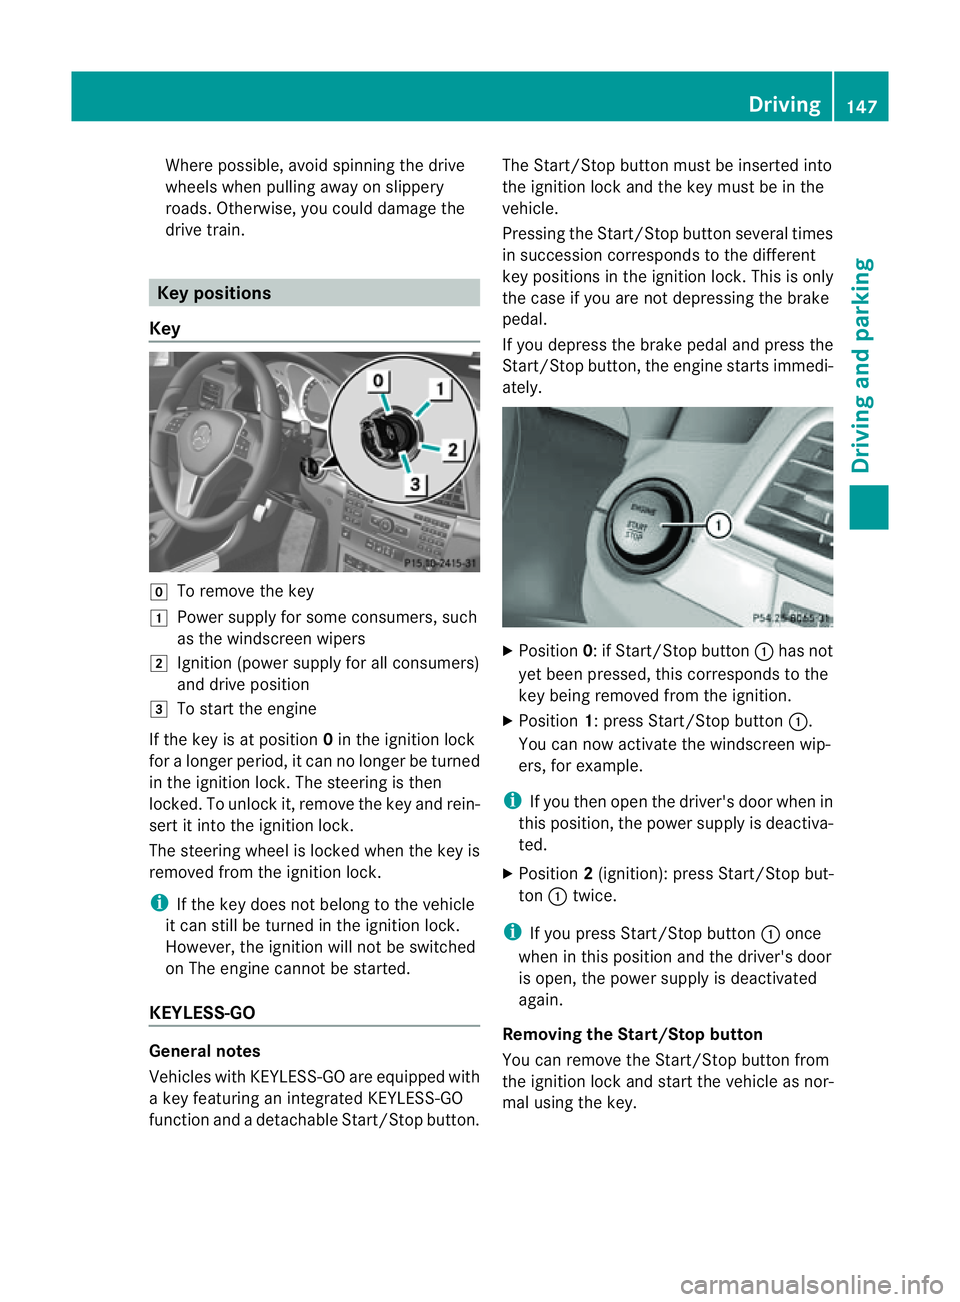
Key g
To remove the key
1 Power supply for some consumers, such
as the windscreen wipers
2 Ignition (power supply for all consumers)
and drive position
3 To start the engine
If the key is at position 0in the ignition lock
for alonger period, it can no longer be turned
in the ignition lock. The steerin gisthen
locked. To unlock it, remove the key and rein-
sert it into the ignition lock.
The steerin gwheel is locked when the key is
removed from the ignition lock.
i If the key does not belong to the vehicle
it can still be turned in the ignition lock.
However, the ignition will not be switched
on The engine cannot be started.
KEYLESS-GO General notes
Vehicles with KEYLESS-GO are equipped with
ak ey featurin ganintegrated KEYLESS-GO
function and adetachable Start/Stop button. The Start/Stop button must be inserted into
the ignition lock and the key must be in the
vehicle.
Pressing the Start/Stop button several times
in succession corresponds to the different
key position
sinthe ignition lock. This is only
the case if you are not depressing the brake
pedal.
If you depress the brake pedal and press the
Start/Stop button ,the engine start simmedi-
ately. X
Position 0:ifStart/Stop button :has not
yet been pressed, this corresponds to the
key being removed from the ignition.
X Position 1:press Start/Stop button :.
You can now activat ethe windscreen wip-
ers, for example.
i If you then open the driver's door when in
this position ,the power supply is deactiva-
ted.
X Position 2(ignition): press Start/Stop but-
ton :twice.
i If you press Start/Stop button :once
when in this position and the driver's door
is open, the power supply is deactivated
again.
Removing the Start/Stop button
You can remove the Start/Stop button from
the ignition lock and start the vehicle as nor-
mal using the key. Driving
147Driving and parking Z
Page 284 of 353
If you push the lidsb
ack, you willnotice a
resistance.
X Release bonnet :.
X Check whether the lidsofb onnet lifter;
are resting on housings =(arrow).
X The lids of bonnet lifter ; are resting
on the housings: close bonnet:
(Y page 282).
or
X The lids of bonnet lifter ; are not rest-
ing on the housings: first lift up bon-
net :on left-hand side ?and then on
right-hand side B.Lift up bonnet :until
the respective lid of bonnet lifter ;no lon-
ger moves.
The lidsofb onnet lifter;must rest on
housings =(arrow).
X Close bonnet :(Ypage 282).
If you cannot close bonnet :or the L
symbola ppears in the multifunction display,
repeatt he steps. G
WARNING
If the bonnet can still not be engaged properly
or the Lsymbol appears in the multifunc-
tion display,don ot continue driving. The bon-
net can then open when the vehicle is in
motion and obscure your field of vision. Con-
sult aqualified specialist workshop. Other-
wise, you may cause an accident and injure
yourself and others.
Opening the bonnet G
WARNING
Do not pull the release lever while the vehicle
is in motion. If you do so, the bonnet may open
up and block your view. G
WARNING
There is arisk of injury if the bonnet is open,
even if the engine is not running.
Some engine components can become very
hot. To avoid the risk of burns, only touch those
components described in the Owner's Manual
and observe the relevant safety notes.
G
WARNING
The radiator fan between the radiator and the
engine can start automatically, even if the key
has been removed from the ignition lock. For
this reason, you must not reach into the fan
rotation area. You could otherwise be injured.
Vehicles with apetrol engine: The elec-
tronic ignitio nsystem uses high voltage. For
this reason ,you mus tnever touch ignition
system components( ignition coil, ignition
cables, spark plug connectors or test socket)
while:
R the engine is running
R the engine is being started
R the ignition is switched on and the engine
is being cranked by hand
You could otherwise suffer an electric shock
and be seriously or even fatally injured.
Vehicles with adiesel engine: The elec-
tronic injection control uses high voltage. For
this reason ,you must never touc hinjection
system components while:
R the engin eisrunning
R the engin eisbeing started
R the ignition is switched on
You could otherwise suffer an electric shock
and be seriously or even fatally injured.
X Make sure that the windscreen wipers are
switched off. G
WARNING
The windscreen wipers and wiper linkage
could be set in motion.
When the bonnet is open, you or others could
be injured by the wiper linkage.
Make sure that the windscreen wipers are
switched off. Remove the key or make sure
that no ignition position has been selected
with KEYLESS-GO. All indicator lamps must be
off in the instrumen tpanel. Engine compartment
281Maintenance and care Z
Page 285 of 353

X
Pull release lever :on the bonnet.
The bonnet is released.
! Make sure that the windscreen wipers are
not folded away from the windscreen .Oth-
erwise, yo ucould damage the windscreen
wipers or the bonnet. X
Reach into the gap, pull bonnet catc hhan-
dle ;up and lift the bonnet.
If yo uliftt he bonnet by approximately
40 cm, the bonnet is opene dand held open
automaticall ybythe gas-filled strut.
Closin gthe bonnet G
WARNING
Make sure tha tnobody can become trapped
as you close the bonnet. X
Lower the bonnet and let it fall from a
height of approximately 20 cm.
X Check that the bonnet has engaged prop-
erly.
If the bonnet can be raised slightly, it is not
properly engaged. Open it again and close
it with alittle more force. Engine oil
Notes on the oil level Depending on driving style, the vehicle con-
sumes
amaximum of 0.8 loil per 1000 km.
The oil consumption may be higher than this
when the vehicle is new or if you frequently
drive at high engine speeds.
Checking the oil level using the oil dip-
stick Depending on the engine, the oil dipstick may
be installed at
adifferent location.
When checking the oil level:
R park the vehicle on alevel surface.
R the engine should be switched off for
approximately five minutes if the engine is
at normal operating temperature. Example:
E350
X Pull oil dipstick :out of the oil dipstick
tube.
X Wipe off oil dipstick :.282
Engine compartmentMaintenance and care
Page 292 of 353
X
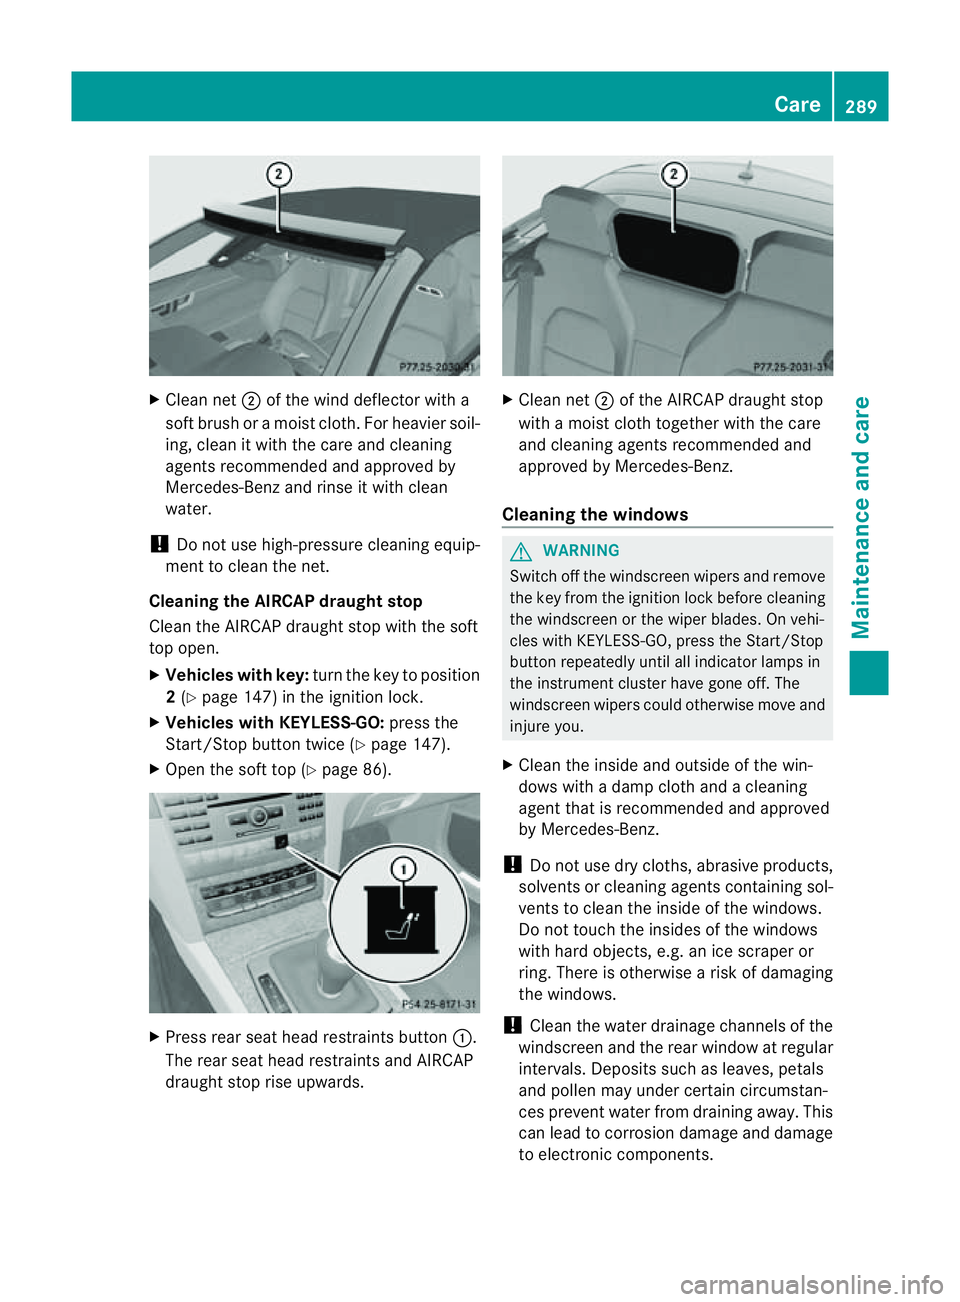
Clean net ;of th ewindd eflecto rwith a
soft brush or amoist cloth. For heavier soil-
ing, clean it with the care and cleaning
agent srecommende dand approved by
Mercedes-Ben zand rins eitwithc lean
water.
! Do not us ehigh-pressure cleaning equip-
ment to clean the net.
Cleanin gthe AIRCA Pdraught stop
Clea nthe AIRCAP draught stop with the soft
top open.
X Vehicles with key: turn the key to position
2 (Y page 147) in the ignition lock.
X Vehicles with KEYLESS-GO: press the
Start/Stop button twice (Y page 147).
X Open the soft top (Y page 86).X
Press rear seat head restraintsb utton:.
The rear seat head restraintsa nd AIRCAP
draught stop rise upwards. X
Cleann et; of the AIRCAP draught stop
with amoist clot htogether with the care
and cleanin gagents recommended and
approved by Mercedes-Benz.
Cleaning the windows G
WARNING
Switc hoff the windscreen wipers and remove
the key from the ignition lock before cleaning
the windscreen or the wiper blades. On vehi-
cles with KEYLESS-GO, press the Start/Stop
button repeatedly until all indicator lamps in
the instrument cluster have gone off. The
windscreen wipers could otherwise move and
injur eyou.
X Clean the inside and outside of the win-
dows with adamp cloth and acleaning
agent that is recommended and approved
by Mercedes-Benz.
! Do not use dry cloths, abrasive products,
solvent sorcleanin gagents containin gsol-
vent stoc lean the inside of the windows.
Do not touch the insides of the windows
with hard objects, e.g. an ice scraper or
ring. There is otherwise arisk of damaging
the windows.
! Clean the water drainage channels of the
windscreen and the rear window at regular
intervals. Deposit ssuch as leaves, petals
and pollen may under certain circumstan-
ces preven twate rfrom draining away.T his
can lead to corrosion damage and damage
to electronic components. Care
289Maintenance and care Z
Page 293 of 353
Cleaning th
ewiper blades G
WARNING
Switch off th ewindscree nwipers and remove
the key fro mthe ignition lock before cleaning
the windscreen or the wiper blades. On vehi-
cles with KEYLESS-GO, press the Start/Stop
button repeatedly until all indicator lamps in
the instrument cluster have gone off. The
windscreen wipers could otherwise move and
injure you.
! Do not pull on the wiper blade. Otherwise,
the wiper blade could be damaged.
! Do not clean wiper blades too often and
do not rub them too hard. Otherwise, the
graphite coating could be damaged. This
could cause wiper noise.
X Fold the wiper arms away from the wind-
screen.
X Cleant he wiper blades carefully using a
damp cloth.
X Fold the windscreen wipers back again
before switching on the ignition.
! Hold the wiper arm securely when folding
back. The windscreen could be damaged if
the wiper arm hits against it suddenly.
Cleaningt he exterior lighting X
Cleant he plastic lenses of the exterior
lighting using awet sponge and amild
cleaning agent, e.g. Mercedes-Ben zcar
shampoo or cleanin gcloths.
! Only use cleanin gagents or cleaning
cloth sthata re suitable for plastic lenses.
Unsuitable cleanin gagents or cleaning
cloth scould scratch or damag ethe plastic
lenses of th eexteri or lighting. Cleaning th
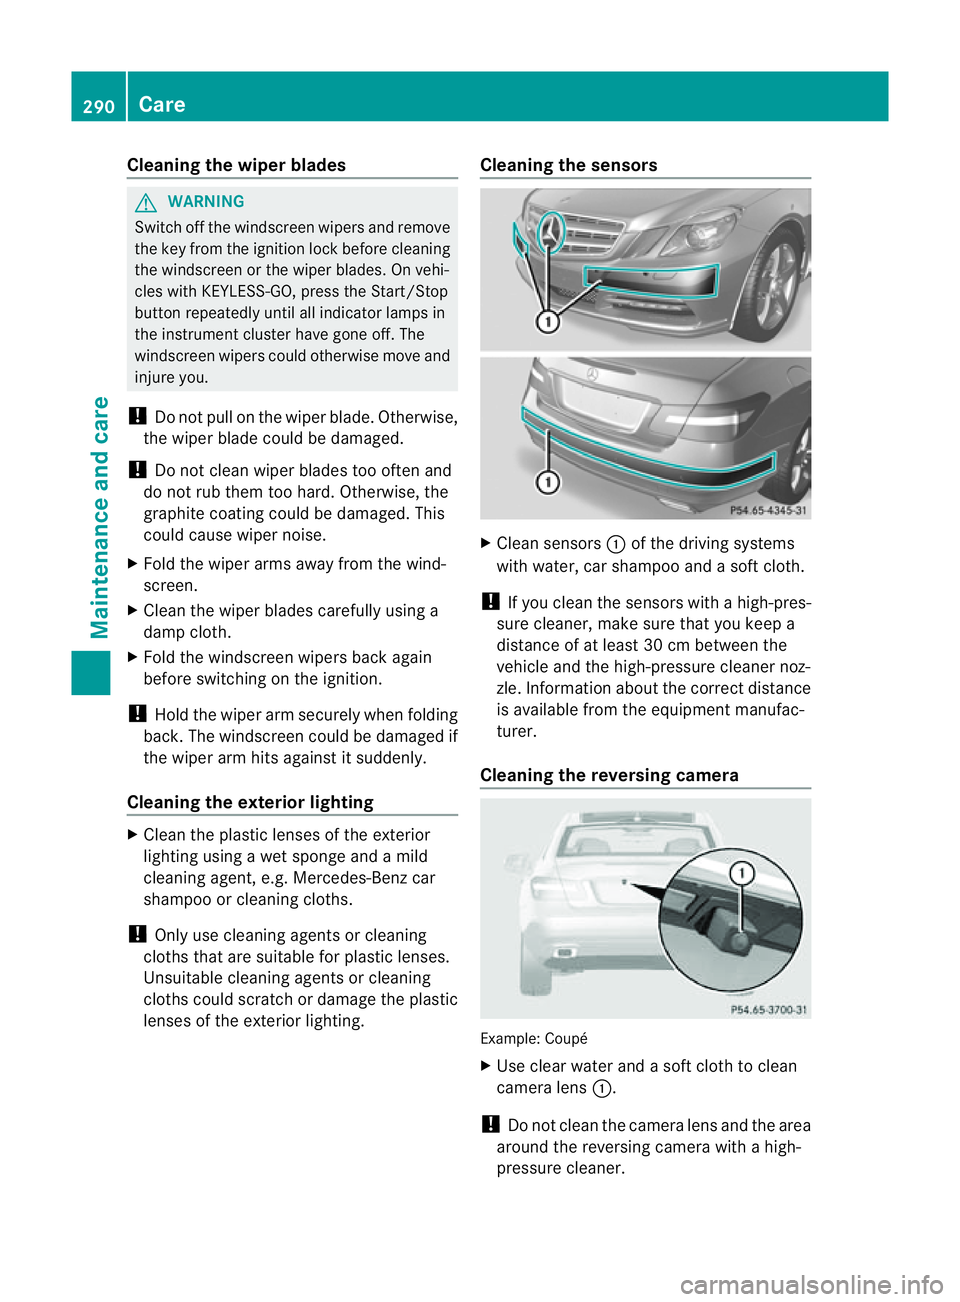
esensors X
Clean sensors :of th edriving systems
wit hw ater, car shampoo and asoftc loth.
! If you clean the sensors with ahigh-pres-
sure cleaner, mak esure that you keep a
distanc eofatl east 30 cm between the
vehicle and the high-pressure cleaner noz-
zle. Information about the correc tdistance
is available fro mthe equipment manufac-
turer.
Cleaningt he reversing camera Example: Coupé
X
Use clear water and asoft cloth to clean
camera lens :.
! Do not clean the camera lens and the area
around the reversing camera with ahigh-
pressure cleaner. 290
CareMaintenance and care
Page 317 of 353

Blow
nfuses must be replace dwith fuses of
the same rating, which you can recognise by
the colour and value. The fuse ratings are lis-
ted in the fuse allocation chart. AMercedes-
BenzS ervice Centr ewill be happy to advise
you.
If the newly inserted fuse also blows, have the
cause traced and rectified at aqualified spe-
cialist workshop, e.g. aMercedes-Benz
Service Centre.
! Only use fuses that have been approved
for Mercedes-Benz vehicles and which
have the correct fuse ratin gfor the system
concerned. Otherwise, componentsors ys-
tems could be damaged. Befor
echanging afuse
X Park the vehicle and apply the parking
brake.
X Switc hoff all electrical consumers.
X Remove the key from the ignition lock.
The fuses are located in various fuse boxes:
R fuse box on the driver's side of the dash-
board
R fuse box in the engin ecompartment on the
left-hand side of the vehicle, when viewed
in the direction of travel
R fuse box in the boot on the right-hand side
of the vehicle, when viewed in the direction
of travel
The fuse allocation chart is located in the
vehicle tool kit (Y page 295)inthe stowage
compartment under the boot floor. Dashboar
dfuse box
! Do not use apointed objec tsuch as a
screwdriver to open th ecover in th edash-
board. You could damag ethe dashboard or
the cover. X
To open: pull out cover :slightly at the
botto mint hedirection of arrow =.
X Pull cover :outwards in th edirection of
arrow ;and remove it.
X To close: clip in cover :on th efront of
th ed ashboard.
X Fol dc over : inwards until it engages. Fuse box in th
eengine compartment
X Mak esure that th ewindscree nwipers are
turned off. G
WARNING
Make sure that the windscreen wipers are
turned off and the key is pulled out of the igni-
tion lock befor eyou open the cover of the fuse
box. Otherwise, the windscreen wipers and
the wiper rods above the cover could be set
in motion. This could lead to you or others
being injured by the wiper rods.
X Open the bonnet (Y page 281).314
Electrical fusesBreakdown assistance