2011 MERCEDES-BENZ E-CLASS CABRIOLET turn signal
[x] Cancel search: turn signalPage 202 of 353

R
the lane markings ar eworna way, dark or
covered up ,e.g.byd irtors now.
R the distance to the vehicl einfront is too
small and the lane marking sthu sc anno tbe
detected.
R the lane markings on the road are unclear,
e.g. near roadworks.
R the lane markings chang equickly, e.g.
lanes branc hoff, cros sone another or
merge.
R the road is narro wand winding.
Lane Keeping Assist cannot detec troad and
traffic conditions. It is not asubstitute for
attentive driving .You are responsible for the
vehicle's speed, braking in good time, and
steering correctly. Always adapt your driving
style to suit the prevailing road and weather
conditions. Always pay attention to traffic
conditions and your surroundings. Otherwise,
you may fail to recognise dangers in time,
cause an accident and injure yourself and oth-
ers.
Aw arning may be given if afront wheel
passes over alane marking. It will warn you
by means of intermittentv ibration in the
steering wheel for up to 1.5 seconds.
Activating Lane Keeping Assist
X Symbol :appears in the multifunction
display. Active Driving Assistance package
General notes The Active Drivin
gAssistance package con-
sists of DISTRONIC PLUS (Y page 171), Active
Blind Spot Assist (Y page 199) and Active
Lane Keeping Assist (Y page 202).
Active Blind Spot Assist Important safety notes
Active Blind Spot Assist uses
aradar sensor
system to monitor the side areas of your vehi- cle that are behind the driver.
Awarning dis-
play in th eexteri or mirror sdraws your atten-
tio ntod etected vehicles in the monitored
area. If you then switch on the corresponding
turn signal to change lane, you will also
receive avisual and acoustic collision warn-
ing. If arisk of lateral collision is detected,
corrective braking may help you avoid acol-
lision. To support the course-correcting brake
application, Active Blind Spot Assist also uses
the forward-facin gradar sensor system.
Active Blind Spot Assist provides assistance
at speeds higher than about 30 km/h. G
WARNING
Active Blind Spot Assist is only an aid and may
detect vehicles/obstacles incorrectly or not
at all.
The system may be impaired or may not func-
tion if:
R there is poor visibility, e.g. due to snow,
rain, fog or spray.
R the rear and/or front sensors are dirty.
Active Blind Spot Assist may not detect nar-
row vehicles, such as motorcycles or bicycles,
or only detect them too late. It cannot detect
vehicles which are overtaken at asmall dis-
tancea nd then enter the blind spot area.
Active Blind Spot Assist cannot detect road
and traffic conditions. It is not asubstitute for
attentive driving. You are responsible for the
vehicle's speed, braking in good time, and
steering correctly. Always adapt your driving
style to suit the prevailing road and weather
conditions. Always pay attention to traffic
conditions and your surroundings. Otherwise,
you may fail to recognise dangers in time,
cause an accident and injure yourself and oth-
ers.
The radar sensor system is automatically
deactivated near radio telescope facilities
(Y page 345).
For Active Blind Spot Assist to assist you
when driving, the radar sensor system must
be activated (Y page 229) and operational. Driving systems
199Driving and parking Z
Page 204 of 353
30 km/h, warning lamp
:on the corre-
sponding sid elights up red. Thi swarning is
always emitted whe navehicle enters the
blind spot monitoring range from behind or
from the side .When you overtake avehicle,
the warning only occurs if the difference in
speed is less than 12 km/h.
The yellow indicator lamp goes out if reverse
gear is engaged. Active Blind Spot Assist is
then no longer active.
The brightness of the indicator/warning
lamps is adjusted automatically according to
the ambient light. G
WARNING
Active Blind Spot Assist is not active at speeds
below 30 km/h. The indicator lamps in the
exterior mirrors are yellow.V ehicles in the
monitoring range are then not indicated.
Always pay attention to traffic conditions and
your surroundings. Otherwise, you may fail to
recognise dangers in time, cause an accident
and injure yourself and others.
Visua land acoustic collisio nwarning
If you switch on the appropriate turn signals
to change lanes, and avehicle is detected in
the side monitoring range of Active Blind Spot
Assist ,you will receive avisual and acoustic
collision warning. You will then hear adouble
warning tone, and red warning lamp :
flashes. If the turn signal remains on, detec-
ted vehicles are indicated by the flashing of
red warning lamp :.There are no further
warning tones.
Course-correcting brak eapplication
If Active Blind Spot Assist detects arisk of a
lateral collision in the monitoring range, a
course-correcting brake application is carried
out. This is designed to help you avoid acol-
lision.
The course-correcting brake application is
available in the range between 30 km/ha nd
200 km/h.
If ac ourse-correcting brake application
occurs, red warning lamp :flashe sinthe exterio
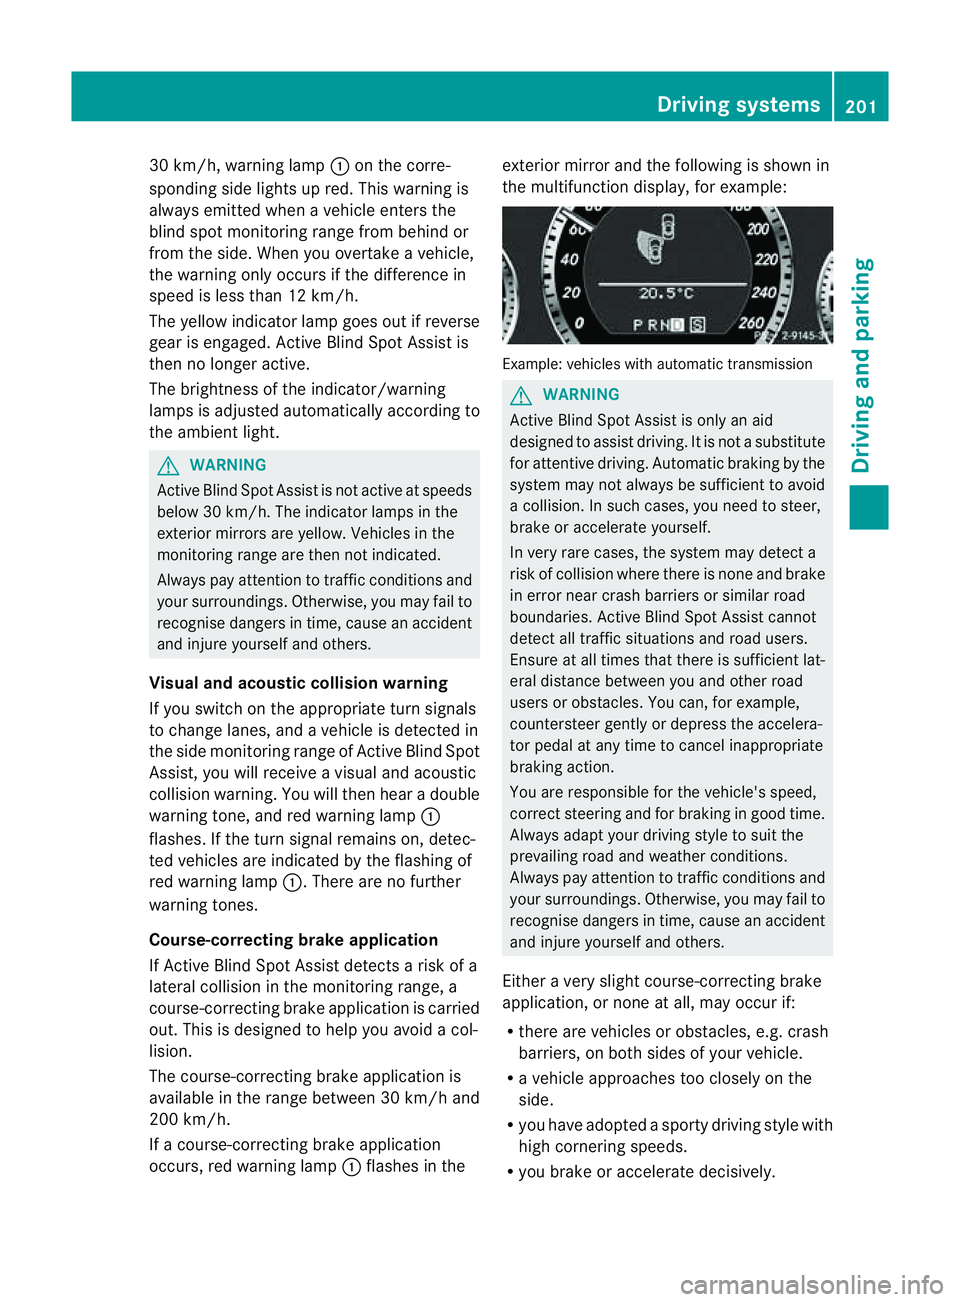
rmirro rand the following is shown in
the multifunctio ndisplay, for example: Example: vehicles with automatic transmission
G
WARNING
Activ eBlindS pot Assist is only an aid
designed to assist driving. It is not asubstitute
for attentive driving. Automatic braking by the
system may not always be sufficien ttoavoid
ac ollision. In such cases, you need to steer,
brake or accelerate yourself.
In very rare cases, the system may detect a
risk of collision where there is none and brake
in error near crash barriers or similar road
boundaries. Active Blind Spot Assist cannot
detect all traffic situations and road users.
Ensure at all times that there is sufficient lat-
eral distance between you and other road
users or obstacles. You can, for example,
countersteer gently or depress the accelera-
tor pedal at any time to cancel inappropriate
braking action.
You are responsible for the vehicle's speed,
correc tsteerin gand for braking in good time.
Alway sadapt your drivin gstyle to suit the
prevailing road and weather conditions.
Always pay attention to traffic conditions and
your surroundings. Otherwise, you may fail to
recognise dangers in time, cause an accident
and injure yourself and others.
Either avery slight course-correcting brake
application, or none at all, may occur if:
R there are vehicles or obstacles, e.g. crash
barriers, on both sides of your vehicle.
R av ehicle approaches too closely on the
side.
R you have adopted asporty driving style with
high cornering speeds.
R you brake or accelerate decisively. Driving systems
201Driving and parking Z
Page 206 of 353
R
the lane markings change quickly, e.g.
lanes branch off ,cros sone anothe ror
merge.
R the road is narrow and winding.
Active Lane Keeping Assist cannot detect
road and traffic conditions. It is not asubsti-
tute for attentive driving. You are responsible
for the vehicle's speed ,braking in good time,
and steering correctly. Always adapt your
driving style to suitt he prevailing road and
weather conditions.A lways pay attention to
traffic condition sand your surroundings. Oth-
erwise, you may fail to recognise danger sin
time, cause an accident and injure yourself
and others.
Warning vibration in th esteering wheel
Aw arnin gmay be given if afront wheel
passes over alane marking. You will be
warned by way of intermitten tvibrations in
the steerin gwheel for up to 1. 5seconds.
In order that you are warned only when nec-
essary and in good time if you cross the lane
marking, the system recognises certain con-
ditions and warns you accordingly.
The warning vibration occur searlier if:
R you approach the outer lane markin gona
bend.
R the road has very wide lanes, e.g. amotor-
way.
R the system recognises solid lane markings.
The warning vibration occur slater if:
R the road has narrow lanes.
R you cut the corner on abend.
No warning vibration occur sif:
R you clearly and actively steer ,brake, or
accelerate.
R you cut the corner on asharp bend.
R ad riving safety system intervenes, such as
ABS, BASorE SP®
.
R you have switched on the turn signals. In
this event ,the warnings are suppressed for
ac ertain period of time. Lane-correcting brak
eapplication
If you leave your lane under certain circum-
stances, the vehicle will brake briefly on one
side. This is designed to help you bring the
vehicle back intot he original lane.
This function is available in the range between
60 km/ha nd 200 km/h.
Al ane-correctingb rake application can only
be made after driving over asolid, recognis-
able lane marking. Befor ethis, awarning
must be emitted by means of intermittent
vibration in the steering wheel. In addition, a
lane with lane markings on both sides must
be recognised. The brake application also
slightly reduces driving speed.
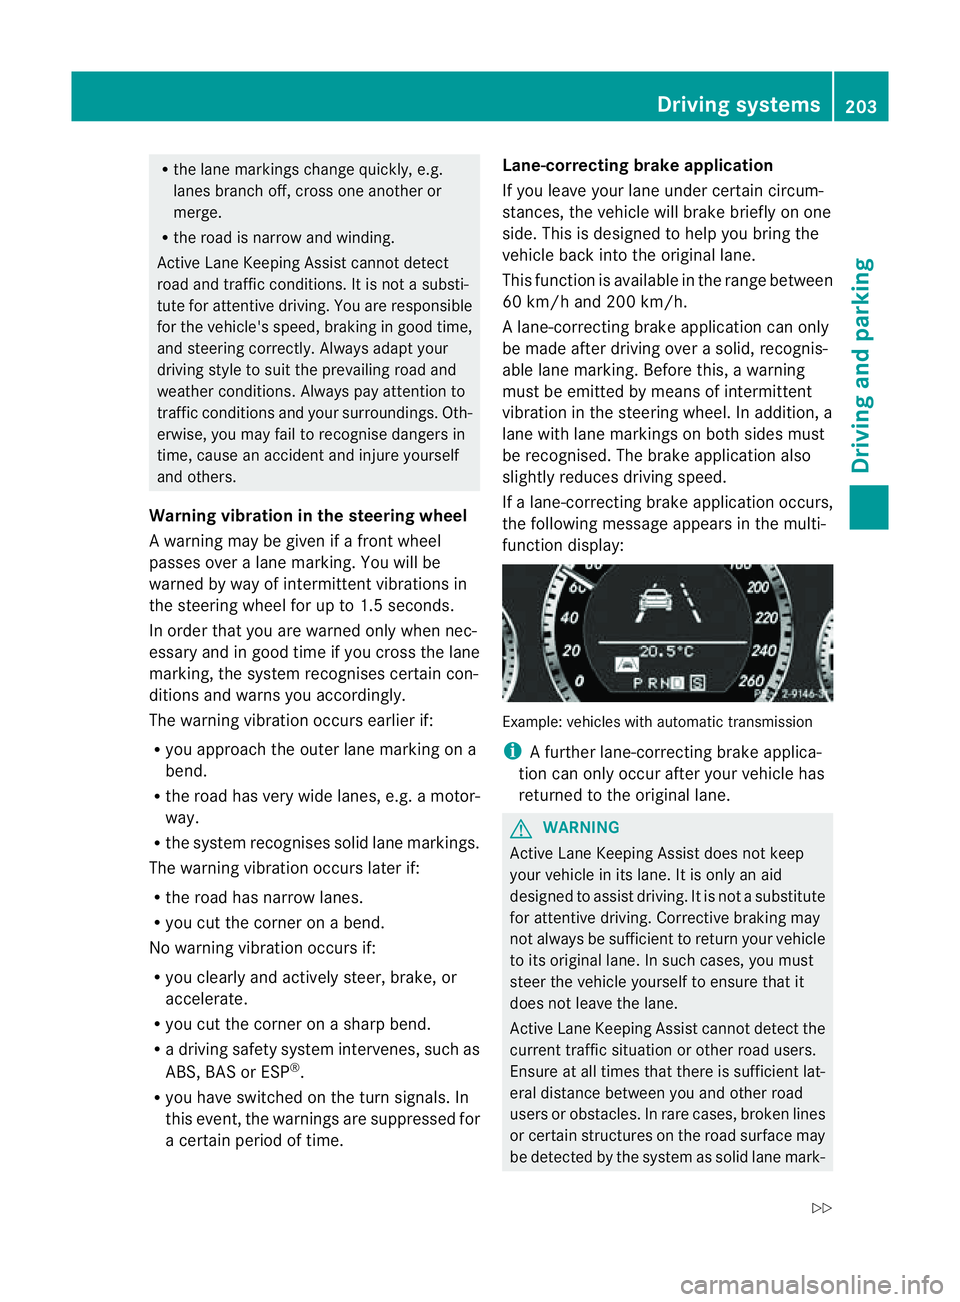
If al ane-correcting brake application occurs,
the following message appears in the multi-
function display: Example: vehicles with automatic transmission
i
Afurther lane-correcting brake applica-
tion can only occur after your vehicle has
returned to the original lane. G
WARNING
Active Lane Keeping Assist does not keep
your vehicle in its lane. It is only an aid
designed to assist driving. It is not asubstitute
for attentive driving. Corrective braking may
not always be sufficient to return your vehicle
to its original lane. In such cases, you must
steer the vehicle yourself to ensure that it
does not leave the lane.
Active Lane Keeping Assist cannot detect the
current traffic situation or other road users.
Ensure at all times that there is sufficient lat-
eral distance between you and other road
users or obstacles. In rare cases, broken lines
or certain structures on the road surface may
be detected by the system as solid lane mark- Driving systems
203Driving and parking
Z
Page 207 of 353
ings
.You can, for example, countersteer gen-
tly at any time to cancel inappropriate braking
action, e.g. if you intentionally drive across a
solid lane marking.
Active Lane Keeping Assist cannot take
weather conditions into account.
You are responsible for the vehicle's speed,
correc tsteerin gand for braking in good time.
Alway sadapt your drivin gstyle to suit the
prevailing road and weather conditions.
Always pay attention to traffic conditions and
your surroundings. Otherwise, you may fail to
recognise dangers in time, cause an accident
and injure yourself and others.
No lane-correcting brake application occurs
if:
R you clearly and actively steer, brake, or
accelerate.
R you cut the corner on asharp bend.
R you have switched on the turn signals.
R ad riving safety system intervenes, such as
ESP ®
,P RE-SAFE ®
Brake or Active Blind
Spot Assist.
R you have adopted asporty driving style with
high cornering speeds or high rates of
acceleration.
R on vehicles with atrailer tow hitch, the
electrical connection to the trailer has been
correctly established.
R ESP ®
is deactivated.
R the transmission is not in position D.
R al oss of tyre pressure or adefective tyre
has been detected and displayed.
Active Lane Keeping Assist does not detect
road and traffic conditions. An inappropriate
brake application may be interrupted at any
time if:
R you steer slightly in the opposite direction.
R you use aturn signal.
R you clearly brake or accelerate. Al
ane-correcting brak eapplicatio nisinter-
rupted automaticallyi f:
R ad riving safety system intervenes, such as
ESP ®
,P RE-SAFE ®
Brake or Active Blind
Spot Assist.
R lane markings can no longer be recognised.
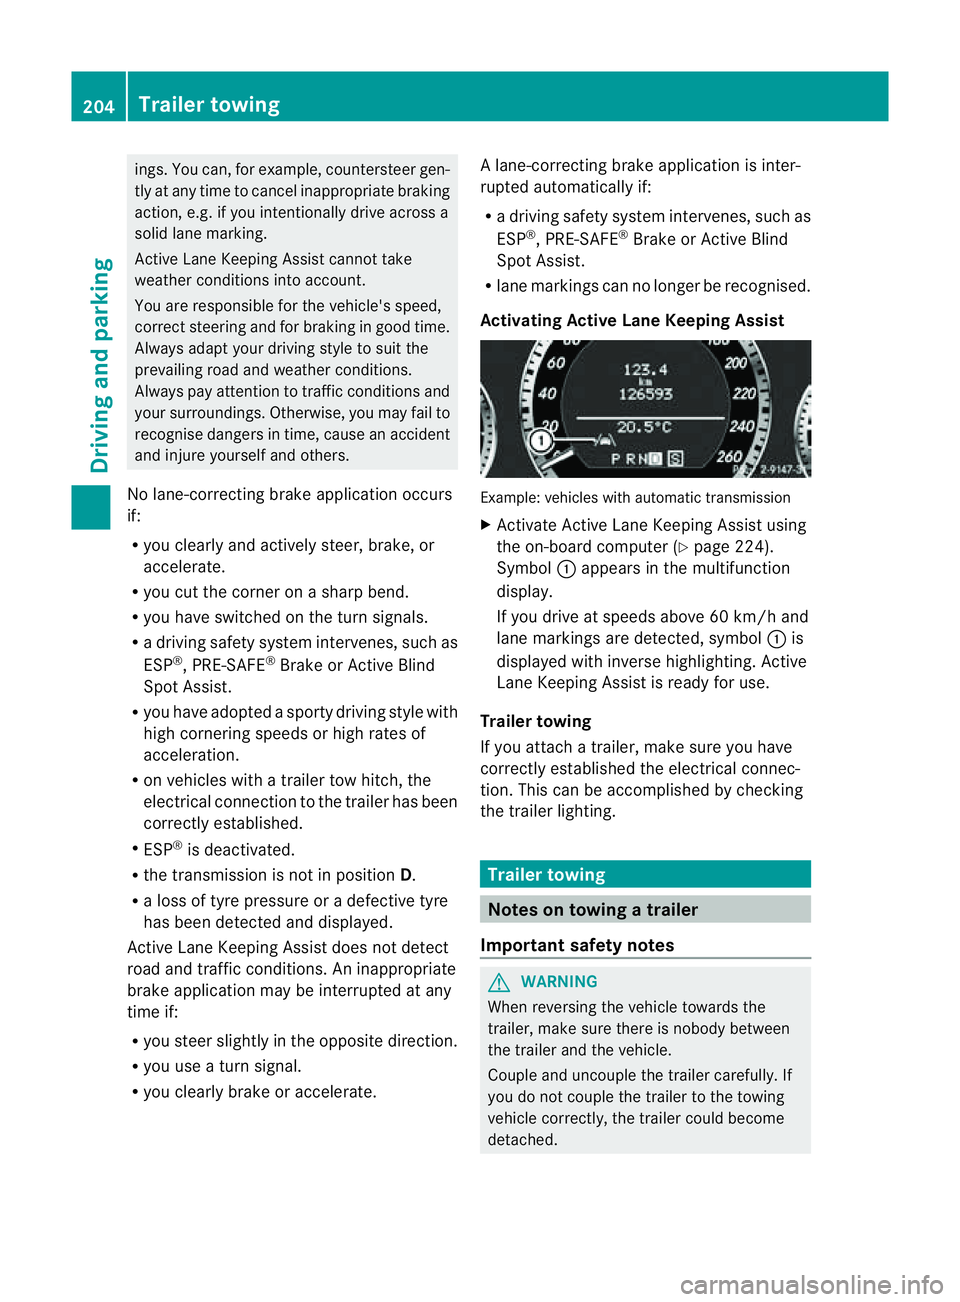
Activating Active Lane Keeping Assist Example: vehicles with automatic transmission
X
Activate Active Lane Keeping Assist using
the on-board computer (Y page 224).
Symbol :appears in the multifunction
display.
If you drive at speeds above 60 km/h and
lane markings are detected, symbol :is
displayed with inverse highlighting. Active
Lane Keeping Assist is ready for use.
Trailer towing
If you attach atrailer, make sure you have
correctly established the electrical connec-
tion. This can be accomplished by checking
the trailer lighting. Trailer towing
Notes on towing
atrailer
Important safety notes G
WARNING
When reversing the vehicl etowards the
trailer, make sure there is nobod ybetween
the trailer and the vehicle.
Couple and uncoupl ethe trailer carefully .If
you do no tcouple the trailer to the towing
vehicle correctly, the trailer could become
detached. 204
Trailer towingDriving and parking
Page 231 of 353
aroun
dthe vehicle are displayed in red in
th em ultifunction display.
X Press the abuttontos ave th esetting.
Deactivating delayed switch-off of th eexte-
rior lighting temporarily:
X Before leaving th evehicle ,turn th ekeyto
position 0in th eignition lock.
X Turn th ekeyto position 2in th eignition
loc ka nd back to position 0.
The exterio rlighting delayed switch-off is
deactivated.
Delayed switch-off of the exterior lighting is
reactivated the nex ttim ey ou start the
engine.
Activating/deactivating th einterior light-
ing delayed switch-off
If you activat ethe Light. delay function,
the interior lighting remain sonfor 20 sec-
onds after you remove the key fro mthe igni-
tion lock.
X Press the =or; button on the steer-
ing wheel to selec tthe Settings menu.
X Press the :or9 button to select the
Light submenu.
X Press the abutton to confirm.
X Press the :or9 button to select the
Light. delay function.
When the Light. delay function is acti-
vated, the vehicle interior is displayed in
red in the multifunction display.
X Press the abutton to save the setting.
Vehicle Setting permanent SPEEDTRONIC
You can set permanent SPEEDTRONIC
(Y page 183) using the Limit speed (win‐ter tyres) function.
X Press the =or; button on the steer-
ing wheel to select the Settings menu.
X Press the :or9 button to select the
Vehicle submenu. X
Press the abutton to confirm.
X Press :or9 to select the Limit speed (winter tyres): function.
You will see the current setting.
X Press the abutton to confirm.
X Press :or9 to adjust permanent
SPEEDTRONIC in increments of 10
(240 km/h to
160 km/h ). The
Off setting
switches permanent SPEEDTRONIC off.
X Press the abutton to store the entry.
Switching the automatic locking feature
on/off
If you select the Automatic door lock func-
tion, the vehicle is centrally locked above a
speed of around 15 km/h.
i For further information on the automatic
locking feature, see (Y page 78).
X Press the =or; button on the steer-
ing wheel to select the Settings menu.
X Press the :or9 button to select the
Vehicle submenu.
X Press the abutton to confirm.
X Press the :or9 button to select the
Automatic door lock function.
When the Automatic door locks func-
tion is activated, the vehicle doors are dis-
played in red in the multifunction display.
X Press the abutton to save the setting.
Activating/deactivating the acoustic
locking confirmation
If you activate the Acoustic Lock function,
an audible signal sounds when the vehicle is
locked or unlocked. When unlocking, the sig-
nal sounds once. When locking, it sounds
three times.
X Press the =or; button on the steer-
ing wheel to select the Settings menu.
X Press the :or9 button to select the
Vehicle submenu.
X Press the abutton to confirm. 228
Menus and submenusOn-board computer and displays
Page 242 of 353
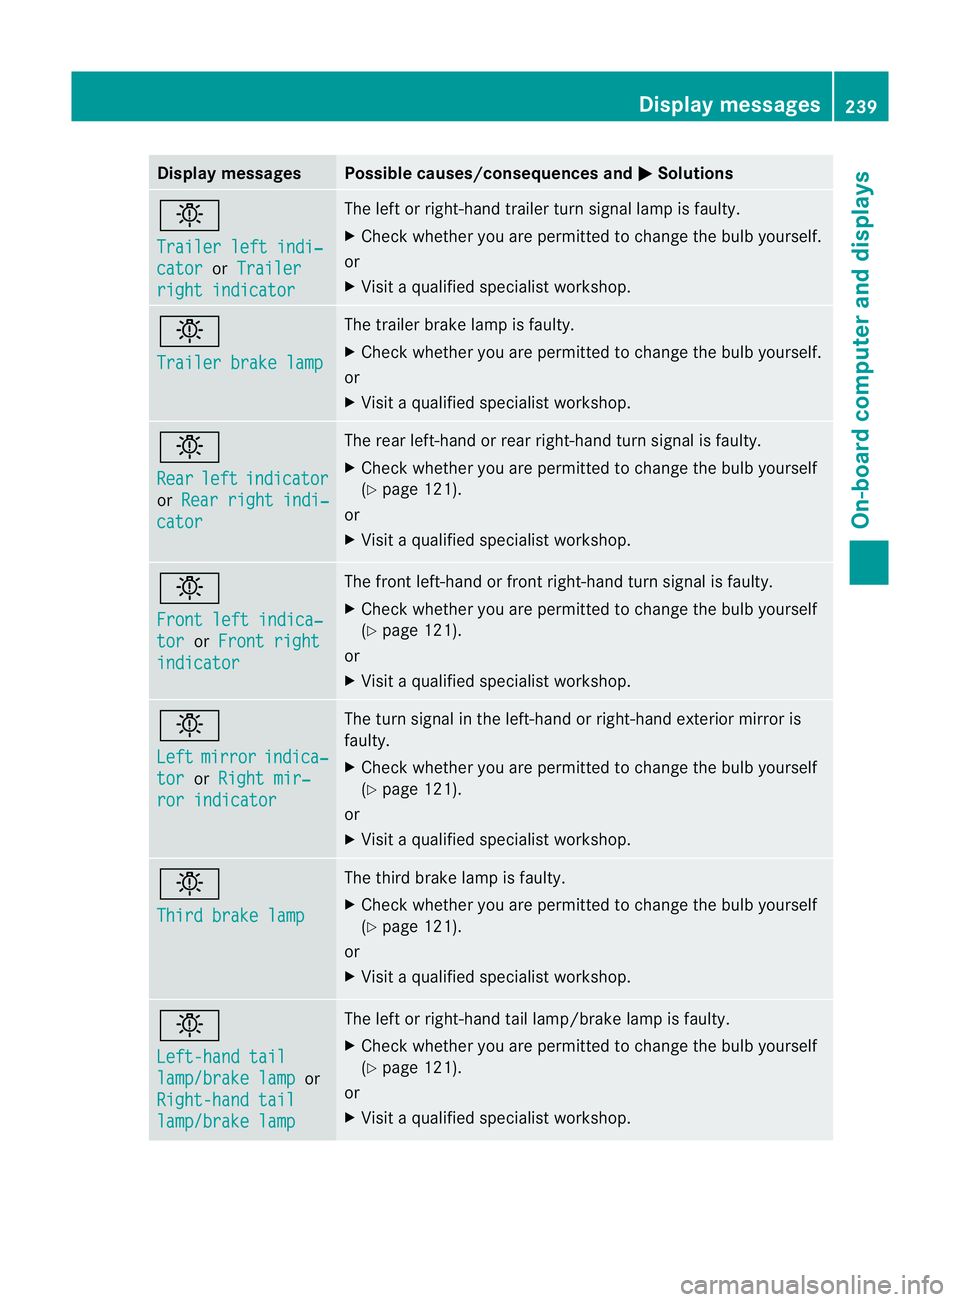
Display messages Possible causes/consequences and
M Solutions
b
Traile
rlefti ndi‐ cator or
Trailer right indicator The lef
torright-han dtrailer tur nsignal lamp is faulty.
X Check whether you are permitted to change the bulb yourself.
or
X Visit aqualified specialist workshop. b
Trailer brak
elamp The trailer brak
elamp is faulty.
X Check whether you are permitted to change the bulb yourself.
or
X Visit aqualified specialist workshop. b
Rear
left indicator
or
Rear righ tindi‐ cator The rear left-han
dorrear right-han dturns ignal is faulty.
X Check whether you are permitted to change the bulb yourself
(Y page 121).
or
X Visit aqualified specialist workshop. b
Fron
tleft indica‐ tor or
Fron tright indicator The front left-han
dorfront right-han dturns ignal is faulty.
X Check whether you are permitted to change the bulb yourself
(Y page 121).
or
X Visit aqualified specialist workshop. b
Left
mirror indica‐
tor or
Righ tmir‐ ror indicator The tur
nsignal in the left-han dorright-han dexterior mirror is
faulty.
X Check whether you are permitted to change the bulb yourself
(Y page 121).
or
X Visit aqualified specialist workshop. b
Thir
dbrakel amp The thir
dbrak elamp is faulty.
X Check whether you are permitted to change the bulb yourself
(Y page 121).
or
X Visit aqualified specialist workshop. b
Left-han
dtail lamp/brake lamp or
Right-hand tail lamp/brake lamp The left or right-han
dtail lamp/brak elamp is faulty.
X Check whether you are permitted to change the bulb yourself
(Y page 121).
or
X Visit aqualified specialist workshop. Display messages
239On-board computer and displays Z
Page 279 of 353

door opener depends on the garage door
drive system. You might require several
attempts
.You should test every position for
at least 25 seconds before trying another
position.
X Press and hold transmitter button Bon
garage door remote control Auntil indi-
cator lamp :lights up green.
The programming has been successful if
indicator lamp :lights up or flashes
green.
X Release transmitter button ;,=or? on
the integrated garage door opener and the
transmitter button on garage door remote
control B.
If indicator lamp :lights up red:
X Repeat the programming procedure for the
transmitter buttons. When doing so, vary
the distance between the garage door drive
remote control and the rear-view mirror.
i If the indicator lamp flashes green after
successful programming, the garage door
system is using arolling code. After pro-
gramming, you must synchronise the
garage door opener integrated in the rear-
view mirror with the receiver of the garage
door system.
Synchronising the rolling code
Your vehicle must be within reach of the
garage or gate opener drive. Make sure that
neither your vehicle nor any persons/objects
are present within the sweep of the door or
gate.
Observe the safety notes when performing
the rolling code synchronisation.
X Turn the key to position 2in the ignition
lock.
X Press the programming button of the door
or gate drive (see the door or gate drive
operating instructions, e.g. under "Pro-
gramming of additional remote controls"). i
Usually ,you now have 30 seconds to ini-
tiate the next step.
X Press the previously programmed button of
the integrated HomeLink ®
garage door
opener repeatedly until the door startsto
move.
The rolling code synchronisation is then
complete.
Problems when programming
If you have problems when programming the
integrated garage door opener, please note
the following:
R check the transmitter frequency of garage
door remote control A(this can usually be
found on the rear of the remote control).
R change the batteries in garage door remote
control A.This increases the likelihood
that garage door remote control Awill
send astronga nd precise signal to the
integrated remote control in the rear-view
mirror.
R when programming, hold garage door
remote control Aat different distances
and angles from the transmitter button that
you are programming. Try various angles at
ad istance of between 5and 30 cm or the
same angle but varying distances.
R if there is another remote control for the
same garage door drive, perform the pro-
gramming steps again using this remote
control. Before performing these steps,
make sure that new batteries have been
fitted in the garage door drive remote con-
trol.
R note that some remote controls transmit
only for alimited period (the indicator lamp
on the remote control goes out). Press the
button on the remote control again before
transmission ends.
R align the aerial cable of the garage door
opener unit. This can improve signal recep-
tion/transmission. 276
FeaturesStowing and features
Page 280 of 353
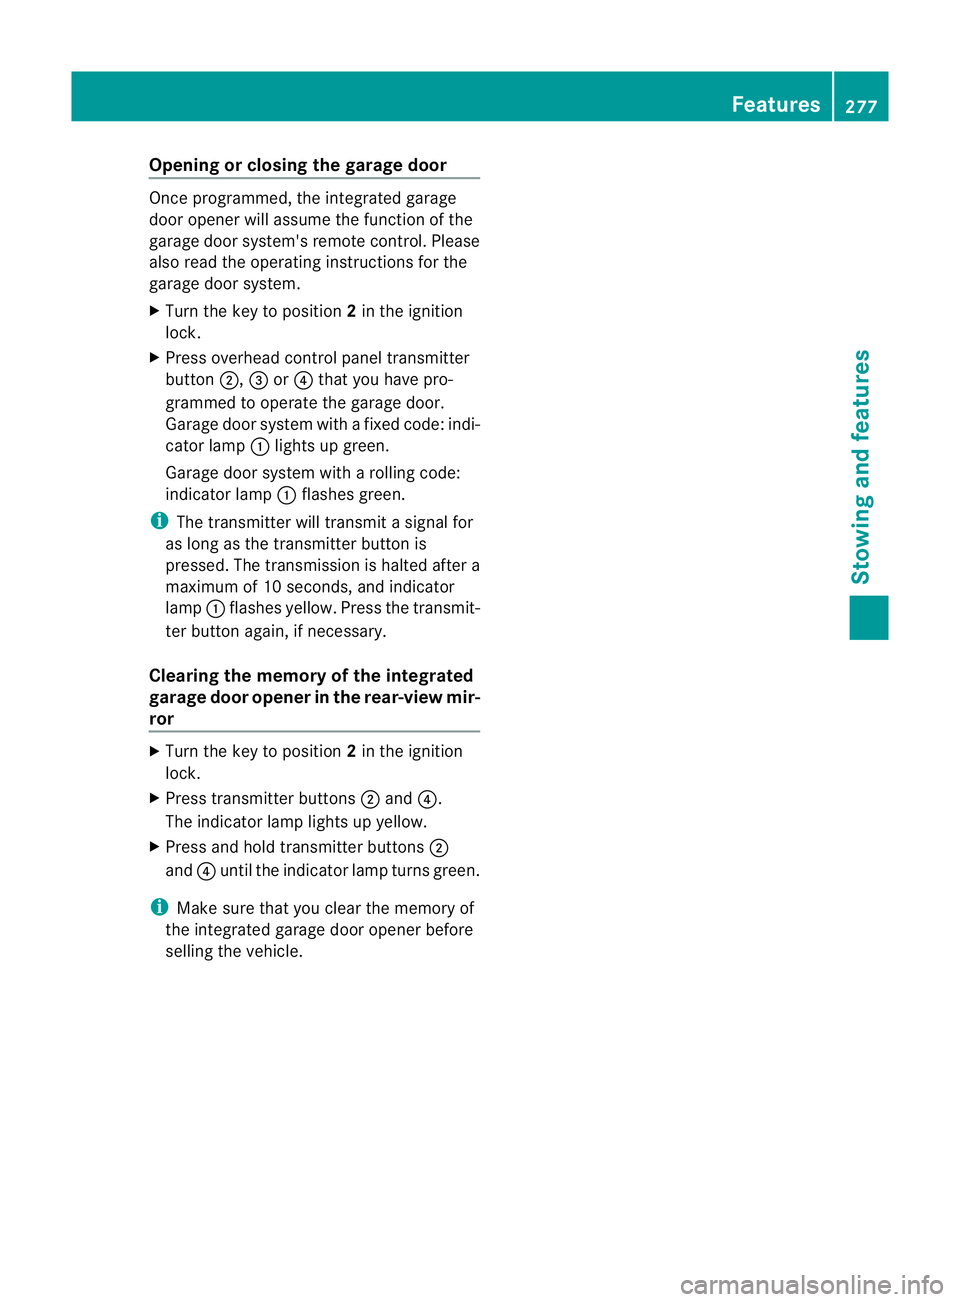
Opening or closing the garage door
Oncep
rogrammed, the integrated garage
door opener will assume the function of the
garage door system's remot econtrol. Please
also read the operatin ginstructions for the
garage door system.
X Turn the key to position 2in the ignition
lock.
X Press overhead control panel transmitter
button ;,=or? that you have pro-
grammed to operate the garage door.
Garage door system with afixed code: indi-
cator lamp :lights up green.
Garage door system with arolling code:
indicator lamp :flashes green.
i The transmitter will transmit asignal for
as long as the transmitter button is
pressed. The transmission is halted after a
maximum of 10 seconds, and indicator
lamp :flashes yellow. Press the transmit-
ter button again, if necessary.
Clearing the memory of the integrated
garage door opener in the rear-view mir-
ror X
Turn the key to position 2in the ignition
lock.
X Press transmitter buttons ;and ?.
The indicator lamp lights up yellow.
X Press and hold transmitter buttons ;
and ?until the indicator lamp turn sgreen.
i Make sure that you clear the memory of
the integrated garage door opener before
selling the vehicle. Features
277Stowing and features Z