2011 MERCEDES-BENZ C-CLASS COUPE brake light
[x] Cancel search: brake lightPage 282 of 373

Problem Possible causes/consequences and
M Solutions
֌
The yellow ESP
®
and
ESP ®
OFF warning
lamps are lit while the
engine is running. G
Risk of accident
ESP ®
, BAS, PRE-SAFE ®
, the HOLD function, hill start assist and
ESP ®
trailer stabilisation are temporarily not available.
The adaptive brake lights, BAS PLUS and PRE-SAFE ®
Brake may
also have failed.
ESP ®
is temporarily unavailable. ESP ®
will not stabilise the vehicle
if it starts to skid or if a wheel starts to spin.
Self diagnosis is not yet complete.
The brake system continues to function normally, but without the
functions listed above. The wheels could therefore lock if you
brake hard, for example.
ATTENTION ASSIST is deactivated.
X Carefully drive on a suitable stretch of road, making slight steer-
ing movements, at a speed above 20 km/h.
The functions mentioned above are available again when the
warning lamp goes out.
If the warning lamp is still on:
X Observe the additional display messages in the multifunction
display.
X Drive on carefully.
X Visit a qualified specialist workshop. J
The red brake system
warning lamp comes on
while the vehicle is
moving. A warning tone
also sounds.
You are driving with the parking brake applied.
X
Release the parking brake.
The warning lamp goes out and the warning tone ceases. 6
The red SRS warning
lamp is lit while the
engine is running.
G
Risk of injury
The restraint systems are malfunctioning. The airbags or belt ten-
sioners may either be triggered unintentionally or, in the event of
an accident, not be triggered at all.
X Drive on carefully.
X Visit a qualified specialist workshop immediately. Warning and indicator lamps in the instrument cluster
279On-board computer and displays Z
Page 283 of 373

Engine
Problem Possible causes/consequences and
M Solutions
;
The yellow engine diag-
nostics warning lamp
lights up while the
engine is running.
There may be a fault, for example:
R
in the engine management
R in the fuel injection system
R in the exhaust system
R in the ignition system (for vehicles with petrol engines)
R in the fuel system
The emission limit values may be exceeded and the engin emay
be running in emergency mode.
X Have the vehicle checked as soon as possible at a qualified
specialist workshop. Vehicles with a diesel engine: the fuel tan
khas been run dry
(Y page 157).
X Start the engine three to four times after refuelling.
If the yellow engine diagnostics warning lamp goes out, emer-
gency running mode is cancelled. The vehicle need no tbe
checked. 8
The yellow reserve fuel
warning lamp lights up
while the engine is run-
ning.
The fuel level has dropped into the reserve range.
Operation of the auxiliary heating is deactivated when the fuel level
drops into the reserve range.
X
Refuel at the nearest filling station. ?
The red coolant warn-
ing lamp lights up while
the engine is running
and the coolant tem-
perature gauge is at the
star
toft he scale. The temperature sensor for the coolant temperature gauge is
faulty.
The coolant temperature is no longer being monitored. There is a
risk of engine damage if the coolant temperature is too high.
X
Stop the vehicle immediately, paying attention to road and traf-
fic conditions, and switch off the engine. Do not continue driving
under any circumstances.
X Apply the parking brake.
X Consult a qualified specialist workshop. 280
Warning and indicator lamps in the instrument clusterOn-board computer and displays
Page 285 of 373
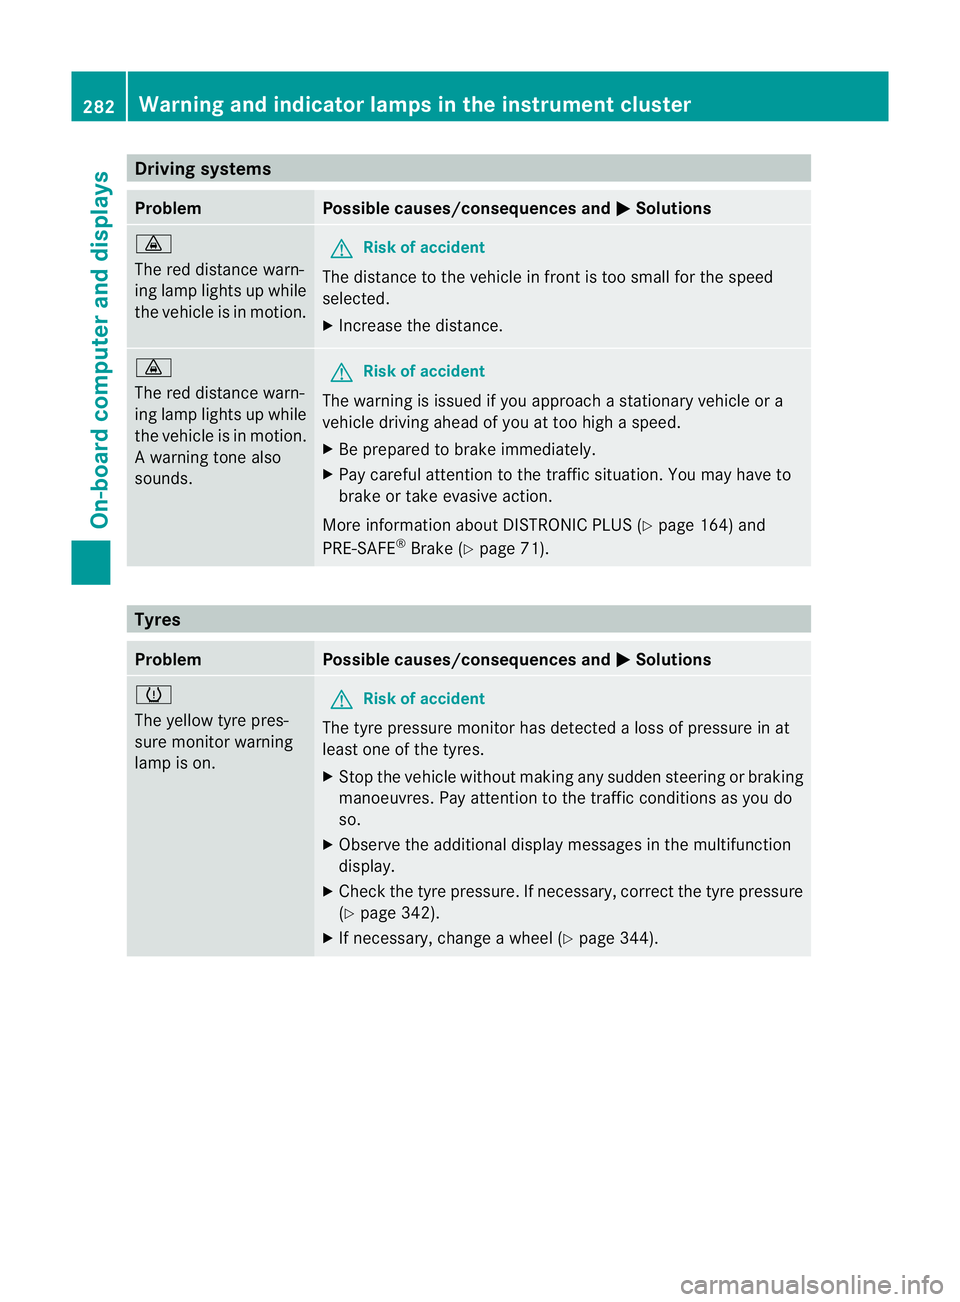
Driving systems
Problem Possible causes/consequences and
M Solutions
·
The red distance warn-
ing lamp lights up while
the vehicle is in motion.
G
Risk of accident
The distance to the vehicle in fron tis too small for the speed
selected.
X Increase the distance. ·
The red distance warn-
ing lamp lights up while
the vehicle is in motion.
Aw arning tone also
sounds. G
Ris
kofa ccident
The warning is issued if you approach a stationary vehicle or a
vehicle driving ahead of you at too high a speed.
X Be prepared to brake immediately.
X Pay careful attention to the traffic situation. You may have to
brake or take evasive action.
More information about DISTRONIC PLUS (Y page 164) and
PRE-SAFE ®
Brake (Y page 71). Tyres
Problem Possible causes/consequences and
M Solutions
h
The yellow tyre pres-
sure monitor warning
lamp is on. G
Ris
kofa ccident
The tyre pressure monito rhas detected a loss of pressure in at
least one of the tyres.
X Stop the vehicle without making any sudde nsteering or braking
manoeuvres .Pay attentio nto the traffic conditions as you do
so.
X Observe the additional display messages in the multifunction
display.
X Check the tyre pressure. If necessary, correc tthe tyre pressure
(Y page 342).
X If necessary, change a wheel (Y page 344).282
Warning and indicator lamps in the instrument clusterOn-board computer and displays
Page 290 of 373
X
Fold rea rseat backrest :back until it
engages. G
WARNING
Make sure that the rear seat backrest is cor-
rectly engaged. Otherwise, vehicle occupants
could be injured by objects being thrown
around if you:
R brake sharply
R change direction suddenly
R are involved in an accident
If the rear seat backrest is not engaged, this
will be shown in the multifunction display in
the instrument cluster.
i You should always engage the rear seat
backrests if you do not need the through-
loading feature. This will preven tunauthor-
ised access to the boot from the vehicle
interior.
X Move the driver's or front-passenger seat
back if necessary. Securing
aload
Lashing eyelets G
WARNING
Distribute the load on the lashing eyelets
evenly.
Otherwise, vehicle occupants could be
injured by objects being thrown around if you:
R brake sharply
R change directio nsuddenly
R are involved in an accident
Please observe the loading guidelines.
Observe the following notes on securing
loads:
R secure the load using the lashing eyelets.
R do no tuse elastic straps or nets to secure
a load, as these are only intended as an
anti-slip protection for light loads. R
do not route lashing materials across sharp
edges or corners.
R pad sharp edges for protection.
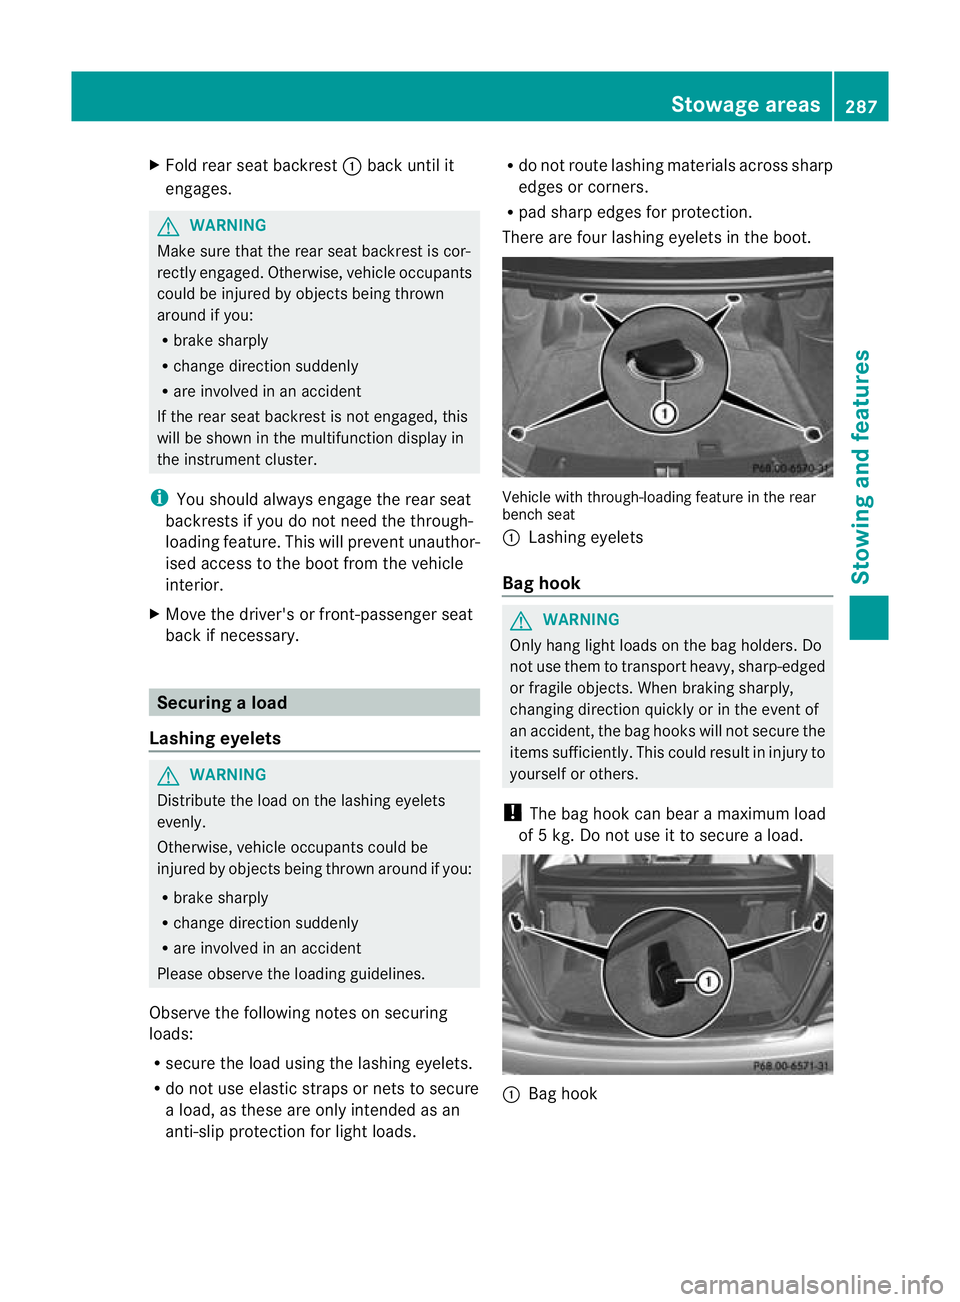
There are four lashing eyelets in the boot. Vehicle with through-loading feature in the rear
bench seat
:
Lashing eyelets
Bag hook G
WARNING
Only hang light loads on the bag holders. Do
not use them to transport heavy, sharp-edged
or fragile objects. When braking sharply,
changing direction quickly or in the event of
an accident, the bag hooks will not secure the
items sufficiently. This could result in injury to
yourselforo thers.
! The bag hoo kcan bear a maximum load
of 5 kg. Do not use it to secure a load. :
Bag hook Stowage areas
287Stowing and features Z
Page 292 of 373
Vehicles with a panorama sliding sunroof
X
Open covers :carefully in the direction of
the arrow.
X Fold covers :upwards.
X Only secure the roof carrier to the anchor-
age points under covers :.
X Observe the manufacturer's installation
instructions. Features
Cup holders
Important safety notes G
WARNING
Keep the cup holder closed while the vehicle
is in motion. Otherwise, vehicle occupants
could be injured by objects being thrown
around if you:
R brake sharply
R change direction suddenly
R are involved in an accident
Only use the cup holders for containers of a
suitable size and which have lids. Otherwise,
the drinks could spill.
Cup holders should not be used for hot drinks.
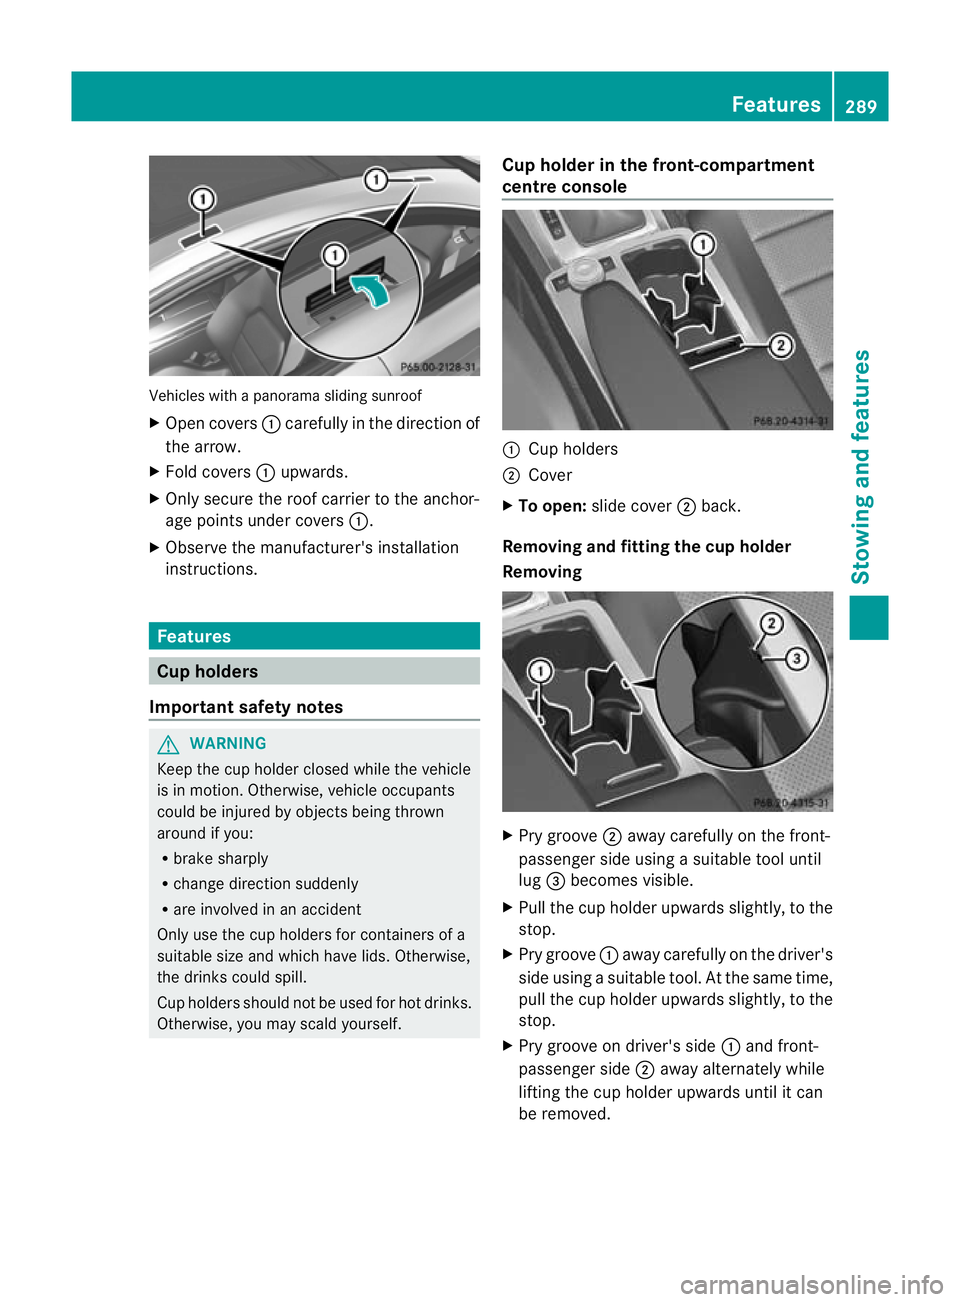
Otherwise, you may scald yourself. Cup holder in the front-compartment
centre console
:
Cup holders
; Cover
X To open: slide cover ;back.
Removing and fitting the cup holder
Removing X
Pry groove ;away carefully on the front-
passenger side using a suitable tool until
lug =becomes visible.
X Pull the cup holder upwards slightly, to the
stop.
X Pry groove :away carefully on the driver's
side using a suitable tool. At the same time,
pull the cup holder upwards slightly, to the
stop.
X Pry groove on driver's side :and front-
passenger side ;away alternately while
lifting the cup holder upwards until it can
be removed. Features
289Stowing and features Z
Page 310 of 373

R
the side windows and sliding sunroo fare
closed completely.
R the blower for the ventilation/heating is
switched off (OFF button is depressed).
R the windscreen wiper switch is at posi-
tion 0.
The vehicle could otherwise be damaged.
After using an automatic car wash, wipe off
waxf rom the windscreen and the wiper
blades. This will prevent smears and reduce
wiping noises caused by residue on the wind-
screen.
High-pressure cleaning equipment G
WARNING
Do not use high-pressure cleaners with circu-
lar-jet nozzles (dirt grinders) to clea nyour
vehicle, in particular the tyres. You could oth-
erwise damage the tyres and cause an acci-
dent.
! Always maintain a distance of at least
30 cm between the vehicle and the high-
pressure cleaner nozzle. Information about
the correc tdistance is available fro mthe
equipment manufacturer.
Move the high-pressure cleaner nozzle
around when cleaning your vehicle.
Do not aim directly at any of the following:
R tyres
R door gaps, roof gaps, joints etc.
R electrical components
R battery
R connectors
R lights
R seals
R trim elements
R ventilation slots
Damaged seals or electrical components
can lead to leaks or failures. Cleaning the wheels !
Do not use acidic wheel cleaning products
to remove brake dust. This could damage
wheel bolts and brake components.
! Do not park up the vehicle for an extended
period straight after cleaning it, particularly
after having cleaned the wheels with wheel
cleaner. Wheel cleaners could cause
increased corrosion of the brake discs and
brake pads/linings. For this reason, you
should drive for a few minutes after clean-
ing. Braking heats the brake discs and the
brake pads/linings, thus drying them. The
vehicle can then be parked up.
Cleaning the paintwork Scratches, corrosive deposits, areas affected
by corrosion and damage caused by inade-
quate care cannot always be completely
repaired. In such cases, visit a qualified spe-
cialist workshop, e.g. a Mercedes-Benz
Service Centre.
X
Remove impurities immediately, where
possible, whilst avoiding rubbing too hard.
X Soak insect remains with insect remover
and rinse off the treated areas afterwards.
X Soak bird droppings with water and rinse
off the treated areas afterwards.
X Remove coolant, brake fluid, tree resin,
oils, fuels and greases by rubbing gently
with a cloth soaked in petroleum ether or
lighter fluid.
X Use tar remover to remove tar stains.
X Use silicone remover to remove wax.
! Do not affix:
R stickers
R films
R magnetic plates or similar items
to painted surfaces. You could otherwise
damage the paintwork. Care
307Maintenance and care Z