2011 MERCEDES-BENZ C-CLASS COUPE weight
[x] Cancel search: weightPage 68 of 373

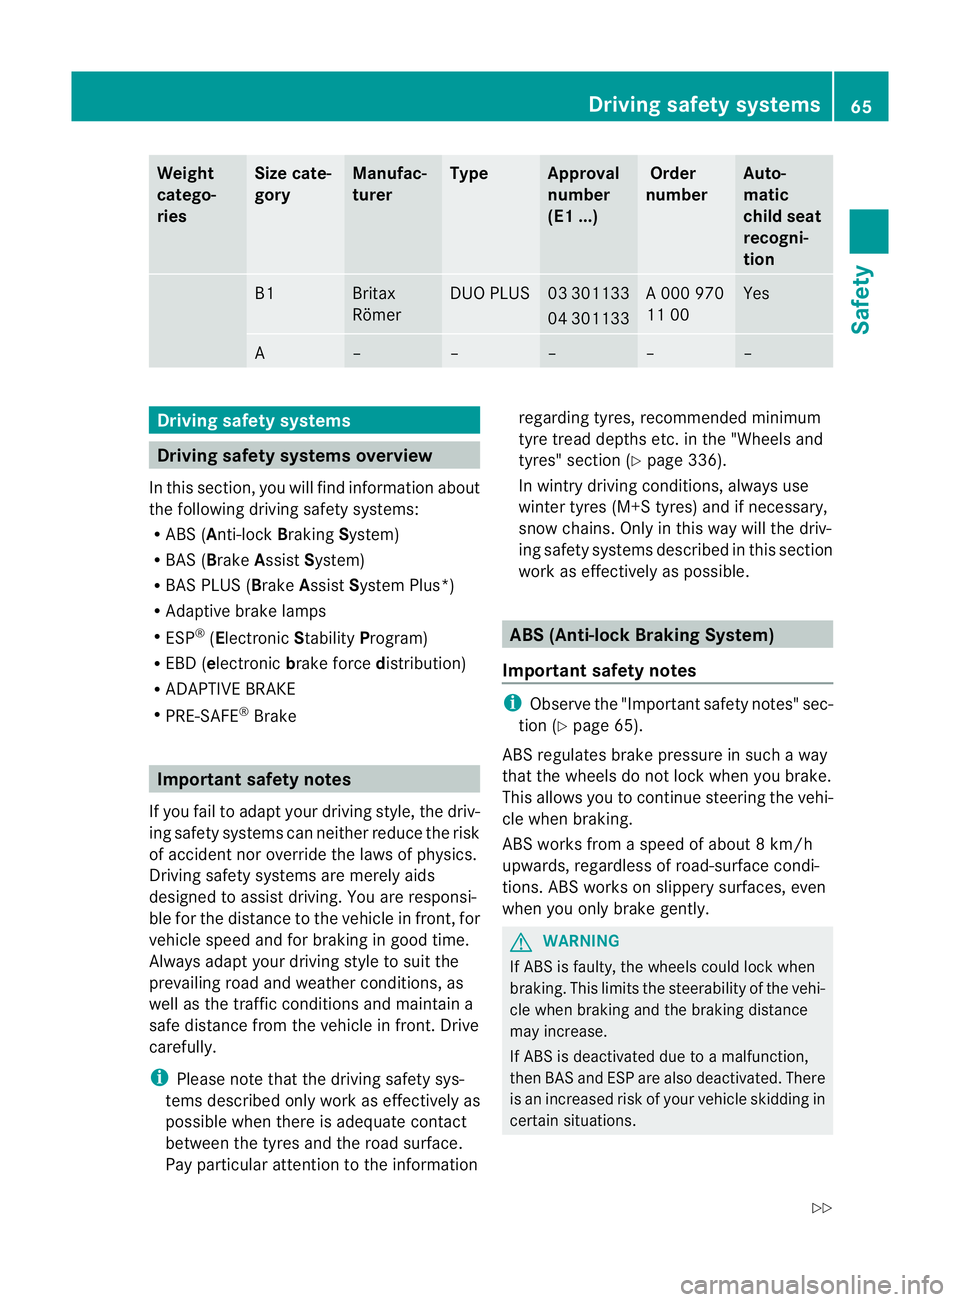
Weight
catego-
ries Size cate-
gory Manufac-
turer Type Approval
number
(E1 ...) Order
number Auto-
matic
chil
dseat
recogni-
tion B1 Britax
Römer DUO PLUS 03 301133
04 301133 A 000 970
11 00 Yes
A – – – – –
Driving safety systems
Driving safety systems overview
In this section, you will find informatio nabout
the following driving safety systems:
R ABS (Anti-lock BrakingSystem)
R BAS (Brake AssistSystem)
R BAS PLUS ( BrakeAssist System Plus*)
R Adaptive brake lamps
R ESP ®
(Electronic StabilityProgram)
R EBD ( electronic brake force distribution)
R ADAPTIVE BRAKE
R PRE-SAFE ®
Brake Important safety notes
If you fail to adapt your driving style, the driv-
ing safety systems can neither reduce the risk
of acciden tnor override the laws of physics.
Driving safety systems are merely aids
designed to assist driving. You are responsi-
ble for the distance to the vehicle in front, for
vehicle speed and for braking in good time.
Always adapt your driving style to suit the
prevailing road and weather conditions, as
well as the traffic conditions and maintain a
safe distance from the vehicle in front. Drive
carefully.
i Please note that the driving safety sys-
tems described only work as effectively as
possible when there is adequate contact
between the tyres and the road surface.
Pay particular attention to the information regarding tyres, recommended minimum
tyre tread depths etc. in the "Wheels and
tyres" section (Y
page 336).
In wintry driving conditions, always use
winter tyres (M+S tyres) and if necessary,
snow chains. Only in this way will the driv-
ing safety systems described in this section
work as effectively as possible. ABS (Anti-lock Braking System)
Important safety notes i
Observe the "Important safety notes" sec-
tion (Y page 65).
ABS regulates brake pressure in such a way
that the wheels do not lock when you brake.
This allows you to continue steering the vehi-
cle when braking.
ABS works from a speed of about 8 km/h
upwards, regardless of road-surface condi-
tions. ABS works on slippery surfaces, even
when you only brake gently. G
WARNING
If ABS is faulty, the wheels could lock when
braking. This limits the steerability of the vehi-
cle when braking and the braking distance
may increase.
If ABS is deactivated due to a malfunction,
then BAS and ESP are also deactivated. There
is an increased risk of your vehicle skidding in
certain situations. Driving safety systems
65Safety
Z
Page 81 of 373

Useful information
i This Owner's Manual describes all models
and all standard and optional equipment
available to your vehicle at the time of pub-
lication of the Owner's Manual. Country-
specific deviations are possible. Please
note that your vehicle may not be equipped
with all features described. This also
applies to safety-relevan tsystems and
functions.
i Please read the information on qualified
specialist workshops (Y page 26).Key
Key functions
Locking an dunlocking centrally The key centrally locks/unlocks:
R
the doors
R the boot lid
R the fuel filler flap G
WARNING
Only for the United Kingdom: if the vehicle
has been locked with the key, the double lock
function is activated as standard. It is then not
possible to open the doors from inside the
vehicle.
Therefore, do not leave any people behind in
the vehicle, particularly children, elderly peo-
ple or people in need of special assistance if
the vehicle has been locked with the key. As
a result, they may not be able to free them-
selves in the event of an emergency. As a
result, they could be seriously or even fatally
injured by prolonged exposure to extremely
high or low temperatures, for example. In this
case, rescuing people from outside the vehi-
cle is difficult.
Deactivate the interior motion sensor before
you lock the vehicle with the key. The doors
can then be opened from the inside after the vehicle has been locked from the outside with
the key.
G
WARNING
If children are left unsupervised in the vehicle,
they could:
R open a door from inside the vehicle at any
time, even if it has been locked
R start the vehicle using akey which has been
left in the vehicle
R release the parking brake
They could thereby endanger themselves and
others. Never leave children unsupervised in
the vehicle. Always take the key with you
when leaving the vehicle, even if you are only
leaving it for a short time. G
WARNING
If a key ring is too heavy or too large, the
weight acting on the key could cause it to turn
in the ignition lock or catch on the steering
wheel. This could cause the engine to be
switched off suddenly. You may lose control
of the vehicle and cause an accident. Do not
attach any heavy or large key rings to the key
that is inserted in the ignition. :
& To lock the vehicle
; F To unlock the boot lid
= % To unlock the vehicle
When unlocking, the turn signals flash once.
When locking, they flash three times.
When it is dark, the surround lighting also
comes on if it is activated in the on-board
computer (Y page 225).78
KeyOpening and closing
Page 202 of 373

No lane-correcting brake application occurs
if:
R you clearly and actively steer, brake, or
accelerate.
R you cut the corner on a sharp bend.
R you have switched on the turn signals.
R a driving safety system intervenes, such as
ESP ®
, PRE-SAFE ®
Brake or Active Blind
Spot Assist.
R you have adopted a sporty driving style with
high cornering speeds or high rates of
acceleration.
R on vehicles with a trailer tow hitch, the
electrical connection to the trailer has been
correctly established.
R ESP ®
is deactivated.
R the transmission is not in position D.
R a loss of tyre pressure or a defective tyre
has been detected and displayed.
Active Lane Keeping Assist does not detect
road and traffic conditions. An inappropriate
brake application may be interrupted at any
time if:
R you steer slightly in the opposite direction.
R you use a turn signal.
R you clearly brake or accelerate.
Al ane-correcting brake applicatio nis inter-
rupted automatically if:
R a driving safety system intervenes, such as
ESP ®
, PRE-SAFE ®
Brake or Active Blind
Spot Assist.
R lane markings can no longer be recognised.
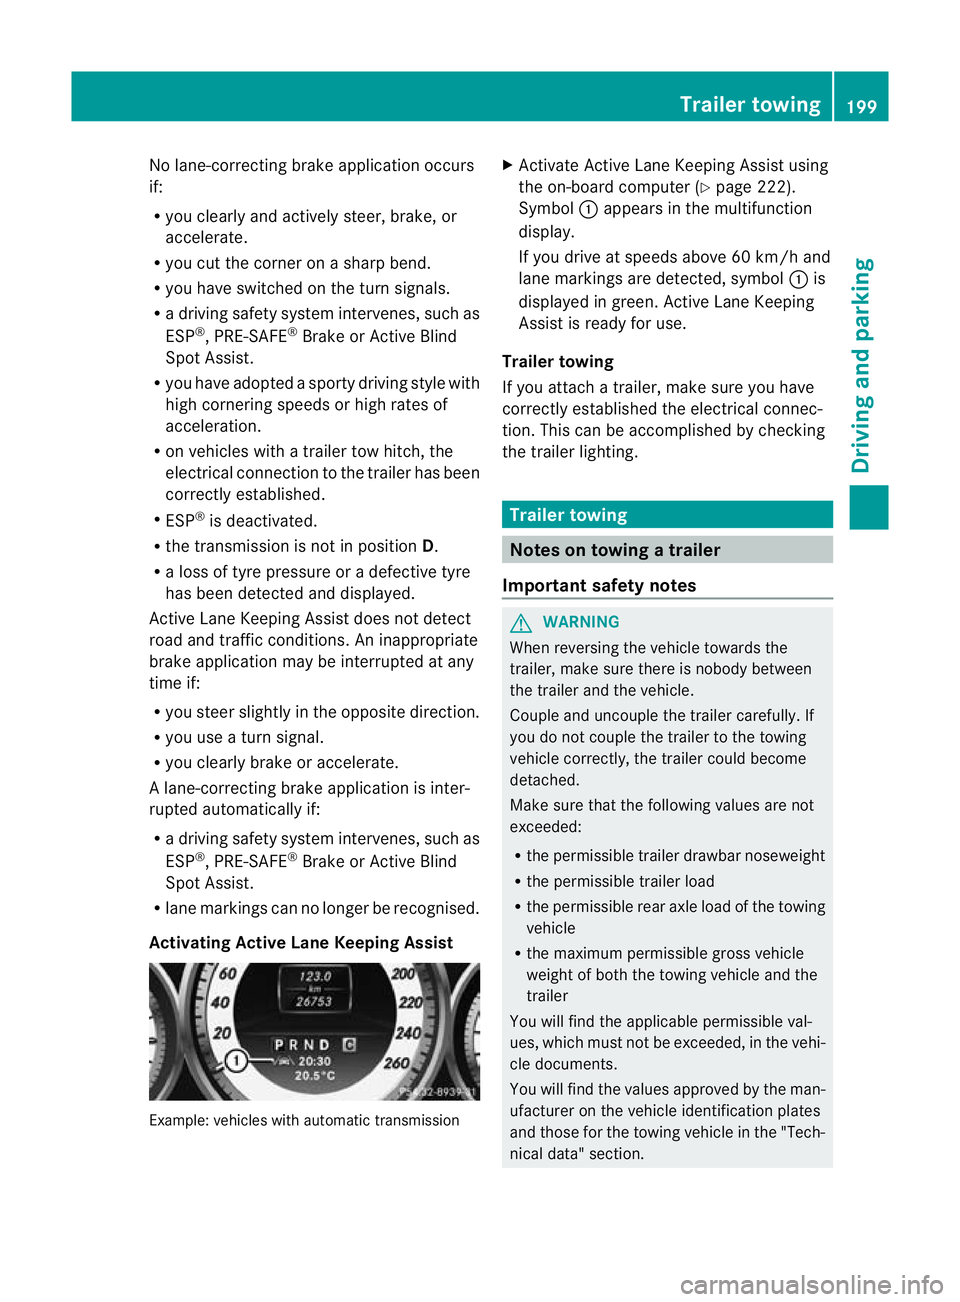
Activating Active Lane Keeping Assist Example: vehicles with automatic transmission X
Activate Active Lane Keeping Assist using
the on-board computer (Y page 222).
Symbol :appears in the multifunction
display.
If you drive at speeds above 60 km/h and
lane markings are detected, symbol :is
displayed in green. Active Lane Keeping
Assist is ready for use.
Trailer towing
If you attach a trailer, make sure you have
correctly established the electrical connec-
tion. This can be accomplished by checking
the trailer lighting. Trailer towing
Notes on towing
atrailer
Important safety notes G
WARNING
When reversing the vehicle towards the
trailer, make sure there is nobody between
the trailer and the vehicle.
Couple and uncouple the trailer carefully .If
you do no tcouple the trailer to the towing
vehicle correctly, the trailer could become
detached.
Make sure that the following values are not
exceeded:
R the permissible trailer drawbar noseweight
R the permissible trailer load
R the permissible rear axle load of the towing
vehicle
R the maximum permissible gross vehicle
weight of both the towing vehicle and the
trailer
You will find the applicable permissible val-
ues, which must not be exceeded, in the vehi-
cle documents.
You will find the values approved by the man-
ufacturer on the vehicle identification plates
and those for the towing vehicle in the "Tech-
nical data" section. Trailer towing
199Driving and parking Z
Page 203 of 373

G
WARNING
If the Check trailer hitch locking mechanism message appears in the multi-
function display while the vehicle is in motion,
pull over immediately and check whethe rthe
ball coupling is correctly engaged. G
WARNING
Always observe the maximum speed permit-
ted in Germany for vehicle/trailer combina-
tions, even in countries where higher speeds
are permitted. This lowers the risk of an acci-
dent. G
WARNING
Never depress the brake pedal continuously
while the vehicle is in motion, e.g. never cause
the brakes to rub by applying constant slight
pedal pressure. This causes the brake system
to overheat, increases the braking distance
and can lead to the brakes failing completely. G
WARNING
On no account should you attempt to draw the
vehicle/trailer combination out by increasing
speed.
General information i
When towing a trailer, set the tyre pres-
sure on the rear axle of the towing vehicle
for a maximum load; see the tyre pressure
table in the fuel filler flap (Y page 339).
You will find installation dimensions and loads
in the "Technical data" section
(Y page 361).
The maximum permissible trailer drawbar
noseweight on the ball coupling is 75 kg.
However, the actual noseweight must not
exceed the value given on the trailer tow hitch
and trailer identification plates. The lowest
weight applies.
! Use a noseweight as close as possible to
the maximum permissible noseweight. Do
not use a noseweight of less than 50 kg,
otherwise the trailer may come loose. Bear in mind that the payload and the rear
axle load are reduced by the actual nose-
weight.
Please note that when towing a trailer, PARK-
TRONIC (Y page 179), parking guidance
(Y page 183) and Blind Spot Assist
(Y page 190) are only available with limita-
tions, or not at all.
i The height of the ball coupling changes
with the load of the vehicle. If necessary,
use a trailer with a height-adjustable draw-
bar.
Driving tips i
Observe the notes on ESP ®
trailer stabi-
lisation (Y page 70).
In Germany, the maximum permissible speed
for vehicle/trailer combinations depends on
the type of trailer, and is either 80 km/h or
100 km/h. In some countries, higher maxi-
mum speeds are permissible for vehicle/
trailer combinations. Before beginning the
journey, check the trailer's documents to see
what the maximum permitted speed is.
For certain Mercedes-Ben zvehicles, the max-
imum permissible rear axle load is increased
when towing a trailer. Refer to the "Technical
data" section to find out whether this applies
to your vehicle. If you utilise any of the added
maximum rear axle load when towing a trailer,
the vehicle/trailer combination may not
exceed a maximum speed of 100 km/h for
reasons concerning the operating permit.
This also applies in countries in which the
permissible maximum speed for vehicle/
trailer combinations is above 100 km/h.
When towing a trailer, your vehicle's handling
characteristics will be differen tincomparison
to when driving without a trailer.
The vehicle/trailer combination:
R is heavier
R is restricted in its acceleration and gradi-
ent-climbing capability
R has an increased braking distance 200
Trailer towingDriving and parking
Page 287 of 373

Useful information
i This Owner's Manual describes all models
and all standard and optional equipment
available to your vehicle at the time of pub-
lication of the Owner's Manual. Country-
specific deviations are possible. Please
note that your vehicle may not be equipped
with all features described. This also
applies to safety-relevan tsystems and
functions.
i Please read the information on qualified
specialist workshops (Y page 26).Loading guidelines
G
WARNING
Secure and position the load as described in
the loading guidelines.
Otherwise, vehicle occupants could
be injured by the load being throw naround in
the event of sharp braking, a sudden change
in direction or an accident.
You will find further informatio ninthe "Secur-
ing a load" section.
Even if you follow all the loading guidelines,
the load will increase the risk of injury in the
event of an accident. G
WARNING
Keep the boot lid closed while the vehicle is
in operation. Otherwise, you could be pois-
oned by exhaust fumes entering the vehicle.
The handling characteristics of a laden vehi-
cle are dependent on the distribution of the
load within the vehicle. For this reason, you
should observe the following notes when
transporting a load:
R when transporting a load, never exceed the
maximum permissible gross vehicle weight or the permissible axle loads for the vehicle
(including occupants).
R position heavy loads as far forwards as pos-
sible and as low down in the boot as pos-
sible.
R the load must not protrude above the upper
edge of the seat backrests.
R always place the load against the rear or
front seat backrests. Make sure that the
seat backrests are securely locked into
place.
R always place the load behind unoccupied
seats if possible.
R secure the load with sufficiently strong and
wear-resistant lashing material. pad sharp
edges for protection.
i Load restraints are available at any quali-
fied specialist workshop, e.g. a Mercedes-
Benz Service Centre. Stowage areas
Stowage compartments
Important safety notes G
WARNING
The stowage compartments must be closed
when items are stored in them. Luggage nets
are not designed to secure heavy items of
luggage.
You or other vehicle occupants could be
injured by objects being thrown around if you:
R brake sharply
R change direction suddenly
R are involved in an accident
Sharp-edged and fragile objects must not be
placed in the luggage net.
Do not place hard objects in the map pockets.
Objects must not protrude from the map
pockets. 284
Stowage areasStowing and features
Page 288 of 373

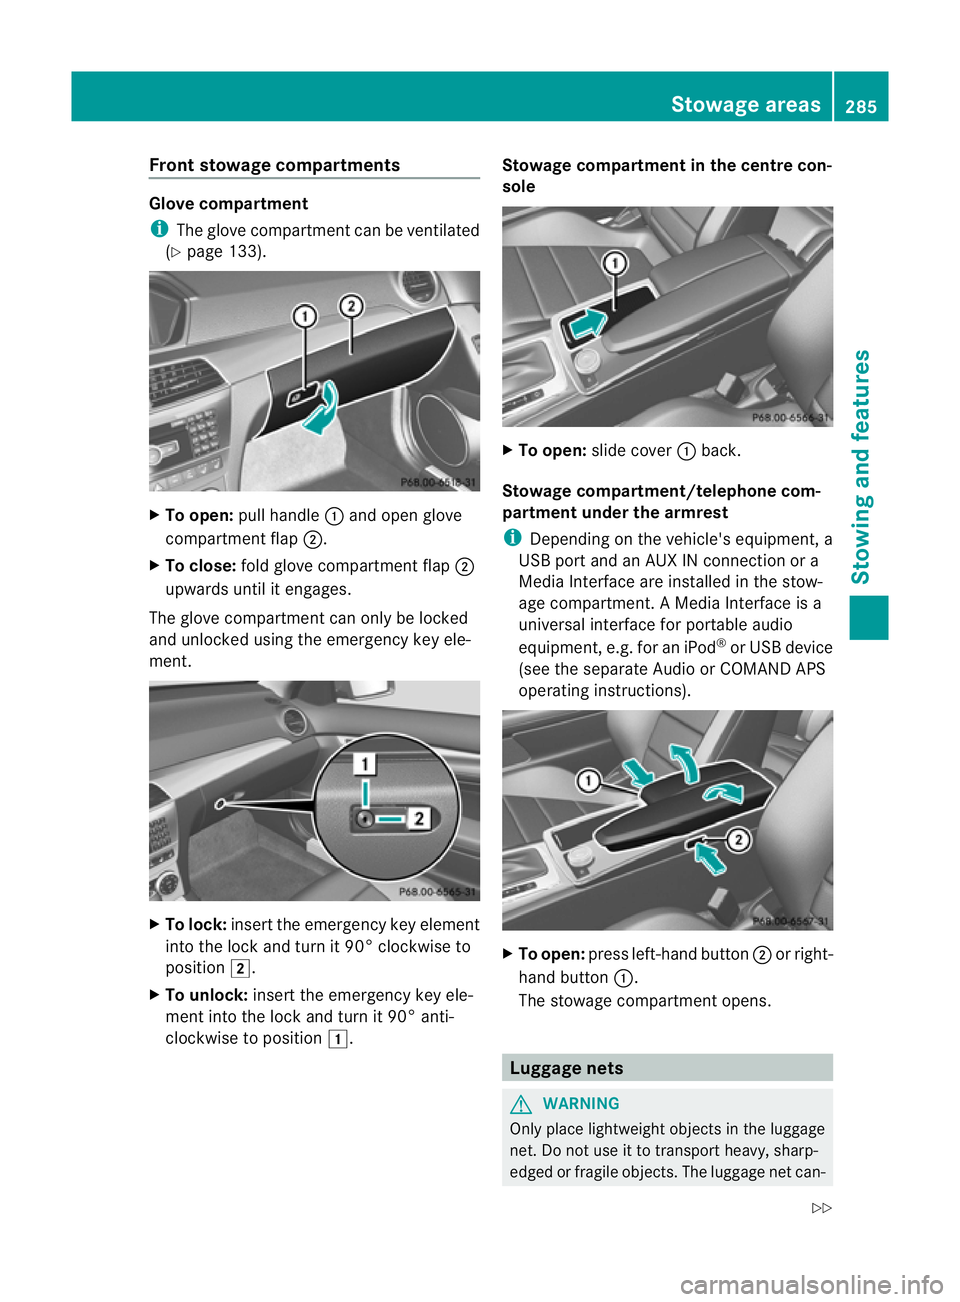
Front stowage compartments
Glove compartment
i
The glove compartmen tcan be ventilated
(Y page 133). X
To open: pull handle :and open glove
compartment flap ;.
X To close: fold glove compartmen tflap ;
upwards until it engages.
The glove compartmen tcan only be locked
and unlocked using the emergency key ele-
ment. X
To lock: insert the emergency key element
into the lock and turn it 90° clockwise to
position 2.
X To unlock: insert the emergency key ele-
ment into the lock and turn it 90° anti-
clockwise to position 1. Stowage compartment in the centre con-
sole
X
To open: slide cover :back.
Stowage compartment/telephone com-
partment under the armrest
i Depending on the vehicle's equipment, a
USB port and an AUX IN connection or a
Media Interface are installed in the stow-
age compartment. A Media Interface is a
universal interface for portable audio
equipment, e.g .for an iPod ®
or USB device
(see the separate Audio or COMAND APS
operating instructions). X
To open: press left-hand button ;or right-
hand button :.
The stowage compartment opens. Luggage nets
G
WARNING
Only place lightweight object sinthe luggage
net. Do not use it to transport heavy, sharp-
edged or fragile objects. The luggage net can- Stowage areas
285Stowing and features
Z
Page 334 of 373

Before towing away, make sure that the steer-
ing can be moved and is not locked.
If you tow or tow-start another vehicle, its
weight must not exceed the maximum per-
missible gross vehicle weigh tofyour vehicle. G
WARNING
The vehicle is braked when the HOLD function
or DISTRONIC PLUS is activated. Therefore,
deactivate HOLD and DISTRONIC PLUS if the
vehicle is to be towed.
It is better to have the vehicle transported
than to have it towed.
! You may tow the vehicle for a maximum
of 50 km. A towing speed of 50 km/hm ust
no tb e exceeded.
For towing distances over 50 km, the entire
vehicle must be lifted up and transported.
! Only secure the tow rope or towing bar to
the towing eyes. The vehicle may otherwise
be damaged.
! Do not use the towing eye for recovery,
as this could damage the vehicle. If in
doubt, recover the vehicle with a crane.
! Pull away smoothly when towing away or
tow-starting a vehicle. If the tractive power
is too high, the vehicles could be damaged.
! On vehicles with KEYLESS-GO, use the
key instead of the Start/Stop button .Turn
the key to position 2in the ignition loc kand
shift the automatic transmission to N.
Then, tur nthe key back to 0and leave it in
the ignition lock.
When towing a vehicle with an automatic
transmission, the transmission must be in
position N.
The battery must be connected and charged.
Otherwise, you:
R cannot turn the key in the ignition lock to
position 2
R cannot shift the transmission to position
N on vehicles with automatic transmission Vehicles with automatic transmission:
release the selector lever lock manually to
move it out of position
P(Y page 152).
i Before the vehicle is towed, switch off the
automatic locking feature (Y page 84). You
could otherwise be locked out when push-
ing or towing the vehicle.
Deactivate tow-away protection
(Y page 73) before the vehicle is towed. Fitting/removing the towing eye
Fitting the towing eye Vehicles with a trailer tow hitch: if you intend
to use the vehicle for towing, fold out the ball
coupling and connect the towbar to it
(Y
page 201).
X Remove the towing eye from the vehicle
tool kit (Y page 315). G
WARNING
The exhaust tail pipe may be hot. You could
burn yourself if you touch the tail pipe. Be
particularly careful when removing the rear
cover.
The mountings for the removable towing eyes
are located in the bumpers. They are at the
front and at the rear, under the covers. Towing and tow-starting
331Breakdown assistance Z
Page 356 of 373

Vehicle identification plate (example)
:
Vehicle identification plate
; Vehicle manufacturer
= EU type approval number
? Vehicle identification number (VIN)
A Maximum permissible gross vehicle
weight
B Gross combination mass
C Maximum permissible front axle load
D Maximum permissible rear axle load
E Paint code Vehicle identification number (VIN)
In addition to being stamped on the vehicle
identification plate, the vehicle identification
number (VIN) is also stamped onto the vehicle
body.
It is located on the floor in front of the right-
hand front seat. X
Slide the right-hand front seat to its rear-
most position.
X Fold floor covering :upwards.
You will see vehicle identification number
(VIN) ;. Engine number
The engine number is stamped into the crank-
case. More information can be obtained from
any Mercedes-Benz Service Centre. Service products and capacities
Important safety notes
Service products include the following:
R fuels (e.g. petrol, diesel)
R lubricants (e.g. engine oil, transmission oil)
R coolant
R brake fluid
R windscreen washerf luid
Vehicle components and their respective
lubricants must match. Mercedes-Benz rec-
ommends that you use products that have
been tested and specially approved by
Mercedes-Benz. These products are listed in
this Mercedes-Ben zOwner's Manual in the
relevant section.
You can recognise service products approved
by Mercedes-Ben zby the following inscrip-
tion on the containers:
R MB-Freigabe (e.g. MB-Freigabe 229.51)
R MB Approval (e.g. MB Approval 229.51)
Other designations or recommendations that
relate to a level of quality or a specification in
accordance with an MB Sheet number (such
as MB 229.5) hav enot necessarily been
approved by Mercedes-Benz.
You can obtain further information from any
Mercedes-Benz Service Centre. G
WARNING
When handling, storing and disposing of any
service products, please observe the relevant Service products and capacities
353Technical data
Z